Table of Contents
Advertisement
Quick Links
Advertisement
Table of Contents

Related Manuals for Prolux PLCX8E


Summary of Contents for Prolux PLCX8E
- Page 2 Congratulations on purchasing your very own Prolux PLCX8E Backpack Vacuum Cleaner. This high-end kit is designed to cut cleaning time in half without breaking the bank. Keep your floors clean, and prolong the life of your flooring in just a few easy steps. Prolux…. Cleaning Reinvented!
-
Page 3: Table Of Contents
Table of Contents Specifications Safety Precautions Description of Parts Unpacking and Assembly Assembly Operation Using the Attachments Maintenance Replacing the Dust Filter Bag Replacing the Cloth Filter Bag and Filters Brushroll Maintenance Frequently Asked Questions Troubleshooting Warranty Information... -
Page 4: Specifications
Specifications ● Powerful deep cleaning 10 amp motor with 120 CFM of Airflow (most vacuums have around 80) ● Lightweight – Canister only weighs 10lbs ● Dependable – 3-year/700 hour motor warranty and 5-year body warranty ● 4 Stages of Filtration – HEPA Bags, Cloth Bag, HEPA Filter and Exhaust filter make sure the air leaving the vacuum is as clean as it should be ●... -
Page 5: Safety Precautions
IMPORTANT SAFETY INSTRUCTIONS Vacuum Safety Read the owner's manual in its entirety before using this product. Failure to do so can result in serious injury or death. Prolux takes no responsibility for damages/injuries due to violations of the following operating instructions. - Page 6 SAFETY CONTINUED Do not pull or carry the vacuum by its power cord, do not use the power cord as a handle, do not close the door on the power cord, or pull the power cord around sharp edges or corners. Do not run the vacuum cleaner over the power cord.
- Page 7 Do not vacuum or clean: Hair and other parts of the body. They could be sucked in and cause injury. Pieces of Clothing (e, g, shoe laces, scarves, etc.). They could be sucked in and cause injury. Water and other liquids, especially moisture from carpet cleaning agents. Moisture inside the appliance can lead to short-circuiting.
-
Page 8: Description Of Parts
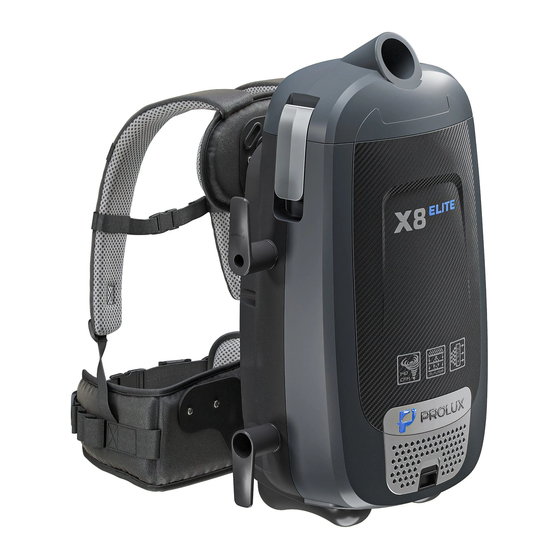
Description of Parts 6. Floor Tool 1. HEPA Bags 7. Crevice Tool 2. Electric Hose 8. Duster Brush 3. Main Canister 9. Mini Turbo 4. Extendable Wand 10. Electric Head 5. Upholstery Tool... - Page 9 1. Breathable Cushioned Straps 9. Canister Lid 2a-b. Lid Latches 10. Chest Support Adjustment 3. Suction Port 11. Chest Clip Adjustment 4. Main Unit 12. Shoulder Strap Adjustment 5. Exhaust Filter Cover 13. Waist Support Clip 6. Exhaust Cover Release 14.
-
Page 10: Assembly
ASSEMBLING YOUR VACUUM Once all items have been removed from the shipping box first INSERT THE HEPA DUST BAG BEFORE USING Important: For best results do not use the vacuum without all filters, cloth dust bag, and the HEPA dust bag in place. NOTE: Always remove the power plug from the wall outlet before assembling or removing accessories NOTE: This model can be used with the cloth dust bag only, however it is not recommended and... - Page 11 ATTACHING THE FLEXIBLE HOSE & TELESCOPIC WAND TO THE VACUUM NOTE: The flexible hose should be connected before strapping the unit on. 1. To connect the flexible hose to the unit, slide the hose connector into the air inlet and plug in the electric power cord to the canister plug in (Fig 1).
- Page 12 Fig 2...
-
Page 13: Using The Attachments
USING THE ATTACHMENTS DUSTING BRUSH The Dusting Brush is used for all types of furniture. (Fig 1) CREVICE TOOL Use for cleaning radiators, cracks & crevices along corners, baseboards, and in-between cushions. (Fig 2) UPHOLSTERY BRUSH Use for cleaning upholstery, stairs or any other surface the floor tool is too large for. The bristles can be removed to really get the suction directly to the surface you’re cleaning. - Page 14 Electric Powerhead - Use the powerhead for all types of floor cleaning. Whether it be hard floors or carpet this head can handle it all. Just attach the head to the extendable wand, flip the switch on the hose handle and you’re ready to clean.
- Page 15 USING YOUR VACUUM Ensure all bags and filters have been installed prior to using the vacuum. Connect hose to top lid assuring you have pressed the friction fit hose firmly into place. Correctly place shoulder straps on each shoulder and secure the waistband with hook and loop strips.
-
Page 16: Maintenance
Removing & Replacing HEPA Dust Bag Important: For best performance DO NOT use the vacuum without all filters, cloth dust bag, or without the HEPA dust bag in place. To remove the HEPA dust bag, press on the canister lid tabs on each side of the unit to unlock and lift the canister lid. -
Page 17: Replacing The Dust Filter Bag
Cleaning the Cloth Dust Bag when Used Alone (not suggested): 1. Remove the cloth dust bag, empty into the trash can, and shake vigorously outdoors until there is no more dust. 2. The cloth dust bag is hand washable in lukewarm water. 3. -
Page 18: Replacing The Cloth Filter Bag And Filters
Brush Roll Changing - The PLCX8E powerhead is equipped to handle a series of interchangeable brush rolls based on your type of flooring. Each brush roll will have its own unique set of bristles, so depending on the type of flooring you have there’s a brush roll for it. - Page 19 Cleaning the Brush Roll - The PLCX8E powerhead has a built-in brush roll cleaner which helps you remove any built-up hair, string or any other material which has wrapped around the brush roll. Built up hair and other materials are the #1 killer of brush rolls because they eventually work themselves into the bearings on the ends which in turn seizes up the brush roll rendering it useless.
-
Page 20: Brushroll Maintenance
Frequently Asked Questions Why is my vacuum not picking up? ● Vacuum bag is full. Open top of the unit and check bag capacity. ● Clog in the hose or wand. Remove the hose from the vacuum. Seperate the hose from the wand. Check for clog. If clog is found using compressed air at a low pressure is the ideal means of removal. -
Page 21: Troubleshooting
Troubleshooting WARNING: Never use a defective appliance. Always switch off the appliance and disconnect it from the outlet or remove the battery before you start to troubleshoot. Fault Possible Cause(s) Solution The plug is not connected to the Insert the plug into an electrical electrical wall outlet or the wall outlet and flip the “on/off”... -
Page 22: Warranty Information
Under no circumstances will Prolux Cleaners or the seller be liable for any loss, damage, expense, or consequential damage arising in connection with the use or inability to use these products. - Page 23 1yr Switches 2yr or 500hrs Upright Vacuums (whichever comes first) on the motor 1yr Electrical Parts 2yr Switches 2yr or 500hrs Garage Vacuums (whichever comes first) on the motor 5yr Electrical Parts 2yr Switches 2yr or 500hrs Wet Dry Vacuums (whichever comes first) on the motor 2yr Electrical Parts...
- Page 24 Whichever comes first. Labor Rate Prolux Cleaners will allow $50.00 per hour for warranty labor work. All warranty labor charges will be paid on this basis. Any repair that requires less than fifteen minutes of labor will not be eligible for reimbursement.
- Page 25 If any operation is not covered in this flat rate schedule, Prolux Cleaners will determine a labor rate when a claim is made based on actual repair times by our own service technicians. Please note: Situations may arise that require special consideration. In these cases, to request special consideration, please contact your Prolux Cleaners warranty department or Prolux Cleaners salesperson and or rep group.
- Page 26 Freight damage is not covered under the Prolux Cleaners warranty policy. Replacement Parts: Prolux Cleaners will not honor any warranty claims for parts, labor, or travel if the replacement part was not purchased through Prolux Cleaners. Prolux cleaners reserves the right to review or modify the above document at any time without specific written...
Need help?
Do you have a question about the PLCX8E and is the answer not in the manual?
Questions and answers