Table of Contents
Advertisement
Quick Links
READ THIS FIRST
Please start by reading the important messages below first.
1. The bundled driver, software, design, specifications and user' s manual that were
packaged with the camera are subject to change without notice.
2. The accessories that come with the camera may vary between regions.
3. For driver updates, you can contact the dealer where you purchased the camera for help.
4. We are not liable whatsoever for any compensation arising from errors in descriptions in
this user' s manual.
WARNINGS
Do not use the camera if it is emitting smoke, becomes unusually hot to be touched,
emitting any unusual odor or noise, or if it is in any other abnormal state. Operating the
camera in any of these situations may cause a fire or an electrical shock. Stop using
the camera immediately, turn the camera off, and then disconnect the power source
(batteries or AC power adapter). (If you are using the AC power adapter, unplug the
adapter from the AC power outlet after you have disconnected the camera.) After
checking that smoke is no longer being emitted, contact your dealer or a local
authorized service facility and request repairs. Never attempt to repair the camera
yourself as this is dangerous.
Do not use the camera if any foreign objects have entered the camera. Turn the
camera off, and then disconnect the power source (batteries or AC power adapter). (If
you are using the AC power adapter, unplug the adapter from the AC power outlet
after you have disconnected the camera.) Then contact your dealer or a local
authorized service facility. Do not continue to use the camera as this may cause a fire
or an electrical shock.
If the camera has been dropped or if the camera case has been damaged, turn the
camera off, and then disconnect the power source (batteries or AC power adapter). (If
you are using the AC power adapter, unplug the adapter from the AC power outlet
after you have disconnected the camera.) Then contact your dealer or a local
authorized service facility. Do not continue to use the camera as this may cause a fire
1
English
Advertisement
Table of Contents

Subscribe to Our Youtube Channel
Related Manuals for Genius P313


Summary of Contents for Genius P313
-
Page 1: Read This First
Do not use the camera if it is emitting smoke, becomes unusually hot to be touched, emitting any unusual odor or noise, or if it is in any other abnormal state. Operating the camera in any of these situations may cause a fire or an electrical shock. Stop using the camera immediately, turn the camera off, and then disconnect the power source (batteries or AC power adapter). - Page 2 Do not place the camera in damp or dusty locations. This may cause a fire or an electrical shock. Do not place the camera in a location affected by oil fumes or steam, such as near a cooking stove or humidifier. This may cause a fire or an electrical shock.
- Page 3 English moving the camera. Failure to do so may damage the cords or cables and cause a fire or an electrical shock. When leaving the camera unused for long periods, such as during a vacation, always unplug the camera from the power source (batteries or AC power adapter) for safety.
-
Page 4: Table Of Contents
GETTING STARTED 12-16 Setting DPOF Installing the batteries Deleting images/video clips Using the AC power adapter To delete one image / video (optional accessory) clip at a time: Loading an SD memory card To delete all images / video (optional accessory) - Page 5 English / video clips LCD brightness For computers running DPOF Windows Copy to card For computers running Mac Setup menu 36-39 Format MENU OPTIONS 31-35 Beep Power off Record menu Reset to default Image size Date type Quality Date setup...
-
Page 6: Introduction
Package contents Carefully unpack your package and make sure that you have the following items. In the event that any item is missing or if you find any mismatch or damage, promptly contact your dealer. Digital camera... -
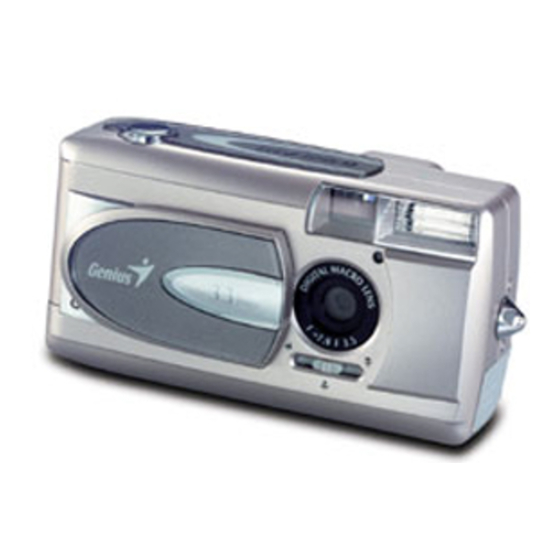
Page 7: Getting To Know The Camera
English GETTING TO KNOW THE CAMERA Front view Shutter button Flash Viewfinder window Lens Lens cover Strap eyelet Focus switch Jack cover DC IN jack Macro mode USB connector Portrait mode Self-timer lamp Landscape mode... - Page 8 English Arrow button (up) Thumbnail button Arrow button (left) Flash button OK button Digital zoom button Arrow button (right) Self-timer button Arrow button (down) Delete button LED indicator Power button Viewfinder Mode dial LCD monitor Battery/SD card cover Display button...
-
Page 9: Mode Dial
Mode Description Use this mode to capture still images. Record Mode Use this mode to view images / video clips, delete Playback mode images / video clips, view a slide show, or view thumbnail displays. Use this mode to record video (movie) clips. -
Page 10: Lcd Monitor Information
English LCD monitor information These indicators are displayed when recording still images: Record mode Fluorescent Battery level EV compensation Full battery power Possible number of shots (at the current size and quality settings) Medium battery power Image size Virtually no battery power... - Page 11 2. Protect indicator 3. DPOF indicator 4. Folder number and image number 5. Card indicator These indicators are displayed when playing video clips back: 1. Movie mode 2. Battery level Full battery power Medium battery power Virtually no battery power 3.
-
Page 12: Getting Started
(+ or -). 4. Close the battery/SD card cover firmly. NOTE — If you won’ t be using the batteries for an extended period of time, remove them from the camera to prevent leaks or corrosion. — Never use manganese batteries. -
Page 13: Attaching The Strap
English clips in the camera. However, you can expand the memory capacity by using an optional SD/MMC memory card so that you can store additional images and video clips. 1. Make sure the camera is off. 2. Slide the battery/SD/MMC card cover in the direction of the OPEN arrow. -
Page 14: Setting The Date And Time
High resolution/quality settings are recommended for printed output and situations requiring the finest detail. Lower resolution/quality images take up less memory space and may be quite suitable for sharing images via e-mail, in a report, or on a web page. - Page 15 Press OK to confirm. To exit the menu screen, press the button. The table below shows the approximate number of shots that you can take at each setting based on 8MB internal memory or an 8MB SD memory card. Resolution Quality...
-
Page 16: Record Mode
640x480 pixels Fine Normal 12:1 * The above data shows the standard testing results. The actual capacity varies according to the shooting conditions and settings. RECORD MODE Taking pictures Your camera is equipped with both an optical viewfinder and a 1.5" LCD monitor to compose images. -
Page 17: Using The Portrait Mode
LCD on and OSD " ? L CD on " LCD off — The image on the LCD monitor darkens when in strong sunlight or bright light. This is not a malfunction. — Using the LCD monitor for an extended period of time may reduce the number of shots you can take. -
Page 18: Using The Landscape Mode
4. Press the shutter button. Using the digital zoom By using the digital zoom, images can be enlarged so that the subject appears closer. However, the more the image is enlarged, the grainier the image will become. The digital zoom function is only available when you set the LCD monitor and the digital zoom to ON. -
Page 19: Using The Self-Timer
To cancel self-timer photography at any time, press the shutter button to disrupt the sequence. NOTE — After one shot is taken, the self-timer mode is turned to off. Using the macro mode Use the macro mode to shoot a close-up of the subject, such as flowers or insects. The... -
Page 20: Using The Flash
— When shooting a close-up in macro mode, use the image LCD monitor to compose your shot, avoiding the off-center parallax phenomenon. — After a macro shot is taken DO NOT FORGET to reset the lens to the normal position. Using the flash The flash is designed to function automatically when lighting conditions warrant the use of flash. -
Page 21: Taking Pictures Manually
The camera has four flash modes: Automatic Flash (default), Red-Eye Reduction, Fill Flash (on), and Flash Off. The modes appear cyclically when you press the button on the rear side of the camera. The table below will help choose the appropriate flash mode: Description Flash Mode The flash fires automatically according to the ambient ﹝... -
Page 22: Playback Mode
7. Press the shutter button. PLAYBACK MODE mode, you can view, magnify, delete images, play video clips, or run a slide show. Playback mode also provides a thumbnail image display, allowing you to quickly scan for the image you want. -
Page 23: Zoom Playback
English NOTE — If there is no image stored in the internal memory or on the memory card, “No images in memory” will appear on the LCD monitor. — You can also view your images on the TV screen. Connect one end of the video cable to the video out jack of the camera and connect the other end to the video input of your TV. -
Page 24: Slide Show Display
4. Set the playback interval by using the /button and then press OK. The slide show starts, displaying your images on the LCD monitor one by one with the set interval. To stop the slide show display, press OK . -
Page 25: Removing Protection From One Image/Video Clip
DPOF allows you to embed printing information on your memory card. By using DPOF, you can select an image to be printed and then specify how many prints you would like. Take your memory card to a DPOF enabled printer that accepts SD memory cards. The DPOF/card-compatible printer will read the embedded information on the memory card and print your images as specified. -
Page 26: Deleting Images/Video Clips
3. When delete message appears, select [Yes] by using the button and then press OK. The next image/video clip appears. If you want to cancel the deletion, select [No]. 4. Continue the deletion if necessary. If all images are deleted, [No images in memory] will... -
Page 27: To Delete All Images/Video Clips At Once
NOTE — To delete the image or video clip stored in the internal memory, remember not to insert the memory card in the camera. Otherwise, you will delete the image or video clip stored in the memory card. -
Page 28: Viewing Video Clips
The elapsed time displays on the LCD monitor while recording a video clip. To stop recording, press the shutter button again. 3. You can also activate the digital zoom function to 4X by pressing OK and the button. Digital zoom must be set before recording the video clips. -
Page 29: Transferring Recorded Images To Your Computer
— The zoom function cannot be activated while playing the video clip back. — To play the video clip back on the computer, we recommend that you use the “QuickTime Player”. This software is free of charge, compatible with Mac- and Windows- computers and can be downloaded from the Apple Web site at www.apple.com. -
Page 30: Installing The Usb Driver On
After the USB driver installation is complete, restart your computer. Installing the USB driver on Macintosh computers Mac OS 8.6 users must install a USB driver. For Mac OS 9.0 or higher, the computer will automatically recognize the camera and load its own USB drivers. - Page 31 Drag and drop from the camera disk to the desired destination. NOTE — It is recommended that you use the AC power adapter as a power supply for the camera while transferring images/video clips from the camera to you computer since camera power maybe cut off unexpectedly if the batteries run out.
- Page 32 English Quality For more information about setting image quality, refer to "Setting the image size and quality". Exposure Your camera adjusts the exposure of each scene automatically. However, when the subject is too dark or too bright, the camera adjusts the brightness to make the subject appears brighter or darker.
- Page 33 OK. The ISO speed decides the sensitivity to the lights. The higher the ISO number is, the more sensitive it is to the lights. When recording under dark situations or recording a fast-moving subject, use a high-number setting. When recording high quality images, use a low number setting.
- Page 34 [400] : high-sensitive photography, equivalent to ISO 400 Quick view By enabling quick view, you can temporarily view the image on the LCD monitor right after you take a picture. After a temporary preview, the camera returns to mode automatically. To enable quick view, first press the button.
- Page 35 Use the Playback menu to create an on-camera slide show, configure DPOF settings, or transfer images to a memory card. You can also use the Playback menu to protect an image, delete all images at once, or adjust the LCD brightness. To access the Playback menu, turn...
-
Page 36: Setup Menu
Then select [Yes] by using the button and press OK. Beep The camera makes a sound (beep) each time you press the camera button if this function is enabled. Press the button. Select [On] or [Off] by using the button and then press OK. -
Page 37: Reset To Default
Auto power off 3 minutes Beep Date type You can select the date type that is imprinted on your image. To set the date type, first press button. Then select one date type you prefer by using the button and press OK. - Page 38 "Setting the date and time". Date imprint If you set imprint function, your image will be displayed with date on it. To enable this function, first press the button. Then select [Yes] by using the button and press OK.
- Page 39 Description Item 3.3-Megapixel CCD Image sensor Super-Fine/Large (2048 x 1536 pixels) Image quality Fine/Medium (1024 x 768 pixels) Normal/Small (640 x 480 pixels) 8MB internal memory; Recording media SD/MMC memory card (optional) (up to 256MB capacity) Fixed focal length: 7.9mm Lens Focusing range: Landscape---1.9m~infinity;...
- Page 40 2 x AA Alkaline batteries, Power 2 x AA Ni-MH batteries, AC power adapter Tripod socket 105 x 55x 41 mm (W x H x D) Dimensions (without protruding parts) Approx. 120g Weight (without batteries and the SD/MMC memory card)
Need help?
Do you have a question about the P313 and is the answer not in the manual?
Questions and answers