Table of Contents
Advertisement
Quick Links
Advertisement
Table of Contents

Related Manuals for True Fitness PLS0900


Summary of Contents for True Fitness PLS0900
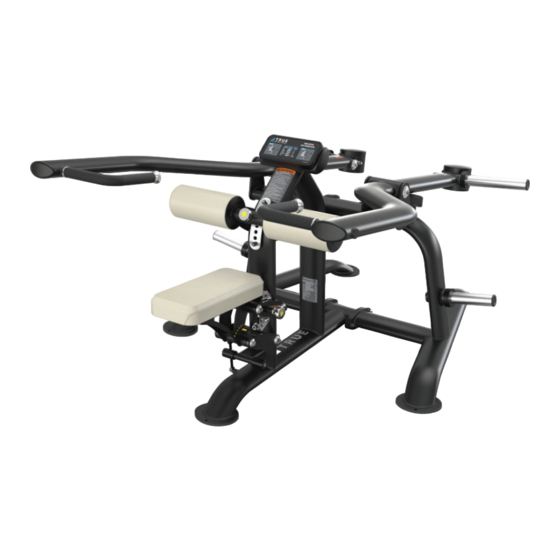
- Page 1 PLS0900 TRICEPS EXTENSION OWNER’S MANUAL MODEL PLS0900 (MAN-PLS0900 REV03)
- Page 3 IMPORTANT—PLEASE READ IMPORTANT! All products shown are prototype. Actual product delivered may vary. Product specifi cations, features, and software are subject to change without notice. For the most up-to-date version of this manual, please see our website: https://truefi tness.com/support/user-manuals/ IMPORTANTE! Todos los productos mostrados son prototipos.
- Page 4 You can count on TRUE Fitness for the best service in the industry, provided by a team focused on optimizing the life of your equipment.
- Page 5 REPORTING FREIGHT CLAIMS OR PARTS DAMAGE Unfortunately, sometimes materials can be damaged during shipment. If materials are damaged during shipment, please follow the guidelines below to determine the appropriate process for you to follow. Severe Damage—Obvious damage to external packaging and internal product. Please refuse the shipment and it will be returned to TRUE by the carrier.
-
Page 6: Table Of Contents
TABLE OF CONTENTS SAFETY INSTRUCTIONS IMPORTANT SAFETY INSTRUCTIONS—SAVE THESE INSTRUCTIONS................7 GENERAL CARE AND MAINTENANCE..........................9 COMMERCIAL MAINTENANCE SCHEDULE........................10 COMPLIANCES..................................10 DIMENSIONS AND WEIGHTS.............................11 LABEL LOCATIONS................................12 WARNING AND INTENDED USE LABELS...........................12 ASSEMBLY INSTRUCTIONS PREASSEMBLY CHECKLIST...............................14 ASSEMBLY STEPS................................16 PREVENTATIVE MAINTENANCE DAILY INSPECTION AND MAINTENANCE...........................22 WEEKLY INSPECTION AND MAINTENANCE........................22 OTHER SCHEDULED PREVENTATIVE MAINTENANCE....................22 CLEANING THE EQUIPMENT.............................23... -
Page 7: Safety Instructions
SAFETY INSTRUCTIONS IMPORTANT SAFETY INSTRUCTIONS—SAVE THESE INSTRUCTIONS FACILITY AND USER SAFETY PRECAUTIONS ● Review and understand all of the warning labels affi xed to this machine and on the facility safety sign. ● Be certain that the machine operation is understood before it is used. Refer to the instructional procedure label affi xed to the machine. - Page 8 INSTALLATION SAFETY PRECAUTIONS ● Read this installation manual entirely before assembling this equipment. ● Verify that there is adequate space surrounding this piece of equipment for safe access and operation. Installation must meet ADA requirements for accessibility. ● Install this piece of equipment on a solid level surface that does not deviate more than 1/8” over a 10’ distance (or as defi...
-
Page 9: General Care And Maintenance
GENERAL CARE AND MAINTENANCE IMPORTANT Preventative maintenance is crucial to maintaining the function and safety of this equipment. Your facility must establish written guidelines for preventative maintenance and keep written or online records of the maintenance performed on these products. As a minimum, the items presented in the SAFETY section of this document and the items that follow here, should be included in your maintenance program. -
Page 10: Commercial Maintenance Schedule
COMMERCIAL MAINTENANCE SCHEDULE Commercial Maintenance Schedule Daily Weekly Monthly 6 Months Annually Inspect cables for wear, tension, and proper connection if equipped. Replace at the fi rst sign of wear. Inspect cable length and cable end fi ttings. Replace at the fi rst sign of wear. Inspect all nuts and bolts and tighten if needed. -
Page 11: Dimensions And Weights
DIMENSIONS AND WEIGHTS ● ASSEMBLED DIMENSIONS (W X D X H) 55.5" x 70” x 37.5” / 141 cm x 177.8 cm x 95.2 cm HEIGHT 37.5” 95.2 cm DEPTH 70” 177.8 cm WIDTH 55.5" 141 cm ● PRODUCT WEIGHT 364 lbs / 165 kg ●... -
Page 12: Label Locations
LABEL, SEAT ADJ POSITION INDICATOR ARROW SPL LBL-ADJ-PLS027 LABEL, PLS SEAT ADJ LBL-WRN-PLS002 LABEL, 6 PLATE WARNING B2065 LABEL, WARNING, COMPLETELY INSERT PIN LBL-PRO-PLS900 LABEL, PLS0900 PROCEDURE LBL-WRN-PLS001 LABEL, GENERAL WARNING LBL-MTN-PLS001 LABEL, MAINTENANCE LBL-LOG-010BK LABEL, 10" NEW TRUE LOGO, WHITE SPL-00-LBLSN... - Page 13 B2065 (Pop Pin Warning) LBL-PRO-PLS900 (Placard) T RICEPS EXT ENS ION LB L-PRO-PLS900 LBL-WRN-PLS001 (General Warning) LBL-MTN-PLS001 (Maintenance) LBL-LOG-010BK (Logo) SPL-00-LBLSN (Serial Number) TRUE FITNESS TECHNOLOGY, INC 865 HOFF RD, ST LOUIS MISSOURI 63366 USA MODEL NO: PLS0900 SERIAL NO: 23-PLS090001X...
-
Page 14: Assembly Instructions
ASSEMBLY INSTRUCTIONS NOTE: Supplemental video available @TRUEFitnessServiceVids: https://youtu.be/tNqV6JrDzxI PREASSEMBLY CHECKLIST CAUTION: Use caution when assembling this product. Unpacking and assembling this product requires two or more people. Use caution when unpacking this product. Avoid damage to the product and product pads. DO NOT use a box cutter. - Page 15 BOX CONTENTS BOX CONTENTS Item Image Item Image Right Arm Assembly Center Frame Assembly Left Arm Assembly Active Weight Post Assemblies (Long) Storage Weight Post Assemblies (Short) Right Side Frame Assembly Seat Pad Assembly Roller Pad Assembly Pad Kit Hardware Left Side Frame Assembly Manual...
-
Page 16: Assembly Steps
DESCRIPTION PLS-09-MFR125X ASSEMBLY, PLS0900 LEFT FRAME PLS-09-MFR025X ASSEMBLY, PLS0900 RIGHT FRAME PLS-09-MFR230X ASSEMBLY, CTR PLS0900 SEAT FRAME C 640A SHCS, 1/2"-13 X 1", BLK C 750B LOCK WASHER, 1/2MED.SPLIT, BLACK BED A. Remove and set aside the preassembled socket B. Using two people, carefully line up the right and left... - Page 17 STEP 1—ASSEMBLE FRAME CONTINUED C. When all 8 socket head cap screws and lock washers are fi nger tight, use a 3/8" allen wrench to fully tighten.
- Page 18 STEP 2—ATTACH ARMS Tools Used in this Step Parts Used in this Step 5/16" Allen Wrench ITEM PART# DESCRIPTION PLS-09-ARM115X ASSEMBLY, PLS0900 USER LEFT ARM PLS-09-ARM015X ASSEMBLY, PLS0900 USER RIGHT ARM PLS-01-AXL001 AXLE, PIVOT PLS-00-CAP005 ALM BOLT CAP Rubber Mallet C 622A SHCS, 3/8"-16 X 3/4"...
- Page 19 STEP 3—ATTACH WEIGHT POST ASSEMBLIES Tools Used in this Step Parts Used in this Step 5/16" Allen Wrench ITEM PART# DESCRIPTION PLS-00-PST000X ASSEMBLY, PLS WEIGHT HORN (ACTIVE-LONG) PLS-00-PST020X ASSEMBLY, WEIGHT HORN (STORAGE-SHORT) PLS-00-CAP005 ALM BOLT CAP C 749B LOCK WASHER, 3/8", BLK ZP Rubber Mallet C 622A SHCS, 3/8"-16 X 3/4"...
- Page 20 STEP 4—ATTACH PADS TO SEAT FRAME Tools Used in this Step Parts Used in this Step 5/16" Allen Wrench ITEM PART# DESCRIPTION PLS0900 PAD KIT PAD KIT PLS PAD KIT HARDWARE C 624A SHCS, 3/8"-16, 1-1/4" BLACK C 749B LOCK WASHER, 3/8", BLK ZP C 754B WASHER, FLAT, 3/8"...
- Page 21 STEP 5—VERIFY ALL ADJUSTMENTS FUNCTION AS INTENDED Pull the pop pin out and place it into each of the adjustment holes for both the center pad assembly and the seat assembly. NOTE: The pad and seat assembly both have six adjustment holes. IMPORTANT! Verify the pin inserts in and out of each hole completely.
-
Page 22: Preventative Maintenance
PREVENTATIVE MAINTENANCE Preventative maintenance is crucial to maintaining the function and safety of this equipment. Your facility must establish written guidelines for preventative maintenance and keep written or online records of the maintenance performed on these products. As a minimum, the items presented in the Safety Instructions section of this document and the items that follow here, should be included in your maintenance program. -
Page 23: Cleaning The Equipment
CLEANING THE EQUIPMENT Daily Cleaning Wipe all machines with a water dampened cloth and dry completely. This includes painted parts, chrome plated parts (except guide rods), plastic parts, and upholstered pads. It is important not to leave parts damp. This will increase the potential for corrosion to occur. -
Page 24: Warranty Information
WARRANTY INFORMATION PLS0900 LIMITED WARRANTY SAVE TIME AND REGISTER ONLINE! https://truefi tness.com/support/warranty-registration/ All TRUE® Fitness products are distributed by TRUE FRAME and are warranted to the original registered product *This limited warranty on the structural frame does not purchaser and the parts of the TRUE product (the include paint or coatings. - Page 25 SAVE TIME AND REGISTER ONLINE! https://truefi tness.com/support/warranty-registration/ THE TRUE LIMITED WARRANTY IS SUBJECT TO AND WILL BE IN ACCORDANCE WITH THE CONDITIONS SET FORTH BELOW: This limited warranty is valid for the United States and 13. This limited warranty does not cover damage or equipment Canada only.
- Page 26 IMPORTANT! Failure to register this product will result in no servicing or authorization of parts to be shipped. To mail your warranty information, please fi ll in the information below and mail to: Service Dept., TRUE Fitness, 865 Hoff Road, St. Louis, MO 63366 (or save postage and register online at www.truefi tness.com).
- Page 28 1.800.883.8783 865 Hoff Road St. Louis, MO 63366 T R U E F I T N E S S . C O M MAN-PLS0900 Owner’s Manual, Assembly Guide, and Warranty Card REV03 © 2024 TRUE Fitness All Rights Reserved...
Need help?
Do you have a question about the PLS0900 and is the answer not in the manual?
Questions and answers