Advertisement
Quick Links
Advertisement

Related Manuals for Dnake EG DIRECT S213K-4G-KIT


Summary of Contents for Dnake EG DIRECT S213K-4G-KIT
- Page 1 S213K-4G-KIT MANUAL & INSTALLATION GUIDE V1.2...
- Page 2 DNAKE S213K-4G Manual – V.1.2 Table of contents (Page 1) 2. Kit contents (Page 2) 3. Product overview – Input / Output Wiring (Page 3-4) 4. Cable Size Guide (Page 5) (Page 5-6) 6. Programming (Page 7-15) App Guide Programming of Keypad Codes Programming of Proximity Tags 7.
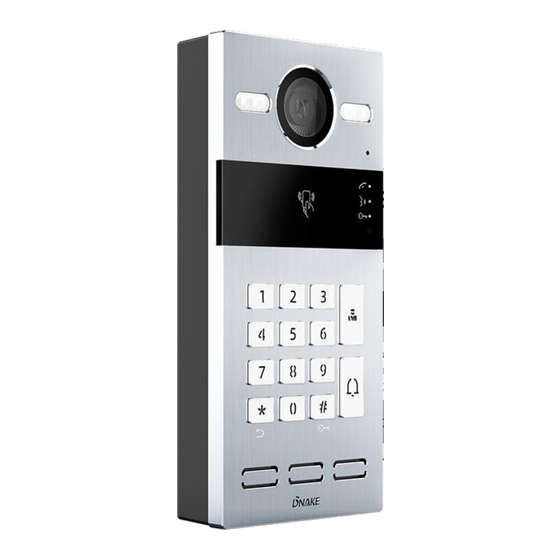
- Page 3 Kit Contents S213K Contents PM2.5x6 (4 pcs) Sealing Plug Wiring S213K for wiring port Cover Screw Plugs PA4 x 30 PM4 x 20 FM3 x 4.5 Screwdriver (2 pcs) (2 pcs) (2 pcs) (2 pcs) Diodes (2 pcs) 4G Enclosure Contents Power Cable Compact Angled HDR-30-12...
- Page 4 Product Overview / Wiring S213K (FULL MANUAL – CLICK HERE) RUT200 (FULL MANUAL – CLICK HERE) Page | 3...
- Page 5 Wiring Diagrams The S213K can be powered by either a direct 12VDC PSU, or via POE. This kit is not supplied with a CONNECT NETWORK INPUT ON S213K TO LAN CONNECTION ON RUT200 VIA CAT5E CABLE WITH RJ45 PLUGS Page | 4...
- Page 6 – Use of diode load device such as a relay or recommended to use a diode 1A/400V (included in the accessories) The intercom will in this way. 2. The load current of the relay cannot picture for more details. Cable Size / Power Guide Model HDR-30-12 12VDC PSU...
- Page 7 for the intercom to the wall / post, then use the two xing screws supplied to mount the place of the 12V supply. Page | 6...
- Page 8 Now you have the entry panel and 4G module connected, you will now need to pair the app to the S213K panel. First, you will need to download the ‘Dnake Smart Life’ app from the Google Play store, or the App Store.
- Page 9 Programming Entry Panel / App 4. Set a name for the ‘Home’ ‘Rooms’, the click ‘Add Room’ Entry point (I.E ‘Front Gate’), then click Con rm. You will then see ‘Home Successfully Created’. Page | 8...
- Page 10 Programming Entry Panel / App 6. Now you have set the app up ready to connect the device, go to your wi connect to the RUT200 Router that the Intercom is connected to. The password for the can also be found on the back of the router itself). Once connected, go back into the app and click ‘Home’...
- Page 11 Programming Entry Panel / App 8. Now the setup is complete, you can change back to the original w e data and test the call bu the door sta on. This will ring through to the app via a no tones can be ed in the menus of the app itself via the below se Me >...
- Page 12 Programming – 2. Click the ‘Add Member’ Bu n in the center, below the exis ng account and share the invite via the op ons that come up. (If choosing the ‘App Account’ op on, you will need to enter their User Code you are adding, found via ‘Se >...
- Page 13 Programming – App Guide The Below guide will reference some of the key features of the app, and how to use them. Communicate Snap-shot Record Landscape View Landscape View – Will Expand the camera view to the full screen of the mobil blet.
- Page 14 Programming – App Guide To release the gates that the entry panel is connected to, simply open the ‘More Op tray, and then click the ‘Lock’ symbol. You will then see another page with the Lock symbol present. Press again and click con .
- Page 15 Programming – Adding Keypad Codes 2. Once logged in, select ‘Access Control’ from the menu on the le hand side of the screen, and then locate ‘Unlock Password’ on the opened screen. Click ‘Add’, then enter the keypad code desired, and select the associated relay intended for. Page | 14...
- Page 16 Programming – Adding Proximity Tags To add proximity tags, the process is similar to adding keypad codes, however, in this case you will need to add a ‘person’ via the tab on the le add the fob by pu ng the reader into a ‘learn’ mode by pressing ‘read’...
- Page 17 Remote Access – Teltonika VPN Portal The use of the RUT200 Router o ers you the poten al to remotely connect into the Dnake S213K via their remote management system. By registering the RUT200 on count.rms.teltonika-networks.c , you will be able to manage keypad codes, proximity fobs, access logs, and all dia eatures.
- Page 18 Remote Access – Teltonika VPN Portal When se ng up the remote access, you will be promted with the below con gura on box. You will need to select the device which you have just added. Then enter a name for the conne you intend on making (such as “S213K Remote Access”).
Need help?
Do you have a question about the EG DIRECT S213K-4G-KIT and is the answer not in the manual?
Questions and answers