Opex OMATION Envelopener 210 Series Operator's Manual
Hide thumbs
Also See for OMATION Envelopener 210 Series:
- Operator's manual (148 pages) ,
- Operator's manual (76 pages) ,
- Operator's manual (148 pages)
Table of Contents
Advertisement
Quick Links
Front Cover
May 2024
Manual #9276911OM-EN
Revision 24-01
Original Instructions
Operator Manual
®
™
™
OMATION
Series 210
Envelopener
WARNING
Read this manual thoroughly before attempting to operate or service this
equipment. Keep a current copy for your reference.
®
© 2019-20, 2022, 2024 OPEX
Corporation
All rights reserved. This publication is made available solely for use by the OPEX Service Organization. The
®
information contained herein is proprietary, confidential and copyrighted by OPEX
Corporation. Copying,
duplicating, selling, or otherwise distributing any part of this publication or the information contained herein without
®
the express written consent of OPEX
Corporation is strictly forbidden.
Advertisement
Table of Contents

Related Manuals for Opex OMATION Envelopener 210 Series


Summary of Contents for Opex OMATION Envelopener 210 Series
- Page 1 Keep a current copy for your reference. ® © 2019-20, 2022, 2024 OPEX Corporation All rights reserved. This publication is made available solely for use by the OPEX Service Organization. The ® information contained herein is proprietary, confidential and copyrighted by OPEX Corporation. Copying, duplicating, selling, or otherwise distributing any part of this publication or the information contained herein without ®...
-
Page 2: Contacting Opex
Fax: +1 856.727.1955 https://www.opex.com/ If you find errors, inaccuracies, or any other issues or concerns with this document, please contact the OPEX Technical Writers via email at: GroupDMATechWriters@opex.com For help with opexservice.com website-related issues, please contact the OPEX Web Developers via email at: dshelp@opex.com... -
Page 3: Ce Declaration Of Conformity
I, the undersigned, hereby declare that the equipment specified above conforms to the above Directive(s) and Standard(s). Place of issue Moorestown, NJ, USA Date of issue Mar 19, 2019 Authorized Scott Maurer, Title President, International Division Drawing: 92701xx-DoC-AU Revision: 0.1 Front Cover Omation® Series 210™ Envelopener™ Operator Manual OPEX Corporation use only - not for distribution... -
Page 4: Declaration Of Conformity France: Fr
à la/aux directive(s) et norme(s) ci-dessus. Place: United States of America (Signature) Date: 05 Novembre 2019 H. Scott Maurer (Nom complet) President, OPEX International (Title) Front Cover Omation® Series 210™ Envelopener™ Operator Manual OPEX Corporation use only - not for distribution... -
Page 5: Declaration Of Conformity Germany: De
Richtlinie(n) und Norm(en) übereinstimmt. Ort: Moorestown, New Jersey Vereinigte Staaten (Unterschrift) Datum: November 12, 2019 H. Scott Maurer (Vollständiger Name) Präsident, International OPEX (Position) Front Cover Omation® Series 210™ Envelopener™ Operator Manual OPEX Corporation use only - not for distribution... -
Page 6: Declaration Of Conformity Republic Of Ireland: Ie
Approval Place of issue Moorestown, NJ, USA Date of issue Mar 19, 2019 Authorized Scott Maurer, Title President, International Division Drawing: 92701xx-DoC-IR Revision: 0.1 Front Cover Omation® Series 210™ Envelopener™ Operator Manual OPEX Corporation use only - not for distribution... -
Page 7: Declaration Of Conformity Switzerland: Ch
Approval Place of issue Moorestown, NJ, USA Date of issue Mar 19, 2019 Authorized Scott Maurer, Title President, International Division Drawing: 92701xx-DoC-SW Revision: 0.1 Front Cover Omation® Series 210™ Envelopener™ Operator Manual OPEX Corporation use only - not for distribution... -
Page 8: Declaration Of Conformity United Kingdom: Uk
I, the undersigned, hereby declare that the equipment specified above conforms to the above Directive(s) and Standard(s). Place of issue Moorestown, NJ, USA Date of issue Mar 19, 2019 Authorized Scott Maurer, Title President, International Division Drawing: 92701xx-DoC-UK Revision: 0.1 Front Cover Omation® Series 210™ Envelopener™ Operator Manual OPEX Corporation use only - not for distribution... -
Page 9: Document History
- updated for new version of transport cover Page 57 - updated text per current OPEX branding Page 63 (Table continued on next page) Front Cover Omation® Series 210™ Envelopener™ Operator Manual OPEX Corporation use only - not for distribution... - Page 10 Reorganized content for uniformity between DMA products. Streamlined text wherever possible. Replaced numerous CAD graphics with photos. - updated front cover layout, OPEX logo, and Page 1 Series 210 logo, per marketing standards - corrected the Country codes in the...
-
Page 11: Table Of Contents
1.6.5. FCC Compliance label ..............24 1.6.6. Ratings / Serial Number label ............25 1.6.7. Service Label ................. 26 1.6.8. ICES-003 label ................27 Table of Contents Omation® Series 210™ Envelopener™ Operator Manual OPEX Corporation use only - not for distribution... - Page 12 ............. . . 59 G.1. List of Terms ..................60 Table of Contents Omation® Series 210™ Envelopener™ Operator Manual OPEX Corporation use only - not for distribution...
-
Page 13: Introduction
1. Introduction 1.1. About This Manual ........14 1.1.1. -
Page 14: About This Manual
1.1. About This Manual This manual contains information about the OPEX OMATION® Series 210™ Envelopener™ (referred to as “Series 210”) and its operational procedures and safety-related components, including: • safety information, safety hazards and precautions • main component identification and function •... -
Page 15: Safety Message Conventions
CAUTION Indicates a hazardous situation that, if not avoided, could result in minor or moderate injury. NOTICE Indicates information considered important, but not hazard related (e.g. messages relating to property damage). Introduction Omation® Series 210™ Envelopener™ Operator Manual OPEX Corporation... -
Page 16: Safety Guidelines
Series 210 or severe personal injury. • Do not use flammable, high pressure, “canned air” to clean paper scraps and dust from the Series 210. • Keep all areas around the Series 210 clear of obstacles. Introduction Omation® Series 210™ Envelopener™ Operator Manual OPEX Corporation... -
Page 17: Interlock System
The interlock system will stop all the motors in the machine whenever the nip arm cover is lifted (Figure 1-1) or chip bin tray is removed (Figure 1-2). Figure 1-1: Top cover removal interlock triggering Figure 1-2: Bin tray removal interlock triggering Introduction Omation® Series 210™ Envelopener™ Operator Manual OPEX Corporation... -
Page 18: Ergonomics
• Maintain an upright body posture. • Occasionally change the angle of your posture for greater comfort. • Avoid operating the Series 210 for longer than 10 hours at a time. If possible, stretch between breaks. Introduction Omation® Series 210™ Envelopener™ Operator Manual OPEX Corporation... -
Page 19: Machine Labels
Follow the safety precautions on all labels when operating the Series 210. Failure to follow these precautions may result in severe bodily injury or death as well as damage to the machine. Introduction Omation® Series 210™ Envelopener™ Operator Manual OPEX Corporation... -
Page 20: Feeder Warning Label
To warn personnel that hair, loose clothing, or jewelry should be Purpose: kept away from this area. Feeder Warning Label (US / EU) Feeder Warning Label (JP) Figure 1-3: Feeder Warning Label Introduction Omation® Series 210™ Envelopener™ Operator Manual OPEX Corporation... -
Page 21: Pinch Point Caution Label
1.6.2. Pinch Point Caution Label The beginning and end of the feed belt path (Figure 1-4). Location: Warns about pinch hazards near the feed belt. Purpose: Figure 1-4: Pinch Point label Introduction Omation® Series 210™ Envelopener™ Operator Manual OPEX Corporation... -
Page 22: Disconnect Power Warning
Rear of the machine (Figure 1-5). Location: Warns personnel to disconnect power before opening the machine. Purpose: Electric Warning Label (US / EU) Electric Warning Label (JP) Figure 1-5: Disconnect Power Before Opening label Introduction Omation® Series 210™ Envelopener™ Operator Manual OPEX Corporation... -
Page 23: Dielectric And Ground Test Label
To inform personnel that the ground points in the machine are well Purpose: connected between each other, and it has passed the ground bond test. Figure 1-6: Dielectric and Ground Test label Introduction Omation® Series 210™ Envelopener™ Operator Manual OPEX Corporation... -
Page 24: Fcc Compliance Label
Rear of US machines only (Figure 1-7). Location: Certifies that the electromagnetic interference from the device is Purpose: under the limits approved by the Federal Communications Commission. Figure 1-7: FCC Compliance Label Introduction Omation® Series 210™ Envelopener™ Operator Manual OPEX Corporation... -
Page 25: Ratings / Serial Number Label
1.6.6. Ratings / Serial Number label Rear of machine (Figure 1-8). Location: Identifies product model, electrical ratings, serial number for U.S. & Purpose: Canada; EU; Japan. US / CA Figure 1-8: Ratings / Serial number label Introduction Omation® Series 210™ Envelopener™ Operator Manual OPEX Corporation... -
Page 26: Service Label
1.6.7. Service Label The right side of the Series 210 (Figure 1-9). Location: Provides contact information and reference serial number to qualified Purpose: personnel maintaining the Series 210. Figure 1-9: Service Label Introduction Omation® Series 210™ Envelopener™ Operator Manual OPEX Corporation... -
Page 27: Ices-003 Label
1.6.8. ICES-003 label Rear of North American machines only (Figure 1-10). Location: This label identifies compliance with Canadian ICES-003. Purpose: Figure 1-10: Canadian ICES-003 label Introduction Omation® Series 210™ Envelopener™ Operator Manual OPEX Corporation... - Page 28 (This page is intentionally blank) Introduction Omation® Series 210™ Envelopener™ Operator Manual OPEX Corporation...
- Page 29 2. Overview 2.1. Main Controls and Components ......30 2.2. Equipment Serial Number Locations ..... . 31 2.3.
-
Page 30: Overview
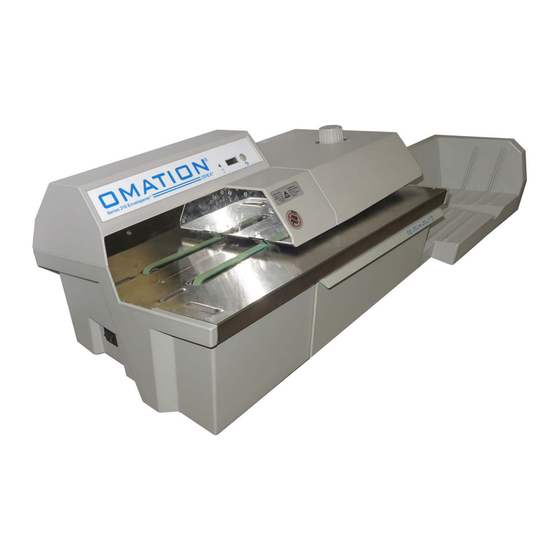
Nip arm cover Feed (Nip arm assembly under cover) thumper Envelope feed hopper Output tray Chip Bin Transport deck Retard assembly (under cover) On/Off switch (left side) Figure 2-1: Main Components Front View Overview Omation® Series 210™ Envelopener™ Operator Manual OPEX Corporation... -
Page 31: Equipment Serial Number Locations
2.2. Equipment Serial Number Locations Before contacting OPEX Technical Support, locate the Model Serial number label or Service tag (OPEX direct sales only) on your machine so that you can provide the assisting technician with your reference serial number. The locations of these labels is shown in Figure 2-2. -
Page 32: Specifications
Length: 440.3" to 42.3" (1023.62 mm to 1074.42 Physical Dimensions Depth: 16.5" (419.1 mm) • with power cord connected: 18” (457.2 mm) Weight: 53 lbs (24.04 kg) with cord and catch tray Overview Omation® Series 210™ Envelopener™ Operator Manual OPEX Corporation... - Page 33 BTU Rating • JP: 1708 BTU/hour Operating and Storage 40°F – 100°F(4.4°C – 37.8°C), Humidity 10 – 90% Temperature range Non-condensed. Decibel Rating Does not exceed safety standard of 80 dB. Overview Omation® Series 210™ Envelopener™ Operator Manual OPEX Corporation...
- Page 34 (This page intentionally left blank) Overview Omation® Series 210™ Envelopener™ Operator Manual OPEX Corporation...
- Page 35 3. Operation 3.1. Operation ..........36 3.1.1.
-
Page 36: Operation
1. Connect the power cord to the back of the machine (Figure 3-1), and plug the other end into an AC-supplied outlet. Figure 3-1: AC input on back Operation Omation® Series 210™ Envelopener™ Operator Manual OPEX Corporation... - Page 37 3500 envelopes before flashing again, to inform you to empty the chip bin. Chip bin light flashes rapidly Figure 3-2: Flashing chip bin light Figure 3-3: Opening the Chip Bin tray Operation Omation® Series 210™ Envelopener™ Operator Manual OPEX Corporation...
- Page 38 • The third depth is for envelopes with glued edges, or to be used if the second is not opening the envelope. • The No Cut position is normally used when only counting the mail. Note: More accurate counting is achieved with smaller stacks of mail. Operation Omation® Series 210™ Envelopener™ Operator Manual OPEX Corporation...
- Page 39 5. Reset the Counter by pressing and holding the Counter Reset button next to the LCD display (Figure 3-5). Press and hold..to reset counter Figure 3-5: Counter reset button Operation Omation® Series 210™ Envelopener™ Operator Manual OPEX Corporation...
- Page 40 ½ to ¾ of an inch above the transport deck (Figure 3-7). Figure 3-7: Loading the Envelope Feed Hopper Operation Omation® Series 210™ Envelopener™ Operator Manual OPEX Corporation...
- Page 41 (the mail is always counted even if it is not cut). 11. The envelope then moves into the mail output tray. 12. Once the Envelope Feed Hopper is empty, empty the output tray. 13. To continue processing, repeat the above steps. Operation Omation® Series 210™ Envelopener™ Operator Manual OPEX Corporation...
-
Page 42: Output Tray Position
(see Figure 3-9). Against the machine 1” away Fully detached for large mail 2” away Figure 3-9: Output tray positions Note: to return/go to the “Order of operation” steps. Click here Operation Omation® Series 210™ Envelopener™ Operator Manual OPEX Corporation... -
Page 43: Clearing Jams
You may have to remove the nip arm cover. This is explained in “Maintenance” on page Operation Omation® Series 210™ Envelopener™ Operator Manual OPEX Corporation... - Page 44 (This page is intentionally blank) Operation Omation® Series 210™ Envelopener™ Operator Manual OPEX Corporation...
-
Page 45: Maintenance
4. Maintenance 4.1. Cleaning the Series 210 ....... . . 46 4.2. -
Page 46: Cleaning The Series 210
2. Press the catch release button on the right side of the cover until a “click” is heard and lift the right side (Figure 4-1). Push until a click is heard..and lift up on this side Figure 4-1: Pressing the catch release button Maintenance Omation® Series 210™ Envelopener™ Operator Manual OPEX Corporation... - Page 47 Note: If you were referred to this section from “Adjusting Cutter Depth,” to return to that section. Click here 4. Lift the Nip arm wheels to clean under them (Figure 4-3). Figure 4-3: Cleaning under the nip wheels Maintenance Omation® Series 210™ Envelopener™ Operator Manual OPEX Corporation...
- Page 48 There is a risk of equipment malfunction and/or injury associated with the use of aerosol cleaners on OPEX equipment prior to the operation of equipment. - When cleaning glass and plastic surfaces, use detergent-based cleaners such as Fantastic™...
-
Page 49: Cutter Adjustment
No Cut Third Cut (deepest) Second Cut (deeper) Standard Cut (shallowest) Figure 4-4: Standard Cut position 2. Remove the nip assembly cover (See “Cleaning the Series 210” on page 46). Maintenance Omation® Series 210™ Envelopener™ Operator Manual OPEX Corporation... - Page 50 5. Repeat steps 3 and 4 until the envelopes are being cut open. If you find the cut is too deep, turn the screw to the left in 1/4 turn or smaller increments until you have the envelope being cut without cutting the contents. Maintenance Omation® Series 210™ Envelopener™ Operator Manual OPEX Corporation...
-
Page 51: Resetting The Circuit Breaker
The circuit breaker shown in Figure 4-6 has been tripped and is open. If there is white showing, the circuit breaker is open Figure 4-6: Open circuit breaker Maintenance Omation® Series 210™ Envelopener™ Operator Manual OPEX Corporation... - Page 52 Figure 4-7: Closing the circuit breaker 3. Plug the power cord back into the machine. 4. Verify the machine has power and operates normally. If the circuit breaker pops back out, call OPEX to have the machine serviced (See “Contacting OPEX” on page Maintenance Omation®...
-
Page 53: User Replaceable Parts
5. User Replaceable Parts 5.1. Overview ..........54 5.1.1. -
Page 54: Overview
(Figure 5-1). Transport Cover Cutter Knob Output Tray Power Cord Chip Bin Figure 5-1: User Replaceable Parts User Replaceable Parts Omation® Series 210™ Envelopener™ Operator Manual OPEX Corporation... -
Page 55: Cutter Depth Knob
Figure 5-2: Cutter Depth Knob (8067050) 5.1.2. Chip Bin Tray Magnet (7023100) Tray Only (7549166) 9131400 Complete Tray Assembly with all parts Click to return Figure 5-3: Chip Bin Tray Assembly User Replaceable Parts Omation® Series 210™ Envelopener™ Operator Manual OPEX Corporation... -
Page 56: Output Tray
9131300 Complete Output Tray with all parts Click to return Click to retur 7221810 Rubber Foot 4X 7662300 Screw 4X 7584100 Sound Dampening Pad 7603700 Spreader Bar 7549180 Tray only Figure 5-4: Output Tray Assembly User Replaceable Parts Omation® Series 210™ Envelopener™ Operator Manual OPEX Corporation... -
Page 57: Transport Cover
Note: Earlier versions of the transport cover had the interlock pin as a molded feature integrated into 8096700. If the molded pin breaks on an old 8096700 cover, then you will need to order the complete top cover (9270925). User Replaceable Parts Omation® Series 210™ Envelopener™ Operator Manual OPEX Corporation... -
Page 58: Ac Power Cords
Figure 5-6: AC Power Cords 5.1.5.1. Additional Power Cords • Australia (109008) • Denmark (109015) • India, South Africa (109016) • Switzerland (109018) • Italy (109019) • Japan (2952200) User Replaceable Parts Omation® Series 210™ Envelopener™ Operator Manual OPEX Corporation... -
Page 59: Glossary
G. Glossary Omation® Series 210™ Envelopener™ Operator Manual... -
Page 60: List Of Terms
Rollers that keep the envelopes firmly pressed against the belt as Nip arms - they move past the cutter. - The person running the machine. Operator - Collects mail as it leaves the Series 210. Output tray Omation® Series 210™ Envelopener™ Operator Manual OPEX Corporation... - Page 61 - Separates the mail to one piece at a time as the stack of Retard Assembly mail is pulled up to the entrance of the retard assembly. - To separate or choose one at a time. Singulate Omation® Series 210™ Envelopener™ Operator Manual OPEX Corporation...
- Page 62 (This page is intentionally blank) Omation® Series 210™ Envelopener™ Operator Manual OPEX Corporation...
- Page 63 About OPEX Corporation OPEX Corporation is more than a manufacturer of machines. We continuously reimagine technology to power the future for our customers. With an innovative approach, we engineer unique automated solutions that support our customers so they can solve the most pressing business challenges for both today and tomorrow.
- Page 64 OPEX Corporation | 305 Commerce Drive | Moorestown, NJ 08057-4234 | USA http://www.opex.com...
Need help?
Do you have a question about the OMATION Envelopener 210 Series and is the answer not in the manual?
Questions and answers