Opex Omation Envelopener 210 Series Operator's Manual
Hide thumbs
Also See for Omation Envelopener 210 Series:
- Operator's manual (148 pages) ,
- Operator's manual (132 pages) ,
- Operator's manual (148 pages)
Table of Contents
Advertisement
April 2019
Omation
Series 210 Envelopener
®
TM
Omation Series 210™ Envelopener® Operator Manual
9276911OM-EN
Revision 19-01
Original Instructions
™
®
Omation Series 210
Envelopener
WARNING
Read this manual thoroughly before attempting to operate this equipment.
Keep a current copy for your reference.
®
© 2019 OPEX
Corporation
All rights reserved. This document is provided by OPEX for use by their customers, partners and dealers. No portion
of these materials may be reproduced, published, or stored in a database or retrieval system, other than for its
intended use without the express, written consent of OPEX Corporation.
Advertisement
Chapters
Table of Contents

Related Manuals for Opex Omation Envelopener 210 Series


Summary of Contents for Opex Omation Envelopener 210 Series
- Page 1 © 2019 OPEX Corporation All rights reserved. This document is provided by OPEX for use by their customers, partners and dealers. No portion of these materials may be reproduced, published, or stored in a database or retrieval system, other than for its...
-
Page 2: Contacting Opex
Fax: +1 856.727.1955 https://www.opex.com/ If you find errors, inaccuracies, or any other issues or concerns with this document, please contact the OPEX Technical Writers via email at: GroupTechwriters@opex.com For help with opexservice.com website-related issues, please contact the OPEX Web Developers via email at: GroupWebDev@opex.com... -
Page 3: Ec Declaration Of Conformity Australia: Au
Technical documentation is compiled in accordance with Part B of Annex VII of the machinery directive. This documentation is available on a Technical File reasoned request by appropriate national authority to our authorized representative: NAME OPEX Business Machines Pty Ltd ADDRESS Level 12, 225 George Street Sydney, NSW 2000... -
Page 4: Ec Declaration Of Conformity France: Fr
This declaration of conformity is issued under the sole responsibility of the manufacturer. Manufacturer NAME OPEX Corporation ADDRESS 305 Commerce Drive, Moorestown, NJ 08057, USA Technical documentation is compiled in accordance with Part B of Annex VII of the machinery directive. This documentation is available on a... -
Page 5: Ec Declaration Of Conformity Germany: Gr
This declaration of conformity is issued under the sole responsibility of the manufacturer. Manufacturer NAME OPEX Corporation ADDRESS 305 Commerce Drive, Moorestown, NJ 08057, USA Technical documentation is compiled in accordance with Part B of Annex VII of the machinery directive. This documentation is available on a... -
Page 6: Ec Declaration Of Conformity Republic Of Ireland: Ir
Technical documentation is compiled in accordance with Part B of Annex VII of the machinery directive. This documentation is available on a Technical File reasoned request by appropriate national authority to our authorized representative: NAME OPEX Business Machines GmbH ADDRESS 104 Lower Baggot Street Dublin 2... -
Page 7: Ec Declaration Of Conformity Switzerland: Sw
Technical documentation is compiled in accordance with Part B of Annex VII of the machinery directive. This documentation is available on a Technical File reasoned request by appropriate national authority to our authorized representative: NAME OPEX Business Machines GmbH ADDRESS Pilatustrasse 41 6003 Luzern... -
Page 8: Ec Declaration Of Conformity United Kingdom: Uk
Technical documentation is compiled in accordance with Part B of Annex VII of the machinery directive. This documentation is available on a Technical File reasoned request by appropriate national authority to our authorized representative: NAME OPEX Business Machines GmbH ADDRESS 29/32 Queensbrook Bolton Technology Exchange... -
Page 9: Document History
0.8. Document History Date Changes (click blue text to go to that page) 19-01 Apr 15, 2019 Initial Release CE compliant Omation Series 210™ Envelopener® Operator Manual OPEX Corporation... -
Page 10: Table Of Contents
Table of Contents 0.1. Contacting OPEX ..................2 0.2. EC Declaration of Conformity Australia: AU ........... 3 0.3. EC Declaration of Conformity France: FR ..........4 0.4. EC Declaration of Conformity Germany: GR .......... 5 0.5. EC Declaration of Conformity Republic of Ireland: IR ......6 0.6. - Page 11 ............. . . 71 G.1. List of Terms ..................72 Table of Contents Omation Series 210™ Envelopener® Operator Manual OPEX Corporation...
- Page 12 Table of Contents Omation Series 210™ Envelopener® Operator Manual OPEX Corporation...
-
Page 13: Introduction
1. Introduction 1.1. About This Manual ........14 1.1.1. -
Page 14: About This Manual
1.1. About This Manual WARNING Read all information thoroughly before attempting to operate this equipment. ™ This manual contains information about the OPEX Omation Series 210 ® Envelopener and its operational procedures and safety-related components, including: • safety information, safety hazards and precautions •... -
Page 15: Manual Navigation Aids
Make sure to use ® ® the latest version of Adobe Acrobat Reader * for optimal performance. *Adobe and Acrobat Reader are registered trademarks of Adobe Systems Incorporated. Introduction Omation Series 210™ Envelopener® Operator Manual OPEX Corporation... -
Page 16: Safety Message Conventions
Indicates a hazardous situation that, if not avoided, could result in minor or moderate injury. NOTICE Indicates information considered important, but not hazard related (e.g. messages relating to property damage). See important safety information in Chapter 2: “Safety“. Introduction Omation Series 210™ Envelopener® Operator Manual OPEX Corporation... -
Page 17: Safety
2. Safety 2.1. Introduction ......... . . 18 2.2. -
Page 18: Introduction
2.1. Introduction The information provided in this chapter is intended to educate you on various safety issues regarding the operation and maintenance of the OPEX equipment described in this manual. This chapter provides an explanation of the safety conventions used throughout this manual, as well as safety guidelines to be observed when working with this equipment. -
Page 19: Safety Guidelines
- Do not modify the design or configuration of the equipment Machine design without consulting OPEX or your authorized representative. - Machine maintenance, particular operations, and all Machine Maintenance adjustments, whether mechanical or electrical, shall be carried out by persons authorized to do so in accordance with a safe system of work. - Page 20 - This equipment is not suitable for use in locations Keep away from children where children are likely to be present. Safety Omation Series 210™ Envelopener® Operator Manual OPEX Corporation...
-
Page 21: Consignes De Sécurité - Traduction Française
- Ne modifiez pas la conception ou la configuration Conception de la machine de l'équipement sans consulter OPEX ou votre représentant autorisé. - La maintenance de la machine, les opérations L'entretien des machines particulières et tous les réglages, qu'ils soient mécaniques ou électriques,... - Page 22 - Gardez toutes les zones autour de la machine sans Accès à la machine obstacles. - Cet équipement ne convient pas aux endroits où Tenir à l'écart des enfants les enfants sont susceptibles d'être présents. Safety Omation Series 210™ Envelopener® Operator Manual OPEX Corporation...
-
Page 23: Machine Labels
Follow the safety precautions on all labels when operating the Sure Sort. Failure to follow these precautions may result in severe bodily injury or death as well as damage to the machine. Safety Omation Series 210™ Envelopener® Operator Manual OPEX Corporation... -
Page 24: Feeder Warning Label
Front of the machine on the back of the feed hopper (Figure 2-1). Location: To warn personnel that hair, loose clothing, or jewelry should be Purpose: kept away from this area. Figure 2-1: Feeder warning Label Safety Omation Series 210™ Envelopener® Operator Manual OPEX Corporation... -
Page 25: Pinch Point Caution Label
2.4.2. Pinch Point Caution Label The beginning and end of the feed belt path (Figure 2-2). Location: Warns about pinch hazards near the feed belt. Purpose: Figure 2-2: Pinch Point label 1637200 Safety Omation Series 210™ Envelopener® Operator Manual OPEX Corporation... -
Page 26: Chip Bin Label
Location: Advises personnel the when the light next to the counter goes on, Purpose: paper cuttings (chips) should be emptied from the bin into the trash. Figure 2-3: Chip Bin label Safety Omation Series 210™ Envelopener® Operator Manual OPEX Corporation... -
Page 27: Disconnect Power Warning
Rear of the machine (Figure 2-4). Location: Warns personnel to disconnect power before opening the machine. Purpose: WARNING! DISCONNECT POWER BEFORE OPENING ATTENTION! METTRE HORS TENSION AVANT OUVERTURE Figure 2-4: Disconnect Power Before Opening label Safety Omation Series 210™ Envelopener® Operator Manual OPEX Corporation... -
Page 28: Dielectric And Ground Test Label
To inform personnel that the ground points in the machine are well Purpose: connected between each other and it has passed the ground bond test. Figure 2-5: Dielectric and Ground Test label P24838-01 Safety Omation Series 210™ Envelopener® Operator Manual OPEX Corporation... -
Page 29: Fcc Compliance Label
Rear of the machine (Figure 2-6). Location: Certifies that the electromagnetic interference from the device is Purpose: under the limits approved by the Federal Communications Commission. Figure 2-6: FCC Compliance Label 7682610 Safety Omation Series 210™ Envelopener® Operator Manual OPEX Corporation... -
Page 30: Interlock System
1. The interlock system will stop all the motors in the machine whenever the nip arm cover is lifted (Figure 2-7) or chip bin tray is removed (Figure 2-8). Figure 2-7: Top cover removal interlock triggering Figure 2-8: Bin tray removal interlock triggering Safety Omation Series 210™ Envelopener® Operator Manual OPEX Corporation... -
Page 31: General Operational Safety
• Do not operate this equipment with the covers removed. • Do not set liquids on the Series 210 which could spill into the machine. • Before cleaning, make sure all power is disconnected. Safety Omation Series 210™ Envelopener® Operator Manual OPEX Corporation... -
Page 32: Ergonomics
• Occasionally change the angle of your posture for greater comfort. • Avoid operating the machine for longer than a single 10-hour shift. If possible, stretch between breaks. • Turn off the machine during periods of non-use. Safety Omation Series 210™ Envelopener® Operator Manual OPEX Corporation... - Page 33 3. Overview 3.1. System Overview ........34 3.2.
-
Page 34: Overview
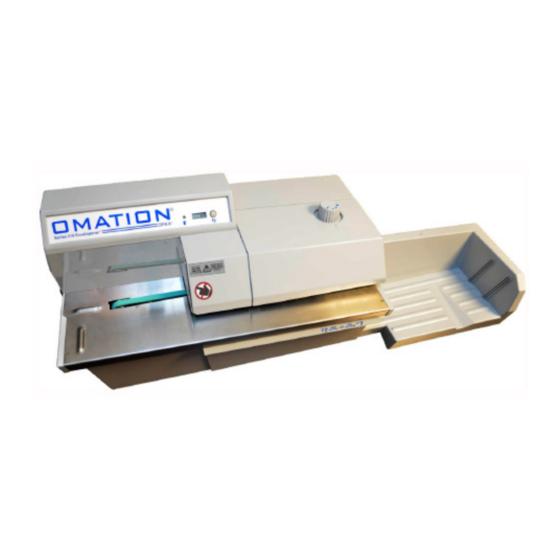
Nip arm cover Nip arm assembly (under cover) Chip Bin Retard assembly Output tray On/Off switch (under cover) (left side) Transport deck Figure 3-1: Main Components Front View Overview Omation Series 210™ Envelopener® Operator Manual OPEX Corporation... - Page 35 WARNING Read and follow all information in before attempting to Chapter 2: “Safety“ operate this equipment. Overview Omation Series 210™ Envelopener® Operator Manual OPEX Corporation...
-
Page 36: Equipment Serial Number Locations
3.2. Equipment Serial Number Locations Before contacting OPEX Technical Support, locate the Model Serial number (Figure 3-2) or Service tag (North American non distributors only Figure 3-3 on 37) on your machine so that you can provide the assisting technician with page your reference serial number. - Page 37 Serial Figure 3-3: Service tag location (NA non-distributors only) Overview Omation Series 210™ Envelopener® Operator Manual OPEX Corporation...
- Page 38 (This page is intentionally blank) Overview Omation Series 210™ Envelopener® Operator Manual OPEX Corporation...
-
Page 39: Operation
4. Operation 4.1. Operation ..........40 4.1.1. -
Page 40: Operation
4.1.1. Order of Operation 1. Connect the power cord to the back of the machine and plug the other end into an AC supplied outlet (Figure 4-1). Figure 4-1: AC input on back Operation Omation Series 210™ Envelopener® Operator Manual OPEX Corporation... - Page 41 3500 envelopes before flashing again to inform you to empty the chip bin. Chip bin light flashes rapidly Figure 4-2: Flashing chip bin light Figure 4-3: Opening the Chip Bin tray Operation Omation Series 210™ Envelopener® Operator Manual OPEX Corporation...
- Page 42 • The third depth is for envelopes with glued edges or to be used if the second is not opening the envelope. • The No Cut position is normally used when only counting the mail. Note: More accurate counting is achieved with smaller stacks of mail. Operation Omation Series 210™ Envelopener® Operator Manual OPEX Corporation...
- Page 43 5. Reset the Counter by pressing and holding the Counter Reset button next to the LCD display (Figure 4-5). Press and hold..to reset counter Figure 4-5: Counter reset button Operation Omation Series 210™ Envelopener® Operator Manual OPEX Corporation...
- Page 44 7. Be sure the top side of the mail to be cut is flush against the back of the Feed Hopper (Figure 4-7). Try to get mail flush against back wall Figure 4-7: Mail flush against Feed Hopper wall Operation Omation Series 210™ Envelopener® Operator Manual OPEX Corporation...
- Page 45 Feed Thumper Figure 4-8: Feed Thumper 8. Press the AC power switch on the left side of the machine to power on the machine (Figure 4-9). Figure 4-9: AC power switch Operation Omation Series 210™ Envelopener® Operator Manual OPEX Corporation...
- Page 46 13. Once the Envelope Feed Hopper is empty, empty the output tray. 14. To continue processing, repeat the above steps. Note: The feed hopper can be loaded with the machine running. Operation Omation Series 210™ Envelopener® Operator Manual OPEX Corporation...
-
Page 47: Output Tray Position
Against the machine (Figure 4-10). Output tray against machine Figure 4-10: Output tray against the machine Note: If you were referenced here by the operation chapter, to return click here to the next step. Operation Omation Series 210™ Envelopener® Operator Manual OPEX Corporation... - Page 48 Two inches away (Figure 4-12). Output tray 2 inches away Figure 4-12: Output tray two inches away Note: If you were referred here from “Order of operation,” to return to click here the next step. Operation Omation Series 210™ Envelopener® Operator Manual OPEX Corporation...
- Page 49 Further than two inches away if disconnected (Figure 4-13). Figure 4-13: Output tray disconnected Note: If were you referred here from “Order of operation,” to return to click here the next step. Operation Omation Series 210™ Envelopener® Operator Manual OPEX Corporation...
-
Page 50: Clearing Jams
You may have to remove the nip arm cover. This is explained in “Routine Maintenance” on page Operation Omation Series 210™ Envelopener® Operator Manual OPEX Corporation... -
Page 51: Routine Maintenance
2. Press the catch release button on the right side of the cover until a “click” is heard and lift the right side (Figure 4-14). 1 Push until a click is heard... 2 ...and lift up on this side Figure 4-14: pressing the catch release button Operation Omation Series 210™ Envelopener® Operator Manual OPEX Corporation... - Page 52 Note: If you were referred to this section from “Adjusting Cutter Depth,” to return to that section. click here 4. Lift the Nip arm wheels to clean under them (Figure 4-16). Figure 4-16: Cleaning the nip wheels Operation Omation Series 210™ Envelopener® Operator Manual OPEX Corporation...
- Page 53 7. Use a cloth moistened with liquid cleaner to wipe down the exterior of the machine. • Use denatured alcohol on areas with stains, if necessary. - Any non-flammable commercially available cleaning solution may be used to clean the machine. When cleaning the OPEX Omation Series ™ ® Envelopener , DO NOT USE aerosol cleaners or compressed air because of the flammable nature of many of these products.
-
Page 54: Cutter Adjustment
No Cut Third Cut (deepest) Second Cut (deeper) Standard Cut (shallowest) Figure 4-17: Standard Cut position 2. Remove the nip assembly cover (See “Cleaning the Series 210 Envelopener®” on page 51). Operation Omation Series 210™ Envelopener® Operator Manual OPEX Corporation... - Page 55 5. Repeat steps 3 and 4 until the envelopes are being cut open. If you find the cut is too deep, turn the screw to the left in 1/4 turn or smaller increments until you have the envelope being cut without cutting the contents. Operation Omation Series 210™ Envelopener® Operator Manual OPEX Corporation...
-
Page 56: Resetting The Circuit Breaker
The circuit breaker shown in Figure 4-19 has been tripped and is open. If there is white showing, the circuit breaker is open Figure 4-19: Open circuit breaker Operation Omation Series 210™ Envelopener® Operator Manual OPEX Corporation... - Page 57 Figure 4-20: Closing the circuit breaker 3. Plug the power cord back into the machine. 4. Verify the machine has power and operates normally. If the circuit breaker pops back out, call OPEX to have the machine serviced (See “Contacting OPEX” on page Operation Omation Series 210™...
- Page 58 (This page is intentionally blank) Operation Omation Series 210™ Envelopener® Operator Manual OPEX Corporation...
-
Page 59: User Replaceable Parts
5. User Replaceable Parts 5.1. Overview ..........60 Omation Series 210™... -
Page 60: Overview
(Figure 5-1). Transport Cover Cutter Knob Chip Bin Power Cord Output Tray Figure 5-1: User Replaceable Parts User Replaceable Parts Omation Series 210™ Envelopener® Operator Manual OPEX Corporation... - Page 61 Cutter Depth Knob Click to return Figure 5-2: 8067050 Cutter Depth Knob User Replaceable Parts Omation Series 210™ Envelopener® Operator Manual OPEX Corporation...
- Page 62 9131300 Complete Output Tray with all parts Click to return 7221810 Rubber Foot 4X 7662300 Screw 4X 7584100 Sound Dampening Pad 7603700 Spreader Bar 7549180 Tray only Figure 5-3: Output Tray Assembly User Replaceable Parts Omation Series 210™ Envelopener® Operator Manual OPEX Corporation...
- Page 63 Chip Bin Tray 7023100 Magnet 7618700 Sticker 7549166 Tray only 9131400 Complete Tray Assembly with all parts Click to return Figure 5-4: Chip Bin Tray Assembly User Replaceable Parts Omation Series 210™ Envelopener® Operator Manual OPEX Corporation...
- Page 64 Transport Cover Click to return Figure 5-5: 8096700 Transport Cover Transport Cover Latch Click to return Figure 5-6: 8069225 Transport Cover Latch (under cover) User Replaceable Parts Omation Series 210™ Envelopener® Operator Manual OPEX Corporation...
- Page 65 Figure 5-7: AC Power Cords Table 5-1: Additional Power Cords Country Part Number Australia # 109008 Denmark # 109015 India, South Africa # 109016 Switzerland # 109018 Italy # 109019 Japan # 2952200 User Replaceable Parts Omation Series 210™ Envelopener® Operator Manual OPEX Corporation...
- Page 66 (This page is intentionally blank) User Replaceable Parts Omation Series 210™ Envelopener® Operator Manual OPEX Corporation...
-
Page 67: Specifications
6. Specifications Omation Series 210™ Envelopener® Operator Manual... - Page 68 The cut adjustment screw changes the cut depth .0044” for every ¼ turn of the screw. Power Specifications 110-120 VAC, 60HZ, 5A Power EURO: 220-240 VAC, 50HZ, 3A JAPAN: 100 VAC, 50/60HZ, 3A Specifications Omation Series 210™ Envelopener® Operator Manual OPEX Corporation...
- Page 69 JAPAN: 1024 BTU/h (max @ 100v/3A) Operating and Storage 40°F – 100°F(4.4°C – 37.8°C), Humidity 10 – 90% Temperature range Non-condensed. Decibel Rating Does not exceed safety standard of 80 dB. Specifications Omation Series 210™ Envelopener® Operator Manual OPEX Corporation...
- Page 70 (This page is intentionally blank) Specifications Omation Series 210™ Envelopener® Operator Manual OPEX Corporation...
-
Page 71: Glossary
G. Glossary Omation Series 210™ Envelopener® Operator Manual... -
Page 72: List Of Terms
Rollers that keep the envelopes firmly pressed against the belt as Nip arms - they move past the cutter. - The person running the machine. Operator - Collects mail as it leaves the Series 210. Output tray Omation Series 210™ Envelopener® Operator Manual OPEX Corporation... - Page 73 - Separates the mail to one piece at a time as the stack of Retard Assembly mail is pulled up to the entrance of the retard assembly. - To separate or choose one at a time. Singulate Omation Series 210™ Envelopener® Operator Manual OPEX Corporation...
- Page 74 (This page is intentionally blank) Omation Series 210™ Envelopener® Operator Manual OPEX Corporation...
- Page 75 Utilizing a vast global workforce of direct employees, OPEX serves a variety of industries including financial services, insurance, healthcare, government, retail, non-profits, utilities, telecommunication, service bureaus, educational institutions and fulfillment operations.
- Page 76 Omation Series 210 Envelopener ® Omation Series 210™ Envelopener® Operator Manual OPEX Corporation...
Need help?
Do you have a question about the Omation Envelopener 210 Series and is the answer not in the manual?
Questions and answers