Table of Contents
Advertisement
Quick Links
User Manual
DOK11068en04
Westerstrand Time System
2024-02-01
Tan/MLE
User Manual
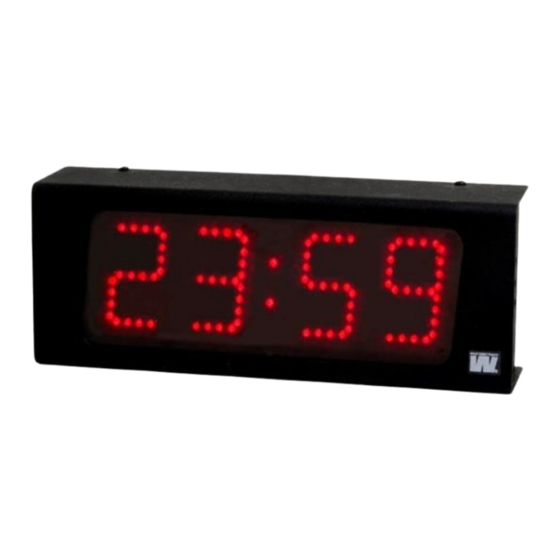
Digital Clock
LUMEX5 NTP PoE, LUMEX7 NTP PoE, LUMEX12 NTP PoE
LUMEX5S NTP PoE, LUMEX7S NTP PoE, LUMEX12S NTP PoE
Westerstrand Urfabrik AB
Box 133, SE-545 23 Töreboda
www.westerstrand.se
Tel.: +46 506 48000
info@westerstrand.se
Advertisement
Table of Contents

Related Manuals for WESTERSTRAND LUMEX5S NTP PoE


Summary of Contents for WESTERSTRAND LUMEX5S NTP PoE
- Page 1 Westerstrand Time System 2024-02-01 Tan/MLE User Manual Digital Clock LUMEX5 NTP PoE, LUMEX7 NTP PoE, LUMEX12 NTP PoE LUMEX5S NTP PoE, LUMEX7S NTP PoE, LUMEX12S NTP PoE Westerstrand Urfabrik AB Box 133, SE-545 23 Töreboda www.westerstrand.se Tel.: +46 506 48000 info@westerstrand.se...
-
Page 2: Table Of Contents
DOK11068en04 2024-02-01 2 (26) Index General ..............................3 Functional description ..........................3 Synchronisation ............................3 Safety ............................... 4 Configuration using R F P buttons ......................7 Configuration using a WEB browser ......................9 Firmware Download / Wunser ......................23 Technical specification .......................... 25 Abbreviations ............................ -
Page 3: General
System installers need run only a single Ethernet cable that carries both power and data to each clock. This allows greater flexibility placing clocks and, in most cases, significantly decreases installation costs. Westerstrand clocks are fully compliant with the IEEE 802.3af standard for providing power over Ethernet. -
Page 4: Safety
DOK11068en04 2024-02-01 4 (26) Safety Installation and maintenance of this device must be performed by accredited personnel. This product must not be installed by unauthorized users/operators. Electrical installation of the equipment must comply with applicable electrical standards. Installation Wall installation of single-sided clocks •... - Page 5 DOK11068en04 2024-02-01 5 (26) Ceiling mounted installation • Unscrew 2 screws under the service front (the front when you have R,F,P buttons to the right). Remove the front. • Mount the 2 holders at the digital clock and mount it on the wall. •...
- Page 6 DOK11068en04 2024-02-01 6 (26) Temperature sensor, temperature/humidity sensor or external dimmer (Option) If a temperature sensor is used, connect it to the CPU board according to the pictures below. Black Shield...
-
Page 7: Configuration Using R F P Buttons
DOK11068en04 2024-02-01 7 (26) Configuration using R F P buttons General Configuration of network settings, light intensity and other parameters is done via a WEB-browser. Some of the parameters can also be set using three buttons located at one side of the clock. Please note, if default settings are used no configuration is needed. - Page 8 DOK11068en04 2024-02-01 8 (26) 11. Push [P] until desired minute (00-59), accept with [F] and clock starts ti nE 12. Display shows 13. Push [R]. Program finished 14. Display shows the set time Setting light intensity The light intensity for the digits can be adjusted in 8 levels. An automatic dimmer function regulates the light intensity within each level.
-
Page 9: Configuration Using A Web Browser
DOK11068en04 2024-02-01 9 (26) Configuration using a WEB browser Login It is possible to login as administrator or guest. The administrator has the rights to read and to write/change configuration. A guest can read only. Username admin or guest. Password Enter a password. - Page 10 DOK11068en04 2024-02-01 10 (26) Status Name Symbolic name. The name is set in function General UTC/LT Current time Timezone Offset to UTC during normal time (=winter time). The Clocks IP address Netmask Shows the netmask setting Gateway Shows the IP address of the gateway Shows the IP address of the DNS server A MAC address has format 00-07-09-xx-xx-xx...
- Page 11 DOK11068en04 2024-02-01 11 (26) Alarms Shows if the Clocks has any alarms. The following alarm texts can be displayed. No Alarms = Clock OK. Not synchronised = The Clock is not synchronised. 5-minute limit = The received time message is more than 5 minutes wrong compared to internal time.
- Page 12 DOK11068en04 2024-02-01 12 (26) Network Enter general network parameters.
- Page 13 Syslog: Syslog server IP address. Send syslog messages if checked. Identity access: Identify access is used in combination with application software Wunser. Wunser is a PC program that is used for finding and doing light configuration on Westerstrand Ethernet products. Firmware updates are also handled by Wunser.
- Page 14 Trap type v2 = Trap according to SNMPv2 NTP settings General Description Westerstrand NTP Clients has several features to achieve a reliable and accurate time. The configuration of the different facilities is flexible, and the features can be selected or deselected depending on each customer’s individual needs.
- Page 15 DOK11068en04 2024-02-01 15 (26) DHCP option 042 Ask for time using the server IP addresses received from the DHCP server (DHCP option 0042). Maximum 2 NTP servers are set automatically by option 0042. Broadcast Accept broadcast/multicast time messages. Broadcast address: 255.255.255.255 Multicast Accept multicast time messages.
- Page 16 DOK11068en04 2024-02-01 16 (26) NTP server Select NTP servers, e.g. 192.168.1.237 or as an URL ntp.se. Also see NTP mode=DHCP above Up to five different NTP servers can be entered. If the first one fails it will automatically go to the next one and so on.
- Page 17 DOK11068en04 2024-02-01 17 (26) NTP advanced Advanced NTP settings Client mode FIRST. Always use the first server in the list if available. If not available take next one. This suits installations where it is more important to know exactly from where the clients get time than to have the most accurate time.
- Page 18 DOK11068en04 2024-02-01 18 (26) Clock Used to configure general clock parameters. Leading zero Time: not checked; " 8:29",checked; "08:29". Date: not checked; " 7.9 ", checked "07.9 " (Sep 7). 12h clock Show e.g. " 2:49" (12h clock) instead of "14.29" (24h clock). Show Time Loop-time in seconds for time.
- Page 19 DOK11068en04 2024-02-01 19 (26) Show Humidity Loop-time in seconds for relative humidity. Show Temp Loop-time in seconds for temperature. Temp Offset Adjust the temperature reading (-9 to +9 °C). Alarm Set temperature bounds. The temperature alarm “Temp is out of bounds” will be active when the temperature reading is below the min value, or above the max value.
- Page 20 DOK11068en04 2024-02-01 20 (26) General Used to configure general parameters. Name Symbolic name, maximum 64 characters. This name is shown in the status menu and is also included in SNMP and Syslog messages. Example: Digital Clock, reception. Contact Contact person. This information is included in SNMP messages.
- Page 21 DOK11068en04 2024-02-01 21 (26) Location The place where the clocks is located. Example: “Building 3 Room 214”. This information is included in SNMP messages. Password Login password. Admin = Adminstrator password. The administrator has the rights to read and to write/change configuration.
- Page 22 DOK11068en04 2024-02-01 22 (26) Advanced Functionality to configure hardware settings for the clock, and to do a factory reset of the clock. Changing the hardware settings may cause the clock to function improperly. Display type Set type of display. With Second Set whether the clock has second digits.
-
Page 23: Firmware Download / Wunser
The Clock has support for firmware upgrade via the network. The utility program Wunser is used for firmware upgrade. Wunser can be downloaded using the following link: http://www.westerstrand.com/archives/download.htm If checkbox Firmware Download is clicked, then the application jumps to a boot-loader. If no firmware upgrade take place within 60 seconds, then the old application is restarted again with the current firmware. - Page 24 DOK11068en04 2024-02-01 24 (26) Reset Button At a normal start (Reset Button is not pressed) then the green LED is flashing about 2 seconds. Then the green LED is turned off. When the clock is synchronized the green LED is turned on. Action when the Reset Button is pressed: Power up The application stays in boot-loader mode for ever and waits for...
-
Page 25: Technical Specification
DOK11068en04 2024-02-01 25 (26) Technical specification General Art. no.: LUMEX 5, LUMEX 7, LUMEX 12 - series Mounting/Installation: Single-, double sided. Wall or ceiling mounted. Digits: Single line red LED. Indicating time in HH:MM or HH:MM:SS Digit height: 50 mm, 70 mm or 120 mm Synchronisation: Accuracy 0,1 sec/24 h at 22... -
Page 26: Abbreviations
DOK11068en04 2024-02-01 26 (26) Abbreviations Daylight Saving Time DHCP Dynamic Host Configuration Protocol Domain Name System. The Internet's system for converting alphabetic names into numeric IP addresses. Light Emitting Diode Local time Physical address (Media Access Control) Network Time Protocol PING Packet Internet Grouper SNMP...
Need help?
Do you have a question about the LUMEX5S NTP PoE and is the answer not in the manual?
Questions and answers