Advertisement
Quick Links
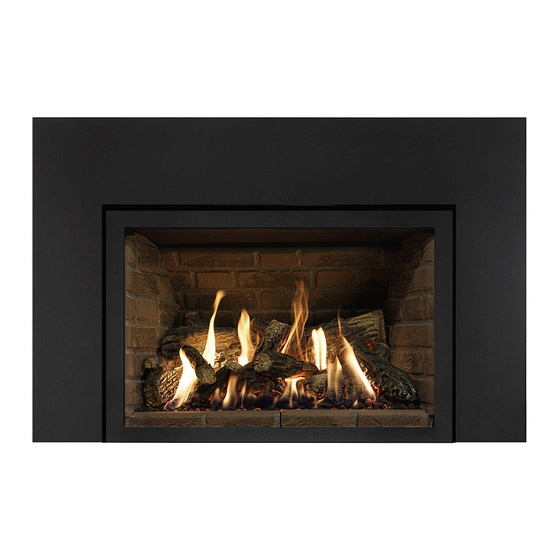
MODELS:
31-LS-GT
31-LS-WW
31-LS-SB
After removing the parts from packaging, inspect them to ensure
that no damage has occurred. Please report any damage
immediately to your authorized Archgard dealer.
INSTALLER:
LEAVE THIS MANUAL WITH THE APPLIANCE.
CONSUMER:
RETAIN THIS MANUAL FOR FUTURE REFERENCE
ARCHGARD FIREPLACE PRODUCTS
7116 Beatty Drive
Mission, BC V2V 6B4 Canada
Grand Timber
Weathered Wood
Silver Birch
.
INSTALLATION MANUAL
Log Sets
For installation in
345-DVTE31LN-1 and 345-DVTE31LP-1
(see the Installation, Operation, and
Maintenance Manual included with the fireplace)
WARNING: If the information in this manual is not followed
exactly, a fire or explosion may result causing property
damage, personal injury or loss of life.
Do not store or use gasoline or other flammable vapors or
liquids in the vicinity of this or any other appliance.
WHAT TO DO IF YOU SMELL GAS:
•
Do not try to light any appliance
•
Do not touch any electrical switch; do not use any phone in
your building
•
Immediately call your gas supplier from a neighbors phone.
•
Follow the gas suppliers instructions
•
If you can not reach your gas supplier, call the fire
department
Installation and service must be performed by a qualified
installer, service agency or the gas supplier.
Please review and understand the information in this manual in
full PRIOR to beginning your installation.
Only kits supplied by the manufacturer may be used.
English and French Installation Manuals available through
your local dealer or visit our website at:
www.archgard.com
Les manuels d'installation en anglais et en français son
disponibles chez votre détaillant local ou en visitant notre
site web: www.archgard.com
IMPORTANT
200-3346-02
March 19, 2024
Advertisement

Related Manuals for Archgard 31-LS-SB


Summary of Contents for Archgard 31-LS-SB
- Page 1 After removing the parts from packaging, inspect them to ensure that no damage has occurred. Please report any damage immediately to your authorized Archgard dealer. Please review and understand the information in this manual in full PRIOR to beginning your installation.
-
Page 2: Locator Pins
Overview The Archgard pan burner bed and fiber logs are designed to give a realistic fire package, and created to look the same as the day they were originally installed even after many years of use. Care must be given when first installing the logs, and if removed for servicing, as they can be damaged or broken if not handled properly. - Page 3 Installation Grand Timber & Silver Birch Log Sets There are slight differences between the Grand Timber and SIlver Birch Log Sets and the Weathered Wood Log Set. The following instructions show the installation of the Grand Timber Log Set, however the installation of Silver Birch is identical. Installation of the Weathered Wood Log Set may be found on Page 10.
- Page 4 Installation Step 1: Place Log 01 on the pin the left, rear corner of the firebox. Figure 04: Figure 05: Step 2: Place Log 02 on other two pins in the back of the firebox. Figure 06: Figure 07: Step 3: Install the log bracket in the holes on the left side of the burner using the two (2) black tek screws included in the manual bag included with the fireplace.
- Page 5 Installation Step 4: Spread some embers along the back side of the burner. Keep the embers away from the pilot opening. Do NOT block the Do not place embers with a flat edge down as it may block burner ports immediately in front of the pilot. ports.
- Page 6 Installation Log 05 in place. Step 7: Spread some embers along the front of the burner. Leave some space where Log 07 will rest. Do not place embers with a flat edge down as it may block burner ports. Leave clear for now.
- Page 7 Installation Step 9: Add embers around the bottom of Log 07. Figure 21: Step 10: Log 06 rests on Log 01 and Log 03. Log 06 in place. Figure 22: Figure 23: Log 03 in place. Step 11: Log 03 rests on Log 02 and Log 05. Figure 25: Figure 24:...
- Page 8 Installation Platinum Ember Placement Step 1: Remove embers from the bag. Be sure to follow handling Step 2: Place the embers randomly throughout the fire bed, instructions on the bag. Separate embers by pulling apart. taking care to avoid burner openings. Embers may be flattened or separated into smaller pieces to achieve any desired look.
- Page 9 Log 02 Log 06 Log 03 Log 05 Log 07 Log 04 Figure 29: Part # Item Description Part # Item Description 31-LS-SB Log Set 1 Set 31-LS-SB-5 Log 5 31-LS-SB-1 Log 1 31-LS-SB-7 Log 7 31-LS-SB-2 Log 2 31-LS-SB-6...
-
Page 10: Weathered Wood Log Set
Installation Weathered Wood Log Set Log 02 Log 01 Log 03 Log 04 Log 07 Log 06 Log 05 Figure 30: Weathered Wood Log Set Identification Step 1: Place Log 01 on the pin the left, rear corner of the firebox. Figure 31: Figure 32:... - Page 11 Installation Step 2: Place Log 02 on other two pins in the back of the firebox. Figure 33: Figure 34: Step 3: Install the log bracket in the holes on the left side of the burner using the two (2) black tek screws included in the manual bag. Figure 35: Figure 36: Step 4: Spread some embers along the back side of the burner.
- Page 12 Installation Step 5: Place Log 04 on the two pins on the left side of the burner. Figure 39: Figure 40: Step 7: Log 05 will have multiple holes on the bottom. Use the Step 8: Place Log 05 on the right side of the burner. hole highlighted in Figure 39.
- Page 13 Installation The port with screen mesh may be covered with embers - Step 10: Place some embers along the front of the burner. Do not ensure the entire port is not blocked. place embers with a flat edge down as it may block burner ports. Figure 45: Figure 46: Step 11: Place the end of Log 07 on the pin at the front of the burner.
- Page 14 Installation Step 13: Log 06 rests on Log 01 and Log 04. Log 06 in place. Figure 50: Figure 51: Step 14: Log 03 rests on Log 02 and the right side of the burner. Log 03 in place. Figure 52: Figure 53: Platinum Ember Placement Step 1: Remove embers from the bag.
- Page 15 Installation Weathered Wood Log Set Overview Log 02 Log 01 Log 06 Log 03 Log 07 Log 04 Log 05 Figure 56: Part # Item Description Part # Item Description 31-LS-WW Log Set 1 Set 31-LS-WW-5 Log 5 31-LS-WW-1 Log 1 31-LS-WW-6 Log 6 31-LS-WW-2...
- Page 16 ARCHGARD INDUSTRIES LTD. 7116 BEATTY DRIVE MISSION, B.C. V2V 6B4 CANADA WEBSITE: WWW.ARCHGARD.COM...
Need help?
Do you have a question about the 31-LS-SB and is the answer not in the manual?
Questions and answers