Table of Contents
Advertisement
Quick Links
Advertisement
Table of Contents

Related Manuals for Labconco WaterPro RO 90750 Series


Summary of Contents for Labconco WaterPro RO 90750 Series
- Page 1 WaterPro RO Systems Models 90750 Series...
- Page 2 Warranty Labconco Corporation provides a warranty to the original buyer for the repair or replacement of parts and reasonable labor as a result of normal and proper use of the equipment with compatible chemicals. Broken glassware and maintenance items, such as filters, gaskets, light bulbs, finishes and lubrication are not warranted.
-
Page 3: Table Of Contents
CHAPTER 1: INTRODUCTION .............. 1 Safety Symbols ................. 3 CHAPTER 2: PREREQUISITES ............5 Location..................... 5 Electrical Requirements ..............6 Feedwater and Drain Requirements ..........6 Space Requirements ................7 CHAPTER 3: GETTING STARTED ............9 Unpacking Your WaterPro RO System ..........10 WaterPro RO System Components ........... - Page 4 APPENDIX B: WATERPRO RO SYSTEM DIMENSIONS ....37 APPENDIX C: WATERPRO RO SYSTEM SPECIFICATIONS ..38 RO Specifications................38 RO Production Rates Table ............... 40 RO Performance Efficiency Table ............ 41 APPENDIX D: WATERPRO RO SYSTEM ACCESSORIES ....42 Expendables ..................42 Accessories ..................
-
Page 5: Chapter 1: Introduction
17-liter storage tank as standard. The unit may be interfaced with a Labconco WaterPro PS Polishing Station to directly feed the Polishing Station with RO purified water. It may also be connected to a Labconco Glassware Washer to dispense RO purified water for the final rinse cycles of the water. - Page 6 99.9 minutes. An outlet port from the 17-liter storage tank is provided for connection to a WaterPro PS Polishing Station and/or a Labconco Glassware Washer.
-
Page 7: Safety Symbols
Chapter 1: Introduction Safety Symbols Your WaterPro RO System was designed with safety in mind, however conditions may exist that could be hazardous. WARNING: Read and understand operator’s manual before using this machine. Failure to follow operating instructions could result in death or serious injury. - Page 8 Chapter 1: Introduction Original Instructions...
-
Page 9: Chapter 2: Prerequisites
Before you install your WaterPro RO System you need to prepare your site for installation. Carefully examine the location where you intend to install your WaterPro RO. Ensure the mounting surface is of solid construction that an electrical source is located near. Carefully read this chapter to learn: ... -
Page 10: Electrical Requirements
Chapter 2: Prerequisites Mounting surface composition, condition and construction must be considered when mounting this unit. The surface must be able to support at least 500 pounds. Inadequate support may result in damage to the mounting surface and/or equipment. Four each 1/4 x 2.0" Lg. tapping screws (1897432) are provided for securing the unit to typical wood frame wall studs. -
Page 11: Space Requirements
It is important to establish feed water pressure, and flow rate, before installing and operating the unit. If your feed water, or feed water quality has not been tested, contact Labconco at 1-800-821-5525 or 1-816-333-8811. Space Requirements Wall mounted units require a minimum of 6"... - Page 12 Chapter 2: Prerequisites Original Instructions...
- Page 13 Now that the site for your WaterPro RO System installation site is properly prepared, you are ready to unpack, inspect, install, and test your WaterPro RO System. Read this chapter to learn how to: Unpack and move your WaterPro RO System. ...
-
Page 14: Chapter 3: Getting Started
NOTE: Do not return goods without the prior authorization of Labconco. Unauthorized returns will not be accepted. If your WaterPro RO System was damaged in transit, you must file a claim directly with the freight carrier. Labconco Corporation and its dealers are not responsible for shipping damage. -
Page 15: Component Identification
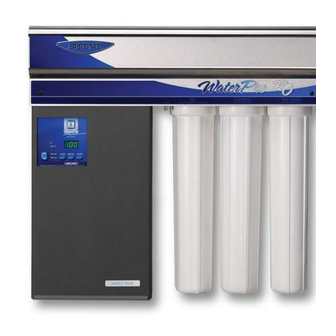
Chapter 3: Getting Started Component Identification (Refer to Figure 2) 1. Control Panel. The control panel located on the left side of the unit contains the PC board. 2. ON/OFF Switch. The ON/OFF switch activates the display. 3. Pressure Gauge. The pressure gauge indicates the RO back pressure. The pressure is preset to 150 psi. - Page 16 Chapter 3: Getting Started Component Identification TO DRAIN Figure 2 Original Instructions...
-
Page 17: Setting Up The Waterpro Ro System
Chapter 3: Getting Started Setting Up the WaterPro RO System Unfold the installation template included and follow the instructions to mount the WaterPro RO System on a suitable wall. If the optional Wall Mounting Panel, Support Stand or optional WaterPro RO/PS Mobile Stand has been purchased, discard the templates and follow instructions provided with the option. -
Page 18: Ro Membrane Installation
Chapter 3: Getting Started RO Membrane Installation 1. Install prefilter, catalog number 9092700, with the O-Rings pointing up in first bowl on the right side. Use the Spanner Wrench for bowl removal. Wear sterile laboratory gloves to prevent contamination of filters. 2. - Page 19 Chapter 3: Getting Started Figure 4 Original Instructions...
-
Page 20: Optional Dispense Gun Installation
Chapter 3: Getting Started Optional Dispense Gun Installation 1. Close the feed-water supply line valve and relieve pressure in system by pressing the dispense button. Disconnect from electrical power after relieving pressure. 2. Remove the two screws located on the front of the cabinet cover with a Phillips screwdriver. -
Page 21: Waterpro Ps And Glassware Washer Feed
The WaterPro RO can be used to feed purified water to the WaterPro PS Polishing System and Labconco’s Glassware Washers. To make the connection(s), first empty the storage tank of stored water. Remove a gray plug located on the bottom of the storage tank and insert tubing from either the Glassware Washer or the WaterPro PS. -
Page 22: Operating Precautions
Chapter 3: Getting Started Operating Precautions Pretreat feed water if indicated by the Labconco Water Profile test, to extend life of the RO membrane. Change prefilters frequently as stated in this manual to prevent free chlorine from destroying the RO membrane. - Page 23 After your WaterPro RO System has been installed as detailed in Chapter 3: Getting Started, you are ready to begin using your WaterPro RO System. Read this chapter to learn how to: Understand the display Operate the unit If the unit is not operated as specified in this manual it may impair the protection provided by the unit.
-
Page 24: Chapter 4: Using Your Waterpro Ro System
Chapter 4: Using Your WaterPro RO System Display Figure 5 1. ON/OFF Switch. This switch turns on the unit and lights the display. When the switch is in the OFF or ON position the pump will automatically start to flush the RO membrane and tank for three minutes every 12 hours of inactivity. -
Page 25: Operating The Unit
Chapter 4: Using Your WaterPro RO System Operating the Unit Initial Start Up Pretreat feed water as recommended by Labconco based upon the Water Profile test. Connect tubing to dispensing valve and direct to drain. (For gun installation, extend gun to drain and click into the ON position). - Page 26 Chapter 4: Using Your WaterPro RO System Work Techniques Use clean glassware to collect RO water. Always leave unit plugged into electrical outlet. Disconnect unit to service. Preserve membrane if unit is left unplugged for more than a week. ...
- Page 27 Under normal operation, the WaterPro RO System requires little maintenance. Read this chapter to learn: The Maintenance Schedule Sanitizing the System Service Tips Maintenance Schedule As needed Change prefilter and carbon/prefilter if more than 500 gallons of feed water have been processed.
-
Page 28: Chapter 5: Maintaining Your Waterpro Ro System
Chapter 5: Maintaining Your WaterPro RO System Quarterly Change air vent filter. Annually Clean RO membrane. Disinfect unit. All monthly activities. Biennial (once every two years) Replace RO membrane if the normalized (flow rate at 25°C see chart on page 30) flow rate has decreased by 20% or more. -
Page 29: Sanitization
Chapter 5: Maintaining Your WaterPro RO System Sanitization Sanitization is necessary when the RO element or storage tank become biologically fouled. Biological fouling of the RO is an obstruction due to living or dead bacteria on the membrane or tank surface. This may occur if the RO is left stagnant without flushing for more than a week. If biological fouling of the membrane occurs, the unit should be sanitized with 0.1% (wt/wt) formaldehyde as follows: 1. - Page 30 Chapter 5: Maintaining Your WaterPro RO System 12. Turn off feed water supply and press the manual dispense button to relieve the pressure. 13. Remove the tank and sanitize with formaldehyde solution. 14. Allow the unit to stand for 1 hour. 15.
- Page 31 Chapter 5: Maintaining Your WaterPro RO System 6. Fill the carbon/prefilter bowl approximately ¾ full with the cleaning solution. 7. Reinstall the bowl. 8. Open the feed water valve. 9. Plug the unit into an electrical outlet, activate the unit and allow it to operate for 5 minutes. 10.
-
Page 32: Service Tips
Chapter 5: Maintaining Your WaterPro RO System Preserving RO Membrane If the system will not be in use (without electricity) for over a week, preserve with 0.1% formaldehyde. 1. Collect approximately 4 liters of RO water in a container. Set aside. 2. - Page 33 Chapter 5: Maintaining Your WaterPro RO System Front Cover Removal 1. Disconnect the power cord. 2. Remove the two black screws on the front panel. 3. Raise the front of the cover slightly and pull out. Prefilter and Carbon/Prefilter Replacement NOTE: Prefilter –...
- Page 34 Chapter 5: Maintaining Your WaterPro RO System Original Instructions...
- Page 35 Refer to the following if your WaterPro RO System fails to operate properly. If the suggested corrective actions do not solve your problem, contact Labconco for additional assistance. PROBLEM CAUSES CORRECTIVE ACTION Unit inoperative no Unit not plugged into outlet...
-
Page 36: Chapter 6: Troubleshooting
Chapter 6: Troubleshooting PROBLEM CAUSES CORRECTIVE ACTION Reduced flow at Restricted tube in the feed line or Inspect polishing loop tubing dispense valve/gun polishing system for any restrictions and storage tank slow to fill Insufficient feed water pressure and Pressure must be a minimum flow rate of 30 psi at a flow rate of at least 6 liters per minute... - Page 37 Chapter 6: Troubleshooting PROBLEM CAUSES CORRECTIVE ACTION Increase in µS High inlet TDS This is normal. With (microsiemen) increased inlet TDS, RO µS increases reading RO membrane scaling or other Clean membrane per deposits instructions in RO cleaning section RO membrane fouled Clean RO membrane per Excessively high µS Biofilm formed...
- Page 38 Chapter 6: Troubleshooting Original Instructions...
- Page 39 The following pages list components that are available for your WaterPro RO System. The parts shown are the most common replacement parts. If other parts are required, contact Product Service. ITEM # QUANTITY PART # DESCRIPTION 1363300 Check Valve 9105300 Conductivity Sensor 1329100 Low Pressure Switch...
-
Page 40: Appendix A: Waterpro Ro System Components
Appendix A: WaterPro RO System Components Original Instructions... - Page 41 31.1 (79.0 cm) (19.3 cm) (21.8 cm) 30.8 (78.2 cm) (15.2 cm) 31.1 10.6 (26.9 cm) (79.0 cm) 35.3 (89.7 cm) 15.9 (40.4 cm) Original Instructions...
- Page 42 Manual dispensing when automatic timed dispense is not selected. Timed dispense 0 – 99.9 minutes. RO Water Production Rate: Port for WaterPro PS and/or Labconco Glassware Washer connection. From RO: Up to 1 L/min. (at 25°C) 8.7 L/min. typical flow (gravity) from storage tank.
-
Page 43: Appendix C: Waterpro Ro System Specifications
< 1 NTU Turbidity: Langlier Saturation Index*: Negative (if positive, requires water softener pretreatment) *LSI is indicated in the Water Profile water analysis test treatment. Recommendations will be provided by Labconco. Maximum Ion Concentrations: Iron (Total): 0.1 ppm (mg/L) Manganese 0.1 ppm Free Chlorine: 0.5 ppm... -
Page 44: Ro Production Rates Table
Appendix C: WaterPro RO System Specifications RO Production Rates Table Original Instructions... -
Page 45: Ro Performance Efficiency Table
Appendix C: WaterPro RO System Specifications RO Performance Efficiency Table Original Instructions... -
Page 46: Expendables
Expendables KIT # DESCRIPTION 9078700 Reverse Osmosis membrane and adapter package. Required for operation. 9062200 Replacement Carbon/Prefilter contains 2 each. 9067201 Prefilter/Carbon Filter Kit required for operation. Includes prefilters (3), carbon filters (3), for initial start-up and two filter changes. 1930500 Air Vent Filter Catalog #... -
Page 47: Accessories
Appendix D: WaterPro RO Expendables and Accessories Accessories ACCESSORY DESCRIPTION Catalog # 9113100 Gun Kit Allows in field installation of an optional gun to dispense RO water 9078800 Wall Mounting Panel Kit Stainless Steel panel that mounts to the wall behind the WaterPro PO and PS systems. - Page 48 Operating Log Original Instructions...
Need help?
Do you have a question about the WaterPro RO 90750 Series and is the answer not in the manual?
Questions and answers