Advertisement
INSTALLATION
GUIDE
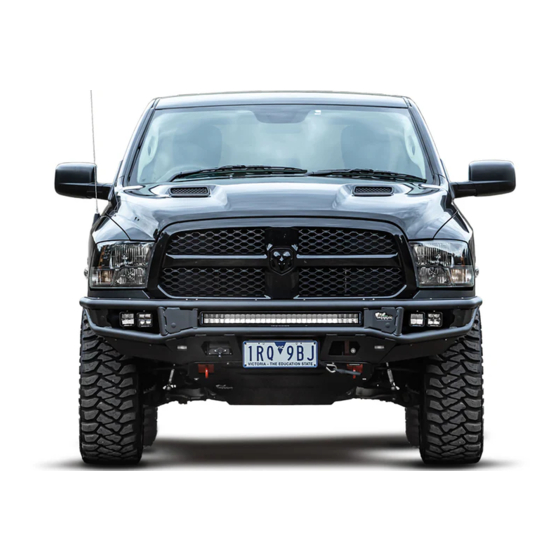
BBR075
RAID BULL BAR TO SUIT RAM DS
• Ironman 4x4 BBR075 Bull Bar to suit Ram DS.
NOTE: This product has been tested for air bag compatibility
and therefore the mounting system MUST NOT be modified
IMPORTANT: Bull bar installations should only be done by a qualified person
and it's the responsibility of this person to ensure correct fitment.
©Copyright 2022 Ironman 4x4 Pty Ltd. No part of this publication may be reproduced or replicated without the prior written consent of Ironman 4x4 Pty Ltd
Advertisement
Table of Contents

Related Manuals for Ironman4x4 BBR075


Summary of Contents for Ironman4x4 BBR075
- Page 1 GUIDE BBR075 RAID BULL BAR TO SUIT RAM DS • Ironman 4x4 BBR075 Bull Bar to suit Ram DS. NOTE: This product has been tested for air bag compatibility and therefore the mounting system MUST NOT be modified IMPORTANT: Bull bar installations should only be done by a qualified person and it’s the responsibility of this person to ensure correct fitment.
-
Page 2: Before Installation
Installation Guide BBR075 Before Installation PLEASE NOTE: It is always good practice to disconnect the battery while working on 12-Volt systems. Please check owner’s manual to see vehicle specific requirements as some models may need battery backup. Caution: Auto electrical work should only be carried out by a competent person. Vehicle wire colours are listed as a guide and may vary on some makes and models. - Page 3 Installation Guide BBR075 WARNING • Ironman 4x4 recovery points are FEA Tested during design and Destruction tested during development to establish the Working Load Limits. (WLL) • Ironman 4x4 recovery points have been designed as a matching pair, supplied in right, and left sides for vehicle specific fitment.
- Page 4 Installation Guide BBR075 Bull Bar Parts List 1. Bull Bar Channel 2. Winch Cradle QTY-1 QTY-1 3. Side Bash Plate LHS 4. Side Bash Plate RHS 5. Recovery Point LHS 6. Recovery Point RHS 7. Chassis Mount Bracket QTY-1 QTY-1...
- Page 5 Installation Guide BBR075 Bull Bar Parts List (continued) 33. Bolt, spring/flat 34. T-Bolt, flat washers, 35. Bolt, Nut, spring/flat 36. Bolt, spring/flat 37. Pan screw, spring/flat washers, Flange nut nut M10×1.5×45mm washers M12×1.5×45mm washers M12×1.5×45mm washers, Flange nut M10×1.5×45mm M5×0.8×16mm...
- Page 6 Installation Guide BBR075 Before installation, check bull bar application is compatible with your vehicle. Remove and retain number plate, if fitted, to be reinstalled later. Disconnect negative battery terminal. Please check owner’s manual to see vehicle specific requirements as some models may need battery backup.
- Page 7 Installation Guide BBR075 Disconnect factory fog lights, and park light wiring. Also disconnect the factory bar loom. NOTE: if vehicle is fitted with factory parking sensors disconnect wiring main plug. Carefully unclip and remove factory bumper, taking note of the side locating lugs on each side if the bar.
- Page 8 Installation Guide BBR075 10. Unclip upper and lower air damp and disregard. 11. Unwrap the hardware. It is good practice to lay out all hardware and cross reference against the parts list. 12. Unwrap winch cradle, bar brackets and recovery points.
- Page 9 Installation Guide BBR075 14. Feed T-bolt N#34 2x (M10X1.5X45mm T-bolt, washer) up into outer chassis rail pedestal and through bull bar cradle outer mount. NOTE: for ease of fitment, you can mount 2 x N#36 (M12x1.5x45mm bolt, washer, nut) through the lower cradle mount to chassis.
- Page 10 Installation Guide BBR075 18. If winch is being installed, refer to winch installation instructions steps 19-21. 19. If installing a winch, use the provide winch control box mounting plate. 20. Install winch control box mounting bracket to winch control box using N#37 4 x (M5x.08x16mm nut, washer,...
- Page 11 Installation Guide BBR075 23. Remove the parking sensor wiring and parking sensors from the factory bumper taking note of the direction and position of each sensor. Remove grommets from the sensor holes in Raid bumper. 24. Fit sensor with factory silicone sleeve to the sensor holder.
- Page 12 Installation Guide BBR075 27. Remove protective film from one side of double-sided tape and apply to mounting surface of sensor holder. 28. Remove protective film from double- sided tape and apply sensor holder/ sensor to Raid bar making sure sensors are in the same positions as they were in the original bumper and in the same orientation.
- Page 13 Installation Guide BBR075 31. Assemble and install Ironman 4x4 cube lights to light pod. Fit the supplied spacer under light bracket. The brackets provide some adjustment to ensure centralized positing and vertical aim of the light. The Cube Light cable can be secured to the inside edge of bull bar using cable ties.
- Page 14 Installation Guide BBR075 36. Install Ironman 4x4 Raid bumper into position, aligned to the chassis mounting holes. We recommend 2 people when lifting the bumper into position to avoid injury or damage to the vehicle and components. 37. Tension all fasteners and mounting hardware, refer to page 5.
- Page 15 Installation Guide BBR075 40. Install the protection plate T-bolt N#34 2x (M10x1.5x45mm t-bolt, washer, nut) to Chassis pedestal using the inner chassis rail as shown. Repeat on the other side. Once installed use N#17 PVC holder sheet to holder T-bolt in place.
- Page 16 Installation Guide BBR075 45. Install both wing protection plates with black M8 bolts provided. N#29 6X (M8x1x25mm) 46. Bolt number plate to the vehicle with M6 hardware supplied. 47. Trim guard liners, drill 2 holes as shown and secure in place behind wing protection plates with cable ties (not supplied).
- Page 17 Installation Guide BBR075 Once Bull Bar is Installed Ensure all bolts are tensioned correctly, it is good practice to do a vehicle pre trip check before heading away or every 10k kms. Visually inspect bull bar and hardware, retention bull bar hardware or when needed.
-
Page 18: Winch Installation
Installation Guide BBR075 Winch Installation 1. Bolt winch to cradle. Bolt fairlead to recess in front of bull bar using bolts, washers and nuts provided. Fit bull bar to vehicle referring to steps of bull bar fitting instructions. Refer to steps 19-21 of main instructions. - Page 19 Installation Guide BBR075 Run the positive and negative battery cables into the engine bay taking care to secure cables away from any sharp or moving objects. Connect positive and negative battery cables main battery of vehicle (Not Auxilliary Battery). Attach breather hose to barb fitting on winch motor.
-
Page 20: Wiring Diagrams
Installation Guide BBR075 Wiring Diagrams FOG LIGHTS Ground Lamp Fuse Connector Relay Black Blue Battery Lamp Parklight Switch SPST Ground White Ground WITHOUT FACTORY FOG LIGHTS Ground Lamp Fuse Connector Relay Black Blue Battery Lamp Positive power supply at connector to factory fog light Page 20 of 20 ©Copyright 2022 Ironman 4x4 Pty Ltd.
Need help?
Do you have a question about the BBR075 and is the answer not in the manual?
Questions and answers