Diphano Alexa Instruction Manual
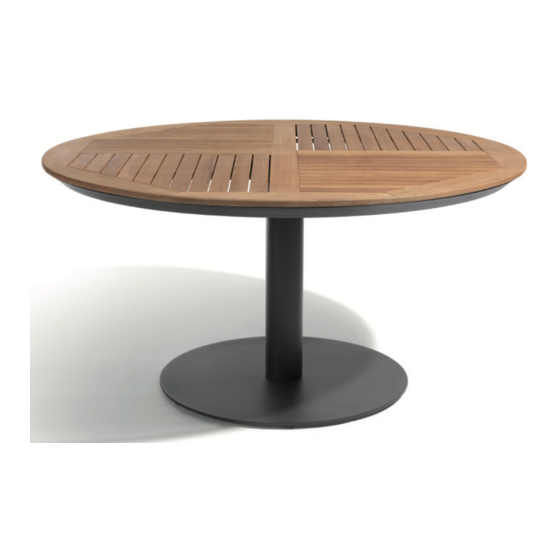
Round dining table 148xr
Hide thumbs
Also See for Alexa:
- Instruction manual (8 pages) ,
- Instruction manual (12 pages) ,
- Instruction manual (12 pages)
Advertisement
Quick Links
Advertisement

Subscribe to Our Youtube Channel
Related Manuals for Diphano Alexa


Summary of Contents for Diphano Alexa
- Page 1 Alexa round dining table 148xR INSTRUCTION MANUAL...
- Page 3 This instruction manual applies to the following models: round dining table 148xR teak round dining table 148xR trespa® round dining table 148xR ceramic Diphano cannot be held responsible if the assembly instructions are not followed properly.
- Page 4 how to assemble the base & pole CONTENT Start by unpacking everything carefully. Make sure to cover the floor to prevent any damage or scratching (you can use the cardboard box for this). 1x base 1x pole 1x hex key (5mm) 4x bolt M8x25mm 4x washer (M8) 4x spring waher (M8)
- Page 5 CONNECT THE POLE TO THE BASE Use the hex key (C) to assemble the aluminium pole (B) onto the base (A) as shown in the picture. Make sure you follow the correct order as indicated by the letters in the picture. BOTTOM BASE...
- Page 6 TURN THE TABLE + POLE Turn the base with the pole carefully to its normal position with at least 2 persons. BOTTOM BASE...
- Page 7 how to assemble teak table top CONTENT Start by unpacking everything carefully. Make sure to cover the floor to prevent any damage or scratching (you can use the cardboard box for this). 1x hex key (4mm) 4x bolt M6x20mm 4x spring washer (M6) 4x washer (M6) 1x teak table top...
- Page 8 SECURE TABLE TOP Carefully place the table top (K) onto the pole (B) so the pre-made holes match. Now use the hex key (G) to fixate the table top (K) onto the pole (B). Make sure you follow the correct order as indicated by the letters in the picture.
- Page 9 ADJUST FEET Check with a spirit level if the table is placed level. If not, (un)screw the adjustable feet till your table is completely level.
- Page 10 how to assemble Trespa® table top CONTENT Start by unpacking everything carefully. Make sure to cover the floor to prevent any damage or scratching (you can use the cardboard box for this). 1x hex key (4mm) 4x bolt M6x20mm 4x spring washer (M6) 4x washer (M6) 1x Trespa®...
- Page 11 SECURE TABLE TOP Carefully place the table top (L) onto the pole (B) so the pre-made holes match. Now use the hex key (G) to fixate the table top (L) onto the pole (B). Make sure you follow the correct order as indicated by the letters in the picture.
- Page 12 ADJUST FEET Check with a spirit level if the table is placed level. If not, (un)screw the adjustable feet till your table is completely level.
- Page 13 how to assemble ceramic table top CONTENT Start by unpacking everything carefully. Make sure to cover the floor to prevent any damage or scratching (you can use the cardboard box for this). 1x hex key (4mm) 4x bolt M6x20mm 4x spring washer (M6) 4x washer (M6) 1x alu support 1x ceramic table top...
- Page 14 SECURE ALU SUPPORT Carefully place the alu support (M) onto the pole (B) so the pre-made holes match. Now use the hex key (G) to fixate the alu support (M) onto the pole (B). Make sure you follow the correct order as indicated by the letters in the picture.
- Page 15 PLACE BUMPERS (AND WASHERS) Place the bumpers (O) on the correct positions as shown in the picture. Check during setup if your ceramic table top (N) is placed stable onto the alu support (M). If not, you can add plastic washers (P) on the necessary postions.
- Page 16 PLACE CERAMIC TABLE TOP Carefully place the ceramic table top (N) onto the alu support with minimal 4 persons.
- Page 17 ADJUST FEET Check with a spirit level if the table is placed level. If not, (un)screw the adjustable feet till your table is completely level.
-
Page 18: Maintenance And Care
maintenance & care POWDERCOATED ALUMINIUM Simply brush away loose dirt, rinse, and clean with a mild, lukewarm soapy solution. Rinse thoroughly and pat dry with a cloth. NATURAL TEAK Simply brush away loose dirt, rinse, and clean with a mild, lukewarm soapy solution. - Page 19 TRESPA® Simply brush away loose dirt, rinse, and clean with a mild, lukewarm soapy solution. Rinse thoroughly and pat dry with a cloth. CERAMIC Simply brush away loose dirt, rinse, and clean with a mild, lukewarm soapy solution or Ceramic cleaner. Rinse thoroughly and pat dry with a cloth. Glass, ceramic, Trespa®...
- Page 20 Textielstraat 4 - 8790 Waregem - Belgium Tel. +32 (0)56 980 008 - info@diphano.com...
Need help?
Do you have a question about the Alexa and is the answer not in the manual?
Questions and answers