
Related Manuals for JYTEK USB-67230


Summary of Contents for JYTEK USB-67230
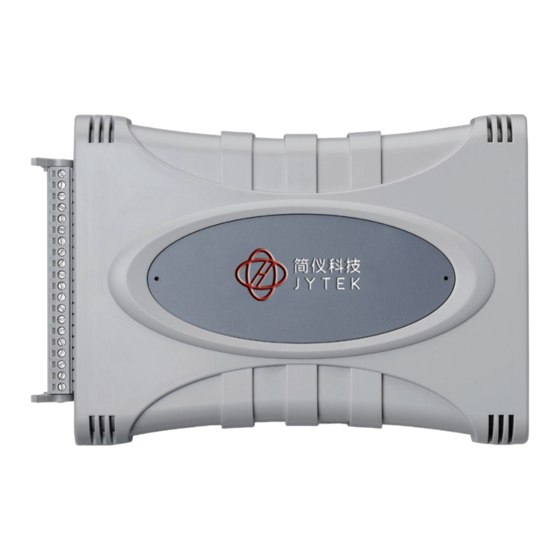
- Page 1 USB-67230/67250 USB 2.0-based Digital I/O Module User’s Manual Manual Rev.: 1.00 Revision Date: Aug. 3, 2017 Advance Technologies; Automate the World.
- Page 2 Restriction of Hazardous Substances (RoHS) directive and Waste Electri- cal and Electronic Equipment (WEEE) directive. Environmental protec- tion is a top priority for JYTEK. We have enforced measures to ensure that our products, manufacturing processes, components, and raw materials have as little impact on the environment as possible. When...
- Page 3 Additional information, aids, and tips that help users perform tasks. NOTE: NOTE: Information to prevent minor physical injury, component damage, data loss, and/or program corruption when trying to complete a task. CAUTION: Information to prevent serious physical injury, component damage, data loss, and/or program corruption when trying to complete a spe- cific task.
-
Page 4: Table Of Contents
Schematics and Dimensions ............7 1.8.1 Module ................7 1.8.2 Module Stand ..............10 1.8.3 Rail Mounting ..............16 1.8.4 Wall Mounting..............20 Connector Pin Assignment............22 2 Getting Started ............... 25 Unpacking Checklist ..............25 Connecting the USB-67230/67250 Module......... 25 Device ID ..................26 Table of Contents... - Page 5 Isolated Digital Input ..............30 Change of State (COS) Detection..........31 Optical Isolated Frequency/Event Counter ......... 33 Digital Filtering ................35 Isolated Digital Output (USB-67230 only) ........36 Relay Output (USB-67250 only)........... 37 Important Safety Instructions ............39 Warranty Policy ................43 Getting Service ................
-
Page 6: List Of Figures
List of Figures Figure 1-1: USB-67230/67250 Module Rear View.........7 Figure 1-2: USB-67230/67250 Module Side View .........8 Figure 1-3: USB-67230 Module Front View ...........9 Figure 1-4: USB-67250 Module Front View .........10 Figure 1-5: Module, Stand, Connector, and USB Cable .......11 Figure 1-6: Module, Stand, &... - Page 7 List of Tables Table 1-1: USB-67230 Pin Assignment .............22 Table 1-2: USB-67230 I/O Signal Description...........23 Table 1-3: USB-67250 Pin Assignment .............24 Table 1-4: USB-67250 I/O Signal Description...........24 List of Tables...
-
Page 8: Introduction
U-Test, a free ready-to-use testing program, is included to enable operation or testing of all JYTEK USB DAQ series functions with no programming require- ment. Features High-speed USB 2.0... -
Page 9: Applications
Applications Automotive testing Laboratory research Industrial I/O control Signal switching Specifications Introduction... -
Page 10: General Specifications
Operating environment Relative humidity: 10% to 90%, non-condensing Ambient temperature: -20 to 70 °C Storage environment Relative humidity: 5% to 95%, non-condensing 1.4.2 Digital Input (DI) USB-67230 USB-67250 Optical Isolated Input Number of channels Polarity Bi-directional (non-polarity) Logic level VIH=5~24V, VIL=0~1.5V... -
Page 11: Digital Output (Do)
JYTEK provides comprehensive software drivers and packages to suit various user approaches to system building. In addition to programming libraries, such as DLLs, for most Windows-based systems, JYTEK also pro- vides drivers for other application environments. JYTEK also pro vides... -
Page 12: Driver Support For Windows
DAQ application development. USB-DASK enables you to perform detailed operations and achieve superior performance and reliability from the data acquisition system. DASK kernel drivers now support Win- ® dows 7/Vista Only UD-DASK versions 1.0.5 and later support the USB-67230/67250 module. NOTE: NOTE: DAQPilot DAQPilot is a SDK with a graphics-driven interface for various application development environments. -
Page 13: Utilities For Windows
U-Test U-Test is a free and ready-to-use utility assisting instant testing and operation of all JYTEK USB DAQ product functions with no program- ming requirment. In addition to data collection and monitoring func- tions, U-Test also supports basic FFT analysis and direct control of analog output and digital I/O with a user-friendly interface. -
Page 14: Figure 1-1: Usb-67230/67250 Module Rear View
Figure 1-1: USB-67230/67250 Module Rear View 156.5 Figure 1-2: USB-67230/67250 Module Side View Introduction... -
Page 15: Figure 1-3: Usb-67230 Module Front View
USB- 67230 41.3 Figure 1-3: USB-67230 Module Front View Introduction... -
Page 16: Module Stand
1.8.2 Module Stand The multi-function USB-67230/67250 stand is compatible with desk, rail, or wall mounting. To fix the module in the stand, slide the module body into the stand until a click is heard. To remove the module from the... -
Page 17: Figure 1-5: Module, Stand, Connector, And Usb Cable
stand, twist the bottom of the stand in a back-and forth motion and sep- arate from the module. Figure 1-5: Module, Stand, Connector, and USB Cable Introduction... -
Page 18: Figure 1-6: Module, Stand, & Wall Mount Kit Side View (W/ Connections)
200.1 169.4 156.5 Figure 1-6: Module, Stand, & Wall Mount Kit Side View (w/ connections) Introduction... -
Page 19: Figure 1-7: Module In Stand Front View
Figure 1-7: Module in Stand Front View Introduction... -
Page 20: Figure 1-8: Module Stand Top View
20.4 20.4 Figure 1-8: Module Stand Top View Introduction... -
Page 21: Figure 1-9: Module Stand Side Cutaway View
Figure 1-9: Module Stand Side Cutaway View Introduction... -
Page 22: Rail Mounting
Figure 1-10: Module Stand Front View 1.8.3 Rail Mounting The multi-function stand can be mounted on the DIN rail using the rail-mount kit as shown. Introduction... -
Page 23: Figure 1-11: Rail Mount Kit
Figure 1-11: Rail Mount Kit Introduction... -
Page 24: Figure 1-12: Module Pre-Rail Mounting
Figure 1-12: Module Pre-Rail Mounting Introduction... -
Page 25: Figure 1-13: Module Rail-Mounted
Figure 1-13: Module Rail-Mounted Introduction... -
Page 26: Wall Mounting
1.8.4 Wall Mounting The multi-function stand can be fixed to a wall using four flush head screws as shown. The four screw holes should be approximately 3.4 mm in diameter. 20.4 13.0 Figure 1-14: Wall Mount Holes Introduction... -
Page 27: Figure 1-15: Module With Wall Mount Apparatus
Figure 1-15: Module with Wall Mount Apparatus Introduction... -
Page 28: Connector Pin Assignment
Connector Pin Assignment The USB-67230/67250 module is equipped with 40-pin removable screw-down terminal connectors, with pin assignment as follows. Function Function DO15 DO14 DO13 DO12 DO11 DO10 IGND IGND IGND CNT0 CNT1 CGND DI15 DI14 DI13 DI12 DI11 DI10 Table 1-1: USB-67230 Pin Assignment... -
Page 29: Table 1-2: Usb-67230 I/O Signal Description
DO<0..15> IGND Isolated digital output channel IGND -------- Ground return path for isolated output channel IGND Common power input junction for isolated output channel Table 1-2: USB-67230 I/O Signal Description Function Function GND1 COM7 CNT1 GND0 COM6 CNT0 DI7L COM5... -
Page 30: Table 1-3: Usb-67250 Pin Assignment
Function Function DI1H DI0L COM0 DI0H Table 1-3: USB-67250 Pin Assignment Signal Name Reference Direction Description COM<0..7> ---------- Common pin of relay <0..7> NO<0..7> COM<0..7> Normal open pin of relay <0..7> NC<0..3> COM<0..3> Normal close pin of relay <0..3> DI<0..7>H DI<0..7>L High input of isolated differential digital input... -
Page 31: Getting Started
Retain the shipping carton and packing materials for inspection. Obtain authorization from the dealer before returning any product to JYTEK. Ensure that the following items are included in the package. USB-67230/67250 ... -
Page 32: Device Id
The USB-67230/67250 module is exclusively powered by the USB port and requires 400 mA @ 5 V. If the USB-67230/67250 module cannot be detected, power provided by the USB port may be insuffi- NOTE: NOTE: cient. Device ID A rotary control on the rear of the module (as shown) controls device ID setting and can be set from 0 to 7. -
Page 33: Figure 2-1: Device Id Selection Control
Figure 2-1: Device ID Selection Control All remaining hardware configuration is software programmable, including sampling/update rate, input/output channel, input range, and others. Please see the UD-DASK Function Reference manual for details. Getting Started... -
Page 34: Operations
Operations Figure 3-1: USB-67230 Functional Block Diagram The USB-67250 provides 8CH optical isolation digital inputs, 8CH relay outputs (4CH form C and 4CH form A), and 2CH frequency/event count- ers. Operations... -
Page 35: Isolated Digital Input
(PC3H4), and normal input voltage range for high state from 5 to 24V. For USB-67230, all digital inputs share the same common junction (COM), with connections either common power or common ground,... -
Page 36: Change Of State (Cos) Detection
Figure 3-3: USB-67230 Isolated Input Figure 3-4: USB-67250 Isolated Input Change of State (COS) Detection COS (Change of State) refers to input state (logic level) changing from low to high or vice versa, wherein the COS detection circuit registers the edge of the level change. -
Page 37: Figure 3-5: Cos Detection Architecture
In the USB-67230/67250, the COS detection circuit is applied to all DI channels, with the channel(s) to enable COS detection selectable by software. When an enabled channel changes logic level, the COS detec- tion circuit generates an interrupt request to the USB microcontroller, which, when detected, latches corresponding DI data into the COS latch register. -
Page 38: Optical Isolated Frequency/Event Counter
(rising or falling edge) of valid events is software configurable. PHOTO COUPLER n=0,1 Figure 3-7: USB-67230/67250 Optical Isolated Frequency/Event Counter The frequency counter base clock is 48MHz. The frequency counter cal- culates base clocks occurring within a period (rising edge to rising edge or falling edge to falling edge) of the repetitive input signal, which is then converted to frequency value. -
Page 39: Figure 3-8: Frequency Counter Example
with falling-edge polarity. Counter value is updated and reset in every period. CNT0 Polarity Freq = 1 MHz CNT0 CNT0 FREQ CNT1 Polarity Freq = 500 KHz CNT1 CNT1 FREQ Figure 3-8: Frequency Counter Example Since the signals are sampled by a 48MHz base clock, latch timing can generate measurement error, maximum error ratio vs. -
Page 40: Digital Filtering
Error 1000 10000 100000 1000000 Frequency (Hz) Figure 3-9: Frequency Counter Error % Digital Filtering Filters unexpected glitch signals from the input channels. By default, when enabled, the input channel ignores signal changes from one state to another when not remaining in the state for a pre-defined period. The digital filter function is applied on all DI channels and counters, with the default setting disabled. -
Page 41: Isolated Digital Output (Usb-67230 Only)
The DO output status is saved in the USB microcontroller and can be read back if necessary. The USB-67230 also features programmable power-up output status,allowing output in a known state when powered on. When the module is powered off (ejected from the USB port), all digital output reverts to OFF. -
Page 42: Relay Output (Usb-67250 Only)
Relay Output (USB-67250 only) USB-67250 provides Form C and Form A relays, with channels 0 to 3 Form C, and 4 to 7 form A, as shown. Figure 3-12: Form C Relay Figure 3-13: Form A Relay Form C relays have NC (Normal Close), NO (Normal Open), and COM (Common) contacts. -
Page 43: Important Safety Instructions
Important Safety Instructions For user safety, please read and follow all instructions, Warnings, Cautions, and Notes marked in this manual and on the associated device before handling/operating the device, to avoid injury or damage. S'il vous plaît prêter attention stricte à tous les avertissements et mises en garde figurant sur l'appareil , pour éviter des blessures ou des dommages. - Page 44 A Lithium-type battery may be provided for uninterrupted backup or emergency power. Risk of explosion if battery is replaced with one of an incorrect type; please dispose of used batteries appropriately. Risque d’explosion si la pile est remplacée par une autre de type CAUTION: incorrect.
- Page 45 BURN HAZARD Touching this surface could result in bodily injury. To reduce risk, allow the surface to cool before touching. RISQUE DE BRÛLURES Ne touchez pas cette surface, cela pourrait entraîner des blessures. Pour éviter tout danger, laissez la surface refroidir avant de la toucher.
-
Page 46: Warranty Policy
Warranty Policy Thank you for choosing JYTEK. To understand your rights and enjoy all the after-sales services we offer, please read the following carefully. 1. All JYTEK products come with a limited two-year warranty: The warranty period starts on the day the product is shipped ... - Page 47 2. Our repair service is not covered by JYTEK's guarantee in the following situations: Damage caused by not following instructions in the User's Manual. Damage caused by carelessness on the user's part during product transportation. Damage caused by fire, earthquakes, floods, lightening, pollu- ...
Need help?
Do you have a question about the USB-67230 and is the answer not in the manual?
Questions and answers