
Subscribe to Our Youtube Channel
Related Manuals for ZKTeco LH4000


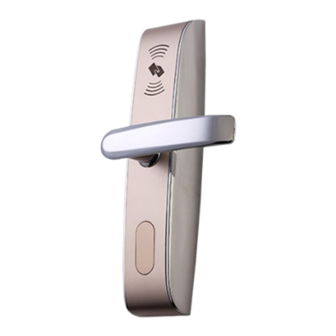
Summary of Contents for ZKTeco LH4000
- Page 1 Installation Guide Model: LH4000 Version: 2.0 English Due to regular upgrades of systems and products, ZKTeco could not guarantee exact consistency betweenthe actual product and the written information in this manual.
- Page 2 Diagram and Caution Diagram...
- Page 3 Caution Left Inward Right Inward Left Outward Right Outward Person Location Note: Do not overexert when tighten the screws. Do not use electric tool to tighten the screws. Please wear eye-protection device to protect your eyes when drilling and slotting.
-
Page 4: Installation Step
Installation Step Align the template along the vertical center line of the mortise at the desired handle height, and tape it to the door. Drill the hole on the door. Handle centerline Desired handle height... - Page 5 Remove two screws (D) from mortise latch plate.
- Page 6 Install mortise (A). Install mortise latch plate (C). Note: Two Triangles on the mortise must be in horizontal alignment (as the above enlarged figure).
- Page 7 Install lock cylinder (E).
- Page 8 Install 8X8 spindle (H) and fix outdoor unit (I). Note: Please confirm the two triangles of the mortise be in horizontal position always! As step3 in this installation instruction.
- Page 9 Install 8X8 spindle (H) and 5X5 spindle (L), and fix the indoor unit (M).
- Page 10 Install batteries (N). Measure the doorframe for strike dimensions and drill the hole.
- Page 11 10. Test lock. Test lock by rotating handle and emergency key. You can use emergency key by removing the cover on the lock cylinder with screwdriver or nails.
-
Page 12: Maintenance
Maintenance Avoid contacting with corrosive substances. Do not hang objects on the handle. When battery power is lower, the lock will beep to remind user to renew the batteries. Please do not mix up positive and negative while replacing battery. To avoid leaking, it is better to renew battery at least once in half year. -
Page 13: Guía De Instalación
Guía de Instalación Modelo: LH4000 Versión: 2.0 Español Debido a las actualizaciones periódicas de los sistemas y productos, ZKTeco no puede garantizar quela información escrita en este manual coincida exactamente con la del producto real. -
Page 14: Antes De La Instalación
Antes de la Instalación Diagrama... - Page 15 Precauciones Entrada por la Izquierda Entrada por la Derecha Salida por la Izquierda Salida por la Derecha Punto de Vista Nota: No tense demasiado los tornillos. No utilice desarmador eléctrico para tensar los tornillos. Utilice equipo de protección para sus ojos al perforar o ranurar.
-
Page 16: Pasos De Instalación
Pasos de Instalación Debe alinear la plantilla conforme a la línea vertical de la cerradura a la altura deseada de la manija y pegarla con cinta adhesiva a la porta.Posteriormente realice las perforaciones a la puerta como se indica en la plantilla. Línea central de la manija Altura deseada de la manija... - Page 17 Remueva los dos tornillos (D) de la cubierta de la cerradura.
- Page 18 Instale la cerradura (A). Instale la cubierta (C). Nota: Los 2 triángulos de la cerradura deben estar en alineación horizontal como se muestra en la figura agrandada.
- Page 19 Instale el cilindro de la llave (E).
- Page 20 Instale el eje de 8X8 (H), conecte los arneses y fije la parte exterior de la cerradura (I). Nota: Confirme que los dos triángulos de la cerradura siempre se encuentren en alineación horizontal como en el paso 3.
- Page 21 Instale el eje de 8X8 (H) y el eje de 5X5 (L), conecte los arneses y fije la parte interior de la cerradura (M).
- Page 22 Instale las baterías (N). Mida el marco de la puerta para las dimensiones de la contra y perfore.
- Page 23 10. Pruebe la cerradura. Pruebe la cerradura con la manija y la llave. Puede utilizar la llave de emergencia removiendo la cubierta del cilindro con un desarmador de punta fina.
-
Page 24: Mantenimiento
Mantenimiento No utilice sustancias corrosivas para limpiar la cerradura. No cuelgue objetos en la manija. Cuando las baterías se encuentren bajas, la cerradura emitirá una alarma audible para recordar al usuario reemplazarlas. Al reemplazar las baterías tenga cuidado de no invertir los polos positivo y negativo. Para evitar que se derramen las baterías es recomendable reemplazarlas cada medio año. - Page 25 Warning: This device complies with Part 15 of the FCC Rules. Operation is subject to the following two conditions: (1) This device may not cause harmful interference, and (2) This device must accept any interference received, including interference that may cause undesired operation.
- Page 26 ZKTeco Industrial Park, No. 32, Industrial Road, Tangxia Town, Dongguan, China. Phone : +86 769 - 82109991 : +86 755 - 89602394 www.zkteco.com Copyright © 2024 ZKTECO CO., LTD. All Rights Reserved.
Need help?
Do you have a question about the LH4000 and is the answer not in the manual?
Questions and answers