Chapters
Table of Contents

Summary of Contents for ZKTeco GL300 Series
- Page 1 Installation Guide Model: GL300 Series Version: 2.0 English Due to the regular upgrades of systems and products, ZKTeco could not guarantee exact consistency between the actual product and the written information in this manual.
-
Page 2: Table Of Contents
Important Notes Please read this Installation Guide carefully and contact the Customer Care for any installation queries. It is recommended that installation be carried out by a professional technician to prevent any potential service charges that can occur due to incorrect installation. Four alkaline AA batteries (not included) are required to power on the device. -
Page 3: What's In The Box
What’s in the Box Screw Cards Sticky Board Part B Part A Installation Procedure 1. Door Properties Measure the glass door thickness Measure the door thickness is between 10 to 12 mm. Check the door opening direction This smart lock is suitable for left and right opening directions, just as below. Left Right... -
Page 4: Installation Of The Sticky Board
Adjust the opening direction (if needed) Rotate the Part B to 180°. Remove the screws from Part A, rotate the Fixed Mount and Indoor Unit to 180°, then install and tighten the screws again. Indoor Unit Fixed Mount 2. Installation of the Sticky Board Peel the sticker o the Sticky Board A and stick it at appropriate height. -
Page 5: Installation Of Part A
3. Installation of Part A Remove screws from Part A. Disconnect the cable, then insert the Sticky Board into the xed mount. Install the xed mount and outdoor unit with 5 screws on the Sticky Board. Connect the cable to the indoor unit, then install and tighten the screws. Pull out the buckle... -
Page 6: Installation Of Part B
4. Installation of Part B Remove the screws from the Part B to separate the Part B Outdoor Unit and Part B Indoor Unit, and then insert the Sticky Board B into Part B. Install and tighten the Part B Outdoor Unit with 5 screws, then install Part B Indoor Unit back. Part B Outdoor Unit Part B Indoor Unit... -
Page 7: Installation Of The Batteries
5. Installation of the Batteries Remove the Battery Cover, then insert 4 AA alkaline batteries, and re-install the Battery Cover back. - Page 8 User Manual Model: GL300 Series Version: 2.0 English Due to the regular upgrades of systems and products, ZKTeco could not guarantee exact consistency between the actual product and the written information in this manual.
- Page 9 Important Notes Batteries must be replaced immediately when the lock prompts the “The battery is dead. ” Please use the correct method when pressing your ngers onto the ngerprint reader for registration and identi cation. Our company will assume no liability for recognition issues that may result from incorrect usage of the product.
-
Page 10: Product Overview
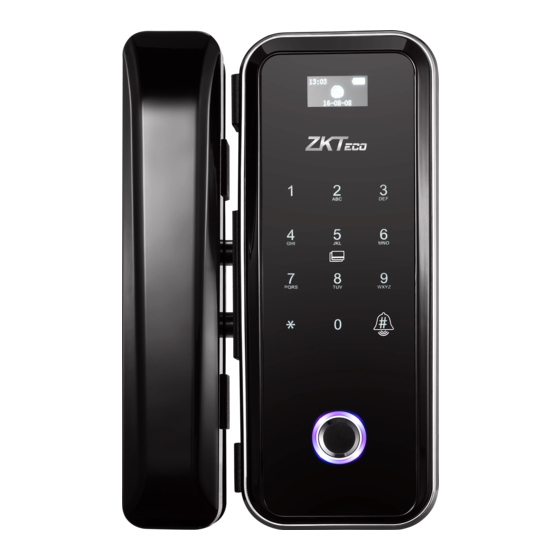
Product Overview OLED Screen Speaker Knob Keypad & Card Detection Area Con rm/Doorbell Reset Button Battery Compartments Fingerprint Sensor Emergence Power Interface Battery Cover Knob De nitions Initialization: All the registered user data will be deleted and restored to the factory settings. Note: After initializing, Wi-Fi will disconnect, and only default administrator password (0123456789) is valid. -
Page 11: Menu Operation Guide On Keypad
Menu Operation Guide on Keypad Right Left Down Backspace Con rm/Doorbell How to Use 1. Reset the Lock Press and hold the Reset button for 5 seconds, until you hear the audio prompt “Initializing, Succeed”. 2. Activate the Lock Touch the keypad with the back of your hand or ngers to activate the lock. 3. -
Page 12: Pair The Lock With App
Password Enter a New Password Fingerprint Input Fingerprint Add User Card Read a Card Enter the User’s Name *Telecontroller Append a Telecontroller Delete User Users Return Password Enter a New Password Admin Fingerprint Input Fingerprint Return Single Key Double Keys Unlock Method Double Users Return... -
Page 13: Quick Start
On your smartphone, enable Bluetooth and Wi-Fi permissions. Open the app, tap the + button on the top right corner of the interface, and then select the "Add Device" option. Once you see the device pop-up, tap the Add button. To automatically pair the device, follow the on-screen instructions. - Page 14 Warning: This device complies with Part 15 of the FCC Rules. Operation is subject to the following two conditions: (1) This device may not cause harmful interference, and (2) this device must accept any interference received, including interference that may cause undesired operation. This equipment has been tested and found to comply with the limits for a Class B digital device, pursuant to Part 15 of the FCC Rules.


Need help?
Do you have a question about the GL300 Series and is the answer not in the manual?
Questions and answers