Table of Contents
Advertisement
Quick Links
Advertisement
Table of Contents

Summary of Contents for SereneLife SLFOLD20
-
Page 2: Warning And Safety Information
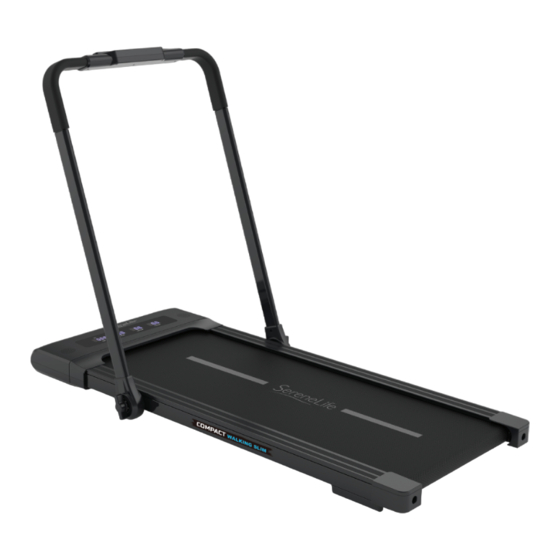
IMPORTANT: Read all instructions carefully before using this product. Retain this owner’s manual for future reference. The speci cations of this product may vary from this photo and are subject to change without prior notice. WARNING & SAFETY INFORMATION 1. Ensure that you read the manual carefully before attempting to assemble or use Power Electric Treadmill. -
Page 3: Parts List
ACCESSORIES Allen Key Safety Tether Key PARTS LIST Control Panel Safety Tether Key Handrail Display Panel Running Belt End Cover Locking Knob www.SereneLifeHome.com... - Page 4 ASSEMBLY INSTRUCTIONS Locking Knob Loose the Locking Knob, then lift up the treadmill to the right postion, tighen the Locking Knob again. Locking Knob Do not rely on it to support your body weight during use. MUSIC Turn on Bluetooth capability on your device and make it discoverable, choose the shown device "BTMP3"...
-
Page 5: Control Panel
CONTROL PANEL NOTE: Always stand on the side rails when you start the treadmill, never start the treadmill while you are standing on the running belt. DISPLAY FUNCTIONS QUICK START: Press the START button on the computer to begin exercising. The running belt starts moving with an initial speed of 0.6MPH. - Page 6 SPEED -: To adjust the function value down. To decrease running speed adjustments during all training periods on di erent training modes. TIME: Displays your elapsed workout time in minutes and seconds. You may also pre-set target time in STOP mode before training. To set TIME press the MODE button on the computer console until you see the split window of TIME begin blinking.
- Page 7 TRAINING IN PRE-SET PROGRAM MODE When in PROGRAM mode, press the PROG (PROGRAM) button to select your chosen workout (P01 to P12). Press the SPEED + or SPEED - button to change the setting. Press the START button to con rm and start your workout. This treadmill console has 2 kinds of Workout Programs to choose from.
-
Page 8: Function Buttons
FUNCTION BUTTONS [Start] Key: Press this key to start exercise program. [P] Key: press this key to select exercising speed programs P01-P03. [M] Key: Press this key to select the time distance or calories in the manual program. [+] Key: Press this key to increase the speed. [-] Key: Press this key to decrease the speed. -
Page 9: Emergency Stop
LUBRICATION Lubricating under the running belt will ensure superior performance and extend its life expectancy. After the rst 25 hours of use (or 2-3 months) apply some lubricant, and repeat for every following 50 hours of use (or 5-8 months). How to check running belt for proper lubrication •... -
Page 10: Belt Adjustment
BELT ADJUSTMENT The running belt is pre-adjusted to the running deck at the factory, but after prolonged use it can stretch and require readjustment. To adjust the belt, turn on the main power switch of the treadmill and let the belt run at a speed of 0.6-2.0 MPH. -
Page 11: Care And Maintenance
CARE AND MAINTENANCE WARNING: To prevent electrical shock, please turn o and unplug the treadmill before cleaning or performing routine maintenance. WARNING: Always check the wear and tear components like spring knob and running belt to prevent injury. CLEANING After each exercise, ensure that the unit is wiped down and any sweat is removed from the unit. -
Page 12: Warm Up And Cool Down Routine
WARM UP AND COOL DOWN ROUTINE The WARM-UP is an important part of any workout. The purpose of warming up is to prepare your body for exercise and to minimize injuries. Warm up for two to ve minutes before aerobic exercising. It should begin every session to prepare your body for more strenuous exercise by heating up and stretching your muscles, increasing your circulation and pulse rate, and delivering more oxygen to your muscles. - Page 13 QUADRICEPS STRETCH With one hand against a wall for balance, reach behind you and pull your right foot up. Bring your heel as close to your buttocks as possible. Hold for 15 counts and repeat with left foot. INNER THIGH STRETCH Sit with the soles of your feet together and your knees pointing outward.
- Page 14 APPLICATION SOFTWARE (APP) Check if your mobile device con rms the requirements for the application. The requirements of each application are shown in the Google PlayStore or AppStore. • Please remember to turn ON the Bluetooth feature on your device. Android Kinomap •...
- Page 15 Features: • Electric Motorized Plug-in Design • Home Gym Digital Treadmill Design • 4 White LED Light Displays • Easy Handlebar Control Panel for Set up Position Use • Watch Remote Controller • Simple Electric Motorized Plug-in Design • Displays Run Time, Distance, Speed, and Calories Burned •...
- Page 16 Questions? Comments? We are here to help! Phone: (1) 718-535-1800 Email: support@pyleusa.com...


Need help?
Do you have a question about the SLFOLD20 and is the answer not in the manual?
Questions and answers