
Related Manuals for Crystal Mountain Storm Cafe


Summary of Contents for Crystal Mountain Storm Cafe
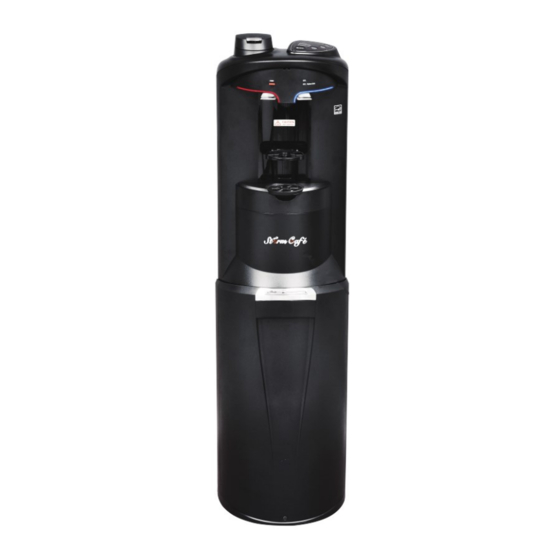
- Page 1 Storm Café Water and Coffee Dispenser User Manual CAUTION: Unit must be stored in an environment where the temperature will not drop below freezing (32° F/0° C). Failure to do so may result in damage to the unit.
- Page 2 1. Coffee Pod Holder 5. LED Nightlight -Left side 7pcs LED(LED1~LED7), night -Top part of Coffee Pod Holder led/indicator dispense hot water -Bottom part of Coffee Pod Holder -Right side 7pcs LED(LED8~LED14), night 2. Brew Selection Panel led/indicator dispense cold water -6 oz button 6.
- Page 3 Coffee Brewer Detail OPEN Coffee Pod Brewer Assembly Opened to Show Pod Holder Beverage Outlet tubes: (L toR) Hot Water, Coffee, Cold Water Coffee Pod Dimensions 2.007" 1.795" 0.197" 1.764" 1.417" CAUTION This unit dispenses water at temperatures that can cause severe burns. Children should be supervised to ensure that they do not play with the appliance.
- Page 4 ® Single service Keurig brand K-Cup Pod K-Cup is a trademark of Keurig Green Mountain, Inc., used with permission Category Brand Description K-Cup® Pod Barista Prima Co eehouse® Barista Prima Co eehouse® Colombia Co ee, 24ct K-Cup® Pod Barista Prima Co eehouse® Barista Prima Co eehouse®...
- Page 5 K-Cup® Pod Dunkin'® Dunkin'® Milk Chocolate Hot Cocoa, 22ct K-Cup® Pod Dunkin'® Dunkin'® Original Blend, 22ct K-Cup® Pod Dunkin'® Dunkin'® Polar Peppermint, 22ct K-Cup® Pod Dunkin'® Dunkin'® Tu le Love, 22ct K-Cup® Pod Dunkin'® Dunkin' COLD, 22ct K-Cup® Pod Dunkin'® Dunkin' COLD Caramel, 22ct K-Cup®...
- Page 6 Green Mountain Co ee Roasters® K-Cup® Pod Green Mountain Co ee Roasters® ICED Vanilla Caramel, 24ct ICED Vanilla Caramel, 24ct Green Mountain Co ee Roasters® Kevin Costner Horizon Blend, K-Cup® Pod Green Mountain Co ee Roasters® 24ct K-Cup® Pod Green Mountain Co ee Roasters® Green Mountain Co ee Roasters® Island Coconut, 24ct K-Cup®...
- Page 7 K-Cup® Pod New England Co ee® New England Co ee® French Roast, 24ct K-Cup® Pod New England Co ee® New England Co ee® French Vanilla, 24ct K-Cup® Pod New England Co ee® New England Co ee® Hazelnut Creme, 24ct K-Cup® Pod New England Co ee®...
- Page 8 FEATURES Function lights Blue Light "Heating" is on steady on the Brew Selection panel indicates water is heating. Blue Light "Load Coffee Pod" is on steady on Brew Selection panel indicates water heating is at temperature and ready for brewing. Blue Light "Select Cup Size"...
-
Page 9: Getting Started
THANK YOU FOR BUYING A CRYSTAL MOUNTAIN WATER COOLER! GETTING STARTED Locate water dispenser 1. Place the water cooler on a flat level surface in a cool shaded location near a grounded wall outlet. 2. Position water dispenser so that the back of the unit is a minimum of 4 inches / 10 cm away from the wall to ensure proper ventilation (Figure 3). - Page 10 Provide electricity Ensure that the available power supply matches the cooler’s voltage specifications indicated on the nameplate label (located at the rear of unit). Connect to power supply. Please ensure that cooler is set up so as access to the power outlet and plug is unobstructed. Note: DO NOT turn on the Hot Tank Power Switch yet.
- Page 11 Hot water dispensing The temperature control of the hot water is preset to dispense water between 188.6-199.4°F (87 to 93°C). Optimum hot water temperatures will be reached after 15-20 minutes. 1. Position bottle, glass or other container below water outlet (Figure 14). 2.
-
Page 12: Cleaning And Sanitization
6. Remove bottle adaptor from the empty bottle (Figure 20) and place directly into the top of the new, full bottle (Figure 21). Note: to maintain integrity of the system, refrain from touching the section of the bottle adaptor tube that is inserted into the bottle. - Page 13 Daily cleaning of coffee pod holder 1. Using the top cover key (Figure 27), insert into the two holes (on the front, approximately 2 inches above and to the right of hot water safety button). Push key inward to open top cover (Figures 28 & 29). Figure 27 Figure 28 Figure 29...
- Page 14 4. Install the cleaned top coffee pod holder components in the cooler (Figure 39), closing the catch on each side (Figure 40). Slide the bottom part of coffee pod holder into place (Figure 41), turning both red twist locks to secure (Figure 42). Place a clean cup holder (brown) in the pod holder (Figure 43) and push down to close the lid (Figure 44).
- Page 15 2. Place a 10 oz or larger glass or similar container under the water outlet ( Figure 47). Select the 10 oz option and press the “Brew” button to start the cleaning cycle ( Figure 48). Figure 47 Figure 48 3.
- Page 16 5. Take bottle out from the base (Caution: don't break the corrugated tube). Remove the connector from adaptor (Figure 56). A plug should be added to the end of the tube, to stop the water dripping on the floor (Figure 57). Save the red plug for future use. Figure 56 Figure 57 6.
- Page 17 8. To drain the hot tank, use a #2 Phillips screwdriver, remove the drain cap cover on the rear of the cooler. Using a flat blade screw driver or 1/2" socket, remove the drain cap and plug (Figure 67 & 68). Drain water into a pail or container (at least 0.5 gal.) (Figure 69) and discard.
- Page 18 11. Use a stiff, non-metallic brush or vacuum attachment to clean the condenser and all accessible areas to remove dirt, lint and debris. Use a clean damp cloth to wipe down condenser (Figure 73). CAUTION: DO NOT CLEAN USING PRESSURE WASHER OR ANY DIRECT WATER CONTACT. Figure 73 12.
- Page 19 14. Close and lock the latch arm (Figure 81). Figure 81 15. Remove the red plug from the blue tube of the Smartflo™ Water Cartridge and install onto the bottle adaptor assembly (Figure 82). Save the red plug for future use. Figure 82 16.
-
Page 20: Troubleshooting
• Ensure that the dispenser is at least 4 inches (100mm) from the wall to provide sufficient ventilation. • If the water still isn't cold, please contact your local supplier or Crystal Mountain for assistance. No hot water (cold water functioning) •... -
Page 21: Safety Precautions
• Children should be supervised to ensure that they do not play with the appliance. • Use with caution only. • Service should only be performed by a certified technician. Please contact your supplier or Crystal Mountain if assistance is needed. Page 20... - Page 22 Services required: See nameplate located on the back of the dispenser Refrigeration system • Refrigerant Type: R134a, 1.13oz (32g) • Pressure (Refrigeration): High Side: 265 PSI, Low Side: 140PSI Water flow • The flow rate from the water outlets on the dispenser is a maximum of 0.475 US gal/minute (1800 ml/minute) The customer acknowledges that water, like other liquids, can cause damage to surfaces.
- Page 23 Notes Page 22...
- Page 24 DOC-C100194 Rev0424 Copyright © 2024 by Crystal Mountain Manufactured under U.S. Patent No. 10,781,093 and other patents...
Need help?
Do you have a question about the Storm Cafe and is the answer not in the manual?
Questions and answers