
Subscribe to Our Youtube Channel
Related Manuals for Crystal Mountain Crystal Pro V2


Summary of Contents for Crystal Mountain Crystal Pro V2
- Page 1 Installation, Operation & Maintenance Manual Crystal Pro V2 Water Dispenser www.crystalcoolers.com © 2024 Crystal Mountain Products Inc.
- Page 2 Notes...
-
Page 3: Table Of Contents
Table of Contents Table of Contents Notices and Safety Information Features and Benefits Exploded Views and Parts List Installation Operating Crystal Pro Water Dispenser Service and Maintenance General Maintenance Sanitizing Reservoirs Draining Reservoirs Resetting Leak Detection System Troubleshooting Technical Specifications Flow Diagram Electrical Diagram Warranty... -
Page 4: Notices And Safety Information
Notices and Safety Information Throughout this manual there are paragraphs set off by special headings. “Notice” is used to emphasize installation, operation or maintenance information which is important, but may not present a hazard to persons or property. “Caution” is used when failure to follow directions could result in damage to equipment or property. “Warning”... -
Page 5: Features And Benefits
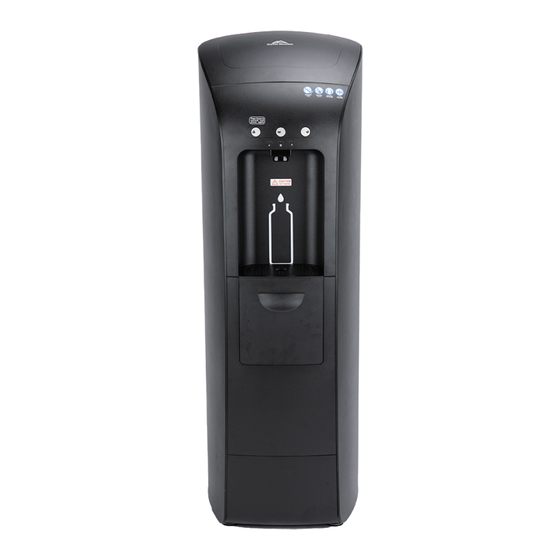
Features & Benefits Thank you for purchasing the Crystal Mountain Crystal Pro Water Dispenser. The Crystal Pro brings a fresh approach and a new look to point-of-use water dispensers. The system's contemporary color scheme complements every office environment. There are no bottles to change and the supply is virtu- ally unlimited. - Page 6 Visually inspect for any wires, tubing, or fittings which may have come loose during shipment. Record the model and serial numbers below for future reference. Record your Crystal Pro model number here: Serial Number: Date purchased: Date installed: Products offered and marketed by Crystal Mountain and its affiliates are protected by patents is-...
-
Page 7: Exploded Views And Parts List
Parts Diagram... - Page 8 Parts Diagram Detail...
- Page 9 Parts Listing Replaced by DESCRIPTION PART CODE Effective Date Multipacks Side Panel, Left, Black - CP SMT-C400002 Side Panel, Right, Black - CP SMT-C400003 Top Cover, Black, CM Logo - CP PLC-C400030 Top Cover, Black, Juturna Logo - CP PLC-C400035 Cover, Back - CP SMT-C400005 Low Pressure Solenold Valve (DC24v)
-
Page 10: Installation
Installation Position & Level Locate the dispenser as close to the water supply and the electrical connections as possible. Level the unit using the adjustable leveling feet and built-in level indicator. Keep the dispenser at least 4 inches from the wall to ensure adequate airflow. Warning: The dispenser should not be exposed to direct sunlight, heat sources, or an ambient air tem- perature above 100°F (38°C) or below 37°F (3°C) or structural damage may occur. - Page 11 Installation Make Water & Electrical Connections The dispenser contains push-to-connect type fittings on the rear of the unit for the water supply and R/O drain. These fittings accept ¼"polypropylene plastic tubing. If copper tubing is to be used, these fittings must be replaced with a metal design. In addition, drain ports are provided for the hot and cold tanks.
- Page 12 Installation Sanitize the Dispenser You must sanitize your system before using it for the first time. Failure to do so may result in poor water taste and water quality. This is best accomplished as outlined below. 1) Ensure both water connections – supply and R/O drain (if applicable) are made at the rear of the unit.
- Page 13 Installation Turn on “Hot” & “Cold” Power Switches. 1) With all tanks completely filled with water, both the hot and cold switches at the rear of the dispenser should be turned “on.” It will take approximately twenty minutes for the hot water and two hours for the cold water to reach their temperature presets.
-
Page 14: Operating Crystal Pro Water Dispenser
Operating the Crystal Pro Your Crystal Pro Water Dispenser contains a simple, intuitive user interface for operation and sta- tus. Hot and Cold buttons are backlit and a nightlight is provided in the dispensing area. Ambient Button Button/LED Flashing Power Indicator Dispenser Powered Dispenser Unpowered Hot Button... -
Page 15: Service And Maintenance
Service & Maintenance Once assembled, installed and flushed properly, your Crystal Pro Water Dispenser will provide years of trouble-free operation. Installation and service should only be carried out by a trained service professional. If applicable, filtration cartridges should be replaced every six months or as directed by the manufacturer. -
Page 16: Draining Reservoirs
Service & Maintenance Caution: Take care to prevent burns when draining the hot tank. Remove the existing filtration cartridges Open the front panel to gain access to the filtration compartment. Remove all cartridges from the filter compartment. For R/O systems, ensure that the drain line with flow restrictor between the R/O cartridge and drain port is removed first. - Page 17 UV. Install the new UV LED (Crystal Mountain part number ELE-C100401 or SUB-C400050) by pushing into the outlet tube or, if replacing the LED in the reservoir lid, by securing it in place with the locknut.
-
Page 18: Resetting Leak Detection System
Service & Maintenance Reset Leak Detection System All models of Crystal Pro Water Dispensers are equipped with a leak detection system. This system will generate an audible and visual warning upon detecting water in the base of the unit. In addition, the sys- tem will automatically shut off... -
Page 19: Troubleshooting
Troubleshooting Symptom Solution Possible Cause Check outlet and plug for proper connection No power to unit No Power / Power status indica- Check external circuit breaker/GFCI Circuit breaker or GFCI is tripped tor off Check fuse at rear of unit and replace if needed Blown fuse Check external water supply valve Tanks not filling during initial... -
Page 20: Technical Specifications
Specifications Water Dispenser Failure to use an appropriate anti-flood device for any reason will not obligate or make Crystal Mountain responsible in any way for Product Safety Features ~1.0 KWH... -
Page 21: Flow Diagram
Flow Diagram An�-Flood Device (not Supplied) Ambient Storage Tank Pressure Reducing Valve (Not Supplied) w/ Mech Safety Float UV Lamp Inlet Hot Solenoid Vent Strainer Filtra�on or R/O System Hot Tank Inlet Solenoid (Not Supplied) Drain Vent UV Lamp Dispenser Nozzle R/O Drain (If Applicable) (Bulkhead Supplied) Ambient Solenoid... -
Page 22: Electrical Diagram
Electric Diagram... -
Page 23: Warranty
Crystal Mountain, the user will be responsi- Crystal Mountain will not be liable for scaling of membranes by minerals, bacterial... - Page 24 DOC-C400001 Rev.091224...
Need help?
Do you have a question about the Crystal Pro V2 and is the answer not in the manual?
Questions and answers