Crystal Mountain Crystal Pro Installation, Operation & Maintenance Manual
Hide thumbs
Also See for Crystal Pro:
- Installation operation & maintenance (20 pages) ,
- Installation, operation & maintenance manual (24 pages)

Related Manuals for Crystal Mountain Crystal Pro


Summary of Contents for Crystal Mountain Crystal Pro
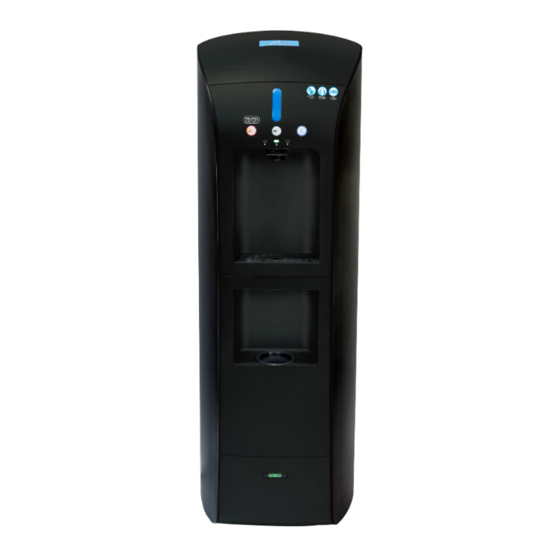
- Page 1 Installation, Operation & Maintenance Manual Crystal Pro Water Dispenser www.crystalcoolers.com © 2020 Crystal Mountain Products Inc.
- Page 2 Notes...
-
Page 3: Table Of Contents
Table of Contents Table of Contents Notices and Safety Information Features and Benefits Exploded Views and Parts List Installation Operating Crystal Pro Water Dispenser Service and Maintenance General Maintenance Sanitizing Reservoirs Draining Reservoirs Resetting Leak Detection System Troubleshooting Technical Specifications... -
Page 4: Notices And Safety Information
It must be understood that common sense, caution, and careful attention are conditions which cannot be built into the equipment. To ensure proper and efficient operation of the Crystal Pro Water Dispenser to your full satisfaction, carefully fol- low the instructions in this manual. -
Page 5: Features And Benefits
Leak Detection System All models of the Crystal Pro are fitted with a leak detector. This system will generate an audible alarm and front panel light alert upon detecting water in the base of the unit. In addition, the system will au- tomatically shut off the incoming water supply to prevent further damage. - Page 6 &Ambient Steel Reservoir The Crystal Pro Water Dispensers come completely assembled and ready for set up and operation either with, or without, installation of reverse osmosis or filtration cartridges. Remove the dispenser from the box, saving the box and the packaging materials. The carton con-...
-
Page 7: Exploded Views And Parts List
Parts Diagram... - Page 8 Parts Diagram Detail...
- Page 9 Parts Listing DESCRIPTION Part Number Side Panel, Left SMT-C400002 Side Panel, Right SMT-C400003 Top Cover SUB-C400007 Lamp, Logo ELE-C100419 Cover, Back SMT-C400005 Solenoid, Low Pressure 24V DC (3 in unit) POU-C400001 Support Bracket, Rear Upper (2 in unit) SMT-C400008 Support Bracket, Front (2 in unit) SMT-C400007 Water Outlet...
-
Page 10: Installation
Using a wrench, secure the unit to the expansion bolt. Reinstall the filtration service panel. Your Crystal Pro Water Dispenser comes complete with a built-in cup holder under the water dis- penser section. This holder is designed to hold up to twenty standard size cups with a diameter be-... - Page 11 Install Filtration (if applicable) The Crystal Pro is shipped from the factory with no internal filtration installed. Consult with your filter supplier on the best filtration solutions for the local water conditions and follow the manufacturer's instructions on their installation, use and servicing.
- Page 12 Installation Sanitize the Dispenser You must sanitize your system before using it for the first time. Failure to do so may result in poor water taste and water quality. This is best accomplished as outlined below. 1) Ensure both water connections – supply and R/O drain (if applicable) are made at the rear of the unit.
- Page 13 Installation Turn on “Hot” & “Cold” Power Switches. 1) With all tanks completely filled with water, both the hot and cold switches at the rear of the dispenser should be turned “on.” It will take approximately twenty minutes for the hot water and two hours for the cold water to reach their temperature presets.
-
Page 14: Operating Crystal Pro Water Dispenser
Operating the Crystal Pro Your Crystal Pro Water Dispenser contains a simple, intuitive user interface for operation and sta- tus. Hot and Cold buttons are backlit and a nightlight is provided in the dispensing area. Flashing Button/LED Power Indicator Dispenser Powered... -
Page 15: Service And Maintenance
Service & Maintenance Once assembled, installed and flushed properly, your Crystal Pro Water Dispenser will provide years of trouble-free operation. Installation and service should only be carried out by a trained service professional. If applicable, filtration cartridges should be replaced every six months or as directed by the manufacturer. -
Page 16: Draining Reservoirs
Service & Maintenance Caution: Take care to prevent burns when draining the hot tank. Remove the existing filtration cartridges Open the front panel to gain access to the filtration compartment. Remove all cartridges from the filter compartment. For R/O systems, ensure that the drain line with flow restrictor between the R/O cartridge and drain port is removed first. - Page 17 UV. Install the new UV LED (Crystal Mountain part number ELE-C100401) by pushing into the outlet tube or, if replacing the LED in the reservoir lid, by securing it in place with the locknut.
-
Page 18: Resetting Leak Detection System
Reset Leak Detection System All models of Crystal Pro Water Dispensers are equipped with a leak detection system. This system will generate an audible and visual warning upon detecting water in the base of the unit. In addition, the sys- tem will automatically shut off the incoming water supply valve to prevent further damage. -
Page 19: Troubleshooting
Troubleshooting Symptom Possible Cause Solution Check outlet and plug for proper connection No power to unit No Power / Power status indica- Check external circuit breaker/GFCI Circuit breaker or GFCI is tripped tor off Check fuse at rear of unit and replace if needed Blown fuse Check external water supply valve Tanks not filling during initial... -
Page 20: Technical Specifications
Specifications Water Dispenser Failure to use an appropriate anti-flood device for any reason will not obligate or make Crystal Mountain responsible in any way for Product Safety Features ~1.0 KWH... -
Page 21: Flow Diagram
Flow Diagram Anti-Flood Device (not Supplied) Ambient Storage Tank Pressure Reducing Valve (Not Supplied) w/ Mech Safety Float UV Lamp Inlet Hot Solenoid Vent Strainer Filtration or R/O System Hot Tank Inlet Solenoid (Not Supplied) Drain Vent UV Lamp Dispenser Nozzle R/O Drain (If Applicable) (Bulkhead Supplied) Ambient Solenoid... -
Page 22: Electrical Diagram
Electric Diagram Logo Lamp PCB UV Display Electric Ball Float Valve Leak Detection Line PCB, Push Button Module Leak Sensor Float Solenoid Pushbutton Hot Tank Main PCBA L Input fromFuse Transformer UV Module LED UV Limiter Hot/Cold Switch LED UV Module Input Output Thermostat... -
Page 23: Warranty
Crystal Mountain, the user will be responsi- Crystal Mountain will not be liable for scaling of membranes by minerals, bacterial... - Page 24 Crystal Mountain Products Inc. US Office 1000 H Taylor Station Rd Gahanna OH 43230 Tel: 614 454 1618 Fax: 614 866 7765 E-mail: sales@crystalcoolers.com Crystal Mountain Products Limited Canadian Office 200 Carnegie Dr Ste 234 St Albert AB T8N 5A7...
Need help?
Do you have a question about the Crystal Pro and is the answer not in the manual?
Questions and answers