
Related Manuals for TKH security Siqura SA3-FIX Series


Summary of Contents for TKH security Siqura SA3-FIX Series
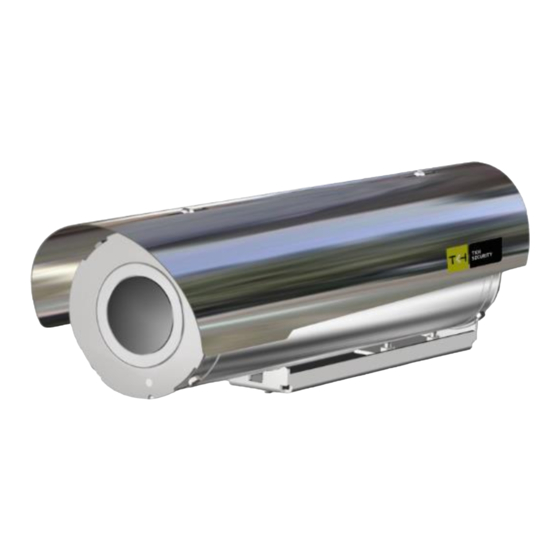
- Page 1 SA3 FIX Series Installation manual 3rd Generation SA FIX Camera 316L Copyright © 2024 TKH Security. Version 1 TKH Security | Siqura EX-PD24 | Installation manual...
- Page 2 Any brand names mentioned in this manual are registered trademarks of their respective owners. Liability TKH Security accepts no liability for claims from third parties arising from improper use other than that stated in this manual. Although considerable care has been taken to ensure a correct and suitably comprehensive description of all relevant product components, this manual may nonetheless contain errors and inaccuracies.
-
Page 3: Table Of Contents
Technical Data ........................8 Unpacking ........................... 9 Installation ......................... 10 Maintain the unit ........................ 20 Sync IR with D/N mode ..................... 21 EU Certificates ........................23 Appendix: Technical drawings ................... 26 TKH Security | Siqura SA3 FIX Series | Installation manual v1 3-30... -
Page 4: Introduction
The manufacturer declines all responsibility for any consequences resulting from improper use of the product, or use which is different from that expected and specified in the present documents. TKH Security | Siqura SA3 FIX Series | Installation manual v1 4-30... -
Page 5: General Information
SA3-FIX(v)-IR34. IR-LED illuminator (v) determines the power supply voltage. (v) can be 24 for AC 24 V, 120 for AC 120 V or 230 for AC 230 V TKH Security | Siqura SA3 FIX Series | Installation manual v1 5-30... - Page 6 OPTICAL RADIATION It indicates a potentially dangerous situation due to the emission of visible light or infrared that could be harmful for eyes. Read the provided instructions carefully. TKH Security | Siqura SA3 FIX Series | Installation manual v1 6-30...
-
Page 7: Before You Continue
Only for SA3-FIX IR34 IR LED illuminator: The unit emits high intensity IR light. Wear protective eyewear. Avoid direct eye and skin exposure. Please follow safety precautions given in IEC 60825-1 and IEC 62471. TKH Security | Siqura SA3 FIX Series | Installation manual v1 7-30... -
Page 8: Technical Data
25W MAX Supply voltage: (v)= 24 AC 24V (±10%) (v)= 120 AC 120V (±10%) (v)= 230 AC 230V (±10%) Certifications Weatherproof standard: IP66/IP67/IP68/IP69, NEMA-4X EMC, LVD CE compliant TKH Security | Siqura SA3 FIX Series | Installation manual v1 8-30... -
Page 9: Unpacking
Washing nozzle brackets kit (for wiper versions only) Unpack If the package or the contents appears to be damaged, notify the shipper immediately. Check that all parts listed above are included. TKH Security | Siqura SA3 FIX Series | Installation manual v1 9-30... -
Page 10: Installation
Do not connect the unit to a supply circuit unless the installation is completed. Check before assembling the position of the O-ring seals in their groove. TKH Security | Siqura SA3 FIX Series | Installation manual v1 10-30... - Page 11 Choose the proper fasteners for surface. The screws must be tightened with suitable torque by authorized and qualified personnel only. See appendix for drawings of the camera’s physical dimensions. TKH Security | Siqura SA3 FIX Series | Installation manual v1 11-30...
- Page 12 (2), provided with the PM01 kit. Check that all the threads are clean. When fixing the screws use thread locking compound (e.g., Loctite) and allow an appropriate rest period. TKH Security | Siqura SA3 FIX Series | Installation manual v1 12-30...
- Page 13 Fix the unit to the swivel joint (1) using the 2x screws (2) and 2x washers (3) provided with the camera station. For the best stability reduce the unit’s overhang. The plate (4) on the lower rail allows to adjust horizontal position (forth/back) of the housing TKH Security | Siqura SA3 FIX Series | Installation manual v1 13-30...
- Page 14 INT3-SM10 SA20, 10 meter composite cable with SM fiber, M25 and M20 adapter If the composite cable tail isn’t provided by TKH Security, please check the correct cable gland thread dimension. (M20 x1.5) To maintain the IP rating of the unit, use only cables, cable glands, blind-stops, adapters that are suitably rated.
- Page 15 DC 12 V, 2 A max. voltage Fuse AC 24 V model: 4 A, HT, AC 250 V, 5x20 AC 120/240 V models: 3.15 A, HT, AC 250 V, 5x20 SA3-FIX W wiring TKH Security | Siqura SA3 FIX Series | Installation manual v1 15-30...
- Page 16 (binary). When a switch is on the ON position, the relative digit has value 1, otherwise the value is 0. For example, the address 13 (00001101 in binary) can be set up turning ON the switch 1, 3 and 4 (see figure). TKH Security | Siqura SA3 FIX Series | Installation manual v1 16-30...
- Page 17 Aux4 is used for Wash-Wiper UNSTOPPABLE automatic cycle (this function will activate the wash-wiper cycle approx. 30 seconds). During the Wash-Wiper cycle, any command issued is ignored. SA3-FIX-IR34 wiring TKH Security | Siqura SA3 FIX Series | Installation manual v1 17-30...
- Page 18 Before closing the unit, set the wiper in its original previous position. Fix the body using the 4x screws (2), the washer (3) and the screw (4). TKH Security | Siqura SA3 FIX Series | Installation manual v1 18-30...
- Page 19 Fix the nozzle bracket (1) on the camera station with the provided screw (2). Adjust horizontal position of the nozzle, use the screwdriver slot on the nozzle to adjust the tilt position. TKH Security | Siqura SA3 FIX Series | Installation manual v1 19-30...
-
Page 20: Maintain The Unit
Fuse replacement If necessary, replace the fuse (F1) as indicated in sections “SA3-FIX wiring”, “SA3-FIX W wiring”, or “SA3-FIX-IR34 wiring”. TKH Security | Siqura SA3 FIX Series | Installation manual v1 20-30... -
Page 21: Sync Ir With D/N Mode
1. Open the web interface; click on the “System” tab and open [Events] > [Application]. Check the boxes as shown below: 2. Click the [Manual Trigger] page and again take over the settings as shown in screenshot below: TKH Security | Siqura SA3 FIX Series | Installation manual v1 21-30... - Page 22 With these settings the Alarm contact output is synchronized with the Day/Night mode of the camera. The Alarm output of the optical camera must be connected to M6 of the IR control board to switch on/off the IR illuminator TKH Security | Siqura SA3 FIX Series | Installation manual v1 22-30...
-
Page 23: Eu Certificates
EU Certificates EU Declaration of conformity TKH Security | Siqura SA3 FIX Series | Installation manual v1 23-30... - Page 24 TKH Security Proposal | RFP Name | RFP Number TKH Security | Siqura SA3 FIX Series | Installation manual v1 24-30...
- Page 25 TKH Security Proposal | RFP Name | RFP Number TKH Security | Siqura SA3 FIX Series | Installation manual v1 25-30...
-
Page 26: Appendix: Technical Drawings
Appendix: Technical drawings SA3-FIX dimensions (mm) TKH Security | Siqura SA3 FIX Series | Installation manual v1 26-30... - Page 27 TKH Security Proposal | RFP Name | RFP Number SA3-FIX W dimensions (mm) TKH Security | Siqura SA3 FIX Series | Installation manual v1 27-30...
- Page 28 TKH Security Proposal | RFP Name | RFP Number SA3-FIX T dimensions (mm) 490 (590*) 256 (356*) 413 (513*) 135 (235*) *: dimensions for thermal lenses >25mm TKH Security | Siqura SA3 FIX Series | Installation manual v1 28-30...
- Page 29 TKH Security Proposal | RFP Name | RFP Number SA3-FIX IR dimensions (mm) TKH Security | Siqura SA3 FIX Series | Installation manual v1 29-30...
- Page 30 TKH Security Proposal | RFP Name | RFP Number tkhsecurity.com Brands Our Brands © 2020, TKH Security. © 2024, TKH Security. TKH Security | Siqura EX-PD24 | Installation manual...
Need help?
Do you have a question about the Siqura SA3-FIX Series and is the answer not in the manual?
Questions and answers