
Related Manuals for TKH security SIQURA EX3 PTZ Series


Summary of Contents for TKH security SIQURA EX3 PTZ Series
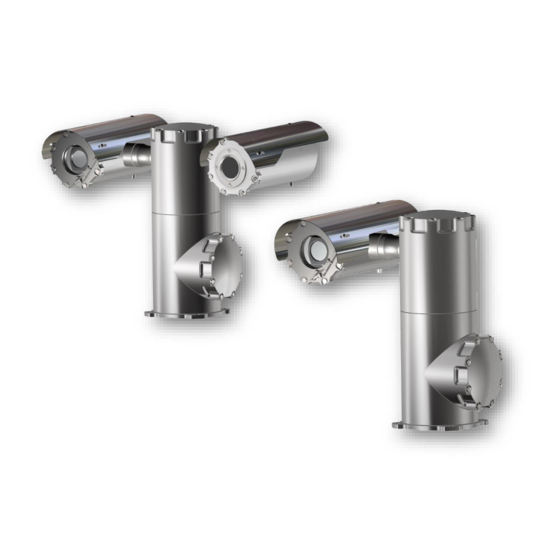
- Page 1 EX3 PTZ Series Installation manual 3rd Generation EX PTZ Camera 316L Copyright © 2024 TKH Security. Version 1.1. TKH Security | Siqura EX-PD24 | Installation manual...
- Page 2 Any brand names mentioned in this manual are registered trademarks of their respective owners. Liability TKH Security accepts no liability for claims from third parties arising from improper use other than that stated in this manual. Although considerable care has been taken to ensure a correct and suitably comprehensive description of all relevant product components, this manual may nonetheless contain errors and inaccuracies.
-
Page 3: Table Of Contents
Maintain the unit ........................ 24 Technical Data ........................26 EX Marking plate ....................... 28 Sync IR with D/N mode ..................... 31 EU Certificates ........................33 Appendix: Technical drawings ................... 36 TKH Security | Siqura EX3 PTZ Series | Installation manual v1.1 3-38... -
Page 4: Introduction
The manufacturer declines all responsibility for any consequences resulting from improper use of the product, or use which is different from that expected and specified in the present documents. TKH Security | Siqura EX3 PTZ Series | Installation manual v1.1 4-38... -
Page 5: General Information
Symbols used WARNING It indicates a potentially dangerous situation that, if ignored, could lead to physical or mortal injuries and/or damage to the unit. Read the provided instructions carefully. TKH Security | Siqura EX3 PTZ Series | Installation manual v1.1 5-38... - Page 6 OPTICAL RADIATION It indicates a potentially dangerous situation due to the emission of visible light or infrared that could be harmful for eyes. Read the provided instructions carefully. TKH Security | Siqura EX3 PTZ Series | Installation manual v1.1 6-38...
-
Page 7: Before You Continue
Only for EX3-PTZD IR34 with integrated IR LED illuminator: The unit emits high intensity IR light. Wear protective eyewear. Avoid direct eye and skin exposure. Please follow safety precautions given in IEC 60825-1 and IEC 62471. TKH Security | Siqura EX3 PTZ Series | Installation manual v1.1 7-38... - Page 8 EN IEC 60079-0:2018; EN 60079-1:2014; EN 60079-31:2014 IECEx Standards: IEC 60079-0:2017; IEC 60079-1:2014-06; IEC 60079-31:2013 INMETRO Standards (TBD) ABNT NBR IEC 60079-0:2020; ABNT NBR IEC 60079-1:2016; ABNT NBR IEC 60079-31:2022 CE compliant TKH Security | Siqura EX3 PTZ Series | Installation manual v1.1 8-38...
-
Page 9: Certificates
40°C) and with temperature classes T1 to T4 (environmental temperature up to 60°C) and with flammable dust covered by apparatus groups IIIA, IIIB and IIIC with temperature T=100°C. TKH Security | Siqura EX3 PTZ Series | Installation manual v1.1 9-38... -
Page 10: Special Conditions For Safe Use
The cross-sectional area occupied by the internal equipment within the camera housing shall not exceed 60%. When coin cells are fitted, the equipment must be marked for limited use at -40°C. TKH Security | Siqura EX3 PTZ Series | Installation manual v1.1 10-38... -
Page 11: Unpacking
3. Pull the strap to tilt the unit in vertical 4. Lift the PTZ out of the box. Be careful to position while still in the box any sudden movements of the unit while lifting. TKH Security | Siqura EX3 PTZ Series | Installation manual v1.1 11-38... -
Page 12: Installation
Fasten all the cables inside the housing with cables ties or other fixing means to avoid the electrical contact with surrounding parts in case the wire gets loose. Route all the cables avoiding contact with the wiper shaft and motor. TKH Security | Siqura EX3 PTZ Series | Installation manual v1.1 12-38... - Page 13 IEC/EN/ABNT NBR IEC 60079-14 The mechanical and physical properties of the fasteners used for the covers shall be A4-70 according EN-ISO 3506-1 TKH Security | Siqura EX3 PTZ Series | Installation manual v1.1 13-38...
- Page 14 . Choose the proper fasteners for surface..The screws must be tightened with suitable torque by authorized and qualified personnel only. See appendix for drawings of the mounting pattern and for the camera physical dimensions ,00 mm ,00 mm TKH Security | Siqura EX3 PTZ Series | Installation manual v1.1 14-38...
- Page 15 Check that all the threads are clean. When fixing the screws use thread locking compound (e.g., Loctite) and allow an appropriate rest period. Screws must be tightened to 38Nm with an adequate torque wrench TKH Security | Siqura EX3 PTZ Series | Installation manual v1.1 15-38...
- Page 16 INT3-MM5, 5 meter armored composite cable with MM fiber INT3-MM10, 10 meter armored composite cable with MM fiber If the composite cable tail isn’t provided by TKH Security, please check the correct cable gland thread dimension. To maintain the certification requirements and the IP rating of the unit, use only cables, cable glands, blind-stops, adapters that are suitably certified and rated for associated ambient range.
- Page 17 Loosening the back-nut (4) and the middle- (2) and lower flange (3) nut (5) Insert plastic washer (6) and tighten the nut Tighten the middle-nut (5) to 50Nm (7). Tighten the back-nut (4). TKH Security | Siqura EX3 PTZ Series | Installation manual v1.1 17-38...
- Page 18 2400 (Default) 9600 19200 57600 Reset button Push 15 seconds to reset to default settings. CAUTION: this operation will reset all the existing presets and the PAN/TILT axis limits. TKH Security | Siqura EX3 PTZ Series | Installation manual v1.1 18-38...
- Page 19 Signal out for camera. Use shielded or unshielded cable according to the needs. Fuse name Fuse value 8 A HT 250 VAC 5x20 10 A HT 250 VAC 5x20 TKH Security | Siqura EX3 PTZ Series | Installation manual v1.1 19-38...
- Page 20 Closing the camera base Check if the O-Ring gasket (4) is in its grove before proceeding. Assemble the rear flange (5) in the PTZ and tight the screws (6) to 11Nm TKH Security | Siqura EX3 PTZ Series | Installation manual v1.1 20-38...
- Page 21 Check if the O-Ring gasket (3) is inside its grove before proceeding A: Access the IP-camera A: Access the IR-Illuminator B: Closing the camera house B: Closing the Illuminator house TKH Security | Siqura EX3 PTZ Series | Installation manual v1.1 21-38...
- Page 22 ON when the IR LEDs are not activated or when they are in short-circuit. Yellow is ON when the IR LEDs are in the activation phase during its hysteresis delay TKH Security | Siqura EX3 PTZ Series | Installation manual v1.1 22-38...
- Page 23 Connect earth cable to the PTZ base, between nozzle bracket and screws (1), with M5 eyelet terminal. Adjust horizontal position of the nozzle, use the screwdriver slot (3) on the nozzle to adjust the tilt position TKH Security | Siqura EX3 PTZ Series | Installation manual v1.1 23-38...
-
Page 24: Maintain The Unit
Be careful not to scratch the carbon coating. Do not use ethyl alcohol, solvents, hydrogenated hydrocarbons, strong acids or alkalis. This will irreparably damage the germanium window. Once completed the cleaning, properly reassemble the protective guard. TKH Security | Siqura EX3 PTZ Series | Installation manual v1.1 24-38... - Page 25 Any intervention which is not listed in the Routine activities list must be done in absence of potentially explosive atmosphere. Any repair or part replacement must be done by, or under supervision of TKH Security. Use only original spare parts. The manufacturer declines all liability for any damage resulting from tampering, use of non-original spare parts and service carried out without following the directives of the present manual.
-
Page 26: Technical Data
ABNT NBR IEC 60079-0; ABNT NBR IEC 60079-1; INMETRO ABNT NBR IEC 60079-31 UKSI 2016:1107 (as amended by UKSI 2019:696) UKEX Schedule 3A, Part 1 Compliancy CE, UKCA, (INMETRO is pending) TKH Security | Siqura EX3 PTZ Series | Installation manual v1.1 26-38... - Page 27 ABNT NBR IEC 60079-0; ABNT NBR IEC 60079-1; INMETRO (pending) ABNT NBR IEC 60079-31 UKSI 2016:1107 (as amended by UKSI 2019:696) UKEX Schedule 3A, Part 1 Compliancy CE, UKCA, (INMETRO pending) TKH Security | Siqura EX3 PTZ Series | Installation manual v1.1 27-38...
-
Page 28: Ex Marking Plate
Every unit must carry a marking plate similar to the one above. Model: Certification model name of the unit. Series: Sales part number of the unit. Serial No.: TKH Security serial number followed by the year of manufacturing. Cable entry: Thread size of the cable entry/entries (optional). See section “Models” below. - Page 29 (c) = A: 2x M20 (c) = B: 2x 3/4" (c) = C: 2x M25 (c) = D: 1x M20 (c) = E: 1x 3/4" (c) = F: 1x M25 TKH Security | Siqura EX3 PTZ Series | Installation manual v1.1 29-38...
- Page 30 4x 3/4" (c) = R: 4x M25 (c) = T: up to 4 entries with different threads housing length. (d)= S: short (d)= M: medium (d)= L: long TKH Security | Siqura EX3 PTZ Series | Installation manual v1.1 30-38...
-
Page 31: Sync Ir With D/N Mode
1. Open the web interface; click on the “System” tab and open [Events] > [Application]. Check the boxes as shown below: 2. Click the [Manual Trigger] page and again take over the settings as shown in screenshot below: TKH Security | Siqura EX3 PTZ Series | Installation manual v1.1 31-38... - Page 32 With these settings the Alarm contact output is synchronized with the Day/Night mode of the camera. The Alarm output of the optical camera must be connected to M6 of the IR control board to switch on/off the IR illumina TKH Security | Siqura EX3 PTZ Series | Installation manual v1.1 32-38...
-
Page 33: Eu Certificates
EU Certificates EU Declaration of conformity TKH Security | Siqura EX3 PTZ Series | Installation manual v1.1 33-38... - Page 34 TKH Security Proposal | RFP Name | RFP Number TKH Security | Siqura EX3 PTZ Series | Installation manual v1.1 34-38...
- Page 35 TKH Security Proposal | RFP Name | RFP Number TKH Security | Siqura EX3 PTZ Series | Installation manual v1.1 35-38...
-
Page 36: Appendix: Technical Drawings
Appendix: Technical drawings EX3-PTZ and EX3-PTZ T TKH Security | Siqura EX3 PTZ Series | Installation manual v1.1 36-38... - Page 37 TKH Security Proposal | RFP Name | RFP Number EX3-PTZD and EX3-PTZD-IR TKH Security | Siqura EX3 PTZ Series | Installation manual v1.1 37-38...
- Page 38 TKH Security Proposal | RFP Name | RFP Number tkhsecurity.com Brands Our Brands © 2020, TKH Security. © 2024, TKH Security. TKH Security | Siqura EX-PD24 | Installation manual...
Need help?
Do you have a question about the SIQURA EX3 PTZ Series and is the answer not in the manual?
Questions and answers