Promise Technology VTRAK E-Class E310f Quick Start Manual
Hide thumbs
Also See for VTRAK E-Class E310f:
- Product manual (328 pages) ,
- Quick start manual (431 pages) ,
- Product manual (434 pages)

Related Manuals for Promise Technology VTRAK E-Class E310f


Summary of Contents for Promise Technology VTRAK E-Class E310f
- Page 1 E-Class E310f and E310s UICK TART UIDE Version 1.0 © 2007 Promise Technology, Inc. All Rights Reserved. Download from Www.Somanuals.com. All Manuals Search And Download.
-
Page 2: Step 1: Unpacking The Vtrak
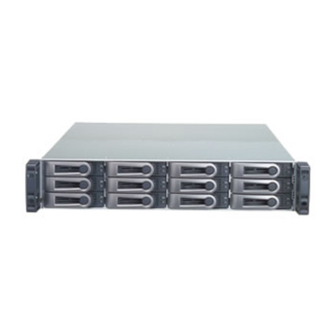
VTrak E-Class Quick Start Guide VTrak E-Class Task List Step 1: Unpacking the VTrak (below) Step 2: Mounting VTrak in a Rack (page 5) Step 3: Installing Disk Drives (page 7) Step 4: Making Management and Data Connections • Fibre Channel (page 11) •... - Page 3 Step 1: Unpacking the VTrak Important Use the following categories of network cables with VTrak: • Cat 6, preferred • Cat 5E, minimum Figure 1. VTrak E310f/s front view Drive Carrier LEDs Drive Carriers Power and Status LEDs Figure 2. VTrak E310f rear view Cooling Unit 2 Cooling Unit 1 Power Supply 1...
- Page 4 VTrak E-Class Quick Start Guide Figure 3. VTrak E310s rear view Cooling Unit 1 Cooling Unit 2 Power Supply 1 Power Supply 2 with Battery with Battery Mgmt Mgmt 115200 115200 8 N 1 8 N 1 RAID Controller 1 RAID Controller 2 Download from Www.Somanuals.com.
-
Page 5: Step 2: Mounting Vtrak In A Rack
Step 2: Mounting VTrak in a Rack Step 2: Mounting VTrak in a Rack The E-Class subsytems installs to the rack using the supplied mounting rails. You can also use your existing rails. Figure 4. VTrak E310f/s mounted in a rack with the supplied rails VTrak E310f/s Vertical Rack Post Handles mount... - Page 6 VTrak E-Class Quick Start Guide Attach a two-hole flange to the rail, with the flange toward the back (connector end) of the enclosure. Install four rail adjustment screws (included) through the flange into the rail. Repeat steps 4 through 6 to attach the other rail and flanges to the enclosure.
-
Page 7: Step 3: Installing Disk Drives
Step 3: Installing Disk Drives Step 3: Installing Disk Drives You can populate the VTrak with SAS or SATA hard disk drives. For optimal performance, install physical drives of the same model and capacity. The drives’ matched performance allows the logical drive to function better as a single drive. The table below shows the number of drives required for each RAID level. -
Page 8: Aamux Adapter
If your VTrak has dual controllers—Fibre Channel or SAS—and you plan to install SATA drives, you must install an AAMUX adapter with each SATA drive. AAMUX adapters are available from Promise Technology. Installing Disk Drives Remove a disk drive carrier. - Page 9 Step 3: Installing Disk Drives Figure 7. Disk drive mounting holes in the drive carrier Disk drive mounting holes AAMUX adapter with AAMUX mounting holes Drive mounting holes without AAMUX Figure 8. SATA drive mounted in a drive carrier with the required AAMUX adapter SATA disk drive SAS connector...
- Page 10 VTrak E-Class Quick Start Guide Figure 9. SAS drive mounted in a drive carrier SAS disk drive Download from Www.Somanuals.com. All Manuals Search And Download.
-
Page 11: Step 4: Making Management And Data Connections
Step 4: Making Management and Data Connections Step 4: Making Management and Data Connections For Serial Attached SCSI setup, go to page 16. Fibre Channel VTrak models can have one or two RAID controllers. Each controller has an Ethernet (RJ45) Management Port connector that enables you to monitor the VTrak over your network using the WebPAM PROe Software. - Page 12 VTrak E-Class Quick Start Guide Connect each Host PC’s or Server’s standard NIC to your network switch. Figure 11. VTrak E310f SAN data and management connections Network Switch FC Switch Mgmt Mgmt FC 1 FC 2 FC 1 FC 2 Gb/s Gb/s 115200...
- Page 13 Step 4: Making Management and Data Connections Figure 12. VTrak E310f DAS data and management connections Network Switch Mgmt Mgmt FC 1 FC 2 FC 1 FC 2 Gb/s Gb/s 115200 Gb/s Gb/s 115200 8 N 1 8 N 1 VTrak Host PC or Server Download from Www.Somanuals.com.
- Page 14 VTrak E-Class Quick Start Guide Configuring JBOD Expansion To expand the number of disk drives: On the E310f controller, connect the SAS connector (a subtractive-routed port) to CN1 (a table-routed port) on the I/O module of the first J300s unit. See Figure 13.
- Page 15 Step 4: Making Management and Data Connections Figure 14.JBOD expansion with no single point of failure Host PCs or Servers Fibre Channel Switches E310f Mgmt Mgmt FC 1 FC 2 FC 1 FC 2 Gb/s Gb/s 115200 Gb/s Gb/s 115200 8 N 1 8 N 1 J300s...
-
Page 16: Serial Attached Scsi
VTrak E-Class Quick Start Guide This completes management and data connections for VTrak E310f. Go to “Step 5: Making Serial Cable Connections” on page 22. Serial Attached SCSI VTrak models can have one or two RAID controllers. Each controller has an Ethernet (RJ45) Management Port connector that enables you to monitor the VTrak over your network using the WebPAM PROe Software. - Page 17 Step 4: Making Management and Data Connections Configuring Direct Attached Storage Direct attached storage (DAS) requires: • Two SAS HBA cards in the Host PC or Server • A network switch • A network interface card (NIC) in the Host PC or Server To establish the data path: On the VTrak controller, connect a SAS data port or a SAS data/cascade port to one of your SAS HBA cards.
- Page 18 VTrak E-Class Quick Start Guide Configuring Cascaded Storage Cascaded storage requires: • One SAS HBA card in the Host PC or Server • A network switch • A network interface card (NIC) in the Host PC or Server To establish the data path: On the VTrak controller, connect a SAS data port or a SAS data/cascade port to your SAS HBA card.
- Page 19 Step 4: Making Management and Data Connections Figure 18. VTrak E310s cascaded management and data connections Network Switch Mgmt 115200 8 N 1 VTrak Host PC or Server Mgmt 115200 8 N 1 VTrak Mgmt 115200 8 N 1 VTrak Download from Www.Somanuals.com.
- Page 20 VTrak E-Class Quick Start Guide Configuring JBOD Expansion To expand the number of disk drives: On the E310s controller, connect the SAS expansion port (a subtractive- routed port) to the CN1 (a table-routed port) on one of the I/O modules of the first J300s unit.
- Page 21 Step 4: Making Management and Data Connections Figure 20. JBOD expansion with no single point of failure Host PCs or Servers E310s Mgmt Mgmt 115200 115200 8 N 1 8 N 1 J300s J300s J300s J300s This completes Network and Data connections for VTrak E310s. Go to “Step 5: Making Serial Cable Connections”...
-
Page 22: Step 5: Making Serial Cable Connections
VTrak E-Class Quick Start Guide Step 5: Making Serial Cable Connections RS232 serial communication enables the Command Line Interface (CLI) and Command Line Utility (CLU) on your PC to monitor and control the VTrak. On VTrak, RS232 communication goes through the RJ11 serial connector on each controller. -
Page 23: Step 6: Connecting The Power
Step 6: Connecting the Power Step 6: Connecting the Power Plug the power cords and switch on both power supplies on. When the power is switched on, the LEDs on the front of the VTrak will light up. Figure 22.VTrak E310f/s front panel LED display Power FRU Status Logical Drive Status... - Page 24 VTrak E-Class Quick Start Guide The Power/Activity LED flashes during drive activity. The Disk Status LED displays Green when a drive is present and configured. Download from Www.Somanuals.com. All Manuals Search And Download.
-
Page 25: Step 7: Setting The Ip Address
Step 7: Setting the IP Address Step 7: Setting the IP Address VTrak has a Command Line Interface (CLI) to manage all of its functions, including customization. A subset of the CLI is the Command Line Utility (CLU), a user-level interface that manages your VTrak via your PC’s terminal emulation program, such as Microsoft HyperTerminal. -
Page 26: Setting Up With The Cli
VTrak E-Class Quick Start Guide Setting up with the CLI Type the following string to set the system date and time, then press Enter. administrator@cli> date -a mod -d 2006/08/25 -t 14:50:05 In the above example, the date and time are included as examples only. Your values will be different. -
Page 27: Setting Up With The Clu
Step 7: Setting the IP Address Setting up with the CLU At the administrator@cli> prompt, type menu and press Enter. The CLU main menu appears. Figure 24.CLU main menu With Quick Setup highlighted, press Enter. The first Quick Setup screen enables you to make Date and Time settings. Setting system date and time Press the arrow keys to highlight System Date. - Page 28 VTrak E-Class Quick Start Guide Type the new IP Address. Follow the same procedure to specify the Subnet Mask, Gateway IP Address and DNS Server IP Address. If you do not have a DNS server, skip the DNS Server IP address. Press Ctrl-A to save your settings.
-
Page 29: Step 8: Creating Disk Arrays With Webpam Proe
Step 8: Creating Disk Arrays with WebPAM PROe Step 8: Creating Disk Arrays with WebPAM PROe Note You can also use the CLU to create disk arrays and logical drives. See Chapter 5 of the VTrak E-Class Product Manual for more information. - Page 30 VTrak E-Class Quick Start Guide When the log-in screen (Figure 21) appears: • Type administrator in the User Name field. • Type password in the Password field. • Click the Login button. The User Name and Password are case sensitive. Figure 25.WebPAM PROe log-in screen After sign-in, the WebPAM PROe opening screen appears.
-
Page 31: Selecting A Language
Step 8: Creating Disk Arrays with WebPAM PROe Selecting a Language WebPAM PROe displays in English, German, French, Italian, Japanese, Chinese Traditional, Chinese Simple, and Korean. Click Language on the WebPAM PROe banner. The language list appears in the Header. Click on the language you prefer. - Page 32 VTrak E-Class Quick Start Guide Figure 27.The Array Configuration menu Automatic When you choose the Automatic option, the following parameters appear on the screen: • Disk Arrays – The number of physical drives in the disk array, their ID numbers, configurable capacity, and the number of logical drives to be created •...
- Page 33 Step 8: Creating Disk Arrays with WebPAM PROe Express When you choose the Express option, a set of characteristics and options appears on the screen. Check the boxes to select any one or a combination of: • Redundancy – The array will remain available if a physical drive fails •...
- Page 34 VTrak E-Class Quick Start Guide Advanced Note For an explanation of the parameters under the Advanced option, see Chapter 7 of the VTrak E-Class Product Manual. When you choose the Advanced option, the Step 1 – Disk Array Creation screen displays.
-
Page 35: Logging Out Of Webpam Proe
Step 8: Creating Disk Arrays with WebPAM PROe 11. Choose a Read Cache policy: • ReadCache • ReadAhead • No Cache 12. Choose a Write Cache policy: • WriteThru • WriteBack 13. Choose the Preferred Controller ID. You can make a selection when LUN Affinity is enabled. Choose 1, 2, or Automatic. -
Page 36: Contacting Technical Support
On-Line Fax Support (408) 228-1097 Attn: Technical Support Phone Support (408) 228-1400 option 4 If you wish to write us for Promise Technology, Inc. support: 580 Cottonwood Drive Milpitas, CA 95035, USA Download from Www.Somanuals.com. All Manuals Search And Download. - Page 37 Fax Support +31 (0) 40 256 9463 Attn: Technical Support Phone Support +31 (0) 40 235 2600 If you wish to write us for Promise Technology Europe B.V. support: Science Park Eindhoven 5542 5692 EL Son, The Netherlands Germany Email Support...
- Page 38 +886 3 578 2390 Attn: Technical Support Phone Support +886 3 578 2395 (ext. 8811) If you wish to write us for Promise Technology, Inc. support: 2F, No. 30, Industry E. Rd. IX Science-based Industrial Park Hsin-Chu 30075, Taiwan (R.O.C.)
- Page 39 Free Manuals Download Website h p://myh66.com h p://usermanuals.us h p://www.somanuals.com h p://www.4manuals.cc h p://www.manual-lib.com h p://www.404manual.com h p://www.luxmanual.com h p://aubethermostatmanual.com Golf course search by state h p://golfingnear.com Email search by domain h p://emailbydomain.com Auto manuals search h p://auto.somanuals.com TV manuals search h p://tv.somanuals.com...
Need help?
Do you have a question about the VTRAK E-Class E310f and is the answer not in the manual?
Questions and answers