Advertisement
- 1 Firmware Upgrade
- 2 NOTES
- 3 Introduction
- 4 Equipment Parameters
- 5 Parts List
- 6 Install Profile
- 7 Install the Printing Platform
- 8 Install Top Component
- 9 Install Filament Holder
- 10 Install Z-axis Cover
- 11 Cable Connection
- 12 Solution for V-wheel jamming of heated bed plate
- 13 Bed Leveling
- 14 Preheating
- 15 Load Filament
- 16 Start Printing
- 17 Maintenance
- 18 Circuit Wiring
- 19 Trouble-shooting
- 20 Documents / Resources
View the accompanied instructions and videos in the storage card.
Visit our official website www.creality.com to find relevant software/hardware information, contact details and operation and maintenance instructions.
Firmware Upgrade
Please login the official website https://www.creality.com/download, switch the language and select the relevant printer and model and download the required firmware, you can use it after the installation is finished.
NOTES
- Do not use the printer any way other than described herein in order to avoid personal injury or property damage.
- Do not place the printer near any heat source or flammable or explosive objects. We suggest placing it in a well-ventilated, low-dust environment.
- Do not expose the printer to violent vibration or any unstable environment, as this may cause poor print quality.
- Before using experimental or exotic filaments, we suggest using stand ard filaments such as ABS or PLA to calibrate and test the machine.
- Do not use any other power cable except the one supplied. Always use a grounded three-prong power outlet.
![]()
Do not touch the nozzle or printing surface during operation as they may be hot. Keep hands away from machine while in use to avoid burns or personal injury.- Do not wear gloves or loose clothing when operating the printer. Such cloths may become tangled in the printers moving parts leading to bums, possible bodily injury, or printer damage.
- When cleaning debris from the printer hotend, always use the provided tools. Do not touch the nozzle directly when heated. This can cause personal injury.
- Clean the printer frequently. Always turn the power off when cleaning, and wipe with a dry cloth to remove dust, adhered printing plastics or any other material off the frame, guide rails, or wheels. Use glass cleaner or isopropyl alcohol to clean the print surface.
- Children under 10 years old should not use the printer without supervision.
- This machine is equipped with a security protection mechanism. Do not manually move the nozzle or printing platform mechanism manually while booting up, otherwise the device will automatically power off for safety.
- Users should comply with the laws and regulations of the corresponding countries and regions where the equipment is located (used), abide by professional ethics, pay attention to safety obligations, and strictly prohibit the use of our products or equipment for any illegal purposes. Creality will not be responsible for any violators' legal liability under any circustance.

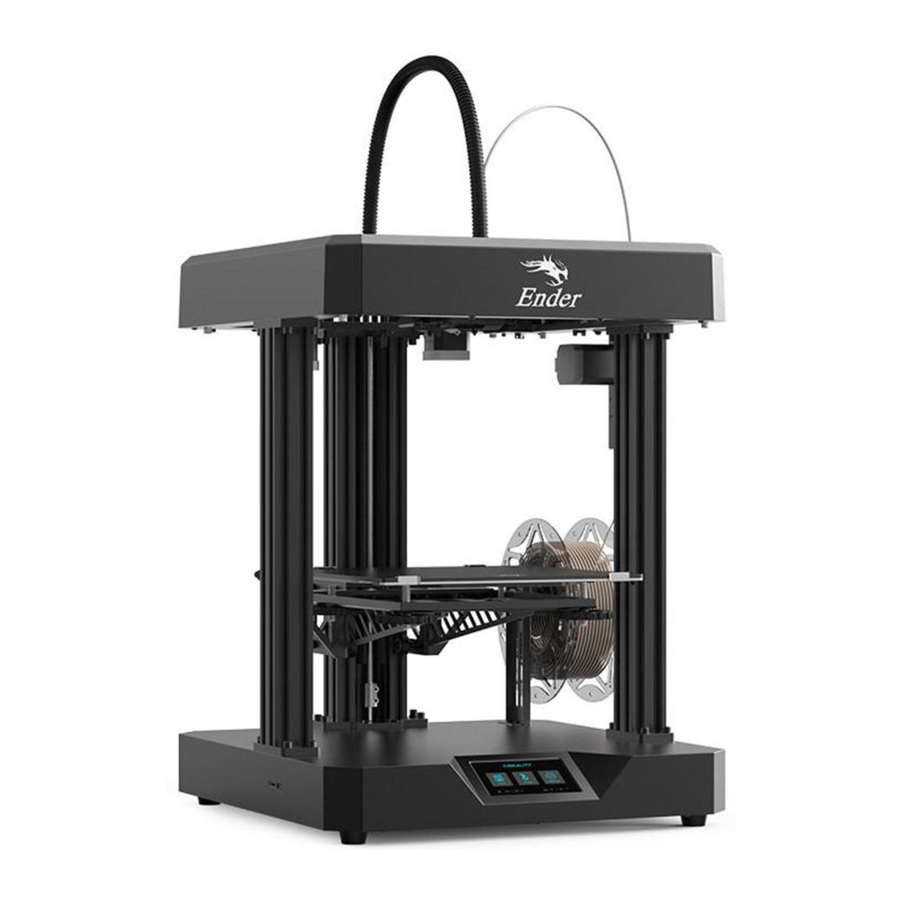
Introduction

- Nozzle Kit
- Upper Cover
- Printing Platform
- Bed Leveling Nut
- LCD Screen
- X Axis Motor
- Remote Extruder
- Filament Detector
- Filament Holder
- Power Cable Connection
- Voltage switching switch
- Bellows
- Z Axis Limit Switch
- X Axis Limit Switch
- Storage card slot & Type-C interface
- Teflon tube
- Y-Axis Limit Switch
- Y-Axis Motor
- Sliding rails
- E-Axis Motor
Equipment Parameters
| Basic Parameters | |
| Model | Ender-7 |
| Printing Size | 250*250*300mm |
| Molding Tech | FDM |
| Nozzle Number | 1 |
| Slice Thickness | 0.1mm-0.4mm |
| Nozzle Diameter | Standard 0.4mm |
| Precision | ±0.1mm |
| Filamen | 1.75mm PLA |
| File Format | STL/OBJ/AMF |
| File Transfer | USB/Storage card |
| Slice Software | Creality Slicer/Cura/Repetier-Host/Simplify3D |
| Rated Valtage | Input: AC115/230V 50/60Hz Output: DC 24V |
| Rated Power | 350W |
| Bed Temp | ≤100℃ |
| Nozzle Temp | ≤260℃ |
| Resume Printing | Yes |
| Filament Detector | Yes |
| Language | 中文/ English/ Español/ Deutsche/ Français/ Pусский/ Português/ Italiano/ Türk |
| Operating System | Windows XP/7/8/10 MAC/Linux |
| Printing Speed | ≤250mm/s |
Parts List


Tips: the above accessories are for reference only, in kind prevail!
Install Profile


Install the Printing Platform


Install Top Component


Install Filament Holder

Install Z-axis Cover

Cable Connection


Connect the heated bed cable.

Connect the Z-axis motor cable.

Note: Align the male plug with the female plug and insert.
Solution for V-wheel jamming of heated bed plate

Gently dial the V-wheel manually to check whether it is idling. If idling happens, please use an open-ended wrench to adjust the off-center separation pillar according to the illustrated direction, so that the V wheel is not idling.
Click back to the origin in the interface after power-on, and then go on moving the Z axis independently. Put your hand on the printing platform to observe whether the platform is stuck. If it is, please adjust the off-center separation pillar in the opposite direction according to the illustrated direction to make the V-wheel move smoothly.
Bed Leveling
Choose setting-leveling-Aid-leveling, clicking number, clicking number 


 Note: The UI information is only for reference, the acutal UI may be different

Move the nozzle the front/left leveling screw and adjust the platform height by turning the knob underneath (The thickness of a piece of A4 paper).
 | ||
 |  |  The nozzle is too far away from the platform, so the consumables can not adhere to the platform. |
 |  |  Filament are extruded evenly, just sticking on the platform. |
 |  |  The nozzle is too close to the platform, and the filament are not extruded enough, even scraping the platform. |


Use a piece of A4 paper (standard printer paper) to assist with the adjustment, making sure that the nozzle lightly scratches the paper.
Complete the adjustment of the screw on all 4 corners. Repeat above steps 1-2 times if necessary. Keep adjusting until theere is slight resistance on the A4 paper from the nozzle.
Preheating

Load Filament

When you wait for the temperature to rise, hang the filament over the Filament Holder.
For smoother Load Filament, the end of the filament should be placed as shown above.

When the current temperature reaches the target temperature, pass the consumables through the material detection test, insert the extruder holes into the nozzle position, and wait for the consumables to flow out of the nozzles.
Tips: How to Replace the Filament?
Method 1:
Insert the new filament into filament runout detection module, the indicator light is on. Click the "Resume after filament runout" in the display, and set the nozzle temperature to 200℃. Take out the remaining filament in the filament runout detection module from the lower part of the extruder after the temperature rises. Push the extruding clamp until the filament is sent into the nozzle through the filament runout detection module.
Method 2:
Insert the new filament into filament runout detection module, the indicator light is on, then click the "Resume after filament runout" in the display. When it starts to print, hold the filament and allow it to go through the extruder. (The filament may not be properly fed into the Teflon tube due to bending or other reasons, resulting in failure of resumption).
Start Printing
- Double click to install the software
![]()
- Double click to open the software
- Select language → Next → Select your machine → Next → Finish.

- Open Creality 3D slicer → Load (Read file) → Select file.
![]()


This machine can print at a fast speed, but it is recommended to print at normal speed! Notes: the temperature of the nozzle is set according to the printing speed. Take PLA as an example:
| Cutting speed | 60mm/s | 125mm/s | 250mm/s |
| Nozzle temperature | Around 200℃ | Around 210℃ | Around 220℃ |
The printing temperature is different owing to the variety of PLA filaments. Please refer to the actual situation.
- Generate G-code, and save the gcode file to storage card.
![]()
- Insert the storage card → Print → Select the file to be printed


 File names must be Latin letters or numbers, not Chinese characters or other special symbols
Notes: For details on the software instructions, please refer to the slicing software manual in the storage card!

Please don't insert or remove the storage card during printing.
Maintenance
Disassemble the upper cover
First move the nozzle unit to where close to the origin.

Diagram 1: Remove the screws used for fixing of top cover,

Diagram 2: Press the position indicated by red arrow from the inside, open the buckles on both sides of the top cover and move them upward simultaneously disengage the buckles, and the top cover is removed.

Diagram 1: Move the nozzle unit to where close to the origin first before assembly.

Diagram 2: Then align the positioning pins of the upper cover with the holes of the mounting plate.
Press the upper cover down again, and then lock the removed screws to the corresponding positions.
Equipment Maintenance
Maintenance of sliding rails/sliding blocks:
Three sliding rails and sliding blocks in the X/Y line should be periodically maintained (generally per 3-6 months).
When surfaces of sliding rails lack the lubricant or there is abnormal sound during the operation, it means that balls in sliding blocks lack the lubricant and lubricating grease or lubricating fluid should be applied on the sliding rails.

Circuit Wiring

Trouble-shooting

SHENZHEN CREALITY 3D TECHNOLOGY CO., LTD.
Add: 18F,JinXiuHongDu Building, Meilong Blvd., Longhua Dist.,
Shenzhen, China 518131
Official Website: www.creality.com
Tel: +86 755-8523 4565
E-mail: info@creality.com cs@creality.com
Documents / Resources
References
![www.creality.com]() Creality - Global Leader in Consumer-Level 3D Printer Ecosystems and Creator
Creality - Global Leader in Consumer-Level 3D Printer Ecosystems and Creator![www.creality.com]() 3D Printer Slicer Software& Firmware Download - Creality 3D
3D Printer Slicer Software& Firmware Download - Creality 3D
Download manual
Here you can download full pdf version of manual, it may contain additional safety instructions, warranty information, FCC rules, etc.
Advertisement


Need help?
Do you have a question about the Ender-7 and is the answer not in the manual?
Questions and answers