Avnet MaaXBoard Mini User Manual
Yocto
Hide thumbs
Also See for MaaXBoard Mini:
- User manual (59 pages) ,
- Hardware user manual (45 pages) ,
- User manual (39 pages)
Table of Contents
Advertisement
Quick Links
Advertisement
Table of Contents

Related Manuals for Avnet MaaXBoard Mini


Summary of Contents for Avnet MaaXBoard Mini
- Page 1 MaaXBoard Mini Yocto User Manual V2.0...
- Page 2 The MaaXBoard Mini single board computer and its related intellectual property are owned by Avnet. Avnet has the copyright of this document and reserves all rights. Any part of the document should not be modified, distributed or duplicated in any approach and form without the written permission issued by Avnet.
- Page 3 MaaxBoard-Mini-Linux-Yocto-User-Manual-v2.0 Revision History Rev. Description Author Date V1.0 Initial version Sandy 20200903 V1.1 Updated Yocto 3.0 Nick 20210322 V2.0 Updated Yocto to Langdale(4.1), BSP_VERSION to lf-6.1.1-1.0.0 Lily 20230714 https://www.avnet.com/wps/portal/us/products/avnet-boards/avnet-board-families/maaxboard/maaxboard-mini...
-
Page 4: Table Of Contents
MaaxBoard-Mini-Linux-Yocto-User-Manual-v2.0 Catalog Chapter 1 Introduction ............................7 1.1 Target Board: MaaXBoard Mini ......................7 1.2 Introduction ............................7 1.3 Feature List ............................7 Chapter 2 Quick Start .............................9 2.1 Boot from SDCard ..........................9 2.2 Boot from eMMC ..........................10 2.3 Login system ...........................10 2.3.1 Login Directly ........................10... - Page 5 3.13 UART ............................35 3.13.1 UART 2 ..........................36 3.14 Control 40 Pin Interface ........................36 3.14.1 GPIO ...........................36 3.14.2 SPI ............................37 3.14.3 IIC ............................37 3.14.4 PWM ........................... 38 3.15 Procedure to Increase eMMC Partition Size ................39 https://www.avnet.com/wps/portal/us/products/avnet-boards/avnet-board-families/maaxboard/maaxboard-mini...
- Page 6 4.2 Program Images Using uuu ......................42 4.2.1 Preparation ........................... 42 4.2.2 Program the Image under Windows OS ................43 4.2.3 Program the Image under Ubuntu OS .................45 Chapter 5 Appendix ............................47 5.1 Hardware Documents ........................47 5.2 Software Documents ........................47 5.3 Contact Information ........................47 https://www.avnet.com/wps/portal/us/products/avnet-boards/avnet-board-families/maaxboard/maaxboard-mini...
-
Page 7: Chapter 1 Introduction
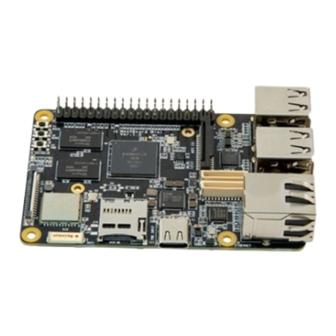
MaaXBoard Mini 1.1 Target Board: The MaaXBoard Mini is a development board developed by Avnet, Which is a low-cost, NXP i.MX 8M Mini processor-based, single-board computer ideal for embedded computing and smart edge IoT applications. The i.MX 8M Mini family of application processors are based on the Arm® Cortex®-A53 and Cortex-M4 cores, which provide industry-leading audio, voice and video processing for applications that scale from consumer home audio to industrial building automation and embedded computers. - Page 8 4 USB 2.0 can work in host & device mode 2 x UART debug ports from USB 2.0 Device Pi HAT 40 Pin Expansion Interface (I2C,UART,SPI,PWM and GPIO) WIFI & BLE 4.1 MIPI-DSI display MIPI-CSI Camera/USB Camera https://www.avnet.com/wps/portal/us/products/avnet-boards/avnet-board-families/maaxboard/maaxboard-mini...
-
Page 9: Chapter 2 Quick Start
MaaxBoard-Mini-Linux-Yocto-User-Manual-v2.0 Chapter 2 Quick Start The default version of MaaXBoard Mini supports SD Card. Avnet also provides eMMC version for users to customize. To program the image into SD Card or eMMC, refer to Chapter 4 Program or update the system Images. -
Page 10: Boot From Emmc
Users could also connect keyboard and mouse to MaaXBoard Mini to login Yocto system. 2.2 Boot from eMMC If you are using the eMMC version, the boot process is the same with boot from SD card, just ignore insert SD Card step. -
Page 11: Login From Ssh
TX errors 0 dropped 0 overruns 0 carrier 0 collisions 0 2.3.3.2 Login Command line In this example, the IP of MaaXBoard Mini is 192.168.2.246, enter following command in command line window to connect: ssh root@192.168.2.246. Enter yes in the first connection, then will login to MaaXBoard Mini, enter exit to logout. - Page 12 MaaxBoard-Mini-Linux-Yocto-User-Manual-v2.0 2.3.3.3 PuTTY PuTTY support SSH, setting method as follows: 1. Run PUTTY, in Connection->SSH->Kex, change the sequence of algorithm. 2. In Session, enter IP address, e.g. 192.168.2.246, port 22, and Connection type SSH, then click Open. https://www.avnet.com/wps/portal/us/products/avnet-boards/avnet-board-families/maaxboard/maaxboard-mini...
- Page 13 MaaxBoard-Mini-Linux-Yocto-User-Manual-v2.0 3. In the first connection, click Y in the popout window. 4. Enter username as “root” to login, enter exit to logout. https://www.avnet.com/wps/portal/us/products/avnet-boards/avnet-board-families/maaxboard/maaxboard-mini...
-
Page 14: Chapter 3 Feature Configuration & Introduction
Here is the default setting in uEnv.txt: # Refer to readme.txt for more information on setting up U-Boot Env # Device tree base file fdt_file=maaxboard-mini.dtb https://www.avnet.com/wps/portal/us/products/avnet-boards/avnet-board-families/maaxboard/maaxboard-mini... - Page 15 Mount the first partition of SD card or eMMC to the system, Then use nano or vi command to modify the uEnv.txt. After the modification, execute sync and reboot command to make it effect. root@maaxboardmini:~# mkdir mount https://www.avnet.com/wps/portal/us/products/avnet-boards/avnet-board-families/maaxboard/maaxboard-mini...
-
Page 16: User Led
3.2 USER LED User can control the 2 single color LED indicators, LED0 and LED1 (corresponding to usr_led and sys_led) on MaaXBoard Mini Board. Execute the following instructions in serial terminal to control them. Turn off the LEDs: root@maaxboardmini:~# echo 0 > /sys/class/leds/usr_led/brightness root@maaxboardmini:~# echo 0 >... - Page 17 Input device name: "30370000.snvs:snvs-powerkey" Supported events: Event type 0 (EV_SYN) Event type 1 (EV_KEY) Event code 116 (KEY_POWER) Properties: Testing ... (interrupt to exit) Event: time 1596184675.913800, type 1 (EV_KEY), code 116 (KEY_POWER), value 1 Event: time 1596184675.913800, -------------- SYN_REPORT ------------ https://www.avnet.com/wps/portal/us/products/avnet-boards/avnet-board-families/maaxboard/maaxboard-mini...
-
Page 18: Display Output
MaaXBoard Mini supports MIPI-DSI screen display. Users can connect the screen to MaaXBoard Mini before boot up the system according to the following table. When the system boot up, the screen will print the related startup message and login UI. Users can connect keyboard to login the MaaXBoard Mini file system. -
Page 19: Mipi-Dsi Screen
Event type 1 (EV_KEY) Event code 59 (KEY_F1) Event code 60 (KEY_F2) Event code 61 (KEY_F3) Event code 62 (KEY_F4) Event code 63 (KEY_F5) Event code 64 (KEY_F6) Event code 125 (KEY_LEFTMETA) Event code 330 (BTN_TOUCH) Event type 3 (EV_ABS) https://www.avnet.com/wps/portal/us/products/avnet-boards/avnet-board-families/maaxboard/maaxboard-mini... - Page 20 Property type 1 (INPUT_PROP_DIRECT) Testing ... (interrupt to exit) Event: time 1689060996.501590, type 3 (EV_ABS), code 57 (ABS_MT_TRACKING_ID), value 0 Event: time 1689060996.501590, type 3 (EV_ABS), code 53 (ABS_MT_POSITION_X), value 291 Event: time 1689060996.501590, type 3 (EV_ABS), code 54 (ABS_MT_POSITION_Y), value 567 https://www.avnet.com/wps/portal/us/products/avnet-boards/avnet-board-families/maaxboard/maaxboard-mini...
-
Page 21: Audio
Use the aplay -l and arecord -l commands to list the audio playback- and record- device IDs. 3.6.1.1 USB Audio Device MaaXBoard Mini supports USB audio device (which do not need specified driver) to play audio. You can record and play audio from USB audio device. Connect a USB audio device to the USB port on MaaXBoard Mini, Use command **arecord -l** and **aplay -l** to check that the device id. -
Page 22: Play Audio File
ID. Change those parameters according to your device. 3.6.3 Play Audio file MaaXBoard Mini can play audio files with the connected USB or Bluetooth device using the following commands: root@maaxboardmini:~# pulseaudio -D -v root@maaxboardmini:~# aplay audio_sample.wav root@maaxboardmini:~# gst-play-1.0 audio_sample.wav... -
Page 23: Video
Yocto system support play video file in mp4 format, the largest support resolution is 4K, Use gplay-1.0 or gst-launch-1.0 command to play video files. Connect MaaXBoard Mini to the MIPI-DSI screen display, take video.mp4 file as an example, select one of the following four commands and enter it in the serial terminal. -
Page 24: Take Photo
1500 inet 192.168.2.230 netmask 255.255.255.0 broadcast 192.168.2.255 inet6 fe80::b876:34ff:fe59:e77b prefixlen 64 scopeid 0x20<link> ether ba:76:34:59:e7:7b txqueuelen 1000 (Ethernet) RX packets 1159 bytes 103974 (101.5 KiB) RX errors 0 dropped 0 overruns 0 frame 0 https://www.avnet.com/wps/portal/us/products/avnet-boards/avnet-board-families/maaxboard/maaxboard-mini... -
Page 25: Set Static Ip
TX packets 88 bytes 7836 (7.6 KiB) TX errors 0 dropped 0 overruns 0 carrier 0 collisions 0 root@maaxboardmini:~# ping www.avnet.com PING www.avnet.com (184.50.161.105) 56(84) bytes of data. 64 bytes from a184-50-161-105.deploy.static.akamaitechnologies.com (184.50.161.105): icmp_seq=1 ttl=50 time=315 ms 64 bytes from a184-50-161-105.deploy.static.akamaitechnologies.com (184.50.161.105): icmp_seq=2 ttl=50 time=352 ms 64 bytes from a184-50-161-105.deploy.static.akamaitechnologies.com (184.50.161.105):... -
Page 26: Usb 2.0 Interface
3.10 USB 2.0 Interface MaaXBoard Mini supports 4 USB Interfaces, the lower one in J2 is USB0, the upper one in J2 is USB3, the lower one in J4 is USB2, the upper one in J4 is USB1. All of the 4 USB 2.0 interfaces support USB HOST function, only USB0 supports USB Device function. -
Page 27: Wi-Fi
The on-board Wi-Fi module support 2.4G/5G network and hotspot. 3.11.1 Enable Wi-Fi User can create wpa_supplicant.conf in /run/media/boot-mmcblk0p1/ to load the Wi-Fi driver and firmware (take "TEST23"&"12345678" as an example), Run the following commands to start Wi-Fi: root@maaxboardmini:~# vi /run/media/boot-mmcblk0p1/wpa_supplicant.conf https://www.avnet.com/wps/portal/us/products/avnet-boards/avnet-board-families/maaxboard/maaxboard-mini... - Page 28 TX packets 158 bytes 15391 (15.0 KiB) TX errors 0 dropped 0 overruns 0 carrier 0 collisions 0 root@maaxboardmini:~# ping www.avnet.com -I wlan0 PING www.avnet.com (184.50.161.105) 56(84) bytes of data. 64 bytes from a184-50-161-105.deploy.static.akamaitechnologies.com (184.50.161.105): icmp_seq=1 ttl=50 time=315 ms 64 bytes from a184-50-161-105.deploy.static.akamaitechnologies.com (184.50.161.105): icmp_seq=2 ttl=50 time=352 ms https://www.avnet.com/wps/portal/us/products/avnet-boards/avnet-board-families/maaxboard/maaxboard-mini...
-
Page 29: Connect Wi-Fi Manually
Run the following command to check wireless connection, it will print the following info once connected: root@maaxboardmini:~# iwconfig wlan0 | grep ESSID wlan0 IEEE 802.11 ESSID:"TEST23" Run the command to get the IP address: root@maaxboardmini:~# udhcpc -i wlan0 -n -R https://www.avnet.com/wps/portal/us/products/avnet-boards/avnet-board-families/maaxboard/maaxboard-mini... -
Page 30: Wi-Fi Hotspot
MaaxBoard-Mini-Linux-Yocto-User-Manual-v2.0 root@maaxboardmini:~# ifconfig wlan0 Test Wi-Fi network with ping command: root@maaxboardmini:~# ping www.avnet.com -I wlan0 PING www.avnet.com (184.50.161.105) 56(84) bytes of data. 64 bytes from a184-50-161-105.deploy.static.akamaitechnologies.com (184.50.161.105): icmp_seq=1 ttl=50 time=315 ms 64 bytes from a184-50-161-105.deploy.static.akamaitechnologies.com (184.50.161.105): icmp_seq=2 ttl=50 time=352 ms 64 bytes from a184-50-161-105.deploy.static.akamaitechnologies.com (184.50.161.105):... -
Page 31: Bluetooth 4.1
-A FORWARD -i eth0 -o wlan0 -m state --state RELATED,ESTABLISHED -j ACCEPT root@maaxboardmini:~# iptables -A FORWARD -i wlan0 -o eth0 -j ACCEPT 3.12 Bluetooth 4.1 3.12.1 Initialize the Bluetooth Module Execute the following instructions on the serial terminal: https://www.avnet.com/wps/portal/us/products/avnet-boards/avnet-board-families/maaxboard/maaxboard-mini... -
Page 32: Connect Bluetooth Device
3.12.3 Configure A2DP sink or source When connected to a remote Bluetooth device that supports the A2DP sink feature, MaaXBoard Mini can be configured as an A2DP Source. This type of bluetooth devices are usually bluetooth headsets, https://www.avnet.com/wps/portal/us/products/avnet-boards/avnet-board-families/maaxboard/maaxboard-mini... - Page 33 UUID: A/V Remote Control Target (0000110c-0000-1000-8000-00805f9b34fb) UUID: A/V Remote Control (0000110e-0000-1000-8000-00805f9b34fb) UUID: PnP Information (00001200-0000-1000-8000-00805f9b34fb) UUID: Generic Access Profile (00001800-0000-1000-8000-00805f9b34fb) UUID: Generic Attribute Profile (00001801-0000-1000-8000-00805f9b34fb) Modalias: usb:v1D6Bp0246d0525 Connect Bluetooth device: root@maaxboardmini:~# bluetoothctl [bluetooth]# power on [bluetooth]# pairable on [bluetooth]# default-agent [bluetooth]# scan on https://www.avnet.com/wps/portal/us/products/avnet-boards/avnet-board-families/maaxboard/maaxboard-mini...
- Page 34 Play the audio file using pulseaudio play utility, the music will be played from the connected Bluetooth device: root@maaxboardmini:~# gst-play-1.0 audio_sample.wav root@maaxboardmini:~# mpg123 audio_sample1.mp3 root@maaxboardmini:~# paplay audio_sample.wav Use the following command to adjust the Bluetooth speaker playback volume, where < volume_level> Set to 0 for silent, 0x10000 for normal volume. https://www.avnet.com/wps/portal/us/products/avnet-boards/avnet-board-families/maaxboard/maaxboard-mini...
-
Page 35: Send Files
[CHG] Transfer /org/bluez/obex/client/session0/transfer0 Status: complete [DEL] Transfer /org/bluez/obex/client/session0/transfer0 [94:87:E0:DF:90:2D]# exit In above instructions, 94:87:E0:DF:90:2D is the address of target device, change it according to your device. 3.13 UART MaaXBoard Mini supports 2 UART interface. MaaXBoard Mini (CPU) Interface Type https://www.avnet.com/wps/portal/us/products/avnet-boards/avnet-board-families/maaxboard/maaxboard-mini... -
Page 36: Uart2
GPIO5_IO28 GPIO5_IO6 SPI1_SCLK SPI1_SS GPIO5_IO9 PWM1 GPIO1_IO1 GPIO5_IO19 SDA3 SCL3 GPIO5_IO18 GPIO1_IO15 GPIO GPIO4_IO27 GPIO GPIO GPIO5_IO5 GPIO5_IO4 GPIO/PWM2 GPIO4_IO31 GPIO/SAI3_TXFS 35 GPIO GPIO3_IO16 GPIO1_IO10 GPIO SAI3_RXD GPIO4_IO30 SAI3_TXD GPIO5_IO1 pinum= $(group-1) \* $groupin + $pin + $pinbase(pinbase=0, groupin=32) https://www.avnet.com/wps/portal/us/products/avnet-boards/avnet-board-families/maaxboard/maaxboard-mini... -
Page 37: Spi
RX | 00 00 00 00 00 00 00 00 00 00 00 00 00 00 00 00 00 00 00 00 00 00 00 00 00 00 00 00 00 00 00 00 |........| 3.14.3 IIC To use the SPI of the 40-pins interface, enable the following options in uEnv.txt : https://www.avnet.com/wps/portal/us/products/avnet-boards/avnet-board-families/maaxboard/maaxboard-mini... -
Page 38: Pwm
To use the PWM of the 40-pins interface, enable the following options in uEnv.txt : Add dtoverlay_pwm=1 to uEnv.txt, then execute sync and reboot commands to make it effect. Configure PWM1: root@maaxboardmini:~# echo 0 > /sys/class/pwm/pwmchip0/export root@maaxboardmini:~# echo 1 > /sys/class/pwm/pwmchip0/pwm0/enable root@maaxboardmini:~# echo 1000000 > /sys/class/pwm/pwmchip0/pwm0/period Connect PWM1(PIN26) to a test LED https://www.avnet.com/wps/portal/us/products/avnet-boards/avnet-board-families/maaxboard/maaxboard-mini... -
Page 39: Procedure To Increase Emmc Partition Size
[ 3612.243815] EXT4-fs (mmcblk0p2): resized filesystem to 3781632 Expand rootfs size successfully, it will be enlarged upon the next reboot. View again, the partition size has been expanded: root@maaxboardmini:~# df -h Filesystem Size Used Avail Use% Mounted on /dev/root 14G 2.1G 12G 16% / https://www.avnet.com/wps/portal/us/products/avnet-boards/avnet-board-families/maaxboard/maaxboard-mini... - Page 40 991M 0 991M 0% /dev/shm tmpfs 397M 10M 387M 3% /run tmpfs 4.0M 0 4.0M 0% /sys/fs/cgroup tmpfs 991M 4.0K 991M 1% /tmp tmpfs 991M 168K 990M 1% /var/volatile tmpfs 199M 12K 199M 1% /run/user/0 /dev/mmcblk0p1 53M 37% /home/root/mount https://www.avnet.com/wps/portal/us/products/avnet-boards/avnet-board-families/maaxboard/maaxboard-mini...
-
Page 41: Chapter 4 Program Or Update The System Images
4.1.1 Program the System Image into SD Card under Windows OS Firstly, you should prepare a SD card, which is no less than 8GB of capacity . Then, download and install “Win32 Disk Imager” from: https://sourceforge.net/projects/win32diskimager/. Select the system images file: Click “Write” button to program the images: https://www.avnet.com/wps/portal/us/products/avnet-boards/avnet-board-families/maaxboard/maaxboard-mini... -
Page 42: Program The System Image Into Sd Card Under Linux Os
$ sync 4.2 Program Images Using uuu USB0 (The lower one in USB interface HUB1) of MaaXBoard Mini supports programming mode. Connect USB0 and PC before power on the board. The system will enter programming mode. Then users could program the system image to the development board using uuu tool. -
Page 43: Program The Image Under Windows Os
MaaXBoard Mini Linux system image file, e.g: avnet-image-full-maaxboard-mini-20230711025928.rootfs.wic u-boot-imx8m-mini.imx U-boot image file: , usually the same version as the one contained in the system Image 4.2.2 Program the Image under Windows OS 4.2.2.1 Driver for Windows OS In Windows OS, connect USB0 to PC, then power on the board. Check the device manager to see if need... - Page 44 .\uuu -b sd_all u-boot-imx8m-mini.imx avnet-image-full-maaxboard-mini-20230711025928.rootfs.wic When programming finished, power down MaaXBoard Mini, disconnect the USB connection between USB0 and PC, power on the board again, then the board will boot with the new system image. 4.2.2.3 Program the Image into eMMC under Windows OS Connect USB0 (the lower one in USB 2.0 interface J2) and PC using USB type A cable.
-
Page 45: Program The Image Under Ubuntu Os
MaaxBoard-Mini-Linux-Yocto-User-Manual-v2.0 When programming finished, power down MaaXBoard Mini, disconnect the USB connection between USB0 and PC, power on the board again, the board will boot with the new system image. 4.2.3 Program the Image under Ubuntu OS 4.2.3.1 Program the Image into SD Card under Ubuntu OS Connect USB0 (the lower one in USB 2.0 interface J2) and PC using USB type A cable. - Page 46 MaaxBoard-Mini-Linux-Yocto-User-Manual-v2.0 https://www.avnet.com/wps/portal/us/products/avnet-boards/avnet-board-families/maaxboard/maaxboard-mini...
-
Page 47: Chapter 5 Appendix
MaaXBoard Mini Hardware user manual. 5.2 Software Documents MaaXBoard Mini supports Yocto Linux system, for additional information, please refer to the following documents: MaaXBoard Mini Linux Yocto UserManual Describes how to boot MaaXBoard Minni and aspects of the BSP functionality (This document)
Need help?
Do you have a question about the MaaXBoard Mini and is the answer not in the manual?
Questions and answers