Table of Contents
Advertisement
Advertisement
Table of Contents

Subscribe to Our Youtube Channel
Related Manuals for Creality Ender-3 V3


Summary of Contents for Creality Ender-3 V3
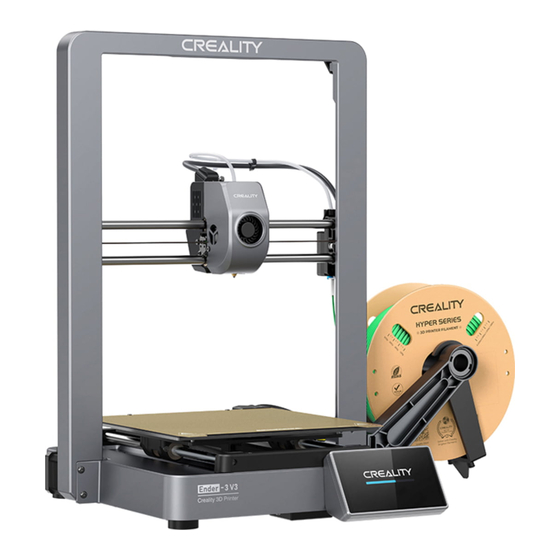
- Page 1 Ender-3 V3 Create reality,achieve dreams Ender-3 V3 3D Printer User Manual V1.0...
- Page 2 Creality is always ready to provide you with high-quality services. If you encounter any issues or have any questions when using our products, please use the contact information at the end of this manual to contact us. To further improve your user experience, you can find more about our devices via the following methods:...
- Page 3 Creality will not be responsible for any violators' legal liability under any circumstance; 12. Tip: Do not plug in or unplug wires on a charged basis.
-
Page 4: Table Of Contents
Contents ······················································································· 1. About the Printer 01-01 ····························································································· 2. Parts List 02-02 ····················································································· 3. Assembly Procedure 03-06 ········································································ 3.1 Material Rack Assembly Installation 03-03 ········································································ 3.2 Gantry Frame Assembly Installation 04-04 ··············································································· 3.3 Touch screen Installation 05-05 ····················································································· 3.4 Equipment Wiring 06-06 ·································································... -
Page 5: About The Printer
1.About the Printer Nozzle Kit X-axis & Z-axis limit switch Model cooling fan Filament Detection X-axis Kit Auxiliary cooling fan Material Rack Assembly Printing Platform X&Z-axis motor (Right) Touch screen Power Switch USB flash disk port X&Z-axis motor (Left) Power Outlet... -
Page 6: Parts List
Teflon tube Hexagon Flat Round Tool kit Head Screw M4*8 ×8 Cutting plier Black tie ×5 Wire Clip ×3 Filament Quick Installation Guide Ender-3 V3 Quick Installation Nozzle cleaner Extruder cable cover USB flash disk Guide V1.0 After-sales After-Sales Services Card... -
Page 7: Assembly Procedure
3.Assembly Procedure 3.1 Material Rack Assembly Installation ① Install the material rack and material barrel according to the diagram; ② Align the installed material rack component holes with the locking positions to the immediate right of the gantry frame and secure them downwards smoothly. ①... -
Page 8: Gantry Frame Assembly Installation
3.Assembly Procedure 3.2 Gantry Frame Assembly Installation ① Select the correct voltage mode based on the local power grid voltage; ② Place the gantry frame assembly into the slots on the base: A. First, use four M4×8 screws to align and secure the left and right screw holes on the base; B. -
Page 9: Touch Screen Installation
3.Assembly Procedure 3.3 Touch screen Installation ① ① Connect the touchscreen to the base screen using the flexible flat cable; ② Snap the buckle on the back of the touch screen into the slots on the base. Follow the illustrated direction for the proper insertion orientation. -
Page 10: Equipment Wiring
3.Assembly Procedure 3.4 Equipment Wiring Secure it with cable ties Fixing position of cable ties ② A. Connect the extruder kit first; B. Fix ① First connect the filament detection the extruder cable with cable ties; C. Install line,then clip the nozzle line into the wire the extruder cable cover;... -
Page 11: About The Power-On Guide And User Interface
4.About the Power-on Guide and User Interface 4.1 Power-on guide The current interface is for reference only. Due to the continuous upgrading of functions, it shall be subject to the latest software/firmware UI published on the official website. - Page 12 4.About the Power-on Guide and User Interface Tips: The current interface is for reference If any abnormalities occur during the self-check process, please refer to only. Due to the continuous upgrading the FAQ to check for possible machine malfunctions; of functions, it shall be subject to the Alternatively, scan the QR code for “fault reporting"...
-
Page 13: About The User Interface
4.About the Power-on Guide and User Interface 4.2 About the User Interface Nozzle temperature Hotbed temperature Home Parameters can be manually set * You can configure functions such as extruder temperature and hotbed temperature through the homepage; Prepare * You can configure functions such as axis movement/temperature control, extrude/retract, and fan cooling through the preparation interface. The current interface is for reference only. - Page 14 4.About the Power-on Guide and User Interface Print file preview * Press and hold on the model to select multiple models and copy them to a USB flash disk * Local and USB flash disk model files can be managed via the print file preview interface. Print interface fan cooling...
- Page 15 4.About the Power-on Guide and User Interface The current interface is for reference only. Due to the continuous upgrading of functions, it shall be subject to the latest software/firmware UI published on the official website. * You can configure functions such as system and network settings through the settings interface.
-
Page 16: First Printing
5.First Printing 5.1 Filament Loading ① Input the nozzle temperature on the screen and wait ② Cut the front of the filament at 45° and break it for it to heat up to the target temperature; off straight; ④ A. Connect the Teflon tube to filament runout sensor; ③... -
Page 17: Lan Printing
5.First Printing 5.2 LAN printing ※ Install Creality Print slicing software by opening the random data on the USB flash disk. ※ Log in to the official website to download for installation: https://www.crealitycloud.com/software-firmware/software?type=7 ① Select “Language" and “Server" ② Add the printer Open ③... - Page 18 5.First Printing ⑤ Set up material type ⑥ Set the print layer height and click on “Slice" ⑦ After slicing is done, click on “LAN printing" ⑧ Add equipment: can be added either by “Scan Add" or “Manual Add". The current interface is for reference only. Due to the continuous upgrading of functions, it shall be subject to the latest software/-firmware UI published on the official website.
- Page 19 5.First Printing ⑧ Add a device: a. Add by scanning → Select a device ⑨ Device List Click “Settings" → “Network" to view the IP address ⑧ Add a device: b. Add a device by manually entering the IP address ⑩...
-
Page 20: Usb Flash Disk Printing
5.First Printing 5.3 USB flash disk Printing DIP switch ② Select the model from the USB flash disk ③ Click on “Print" ① Insert the USB flash disk into USB port Tips: The current interface is for reference only. Due to the continuous upgrading ①... -
Page 21: Functional Specification
6.Functional Specification 6.1 Filament Retreat Method 1: Manual retract ① Input the nozzle temperature on the screen and wait for it to ② A. Unlock the dip switch; B. Hold the Teflon tube connector above the extruder; heat up to the target temperature; C. - Page 22 6.Functional Specification Method 2: Auto retract ① Click on “Retract"; ② Waiting for the retraction process to complete; The current interface is for reference only. Due to the continuous upgrading of functions, it shall be subject to the latest software/firmware UI published on the official website.
-
Page 23: Auto Extrude
6.Functional Specification 6.2 Auto extrude ① A.Unlock the DIP switch; B.Insert the filament into the deepest ② Click on “Extrude"; part of the Teflon tube until it cannot be moved; C.Lock the DIP switch. The current interface is for reference only. -
Page 24: Equipment Maintenance
7.Equipment Maintenance 7.1 Platform plate removal and maintenance ① a. When printing is finished, wait for the platform plate to cool ② If there are residual filaments on the ③ If the first layer of the model is not before removing the printing platform with the model attached; platform plate, scrape them off... -
Page 25: Equipment Parameters
8.Equipment Parameters Equipment Parameters Model Ender-3 V3 Modeling Technolog Modeling Dimensions 220*220*250mm Leveling Method Auto-leveling Number of Nozzles 1pcs Extruder Diameter 0.4mm Slice Thickness 0.1-0.35mm Precision ±0.2mm Nozzle Temperature ≤300℃ Hotbed Temperature ≤110℃ Filaments PLA/TPU/PETG/ABS/PLA-CF/PETG-CF/CR-carbon Rated Power 350W Input voltage... -
Page 26: Circuit Wiring
9.Circuit Wiring Filament Detection RGB screen DC 24V USB flash disk Hotbed (BED) AI LiDAR Heating (NC) Fan (NC) Hotbed thermistor Bottom shell fan Fan (NC) Fan (NC) Extruder Hotbed X-axis Y-axis Z-axis X limit Z limit commu- commu- motor motor motor nication... - Page 27 FCC WARNING This device complies with part 15 of the FCC Rules. Operation is subject to the following two conditions: (1) this device may not cause harmful interference, and (2) this device must accept any interference received, including interference that may cause undesired operation.
- Page 28 Due to the differences between different machine models, the actual objects and the images can differ. Please refer to the actual machine. The final explanation rights shall be reserved by Shenzhen Creality 3D Technology Co., Ltd. 18th Floor, JinXiuHongDu Building, Meilong Road, Xinniu Community, Minzhi Street, Longhua District, Shenzhen City, China.
Need help?
Do you have a question about the Ender-3 V3 and is the answer not in the manual?
Questions and answers
Does the dip switch stay locked when printin?
Yes, the DIP switch on the Creality Ender-3 V3 should stay locked during printing.
This answer is automatically generated