Table of Contents
Advertisement
Quick Links
Repair - Parts
SaniSpray HP
Pump for water-based disinfectants approved for spray application only. Not for use with
paints, stains, or other types of coatings. Not approved for use in explosive atmospheres
or hazardous (classified) locations. For professional use only.
1250 psi (8.6 MPa, 86 bar) Maximum Working Pressure
Important Safety Instructions
Read all warnings and instructions in this
manual, in related manuals, and on the
unit before using the equipment. Save
these instructions.
WARNING
CHEMICAL HAZARD
To prevent serious injury:
•
Follow all directions and requirements
on disinfectant label. It is a violation of
federal law to use an EPA-approved
disinfectant in a manner inconsistent
with its labeling.
•
Flush after each use. Never store
disinfectant in equipment.
•
Use only with appropriate personal
protective equipment.
Use only genuine Graco parts.
The use of non-Graco replacement parts may void warranty.
™
750 Pump
844-241-9499
3A7945A
EN
ti11389a
Advertisement
Table of Contents

Related Manuals for Graco SaniSpray HP 750


Summary of Contents for Graco SaniSpray HP 750
- Page 1 • Flush after each use. Never store disinfectant in equipment. • Use only with appropriate personal protective equipment. ti11389a 844-241-9499 Use only genuine Graco parts. The use of non-Graco replacement parts may void warranty.
-
Page 2: Table Of Contents
Disassemble the Pump ....11 Graco Standard Warranty ....18 Assemble the Pump . -
Page 3: Important User Information
Important User Information Important User Information Before using your disinfectant You must also read and follow the information sprayer, read this manual for on the disinfectant container label and ask for complete instructions on proper use a Safety Data Sheet (SDS) from your supplier. and safety warnings. -
Page 4: Warnings
Warnings Warnings The following warnings are for the setup, use, grounding, maintenance, and repair of this equipment. The exclamation point symbol alerts you to a general warning and the hazard symbols refer to procedure-specific risks. When these symbols appear in the body of this manual or on warning labels, refer back to these Warnings. Product-specific hazard symbols and warnings not covered in this section may appear throughout the body of this manual where applicable. - Page 5 Warnings WARNING SKIN INJECTION HAZARD High-pressure disinfectant from gun, hose leaks, or ruptured components will pierce skin. This may look like just a cut, but it is a serious injury that can result in amputation. Get immediate surgical treatment. • Use only to spray surfaces.
- Page 6 Warnings WARNING MOVING PARTS HAZARD Moving parts can pinch, cut or amputate fingers and other body parts. • Keep clear of moving parts. • Do not operate equipment with protective guards or covers removed. • Equipment can start without warning. Before checking, moving, or servicing equipment, follow the Pressure Relief Procedure and disconnect all power sources.
-
Page 7: Repair
Repair Repair Disconnect the Pump • Kit parts indicated with this symbol (*) are available in Packing repair kit 247881. Use all of the parts in the kit for best results. • Parts indicated with this symbol (†) are recommended spare parts. Have all necessary parts on hand. - Page 8 Repair 5. Hold the tie rod flats with a wrench to keep the rods (8†) from turning. Unscrew the nuts (10*). Remove the pump (9†). To prevent injury from crushing or pinching, always use at least two people when lifting, moving, or disconnecting the pump.
-
Page 9: Reconnect The Pump
Repair Reconnect the Pump 3. Make sure the coupling nut (13†) and coupling collars (12*) are in place on the rod. 1. Screw the connecting rod adapter (11*) to the motor shaft. To prevent injury from crushing or pinching, always use at least two people when lifting, moving, or connecting the pump. - Page 10 8. Reconnect all hoses. Fill the packing nut (D) 1/3 full of Graco Throat Seal Liquid. 9. Turn on the electric motor. Run the pump slowly to ensure that it operates properly.
-
Page 11: Disassemble The Pump
Repair Disassemble the Pump 4. Remove the cylinder (2†) from the outlet housing (1). Do not scratch or damage the polished inner surface of the cylinder. Remove the o-rings (3*). 1. Perform the Disconnect the Pump procedure, page 7. 5. Loosen the packing nut (15). Pull the displacement rod (8†) out the bottom of the outlet housing (1). - Page 12 Repair 7. Unscrew the piston body (13†) from the 8. Unscrew the packing nut (15). Remove the bearing displacement rod (8†). Disassemble the piston. (14*) from the packing nut. Remove the throat Inspect the ball (4†) and seat for nicks and packing stack (12*) from the outlet housing (1).
-
Page 13: Assemble The Pump
Repair Assemble the Pump 5. Lubricate and install the piston packing stack (11*) on the piston (13†) with the lips of the v-packings facing up. 1. Install the throat packing stack (12*) into the outlet housing (1), with the lips of the v-packings facing NOTE: The piston packing stack is preassembled to the down. - Page 14 Repair 8. Install an o-ring (3*) on the groove at the bottom of 10. Install the four tie bolts (7) through the outlet the outlet housing (1). Carefully slide the cylinder housing (1) and into the intake valve housing (6†). (2†) into the outlet housing.
-
Page 15: Parts
Parts Parts Lubricate. Do not disassemble throat packing stack (12). Lips of throat packings must face down. Do not disassemble piston packing stack (11). Piston packing stack includes up to three shims (S). Lips of piston packings must face up. Torque to 150-175 ft-lb (203-237 N•m). -
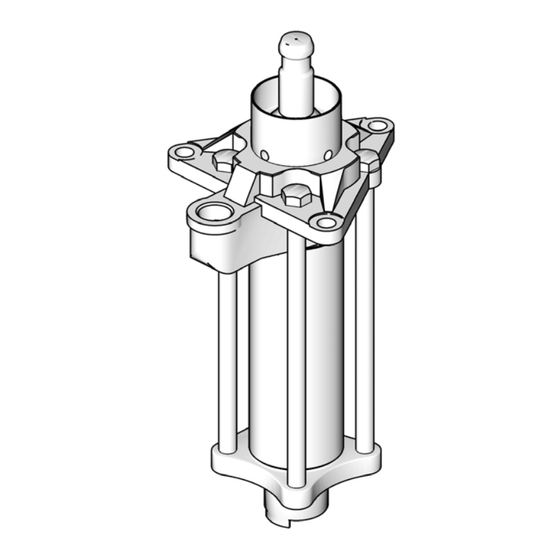
Page 16: Dimensions
Dimensions Dimensions ti11389a Weight in. (mm) in. (mm) lb (kg) 19.0 (483) 13.75 (350) 1-1/2 in. 1 in. 35 (15.8) npt(f) npt(f) 3A7945A... -
Page 17: Technical Specifications
Technical Specifications Technical Specifications SaniSpray HP 750 Pump Metric Maximum fluid working pressure 1250 psi 8.6 MPa, 86 bar 303 and 304 grades of stainless steel, PTFE, carbon-filled Wetted Parts PTFE Notes All trademarks or registered trademarks are the property of their respective owners. -
Page 18: Graco Standard Warranty
Graco warrants all equipment referenced in this document which is manufactured by Graco and bearing its name to be free of defects in material and workmanship on the date of sale by an authorized Graco distributor to the original purchaser for use. Graco will, for a period of ninety (90) days from the date of sale, provide repair parts for equipment determined by Graco to be defective.
Need help?
Do you have a question about the SaniSpray HP 750 and is the answer not in the manual?
Questions and answers