NCR P1532 Kit Instructions
Counter mount for black c730
Hide thumbs
Also See for P1532:
- Kit instructions (11 pages) ,
- User manual (52 pages) ,
- Site preparation manual (23 pages)
Advertisement
Quick Links
Advertisement

Related Manuals for NCR P1532


Summary of Contents for NCR P1532
- Page 1 KIT INSTRUCTIONS P1532 Counter Mount for Black C730 Release 1.0 5934–K311 Issue A...
- Page 2 NCR, therefore, reserves the right to change specifications without prior notice. All features, functions, and operations described herein may not be marketed by NCR in all parts of the world. In some instances, photographs are of equipment prototypes. Therefore, before using this document, consult with your NCR representative or NCR office for information that is applicable and current.
-
Page 3: Revision Record
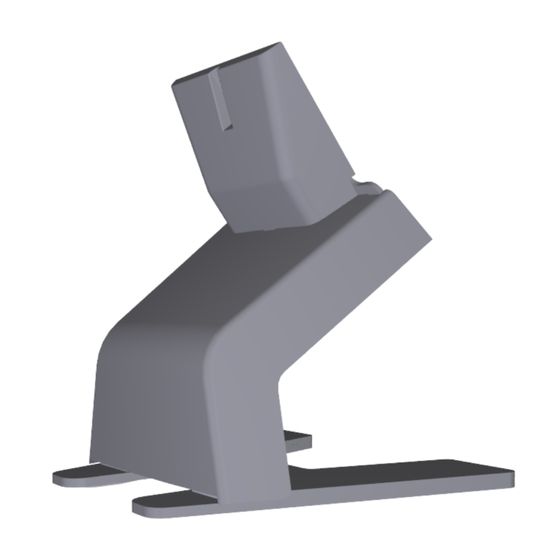
Revision Record Issue Date Remarks Apr 2016 First Issue... - Page 4 Counter Mount for Black C730 Introduction This kit provides a counter mount for a black C730 customer display with Powered USB and DVI - HDMI cables when integrated to the P1532 POS (7734).
-
Page 5: Installation Procedure
Counter Mount for Black C730 Installation Procedure 1. Loosen the screw (1). 2. Remove the Back Connector Cover. - Page 6 Counter Mount for Black C730 3. Remove the screws (2) and the Stand Cover. 4. Attach the black C730 customer display to the stand. Tighten the screws (4).
- Page 7 Counter Mount for Black C730 5. Plug in the DVI and the 12 V Powered USB cables into the dedicated ports. 6. Replace the Stand Cover and secure with the screw (1). 7. Replace the Back Connector Cover and secure with the screws (2). 8.
- Page 8 Counter Mount for Black C730 9. Route the cables under the stand and up through the CableLock™ Cover. 10. Route the cables into the cable clamps. Install the expansion blank plate and cable clamps (2) and secure with screws (2).
- Page 9 Counter Mount for Black C730 Note: If the POS includes an expansion, install the cable clamps under the expansion and secure with screws (2). 11. Close and secure the CableLock™ Cover with a thumbscrew. 12. Connect the cables to the HDMI and 12 V Powered USB ports. Note: Ensure that the USB cables do not hang loose.
Need help?
Do you have a question about the P1532 and is the answer not in the manual?
Questions and answers