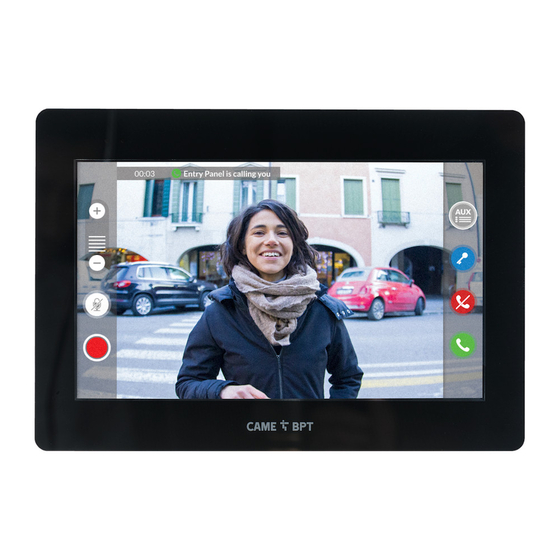
CAME XTS 7 WH WIFI User Manual
Wifi touch-screen speaker video-intercom
Hide thumbs
Also See for XTS 7 WH WIFI:
- User manual (113 pages) ,
- Installation and setting manual (21 pages) ,
- Installation and configuration manual (21 pages)

Related Manuals for CAME XTS 7 WH WIFI


Summary of Contents for CAME XTS 7 WH WIFI
- Page 1 Videocitofono vivavoce Wi-Fi touch screen FB01184M04 XTS 7 WH WIFI XTS 7 BK WIFI IT Italiano XTS 7 WH WFBF EN English FR Français MANUALE PER L’UTENTE RU Pусский...
- Page 2 AVVERTENZE GENERALI Leggere attentamente le istruzioni prima di utilizzare il dispositivo. • L’installazione, la programmazione, la messa in servizio e la manutenzione del prodotto devono essere effet- • tuate soltanto da personale tecnico qualificato ed opportunamente formato nel rispetto delle normative vigenti ivi comprese le osservanze sulla prevenzione infortuni e lo smaltimento imballaggi.
- Page 3 Comandi e segnalazioni presenti sulla home page L’aspetto della home page può variare a seconda della configurazione dell’impianto o dell’interfaccia Utente. Preferiti Posti esterni Contatti Segreteria video Lista Aux Registro chiamate 19:02 Giovedì 01 Feb 2018 Info Indietro Home A Comando esclusione suonerie chiamate; quando H L’icona di colore bianco, indica che il dispositivo il comando è...
- Page 4 UTILIZZO DEL DISPOSITIVO Rispondere ad una chiamata Chiamata da Posto Esterno Sullo schermo viene visualizzata l’immagine del chiamante (se disponibile). L’audio da e verso il chiamante non è attivo. A Toccare il pulsante per rispondere alla chiamata e abilitare la comunicazione audio. B Toccare il pulsante per rifiutare la chiamata e tornare alla home page.
- Page 5 Effettuare una chiamata Dal dispositivo è possibile effettuare chiamate verso altri derivati (intercomunicazione), verso dispositivi connessi attraverso la rete Wi-Fi (App) oppure verso posti esterni. Chiamare un contatto dalla lista preferiti Preferiti Posti esterni Contatti A Toccare l’icona per accedere alla lista dei contatti preferiti.
- Page 6 Aprire la comunicazione verso il posto esterno Preferiti Posti esterni Contatti B Toccare l’icona per accedere alla lista dei posti esterni. Per popolare la lista dei po- sti esterni, consultare il capitolo "Contatti" a pagina 7. Segreteria video Lista Aux Registro chiamate 19:02 Giovedì...
- Page 7 Contatti Toccare l’icona per accedere alla lista dei contatti. Preferiti Posti esterni Contatti Segreteria video Lista Aux Registro chiamate 19:02 Giovedì 01 Feb 2018 Info Indietro Home L’elenco contiene tutti i dispositivi che possono essere contattati. Unità Posto esterno Intercomunicante 1 Intercomunicante 2 Intercomunicante 3 Intercomunicante 4...
- Page 8 Unità A Unità abitativa (comprende il Unità derivato interno e le app associate). ESTENSIONI B Il derivato interno. Ricevitore XTS C Possibili utenti connessi all’im- App Mobile 1 pianto attraverso app. in locale o in App Mobile 2 remoto. Toccare uno dei contatti, per avvia- App Mobile 3 re la chiamata.
- Page 9 Portiere G Posto di portineria (presente se Portiere previsto dall’impianto). Toccare il contatto per avviare la chiamata. Toccare l’icona per modificare il nome del contatto. Segreteria video A Toccare l’icona per attivare/di- sattivare la segreteria. Preferiti Posti esterni Contatti Per configurare correttamen- te la segreteria, consultare il ca- pitolo "Segreteria video"...
- Page 10 Lista Aux A Toccare l’icona per accedere alla lista dei contatti ausiliari. Preferiti Posti esterni Contatti I comandi ausiliari (AUX) permetto- no l’attivazione di contatti adegua- tamente programmati per eseguire comandi aggiuntivi alla classica apertura della porta di ingresso. Segreteria video Lista Aux Registro chiamate Per popolare la lista dei con-...
- Page 11 Tipologia delle chiamate Chiamata ricevuta. 29 gen 2018 19:55 Posto esterno Chiamata effettuata. 28 gen 2018 11:23 Posto esterno Chiamata persa. 07 gen 2018 21:03 Posto esterno Le chiamate che non hanno ricevu- 05 gen 2018 14:21 to risposta sono evidenziate . Posto esterno Cancella tutto Toccare la riga desiderata per chia-...
- Page 12 IMPOSTAZIONI GENERALI Toccare l’icona per accedere alla lista delle impostazioni. TVCC Impostazioni 19:02 Giovedì 01 Feb 2018 Info Indietro Home Informazioni di sistema La finestra contiene una serie di informazioni tecniche utili ad Informazioni di sistema identificare le caratteristiche del dispositivo, la versione hardware e Lingue software.
- Page 13 Data/ora La finestra permette di impostare data e ora del derivato interno. Modalità Manuale Auto A Data e ora vengono impostate Modalità auto Sistema manualmente dall’Utente. Server NTP B Data e ora vengono sincronizza- te automaticamente. Data/Ora 01 feb 2018 19:02 La rete cui è...
- Page 14 B Toccare l’area per assegnare un nome al comando AUX che si sta Descrizione Apri cancello per aggiungere. Comando Aux 3 C Scegliere dall’elenco il comando al quale associare l’AUX. Destinazione Posto Esterno Salvare la configurazione toccando il pulsante Salva. Salva 19:02 Giovedì...
- Page 15 Segreteria video Se l’impianto prevede la presenza di un posto esterno videocitofonico, in caso di assenza dell’utente chiamato, il dispositivo permette al chiamante di registrare un videomessaggio. Il chiamante può essere avvisato di tale opportunità da un messaggio messaggio di cortesia (es. «L’utente non è al momento disponibile, potete lasciare un messaggio dopo il bip»).
- Page 16 B Toccare l’area per assegnare un nome alla telecamera IP che si sta Descrizione per aggiungere. URI per connessione in C Toccare l’area e digitare la strin- tempo reale ga URI che permette la connessio- ne con la telecamera. URI per l'immagine fissa D Toccare l’area e digitare la strin- ga URI che permette di acquisire dalla telecamera l'immagine statica...
- Page 17 Sfondi Scegliere lo sfondo preferito; la nuova configurazione viene appli- Sfondo cata immediatamente. Toccare il pulsante Indietro per tornare all’elenco dei parametri da configurare. 19:02 Giovedì 01 Feb 2018 Info Indietro Home Schermo A Regola la luminosità dello schermo durante l’uso. Luminosità...
- Page 18 19:02 Giovedì 01 Feb 2018 Info Indietro Home Accedere all’elenco delle imposta- zioni avanzate. Configurazione X2 Selezionare la prima voce in elenco. Rete CAME Connect Multimedia Credenziali Apriporta automatico Configurazione interfaccia utente 19:02 Giovedì 01 Feb 2018 Info Indietro Home...
- Page 19 Rete C Il pulsante permette di abilitare la comunicazione Wi-Fi. Tipo connessione WiFi L’icona indica che la modalità Abilitato di connessione Wi-Fi è attiva e ven- Configura WiFi gono abilitate le sezioni sottostanti relative alla configurazione di rete. Modalità DHCP Statico Indirizzo IP Netmask...
- Page 20 B Permette di abilitare o disabi- litare la remotizzazione VoIP della Keycode chiamata videocitofonica. Abilita connessione Le impostazioni di fabbrica, preve- dono che la connessione a CAME Fornitore servizio internet Connect sia abilitata. Stato La connessione a CAME Con- nect deve essere attiva per rice- vere le chiamate su App.
- Page 21 Multimedia La finestra permette di configurare il massimo BITRATE che il dispo- Audio codec sitivo può gestire, scegliendo tra i valori disponibili. Video codec Maggiori sono i valori di BI- App Video Bitrate (Kbps) TRATE, migliore è la qualità video, ma maggiore è...
- Page 22 C Toccare le sezioni vuote e at- traverso il pop-up impostare l’ora Ora inizio di inizio e fine della fascia oraria di attivazione della funzione. Ora fine Giorni della settimana Salva 19:02 Giovedì 01 Feb 2018 Info Indietro Home D Toccare i giorni della settimana nel corso dei quali la fascia oraria Ora inizio 08:30...
- Page 23 Configurazione interfaccia utente Questa sezione permette di per- sonalizzare l’aspetto della pagina Home page attiva Predefinita Personalizzata principale. A Scegliere il tipo di home page Personalizza funzioni della Home page che si vuole visualizzare. B Toccare il pulsante per creare una home page personalizzata.
- Page 24 Manutenzione (password amministratore richie- sta; default password 112233). Riavvia dispositivo A Toccare il pulsante per riavviare il derivato interno. Riavvia applicazione B Toccare il pulsante per riavviare Imposta modalità slave solo l’applicazione che gestisce il Ripristina impostazioni predefinite derivato interno. 19:02 Giovedì...
- Page 25 IMPOSTAZIONI DISPONIBILI SOLO DA PAGINA WEB Le pagine web, oltre a consentire la configurazione di gran parte dei parametri che possono essere impostati dall’interfaccia del derivato, permettono di eseguire alcune funzioni aggiuntive illustrate in questa sezione. Digitare sulla barra degli indirizzi del browser (Chrome, Firefox, XTS 7 Safari) l’indirizzo del dispositivo.
- Page 26 Manutenzione Manutenzione Aiuto Esci Aggiornamento Sistema AGGIORNAME... CAMBIO PASS... CONFIGURAZI... Mediante questa finestra è possibi- Data e Ora le aggiornare il firmware del dispo- sitivo procedendo come segue: Rete VERSIONE A Premere il pulsante, selezionare il file contenente l’aggiornamen- to firmware all’interno del proprio Credenziali computer e avviare il processo.
- Page 28 Riferimenti normativi. Il fabbricante, CAME Spa, dichiara che i prodotti descritti in questo manuale, sono conformi alla Direttiva 2014/53/UE. Il testo completo della dichiarazione di conformità UE è disponibile al seguente indirizzo internet: www.came.com. Dismissione e smaltimento. Non disperdere nell’ambiente l’imballaggio e il dispositivo alla fine del ciclo di vita, ma smaltirli seguendo le norme vigenti nel paese di utilizzo del prodotto.
- Page 29 Wifi touch-screen speaker video-intercom FB01184-EN XTS 7 WH WIFI XTS 7 BK WIFI XTS 7 WH WFBF USER MANUAL EN English...
- Page 30 GENERAL PRECAUTIONS Carefully read the instructions before using the device. • The installation, programming, commissioning and maintenance of the product must only be carried out by • qualified technicians, properly trained in compliance with the regulations in force, including health and safety measures and the disposal of packaging.
- Page 31 Commands and notifications found on the home page The appearance of the homepage may vary according to the system configuration or the user interface. Favorites Entry panels Contacts Video Recording Aux List Call register 19:02 Thursday 01 Feb 2018 Info Back Home A Command to exclude call ringer;...
- Page 32 HOW TO USE THE DEVICE Answering a call Call from Entry Panel An image of the caller appears on the screen. The audio from and towards the caller is turned off. A Touch the button to answer the call and to turn on the audio communication. B Touch the button to refute the call and to return to the homepage.
- Page 33 Making a call This device lets you call other indoor receivers (intercommunication), any devices connected over the Wifi network or, any entry panels. Calling a contact on the favorites list A Touch the icon to access the list Favorites Entry panels Contacts of favorite contacts.
- Page 34 Turn on communication to entry panel Favorites Entry panels Contacts B Touch the icon to access the list of entry panels. To fill the list of entry panels, see the "Contacts" chapter on page 7. Video Recording Aux List Call register 19:02 Thursday 01 Feb 2018...
- Page 35 Contacts Touch the icon to access the con- tacts list. Favorites Entry panels Contacts Video Recording Aux List Call register 19:02 Thursday 01 Feb 2018 Info Back Home The list contains all the devices that can be contacted. Unit Entry panel Intercom 1 Intercom 2 Intercom 3...
- Page 36 Unit A Household (includes the indoor Unit receiver and any associated apps). EXTENSIONS B the indoor receiver. XTS receiver C Possible users connected to the Mobile App 1 system via app, either locally or from a remote location. Mobile App 2 Touch one of the contacts to initiate Mobile App 3 a call.
- Page 37 Porter G Concierge panel, if the system Porter features this. Touch the contact to initiate the call. Touch the icon to edit the contact's name. Video Recording A Touch the icon the turn the an- swering service on or off. Favorites Entry panels Contacts...
- Page 38 Aux List A Touch the icon to access the list of auxiliary contacts. Favorites Entry panels Contacts The auxiliary commands (AUX) let you activate suitably programmed contacts to carry out additional commands to the classic opening of the entry door. Video Recording Aux List Call register...
- Page 39 Types of calls Incoming call. 29 Jan 2018 19:55 Entry panel Outgoing call. 28 Jan 2018 11:23 Entry panel Missed call. 07 Jan 2018 21:03 Entry panel Any missed calls are highlighted . 05 Jan 2018 14:21 Entry panel Touch the line you want to call your Delete all contact.
- Page 40 GENERAL SETTINGS Touch the icon to return to the list of settings. CCTV Settings 19:02 Thursday 01 Feb 2018 Info Back Home System information This window gives technical infor- mation that is useful for identifying System information the device's characteristics and the hardware and software versions.
- Page 41 Date/time This window is for setting the date and time on the indoor receiver. Mode Manual Auto A The date and time are manually Auto mode System set by the user. NTP server B The date and time are automa- tically synchronized.
- Page 42 B Touch the area to assign a name to the AUX command that you are Description Gate opener going to add. Command Aux 3 C Choose the command to asso- ciate the AUX to, from the list. Destination Entry panel Press button to save the configura- tion Save.
- Page 43 Video Recording If the system has a video intercom entry panel installed, if the called user is not in, the device lets the caller record a video message. The caller may be notified of this by a courtesy message, for example, "The user is not available at the moment, please leave a message after the beep".
- Page 44 B Touch the area to assign a name to the IP video camera that you are Description going to add. URI for real-time con- C Touch the area and type the nection URI string for connecting the video camera. URI for fixed image D Touch the area and type the URI string for acquiring the static image from the video camera, needed for...
- Page 45 Backdrops Select your preferred backdrop; the new setting appears immediately. Background Touch the Back button to return to the list of settable parameters. 19:02 Thursday 01 Feb 2018 Info Back Home Display A Adjusts the brightness of the screen during use. Brightness B This is for adjusting the Brightness in stand-by...
- Page 46 01 Feb 2018 Info Back Home Accessing the list of advanced set- tings. Configuration X2 Select the first item on the list. Network CAME Connect Multimedia Credentials Automatic door opener Configuring the user interface 19:02 Thursday 01 Feb 2018 Info...
- Page 47 Network C This button is for enabling WiFi communication. Type of connection WiFi This icon shows that the WiFi Enabled connection is active, enabling the Configure WiFi network-settings sections below. Mode DHCP Static IP address Netmask Gateway Address MAC Save 19:02 Thursday 01 Feb 2018...
- Page 48 B For enabling or disabling the VoIP remote control of the video-in- Keycode tercom call. Enable connection The factory settings require that the connection to CAME Connect be Internet service provider enabled. Status The CAME Connect connec- tion must be active to receive calls on the App.
- Page 49 Multimedia This window lets you configure the maximum BITRATE that the device Audio codec can handle, while choosing among the available values. Video codec The greater the BITRATE val- Video App Bitrate (Kbps) ues, the better the video quali- ty, but also the greater the data bandwidth occupied in UPLINK.
- Page 50 C Touch the empty sections and in the pop-up window set the start Start time and finish time of the time-slot for activating the function. Start time Days of the week Save 19:02 Thursday 01 Feb 2018 Info Back Home D Touch the days of the week dur- ing which the time-slot needs to be Start time...
- Page 51 Configuring the user interface This section is for customizing the appearance of the homepage. Homepage active Preset Customized A Select the type of homepage that you wish to see. Customize Homepage functions B Touch the button to create a customized homepage. 19:02 Thursday 01 Feb 2018...
- Page 52 Maintenance (administrator password required; the default password is 112233). Reboot device A Touch the button to reboot the indoor receiver. Restart application B Touch the button to reboot only Set slave mode the application that runs the indoor Restore preset settings receiver.
- Page 53 SETTINGS ONLY AVAILABLE ON WEBPAGE The webpages, besides allowing you to set most of the parameters that may be set up on the indoor receiver's interface, also allow you to run certain additional functions shown in this section. In the Chrome, Firefox, Safari browsers' address bar, type the de- XTS 7 vices address..
- Page 54 Maintenance Maintenance Help Exit Update System UPDATE... CHANGE PASSW... CONFIGUR... This window is for upgrading the Date and Time device's firmware, as follows: Network A Press the button, select the file VERSION with the firmware upgrade within your computer and launch the pro- cess.
- Page 56 Pertinent Regulations.CAME SpA, the manufacturer, declares that the products described in this manual conform to Directive 2014/53/EU. The complete wording of the EU declaration of conformity is available at the following Internet address: www.came.com Decommissioning and disposal. Dispose of the packaging and the device at the end of its life cycle responsibly, in compliance with the laws in force in the country where the product is used.
- Page 57 Portier vidéo mains libres Wi-Fi à écran tactile FB01184-FR XTS 7 WH WIFI XTS 7 BK WIFI XTS 7 WH WFBF MANUEL POUR L’UTILISATEUR FR Français...
- Page 58 INSTRUCTIONS GÉNÉRALES Lire attentivement les instructions avant d’utiliser le dispositif. • L’installation, la programmation, la mise en service et la manutention du produit ne doivent être effectuées • que par des techniciens qualifiés et dans le strict respect des normes en vigueur, y compris des règles sur la prévention des accidents et l'élimination des emballages.
- Page 59 Commandes et signalisations présentes sur la page d’accueil L’aspect de la page d’accueil peut varier en fonction de la configuration de l’installation ou de l’interface utilisateur. Favoris Postes externes Contacts Répondeur vidéo Liste Aux Registre d'appels 19:02 Jeudi 01 févr. 2018 Info Précédent Home...
- Page 60 UTILISATION DU DISPOSITIF Répondre à un appel Appel provenant d’un poste externe L’écran visualise l’éventuelle image de l’appelant. L’audio depuis/vers l’appelant n’est pas activé. 1 Appuyer sur le bouton pour répondre à l’appel et activer la communication audio. 2 Appuyer sur le bouton pour refuser l’appel et revenir à la page d’accueil. Indications visualisées à...
- Page 61 Effectuer un appel Le dispositif permet d’effectuer des appels vers d’autres postes (intercommunication), vers des dispositifs connec- tés via le réseau Wi-Fi (App) ou vers des postes externes. Appeler un contact dans la liste des favoris A Appuyer sur l’icône pour accé- Favoris Postes externes Contacts...
- Page 62 Établir l'audio avec le poste externe Favoris Postes externes Contacts 2 Appuyer sur l’icône pour accé- der à la liste des postes externes. Pour remplir la liste des postes externes, consulter le cha- pitre « Contacts » à page 7. Répondeur vidéo Liste Aux Registre d'appels...
- Page 63 Contacts Appuyer sur cette icône pour accé- der à la liste des contacts. Favoris Postes externes Contacts Répondeur vidéo Liste Aux Registre d'appels 19:02 Jeudi 01 févr. 2018 Info Précédent Home La liste contient tous les dispositifs pouvant être contactés. Unité...
- Page 64 Unité 1 Unité d’habitation (à savoir le Unité poste interne et les applications EXTENSIONS associées). Récepteur XTS 2 Le poste interne. App Mobile 1 3 Éventuels utilisateurs connectés à l’installation par app. localement App Mobile 2 ou à distance. App Mobile 3 Appuyer sur l’un des contacts pour App Mobile 4 lancer l’appel.
- Page 65 Concierge 7 Poste de conciergerie (éven- Concierge tuellement prévu sur l’installation). Appuyer sur le contact pour lancer l’appel. Appuyer sur cette icône pour modifier le nom du contact. Répondeur vidéo 1 Appuyer sur cette icône pour activer/désactiver le répondeur. Favoris Postes externes Contacts Pour configurer correctement...
- Page 66 Liste Aux 1 Appuyer sur cette icône pour accéder à la liste des contacts au- xiliaires. Favoris Postes externes Contacts Les commandes auxiliaires (AUX) permettent l'activation de contacts dûment programmés pour exécuter d’autres commandes outre l'ouver- Répondeur vidéo Liste Aux Registre d'appels ture classique de la porte d'entrée.
- Page 67 Type d’appel Appel reçu. 29 jan 2018 19:55 Poste externe Appel effectué. 28 jan 2018 11:23 Poste externe Appel manqué. 07 jan 2018 21:03 Poste externe Les appels sans réponse sont mis 05 jan 2018 14:21 en évidence. Poste externe Tout effacer Appuyer sur la ligne souhaitée pour 03 jan 2018 16:31...
- Page 68 CONFIGURATIONS GÉNÉRALES Appuyer sur cette icône pour accé- der à la liste des configurations. CCTV Réglages 19:02 Jeudi 01 févr. 2018 Info Précédent Home Informations de système La fenêtre contient une série d'in- formations techniques utiles à Informations de système l'identification des caractéristiques du dispositif, la version ordinateur Langues...
- Page 69 Date/heure Cette fenêtre permet de configurer la date et l’heure du poste interne. Modalité Manuelle Auto 1 La date et l’heure sont configu- Modalité auto Système rées manuellement par l’utilisateur. Serveur NTP 2 La date et l’heure sont synchro- nisées automatiquement. Date/Heure 01 févr.
- Page 70 2 Appuyer sur cette zone pour at- tribuer un nom à la commande AUX Description Ouverture portail à ajouter. Commande Aux 3 3 Choisir dans la liste la com- mande à laquelle associer l'AUX. Destination Poste externe Sauvegarder la configuration en appuyant sur le bouton Sauvegar- der.
- Page 71 Répondeur vidéo Si l’installation prévoit la présence d'un poste externe avec portier vidéo, en cas d'absence de l'utilisateur appelé, le dispositif permet à l'appelant d’enregistrer un message vidéo. L'appelant peut être informé de cette opportunité par un message de courtoisie (ex. : « L’utilisateur n'est pas disponible pour le moment, veuillez laisser un message après le bip »).
- Page 72 2 Appuyer sur cette zone pour attribuer un nom à la caméra IP à Description ajouter. URI pour la connexion en 3 Appuyer sur cette zone et sai- temps réel sir la chaîne URI permettant la connexion à la caméra. URI pour l'image fixe 4 Appuyer sur cette zone et saisir la chaîne URI permettant d’obtenir...
- Page 73 Fonds d’écran Choisir le fond d’écran préféré ; la nouvelle configuration est immé- Fond d’écran diatement visualisée. Appuyer sur le bouton Précédent pour revenir à la liste des para- mètres à configurer. 19:02 Jeudi 01 févr. 2018 Info Précédent Home Écran 1 Permet de régler la luminosité...
- Page 74 01 févr. 2018 Info Précédent Home Accéder à la liste des configura- tions avancées. Configuration X2 Sélectionner la première option de Réseau la liste. CAME Connect Multimédia Authentifiants Ouvre-porte automatique Configuration interface utilisateur 19:02 Jeudi 01 févr. 2018 Info Précédent...
- Page 75 Réseau 3 Ce bouton permet d’activer la communication Wi-Fi. Type de connexion WiFi L’icône indique que la modalité Activé de connexion Wi-Fi est activée avec Configurer WiFi activation des sections inférieures liées à la configuration de réseau. Modalité DHCP Statique Adresse IP Masque réseau Passerelle...
- Page 76 Les configurations par défaut pré- Activation connexion voient l'activation de la connexion à Fournisseur services Internet CAME Connect. État La connexion à CAME Connect doit être activée pour permettre la réception des appels sur App. Sauvegarder 19:02 Jeudi 01 févr. 2018 Info Précédent...
- Page 77 Multimédia Cette fenêtre permet de configurer le maximum de BITRATE que le Codec audio dispositif peut gérer en choisissant parmi les valeurs disponibles. Codec vidéo Plus les valeurs de BITRATE App Bitrate Vidéo (Kbps) sont élevées, meilleure est la qualité vidéo et plus est importante l’occu- pation de la base de données dans la LIAISON MONTANTE (UPLINK).
- Page 78 3 Appuyer sur les sections vides et configurer, dans la fenêtre Heure début contextuelle, l’heure de début et de fin de la plage horaire d’activation Heure fin de la fonction. Jours de la semaine Sauvegarder 19:02 Jeudi 01 févr. 2018 Info Précédent Home...
- Page 79 Configuration interface utilisateur Cette section permet de personna- liser l’aspect de la page principale. Page d'accueil activée Prédéfinie Personnalisée 1 Choisir le type de page d’accueil à visualiser. Personnalisation fonctions page d’accueil 2 Appuyer sur le bouton pour créer une page d’accueil person- nalisée.
- Page 80 Entretien (mot de passe administrateur re- quis ; mot de passe par défaut Redémarrer dispositif 112233). 1 Appuyer sur le bouton pour re- Redémarrer application mettre en marche le poste interne. Configuration modalité slave 2 Appuyer sur le bouton pour ne Restaurer paramètres par défaut relancer que l’application gérant le poste interne.
- Page 81 CONFIGURATIONS DISPONIBLES UNIQUEMENT SUR PAGE WEB Les pages web permettent non seulement la configuration de la plupart des paramètres pouvant être configurés depuis l’interface du poste mais également l’exécution de quelques fonctions supplémentaires illustrées dans cette section. Saisir dans la barre d'adresses du navigateur (Chrome, Firefox, XTS 7 Safari) l’adresse du dispositif.
- Page 82 Entretien Entretien Aide Sortir Mise à jour Système MISE À JOUR CHANG. MOT DE P. CONFIGURATION Cette fenêtre permet de mettre à Date et Heure jour le firmware du dispositif de la façon suivante : Réseau VERSION 1 Appuyer sur le bouton, sélec- tionner le fichier contenant la mise à...
- Page 84 Références normatives Le fabricant, CAME spa, déclare que les produits décrits dans ce manuel sont conformes à la Directive 2014/53/UE. Le texte intégral de la déclaration de conformité UE est disponible sur Internet à l’adresse suivante : www.came.com. Mise au rebut et élimination. Ne pas jeter l'emballage et le dispositif dans la nature au terme du cycle de vie de ce dernier, mais les éliminer selon les normes en vigueur dans le pays où...
- Page 85 Абонентское видеоустройство с сенсорным FB01184-RU экраном, громкой связью и Wi-Fi XTS 7 WH WIFI XTS 7 BK WIFI XTS 7 WH WFBF РУКОВОДСТВО ПОЛЬЗОВАТЕЛЯ RU Русский...
- Page 86 ОБЩИЕ ПРЕДУПРЕЖДЕНИЯ Внимательно прочитайте инструкции перед использованием устройства. • Установка, программирование, ввод в эксплуатацию и обслуживание продукта должны выполняться • только квалифицированным и специально обученным персоналом с соблюдением действующих стандар- тов, включая требования по охране труда, технике безопасности и утилизации упаковки. Устройство...
- Page 87 Элементы управления и сигнализации на главной странице Внешний вид главной страницы может меняться в зависимости от конфигурации системы или интерфейса пользователя. Избранное Вызывные панели Контакты Автоответчик с Список Aux Журнал вызовов видеосвязью 19:02 Четверг 1 февраля 2018 г. Информация Назад Главная...
- Page 88 ИСПОЛЬЗОВАНИЕ УСТРОЙСТВА Ответ на вызов Вызов с вызывной панели На экране появляется изображение вызывающего (при наличии). Входящий и исходящий звук не работает. A Нажмите кнопку для ответа на вызов и включите аудиосвязь. B Нажмите кнопку для отклонения вызова и возврата на главную страницу. Индикация...
- Page 89 Осуществление вызова С этого устройства можно осуществлять вызов других абонентских устройств (интерком), вызывных пане- лей, а также устройств, подключенных к сети Wi-Fi (через приложение). Вызов контакта из списка «Избранные» A Коснитесь иконки для доступа Избранное Вызывные панели Контакты к списку избранных контактов. О...
- Page 90 Установка соединения с другой вызывной панелью Избранное Вызывные панели Контакты B Коснитесь иконки для доступа к списку вызывных панелей. О процедуре добавления вызывных панелей в соответ- ствующий список можно про- Автоответчик с Список Aux Журнал вызовов видеосвязью читать в разделе "Контакты" на странице...
- Page 91 Контакты Коснитесь иконки для доступа к списку контактов. Избранное Вызывные панели Контакты Автоответчик с Список Aux Журнал вызовов видеосвязью 19:02 Четверг 1 февраля 2018 г. Информация Назад Главная Список содержит все устройства, с которыми можно связаться. Помещение Вызывная панель Интерком 1 Интерком...
- Page 92 Помещение A Жилое помещение (с або- Помещение нентским устройством и присво- РАСШИРЕНИЯ енными ему приложениями). Радиоприемник XTS B Абонентское устройство. Мобильное приложение 1 C Возможные пользователи, подключенные к системе по- Мобильное приложение 2 средством приложения, локаль- Мобильное приложение 3 но или дистанционно. Мобильное...
- Page 93 Консьерж G Панель консьержа (присут- Консьерж ствует, если предусмотрено системой). Выберите контакт для начала вызова. Коснитесь значка для изме- нения имени контакта. Автоответчик видео A Коснитесь иконки для вклю- чения/выключения автоответчи- ка. Избранное Вызывные панели Контакты О правильной настройке ав- тоответчика...
- Page 94 Список Aux A Коснитесь иконки для доступа к списку вспомогательных контак- тов. Избранное Вызывные панели Контакты Вспомогательные команды (AUX) позволяют активировать должным образом запрограммированные контакты для выполнения дополни- Автоответчик с Список Aux Журнал вызовов тельных команд, помимо стандарт- видеосвязью ного открывания входной двери. 19:02 Четверг...
- Page 95 Тип вызовов Принятый вызов. 29 января 2018 19:55 Вызывная панель 0 с Выполненный вызов. 28 января 2018 11:23 Вызывная панель 0 с Пропущенный вызов. 07 января 2018 21:03 Вызывная панель 0 с Пропущенные вызовы выделяют- 05 января 2018 14:21 ся в списке. Вызывная...
- Page 96 ОБЩИЕ НАСТРОЙКИ Коснитесь иконки для доступа к списку настроек. Видеонаблю- Настройки дение 19:02 Четверг 1 февраля 2018 г. Информация Назад Главная Информация о системе В этом окне содержится ряд по- лезной технической информации Информация о системе для определения характеристик устройства, версии программ- Языки...
- Page 97 Дата/Время В этом окне можно установить дату и время для абонентского Автоматиче- Режим Ручной ский устройства. Автоматический режим Система A Дата и время устанавливают- ся вручную пользователем. NTP-сервер B Дата и время синхронизиру- Дата/Время 1 февраля 2018 19:02 ются автоматически. Континент...
- Page 98 B Коснитесь зоны для присва- ивания имени добавляемой ко- Описание Открыть ворота манде AUX. Управление Aux 3 C Выберите из списка команду для присвоения AUX. Назначение Вызывная панель Сохраните настройки, нажав кнопку «Сохранить». Сохранить 19:02 Четверг 1 февраля 2018 г. Информация...
- Page 99 Автоответчик видео Если в системе предусмотрена вызывная видеопанель, в случае отсутствия абонента устройство позволяет вызывающему записать видеосообщение. Вызывающий может узнать об этой возможности посредством служебного сообщения (например: «В на- стоящее время абонент недоступен, вы можете оставить ему сообщение после звукового сигнала»). Видеосообщение...
- Page 100 B Коснитесь зоны для присвое- ния имени добавляемой IP-виде- Описание окамере. URI для соединения в C Коснитесь зоны и введите реальном времени строку URI, позволяющую уста- новить соединение с видеока- URI для фиксированного мерой. изображения D Коснитесь зоны и введите строку...
- Page 101 Фоновые изображения Выберите любимое фоновое изображение; новая настройка Фоновое изображение будет применена мгновенно. Нажмите кнопку Назад для воз- врата к списку настраиваемых параметров. 19:02 Четверг 1 февраля 2018 г. Информация Назад Главная Экран A Регулирует яркость экрана во время использования. Яркость...
- Page 102 1 февраля 2018 г. Информация Назад Главная Войдите в список дополнитель- ных настроек. Настройка X2 Выберите первый пункт из спи- Сеть ска. CAME Connect Мультимедиа Параметры доступа Автоматическое открывание дверей Настройка пользовательского интерфейса 19:02 Четверг 1 февраля 2018 г. Информация Назад...
- Page 103 Сеть C Кнопка позволяет включать соединение Wi-Fi. Тип соединения Wi-Fi Иконка указывает на то, что Включено ДА НЕТ режим беспроводного соедине- Настроить Wi-Fi ния включен и доступны распо- ложенные ниже разделы, касаю- Режим DHCP Статический щиеся настроек сети. IP-адрес Маска сети Шлюз...
- Page 104 ключать удаленный прием VoIP Идентификационный код видеовызова. Активировать ДА НЕТ Заводскими настройками пред- подключение усмотрено, чтобы подключение Интернет-провайдер к CAME Connect было включено. Статус Подключение к CAME Connect должно быть активно для приема вызова с помощью Сохранить приложения. 19:02 Четверг...
- Page 105 Мультимедиа Окно позволяет настроить мак- симальный БИТРЕЙТ, поддер- Аудиокодек живаемый устройством, выбрав одно из доступных значений. Видеокодек Чем больше значения БИ- Битрейт видео для приложения (кб/сек) ТРЕЙТА, тем лучше качество ви- део и тем более загружен канал связи UPLINK. Если видео на приложении транслируется...
- Page 106 C Коснитесь пустых разделов и в открывшемся окне установите Время начала время начала и окончания дей- ствия функции. Время окончания Дни недели Пн Вт Ср Чт Пт Сб Вс Сохранить 19:02 Четверг 1 февраля 2018 г. Информация Назад Главная D Коснитесь дней недели, когда заданный...
- Page 107 Настройка пользовательского интерфейса Этот раздел позволяет персона- лизировать внешний вид главной Персонализи- Главная страница активна По умолчанию страницы. рованная A Выберите отображаемый тип Выберите функции главной страницы главной страницы. B Нажмите кнопку для создания персонализированной главной страницы. 19:02 Четверг 1 февраля 2018 г. Информация...
- Page 108 Техобслуживание (требуется пароль администра- тора; пароль по умолчанию: Перезагрузка устройства 112233). A Нажмите кнопку для переза- Перезагрузка приложения грузки абонентского устройства. Установить управляемый режим B Нажмите кнопку для переза- Восстановить настройки по умолчанию грузки только того приложения, которое управляет абонентским устройством.
- Page 109 НАСТРОЙКИ ДОСТУПНЫ ТОЛЬКО НА ВЕБ-СТРАНИЦЕ Веб-страницы, помимо доступа к настройке большинства параметров, которые могут быть установлены через интерфейс абонентского устройства, позволяют выполнять некоторые дополнительные функции, описанные в этом разделе. Введите адрес устройства в адресной строке браузера XTS 7 (Chrome, Firefox, Safari). НАСТРОЙКИ...
- Page 110 Техобслуживание Техобслуживание Помощь Выйти Обновление Система ОБНОВЛЕ... СМЕНА ПАРО... КОНФИГУРАЦ... С этого экрана можно обновить Дата и время прошивку устройства, выполнив указанные далее действия. Сеть ВЕРСИЯ A Нажмите эту кнопку, выбери- те файл обновления прошивки на компьютере и запустите про- Параметры...
- Page 112 Нормы и стандарты. Фирма-производитель CAME S.p.A. заявляет, что описанные в этой инструкции изде- лия соответствуют требованиям Директивы 2014/53/UE. Полный текст декларации о соответствии доступен по адресу: www.came.com. Утилизация. Не выбрасывайте упаковку и устройство в окружающую среду. Утилизируйте их в соответ- ствии...
Need help?
Do you have a question about the XTS 7 WH WIFI and is the answer not in the manual?
Questions and answers