Advertisement
Quick Links
Advertisement

Related Manuals for Seers Medical Standard Tilt Tables


Summary of Contents for Seers Medical Standard Tilt Tables
- Page 1 Instructions for Use SEERS Medical Therapy Tilt Tables 03-1008-IFU-EN | ISSUE 1...
- Page 2 WARNING To avoid injury, always read this Instructions for Use and accompanied documents before using the product. Mandatory to read the Instructions for Use...
- Page 3 This Instructions for Use document applies to the following products: Standard Tilt Tables ST7641, ST7641DL Tilt Table Pro ST7645, ST7645DL 2 Section Tilt Table ST7647, ST7647DL, ST7649, ST7649DL...
- Page 4 INDEX 1. General Information – Intended Use, Warnings & Cautions 2. How to Use a. Wheel System - LMWD b. Adjusting the Height of the Tilt Table c. Applying Tilt Adjustment to the Tilt Table d. Memory Function of The Tilt Table Pro e.
-
Page 5: General Information
1. General Information CONGRATULATIONS on the purchase of your new SEERS MEDICAL product. If these operating instructions are adhered to, the product will provide many years of safe use. If these operating instructions are not followed, your warranty could be invalid! Always keep these Instructions for Use available for reference. - Page 6 WARNINGS! Warnings identify potential hazards which if not followed correctly, could result in serious injury, or possibly death! • Ensure electric couches are not used in the presence of flammable gasses such as an anaesthetic agent. • DO NOT EXCEED the Maximum Safe Working Load of the product. •...
-
Page 7: How To Use
2. How To Use Wheel System - Large Mobile Wheel Design Wheel Lever Wheel Lever Wheel Lever RED Down Horizontal GREEN Down Castors locked Castors unlocked Directional Steering... - Page 8 Adjusting the Height of the Tilt Table Standard Tilt Table (-2WH or -2WF) Hand Switch Foot Switch Raising the Tilt Table 1. To elevate the couch, push the UP button on the hand or foot switch. 2. Once the desired height is achieved, release the button. 3.
- Page 9 Tilt Table Pro (-DSP) To adjust the height of the table, simply press the height function button indicated by the symbol, at the top of the handset. Once selected, the graphic in the display window changes to show the Hi-Low function has been chosen.
- Page 10 Applying Tilt Adjustment to the Tilt Table Standard Tilt Table To apply tilt to the couch, simply press the raise or lower button of the bottom button indicated by the tilt symbol, until desired angle is achieved. Once the button is released, the tilt angle is locked in that position, ready for use.
- Page 11 In releasing the arrow, the table automatically locks at that height. If the up or down arrow is pressed and held again within ten seconds the height function will continue to be selected. If a button is not pressed within 10 seconds the function will need to be selected once again (step 1).
- Page 12 d. Memory Function of The Tilt Table Pro Should you ever wish to return the table to the same position, ie a given height or tilt position, the position can be saved to memory. To set a stored Memory Position, use the following steps…. Position the product as desired.
- Page 13 e. Treatment Timer Feature of the Tilt Table Pro The table is fitted with a treatment timer function. To use this function, follow the steps below…. Press the stopwatch key button. 01:00 minute will be displayed on the display. Pressing the key again will add a further minute.
- Page 14 f. CPR Feature of the Tilt Table Pro The table is fitted with a CPR function. In activating the CPR function, the table puts it itself into a low horizontal position as quickly as it can, to allow CPR to be carried out if necessary. To use this function, follow the steps below….
-
Page 15: Adjusting The Footboard Angle
g. Adjusting the Footboard Angle To adjust the angle of the footboard, first ensure the patient is not standing on the footboard. Pull the release knob outward and lift or lower the footboard to the desired angle. On releasing the knob, the pin should click into the next available hole position and lock in that new position. - Page 16 h. Patient Support Hand Grips To fit the Patient Support Hand Grip to the couch, undo the locking lever on the sliding bracket. Locate sliding bracket to the desired position and re-tighten the lever to secure. Plug the hand hold into the sliding bracket and secure by tightening the locking lever on the underside.
- Page 17 i. Patient Work Table Ensure the sliding brackets are at roughly the same height on each side of the couch. Engage the worktable into the two sliding brackets mounted on the side rails. Secure by tightening the locking levers on each sliding bracket Adjust rake angle of work table by adjusting the locking knobs on the underside of the worktable.
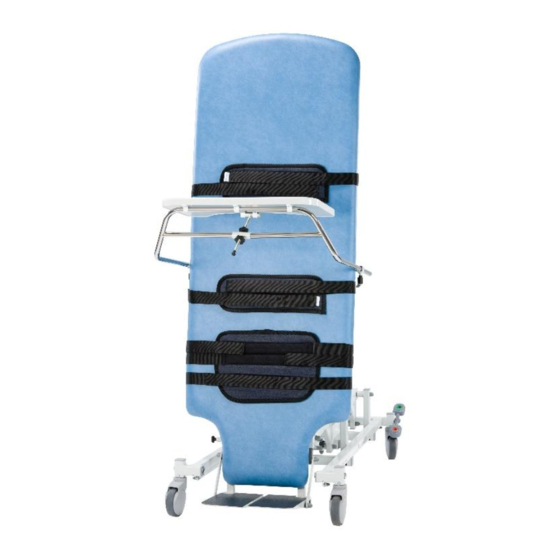
- Page 18 Always ensure that the straps and harnesses are in the correct position and that the patient is fully secure before operating the tilt facility. The Standard Tilt Tables are supplied with the following Fixation Strap Set (6062): 2x Narrow Belts (6066) 1x Wide Belt (6065) The 6062 Strap set comprises of 2 x 6066 and 1 x 6065.
- Page 19 The upper strap should be passed between the chrome side rail and upholstery on each side of the table and then pulled across the front side of the harness to fasten. The lower strap should be passed around the back of the table and then back around the front to fasten on top of the lower portion of the harness.
- Page 20 Always ensure that the straps and harnesses are in the correct position and that the patient is fully secure before operating the tilt facility. Only use straps/harnesses supplied by SEERS Medical Ltd. The Split Leg Tilt Tables are supplied with the following Fixation Strap Set (6063): The 6063 Strap set comprises of 2 x 6066 and 1 x 6064.
- Page 21 l. Pelvic Stabilisers (Model ST6058) Locate the lower sliding bracket on the side rail to the desired height. Adjust the height and distance into the patient of the stabiliser, by loosening the relevant locking lever, adjusting to desired position and the re-tightening to secure.
- Page 22 n. Emergency Override (Tilt Table Pro) WARNING! To ensure the emergency override facility works safely and reliably, it is imperative these instructions are followed. Incorrect use could cause damage - as well as the system failing to operate when needed. This is an emergency down facility - not the everyday way to get the tilt table from vertical to horizontal.
- Page 23 WARNING! Before pulling the emergency activation lever - be ready to take patient weight as activating the lever disengages the electric motor. Failure to adhere to this advice could result in the table coming down inadvertently, injuring the operator/patient! Become familiar with the operation of this facility without a patient present - so you know what to do when it’s needed in an emergency.
- Page 24 Use the Pull Down Handle(s) to lower the table from a vertical to horizontal position. As the table gets lower, be aware the patient weight will increase, as the table nears horizontal. Once horizontal, the patient can be treated or removed from the table. Before the table can be used normally again (by the handset) the emergency facility must be reset.
- Page 25 p. Adjusting the Backrest Angle (Gas Strut) To raise the backrest or foot section, simply grasp the release lever towards the upholstery and adjust the backrest to the desired angle. Releasing the lever automatically locks the section at that angle. To lower, grasp the lever again, and lower the backrest or foot section to the required angle.
-
Page 26: Cleaning Instructions
3. Cleaning Instructions WARNING! Disconnect the couch from the mains power supply prior to carrying out any cleaning or decontaminating. DO NOT SATURATE PRODUCT! IF THE PRODUCT GETS SATURATED DURING CLEANING, THIS COULD ACCELERATE CORROSION, REDUCING PRODUCTS LENGTH OF SERVICE. General Cleaning To get rid of any dust or marks on the surface the Faux Leather MUST be wiped DAILY with a moist soft cotton cloth. - Page 27 Ink, Ball point pen, Denim, hard stains Rub the stain by means of gentle circular movements with tissue dampened with 96°alcohol and water (1:1) After this rub the surface with gentle circular movement with tissue paper to dry it. Butter, oil, grease stains Wipe excess butter, oil or grease off the surface with a clean 100% Cotton white dry cloth.
- Page 28 If DECONTAMINATING the couch then repeat steps above using a dilute Hypochlorite & warm water mixture (mixed at 10,000ppm) instead of warm water and soap. It is crucial that any staining is treated as soon as possible but never later than 24 hours.
-
Page 29: Maintenance
r. Maintenance WARNING! Disconnect the couch from the mains power supply prior to carrying out any maintenance. All electrical maintenance should be performed by a suitably qualified person. BLUE or BROWN wires must not be connected to any earth terminal. Actions to be done by clinician Daily Weekly... - Page 30 Actions to be done by qualified personnel Once a year • Carry out a full test of all electrical couch positioning functions (backrest, height, etc.) • Check operation of the backrest/footrest. Check gas struts operate smoothly and correctly throughout all ranges of movement.
- Page 31 Warranty and Product Lifetime SEERS MEDICAL Limited standard terms and conditions apply to this device. A copy of this is available upon request. This contains full details of warranty terms and does not affect your statutory rights. For any further information on this product, regarding spares, warranty,...
-
Page 32: Troubleshooting
Troubleshooting Fault Possible Cause Solution Electrical functions Mains cable has become Locate control box and see whether not working disconnected, either the power light is illuminated and correctly from the wall socket or that the lead is connected at both the control box ends. - Page 33 Mechanical faults Squeaking or An over tight pivot point Locate the noisy pivot point, then grinding noise either a bolt or pin is not slacken the securing nut by ¼ turn rotating freely. and lubricate until noise reduces. Wheels will not raise Couch is not on level Level couch by adjusting the or lower...
- Page 34 u. Technical Data - Standard Tilt Table & Tilt Table Pro Index / Model Configuration Elevation Control Electric Large Mobile Wheel Design Large Mobile Wheel Design Wheel System (125mm) (150mm) Overall Length 195cm Width 70cm Minimum Height 47cm Maximum Height 101cm Tilt Angle 0˚...
-
Page 35: Electrical Technical Data
Electrical Technical Data Linak Ti-Motion Control Box 100 - 240V, 50/60Hz 100 - 240VAC, 50/60Hz, 2500mA Output 120W 32V, 128VA, Standby power 0.5W Duty Cycle 10% max, 2 min ON / 18 min OFF Mains Plug Fuse Rt 5.0A x 1- (UK) IP RATING IPX 6 washable... - Page 36 Symbols Safe working load Double Insulated (Class II) Alternating current (a.c.) Manufacturer Total weight of the Manufacturing date equipment including its safe working load Complies with the European Caution/Warning Regulatory affair Serial number Refer to instructions For Use Type B applied part. Model number Waste Electrical and Electronic Equipment...
- Page 37 UNITED KINGDOM t: +44 (0)1728 861590 f: +44 (0)1728 861868 e: info@seersmedical.com w: www.seersmedical.com © SEERS MEDICAL Limited 2023 Advena Limited. Tower Business Centre, 2 Flr. Tower Street, Swatar, BKR 4013 Malta. mark on this product demonstrates conformity with MDR...
Need help?
Do you have a question about the Standard Tilt Tables and is the answer not in the manual?
Questions and answers