
Related Manuals for Lynx CPS-5


Summary of Contents for Lynx CPS-5
- Page 1 CPS series USER MANUAL CPS-214 CPS-210 CPS-14 CPS-18S CPS-5 CPS-4 Lynx Pro Audio S.L. Valencia, Spain - www.lynxproaudio.com - info@lynxproaudio.com V.24.02...
- Page 2 LYNX Pro Audio S.L. Calle 1 - Pol. Ind. Picassent E-46220 Picassent (Valencia) CE CERTIFICACTION, EUROPEAN PRODUCT This user guide is property of Lynx Pro Audio S.L. Any reproduction of this manual, by any means is strictly prohibited. Copyright 2020. All rights reserved.
-
Page 3: Table Of Contents
This manual describes the recommended installation procedure for the coaxial point source CPS-214, CPS-210 and CPS-14 in combination with the subwoofer CPS-18S. Also, two ultra-compact passive coaxial cabinets, CPS-5 and CPS-4 are included. The CPS (Coaxial Point Source) Series is our new high power, point source system. -
Page 4: Safety Precautions
When flying this system please observe the technical and “Rainbow” software data carefully. Never exceed the maximum safe working loads or ignore the instructions included within this manual. Use Only flying accessories provided by Lynx Pro Audio S.L. Rigging must be always carried out by professionals. • Delicate Material Please ensure no foreign object or water enters the speaker. -
Page 5: System Overview
15 mm Premium birch plywood Dimensions: 900 x 420 x 515 mm (H x W x D) Weight: 49 Kg (108 lbs) * Calculated maximum SPL based on rated peak power and measured sensitivity. CPS-214 measurements • Lynx Pro Audio S.L www.lynxproaudio.com... -
Page 6: Cps-210
15 mm Premium birch plywood Dimensions: 710 x 350 x 428 mm (H x W x D) Weight: 35 Kg (77.1 lbs) * Calculated maximum SPL based on rated peak power and measured sensitivity. CPS-210 measurements • Lynx Pro Audio S.L www.lynxproaudio.com... - Page 7 15 mm Premium birch plywood Dimensions: 755 x 415 x 430 mm (H x W x D) Weight: 33 Kg (72.75 lbs) *Calculated maximum SPL based on rated peak power and measured sensitivity. • CPS-14 measurements Lynx Pro Audio S.L www.lynxproaudio.com...
-
Page 8: Cps-18S
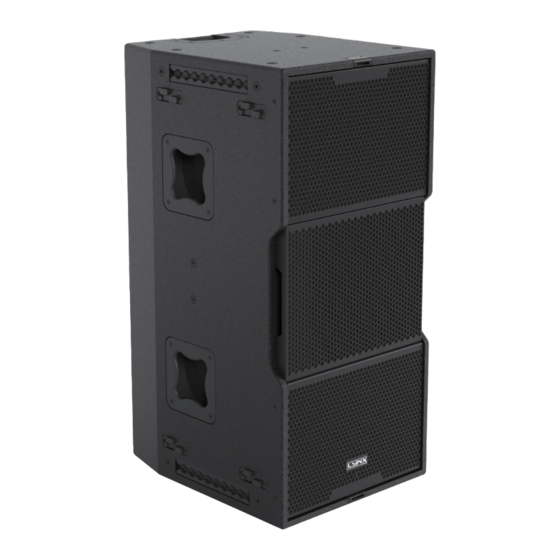
16A Neutrik powerCON TRUE1 TOP with looping output Finish: Polyurea coating, high grade resistant paint Material: 15 mm Premium birch plywood Dimensions: 600 x 900 x 750 mm (H x W x D) Weight: 62 Kg (136.6 lbs) CPS-18S measurements • Lynx Pro Audio S.L www.lynxproaudio.com... - Page 9 • The CPS-5 is a two-way passive vented system part of the CPS series, with a 5” coaxial speaker (1.5” LF voice coil and 1” HF voice coil) offering a coverage of 70º conical dispersion and 120dB SPL in a compact enclosure designed for short throw applications.
- Page 10 9 mm Premium birch plywood Dimensions: 122 x 122 x 131 mm (H x W x D) Weight: 1.5 Kg (3.3 lbs) *Calculated maximum SPL basen on rated peak power and measured sensitivity. CPS-4 measurements • Lynx Pro Audio S.L www.lynxproaudio.com...
-
Page 11: Back Panel
CPS Series User Manual CPS BACK PANEL panel CPS-214, CPS-210 and CPS-14 back panel: IPS display & digital control Multifunction joystick control digital INPUT Main input Main Link digital Through analog analog connection Ethernet Through INPUT Lynx Pro Audio S.L www.lynxproaudio.com... - Page 12 CPS Series User Manual CPS BACK PANEL panel CPS-18S back panel: Main input Main Link IPS display & digital control digital INPUT Multifunction joystick control digital Through analog analog connection Ethernet Through INPUT Lynx Pro Audio S.L www.lynxproaudio.com...
-
Page 13: Connectors And Connections
AC Power c onnect ors under load. NAC3FX-W NAC3MX-W XLR SOCKET CONNECTORS XLR AEREAL CONNECTORS INPUTS 1.- EARTH 2.- LIVE (+) 3.- LIVE (-) OUTPUTS 1.- EARTH 2.- LIVE (+) 3.- LIVE (-) Lynx Pro Audio S.L www.lynxproaudio.com... -
Page 14: Configuring The Digital Signal Processor
On the second screen you can modify some parameters. • Gain • Mute • Polarity • Delay • High Pass Filter: You can setup a High Pass filter selecting type, frequency and order. Lynx Pro Audio S.L www.lynxproaudio.com... - Page 15 The last screen shows you some general information regarding the cabinet’s components. Here you can see the cabinet model, its serial number, DSP firmware and hardware versions, amp module model with hardware version, as well as the accelerometer status. Lynx Pro Audio S.L www.lynxproaudio.com...
-
Page 16: Online Control System
User Manual ONLINE CONTROL SYSTEM • Who is it for? Users of Self powered DSP incorporated Lynx Pro Audio Cabinets where the user has requested the cabinets be supplied with the Ethernet Module kit. • What is it for? Obtain detailed information of cabinet behaviour and monitor the cabinet/s in real time. You can change the preset, gain, mute, polarity and phase. -
Page 17: Rainbow 3D Acoustic Simulation Software
Additionally, the export of FIR coefficients can be performed with the optimization for later loading in the DSP via Ethernet or a USB device. In the near future direct communication with Lynx Pro Audio and OCS will be available. -
Page 18: Hardware And Accessories
Rotatable horn for CPS- Nylon protection for CPS- 210/96 or CPS-14/96 (90º x 60º) MS-5CX UBR-CPS5 Quick Coupler for 3/8” to Wall bracket for the CPS-5 5/8” stand SP-5CX UBR-CPS4 35mm Speaker pole to 3/8” Wall bracket for the CPS-4 male thread Lynx Pro Audio S.L... - Page 19 • To rotate the horn the user must first remove • Then, unscrew the screws that are holding the the central cabinet grill, pulling it out. It is speaker. attached with magnets. Lynx Pro Audio S.L www.lynxproaudio.com...
- Page 20 Make sure that the horn fits correctly. Make sure it is correctly fixed. • Place the cabinet grill back into the former position. Make sure that the cabinet grill is properly fixed with the magnets. Lynx Pro Audio S.L www.lynxproaudio.com...
- Page 21 U BRACKET: HORIZONTAL MOUNTING FOR CPS-214 / CPS-210 / CPS-14 UBR-HCPS is the horizontal mounting system specially designed for Lynx Pro Audio CPS-214, CPS-210 and CPS-14 cabinets. In order to correctly mount the horizontal U bracket, you must first put the wooden adapter (Picture A) before mounting the U bracket.
- Page 22 The angles show the different variations available in order to fix the center of the cabinet (front grill). Please pay special attention to the optimal positioning of your cabinet. Once your selection is made (Position 1, 2 or 3) then you can start with the installation. Lynx Pro Audio S.L www.lynxproaudio.com...
- Page 23 Now that everything is clear we can start with the instalacion of the cabinet. We recommend the use of the Position 1 or Position 2, and this is how to proceed: Position 1 Position 2 Lynx Pro Audio S.L www.lynxproaudio.com...
- Page 24 12 mm free so you can guide the enclosure carefully to achieve the correct coverage. When the cabinet is in the desired position then tighten the four screws (2 per side) and the cabinet will be correctly installed. Lynx Pro Audio S.L www.lynxproaudio.com...
- Page 25 U BRACKET: VERTICAL MOUNTING FOR CPS-214 / CPS-210 / CPS-14 UBR-VCPS is the vertical mounting system specially designed for Lynx Pro Audio CPS-214, CPS-210 and CPS-14 cabinets. It is composed by the U type support made of steel and 4 special fixing screws (2 per side) in order to fix the cabinet to the U support.
- Page 26 UPPER HOLE for Position 2, of each side (left/right), but don’t insert it completly. Just keep 12 mm out of the insert. These screws will help you to hook up the cabinet from the UBR support in order to start with the cabinet installation. Lynx Pro Audio S.L www.lynxproaudio.com...
- Page 27 When the cabinet is in the desired position then tighten the four screws (2 per side) and the cabinet will be correctly installed. Lynx Pro Audio S.L www.lynxproaudio.com...
-
Page 28: How To Use The Flying Frame Sv-Cps On Cps-214
12º 0º 12º 9º 6º 3º 0º Use the screws given with support kit to fix the frame (Figure C). Once the frame is secure, it can be hooked up for its installation (Figure D). Lynx Pro Audio S.L www.lynxproaudio.com... - Page 29 Figure C. NOTE: The start position will be 0 degrees. The angulation can open up to 12 degrees. Each point will add 3 degrees of angulation. Lynx Pro Audio S.L www.lynxproaudio.com...
- Page 30 NOTE: Each hole has a degree position, as shown in the picture above. Make sure to insert the screws in the right holes to obtein the desired angulation. • Finally, you can hook the flying bracket to the engine in the desired position. Lynx Pro Audio S.L www.lynxproaudio.com...
-
Page 31: How To Use The Transport Dolly On Cps-214
HOW TO USE THE TRANSPORT DOLLY FOR CPS-214 Transport dolly for CPS-214: • • CPS-214 on a dolly with squid wheels for easy transport. Squid wheels • Remove latches from above and take off the dolly. Latches Latches Lynx Pro Audio S.L www.lynxproaudio.com... -
Page 32: How To Use The Transport Dolly On Cps-18S
CPS Series User Manual HOW TO USE THE TRANSPORT DOLLY FOR CPS-18S Transport dolly for CPS-18S: • Squid wheels • Lay the cabinet carefully, remove latches and take off the dolly. Latches Latches Lynx Pro Audio S.L www.lynxproaudio.com... -
Page 33: Application Examples For Cps-214 And Cps-18S
APPLICATION EXAMPLES FOR CPS-214 AND CPS-18S • Combination: 1 CPS-214 vertically mounted on top + 1 CPS-18S subwoofer in vertical position • Combination: 2 CPS-18S subwoofers stacked in horizontal + 1 CPS-214 on top in horizontal position Lynx Pro Audio S.L www.lynxproaudio.com... - Page 34 CPS Series User Manual APPLICATION EXAMPLES FOR CPS-214 AND CPS-18S • Combination: 2 CPS-18S subwoofers stacked in horizontal + 1 CPS-214 on top in vertical position Lynx Pro Audio S.L www.lynxproaudio.com...
-
Page 35: Application Examples For Cps-210 And Cps-18S
• Combination A: 1 CPS-210 mounted on top on vertical position as satellite with the subwoofer CPS-18S in horizontal position. • Combination B: 1 CPS-210 mounted on top on vertical position as satellite with the subwoofer CPS-18S in vertical position. Lynx Pro Audio S.L www.lynxproaudio.com... -
Page 36: Application Examples For Cps-14 And Cps-18S
• Combination A: 1 CPS-14 mounted on top on vertical position as satellite with the subwoofer CPS-18S in horizontal position. • Combination B: 1 CPS-14 mounted on top on vertical position as satellite with the subwoofer CPS-18S in vertical position. Lynx Pro Audio S.L www.lynxproaudio.com... -
Page 37: Certifications And Guarantee
Calle 1 - Pol. Ind. Picassent 46220 Picassent (Valencia) SPAIN - EU Tel.: (+34) 961 10 96 01 www.lynxproaudio.com Lynx Pro Audio S.L. declares that ionic series are in conformity with the following EC directives: Low Voltage Directive 2014/35/UE Electromagnetic Compatibility EMC 2014/30/UE... - Page 38 Lynx Pro Audio S.L. In the case that the product could not be returned to the factory for checking and repairing, Lynx Pro Audio S.L. would supply all the necessary parts.
Need help?
Do you have a question about the CPS-5 and is the answer not in the manual?
Questions and answers