
Subscribe to Our Youtube Channel
Related Manuals for Lynx LX-218S


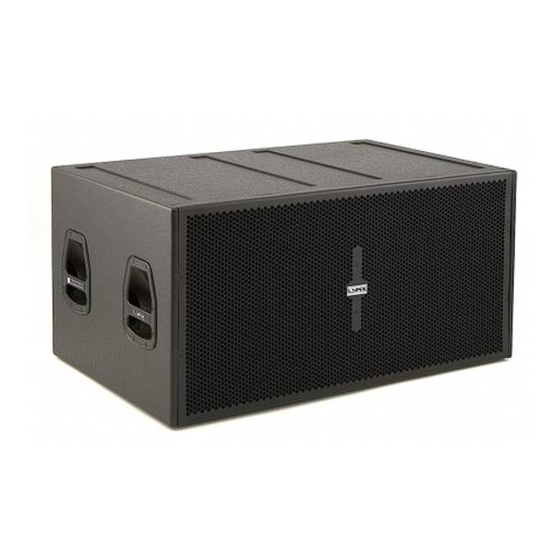
Summary of Contents for Lynx LX-218S
-
Page 1: User Manual
LX-218S USER MANUAL V.10.13 V.13.10 Lynx Pro Audio S.L. Valencia, Spain www.lynxproaudio.com - info@lynxproaudio.com... - Page 2 CB SCHEME, IEC SYSTEM FOR CONFORMITY TESTING AND CERTIFICATION OF ELECTRICAL EQUIPMENT CE CERTIFICACTION, EUROPEAN PRODUCT RoHS Directive 2002/95/EC This user manual is property of Lynx Pro Audio S.L. Any reproduction of this manual, by any means is strictly prohibited. Copyright 2013. All rights reserved.
-
Page 3: Table Of Contents
CONTENTS - SAFETY PRECAUTIONS - CABINET INTRO SPECIFICATIONS BACK PANEL CONNECTORS AND CONNECTIONS - CONFIGURING THE CABINET DSP OPTIONS CONFIGURATION PANEL SELECT INPUT DIGITAL / ANALOG SELECT AND RUN PRESETS PRESET LIST CARDIOID CONFIGURATION ONLINE CONTROL SYSTEM ETHERNET CONFIGURATION - SOFTWARE, RAINBOW - ACCESSORIES - GUARANTEE - DECLARATION OF CONFORMITY CE... - Page 4 When flying this system please observe the technical and “Rainbow” software data carefully. Never exceed the maximum safe working loads or ignore the instructions included within this manual. Use Only flying accessories provided by Lynx Pro Audio S.L. Rigging must be always carried out by professionals.
-
Page 5: Specifications
LX-218S INTRODUCTION To facilitate, correct and reliable use of the Lynx LX-218S we have designed this instruction manual. Please read the manual carefully before proceeding to install the system. When flying this system please observe the technical and “Rainbow” software data carefully. Never exceed the maximum safe working loads or ignore the instructions included within this manual. -
Page 6: Back Panel
2.- LIVE (+) 3.- LIVE (-) 3.- LIVE (-) XLR AEREAL CONNECTORS Connect to input 1 Earth 2 Live(+) 3 Live(-) Connect to output 1 Earth 2 Live(+) 3 Live(-) LYNX Pro Audio S.L. - Valencia, Spain - www.lynxproaudio.com -info@lynxproaudio.com... - Page 7 L - Line CAUTION: Do not connect or N - Neutral disconnect the AC Power connectors under load. - Earth CONNECTION EXAMPLE: 4 LX-218S CABINETS Connect to AC output (max.2 cabinets) Connect to AC output (max.2 cabinets) Connect to signal output LYNX Pro Audio S.L.
-
Page 8: Configuring The Cabinet Dsp Options
LX-218S CONFIGURING THE CABINETS DSP OPTIONS From the buttons below the display on the Lynx cabinet’s back panel you are able to configure the Basic adjustment functions of the internal DSP. Note: You must apply the desired configuration in each cabinet. This is done via the buttons located on the back panel of the cabinet and requires electrical power to work. -
Page 9: Select And Run Presets
(Fig2). Once found, press OK (3) until the progress bar finishes (Fig3). The display will indicate “Loading DSP” (Fig4) Fig 3 Fig 4 Fig 2 Note: In case of a power cut, the DSP will save its last configuration when restarted. LYNX Pro Audio S.L. - Valencia, Spain - www.lynxproaudio.com -info@lynxproaudio.com... -
Page 10: Preset List
You must apply the desired configuration in each one cabinet. This is done via the buttons located on the back panel of the cabinet and requires electrical power to work. LYNX Pro Audio S.L. - Valencia, Spain - www.lynxproaudio.com -info@lynxproaudio.com... -
Page 11: Cardioid Configuration
Image 2: Polar response at 60 Hz (2 cabinets) (dBr) Mode 1: Front Mode 1: Rear Normal Mode: Front Normal Mode: Rear 80 90 100 (Hz) Graphic 1: Mode 1 vs. Normal Mode LYNX Pro Audio S.L. - Valencia, Spain - www.lynxproaudio.com -info@lynxproaudio.com... - Page 12 Image 4: Polar response at 60 Hz (2 cabinets) (dBr) Mode 2: Front Mode 2: Rear Normal Mode: Front Normal Mode: Rear 80 90 100 (Hz) Graphic 2: Mode 2 vs. Normal Mode LYNX Pro Audio S.L. - Valencia, Spain - www.lynxproaudio.com -info@lynxproaudio.com...
- Page 13 Image 6: Polar response at 60 Hz (2 cabinets) (dBr) Mode 3: Front Mode 3: Rear Normal Mode: Front Normal Mode: Rear 80 90 100 (Hz) Graphic 3: Mode 3 vs. Normal Mode LYNX Pro Audio S.L. - Valencia, Spain - www.lynxproaudio.com -info@lynxproaudio.com...
- Page 14 Image 8: Polar response at 60 Hz (2 cabinets) (dBr) Mode 4: Front Mode 4: Rear Normal Mode: Front Normal Mode: Rear 80 90 100 (Hz) Graphic 4: Mode 4 vs. Normal Mode LYNX Pro Audio S.L. - Valencia, Spain - www.lynxproaudio.com -info@lynxproaudio.com...
- Page 15 Image 10: Polar response at 60 Hz (1 cabinet) (dBr) Mode 5: Front Mode 5: Rear Normal Mode: Front Normal Mode: Rear 80 90 100 (Hz) Graphic 5: Mode 5 vs. Normal Mode LYNX Pro Audio S.L. - Valencia, Spain - www.lynxproaudio.com -info@lynxproaudio.com...
- Page 16 Image 12: Polar response at 60 Hz (2 cabinets) (dBr) Mode 6: Front Mode 6: Rear Normal Mode: Front Normal Mode: Rear 80 90 100 (Hz) Graphic 6: Mode 6 vs. Normal Mode LYNX Pro Audio S.L. - Valencia, Spain - www.lynxproaudio.com -info@lynxproaudio.com...
- Page 17 Image 14: Polar response at 60 Hz (1 cabinets) (dBr) Mode 7: Front Mode 7: Rear Normal Mode: Front Normal Mode: Rear 80 90 100 (Hz) Graphic 7: Mode 7 vs. Normal Mode LYNX Pro Audio S.L. - Valencia, Spain - www.lynxproaudio.com -info@lynxproaudio.com...
- Page 18 - In a closed room the response can vary depending on distance between walls, ceiling etc. - The graphs are shown in relative dB measurements. - The polar responses are shown in dB SPL obtained from acoustic prediction. LYNX Pro Audio S.L. - Valencia, Spain - www.lynxproaudio.com -info@lynxproaudio.com...
-
Page 19: Online Control System
LX-218S ONLINE CONTROL SYSTEM Who is it for? Users of Self powered DSP incorporated Lynx Pro Audio Cabinets where the user has requested the cabinets be supplied with the Ethernet Module kit. What is it for? Obtain detailed information of cabinet behaviour and monitor the cabinet/s in real time. You can change the preset, gain, mute, polarity and phase. -
Page 20: Ethernet Configuration
LX-218S CONFIGURING ETHERNET TO WORK WITH LX-218S There are two possible ways to connect: 1.- Connecting through an ETHERNET SWITCH/HUB:: - You will need a normal CAT5 Cable. 2.- Connecting through a Wirless ETHERNET. Let us now proceed to configure the Ethernet network, setting the IP address of the computer as static. - Page 21 Open the OCS software and from the Initial Screen choose Ethernet device into the configuration menu. It will open a different screen, as follows, there you can see your Network configuration, and the cabinets currently connected. LYNX Pro Audio S.L. - Valencia, Spain - www.lynxproaudio.com -info@lynxproaudio.com...
- Page 22 Assign IP to select Device button after writing in the box above the desired data. Remember there cannot be two devices with exactly the same IP address, the last set of three numbers has to be different and unique to each one of the devices. LYNX Pro Audio S.L. - Valencia, Spain - www.lynxproaudio.com -info@lynxproaudio.com...
- Page 23 Returning to the main screen, we can see each cabinet showing: Model, IP address and Name, as well as monitoring: RMS levels, Input clip, power module temperature, compression levels, air absorption compensation and cabinet angulation, as well as displaying the cabinet model and IP address. LYNX Pro Audio S.L. - Valencia, Spain - www.lynxproaudio.com -info@lynxproaudio.com...
- Page 24 It will open the cmd.exe from where you can type the IPCONFIG command ( ipconfig + Enter), which will show your actual IP settings. Here we can see that this PC has IP set as 192.168.2.99. LYNX Pro Audio S.L. - Valencia, Spain - www.lynxproaudio.com -info@lynxproaudio.com...
- Page 25 If the IP is in use, the device will respond to the Ping, and we will obtain this information: You now have the Cabinets working in the ETHERNET Network Enviroment. LYNX Pro Audio S.L. - Valencia, Spain - www.lynxproaudio.com -info@lynxproaudio.com...
-
Page 26: Software, Rainbow
The Rainbow software has been designed by and for sound technicians. Its aim is to help installers and users of Lynx pro audio products. This software is able to import WMF Vector Files with technical drawings and insert them directly into the prediction window and thus enabling real measurement predictions. - Page 27 - Coverage curves on the hearing zones. - Export of SPL Map and coverage curves on jpg or bmp format - Print project report (SPL prediction, flying points, weights, cabinet inclination, polarities, process aplied, EQ Curves…) LYNX Pro Audio S.L. - Valencia, Spain - www.lynxproaudio.com -info@lynxproaudio.com...
-
Page 28: Accessories
LX-218S ACCESSORIES The LX-218S sub unit has at its disposal some practical accessories to help use the system in a number of applications. FD-2LX218S CA-LXV8 FD-3LX218S Transport dolly for up to 3 Nylon protection cover for LX-218S either 2 or 3 cabinets... -
Page 29: Guarantee
Lynx Pro Audio S.L. In the case that the product could not be returned to the factory for checking and repairing, Lynx Pro Audio S.L. -
Page 30: Declaration Of Conformity Ce
DECLARATION OF CONFORMITY LYNX Pro Audio S.L. Calle 7 - Pol. Ind. Picassent E-46220 Picassent (Valencia) Lynx Pro Audio S.L. declares that LX-218S cabinets are in conformity with the following EC directives: Low Voltage Directive 2006/95/EC Electromagnetic Compatibility EMC 2004/108/EC...
Need help?
Do you have a question about the LX-218S and is the answer not in the manual?
Questions and answers