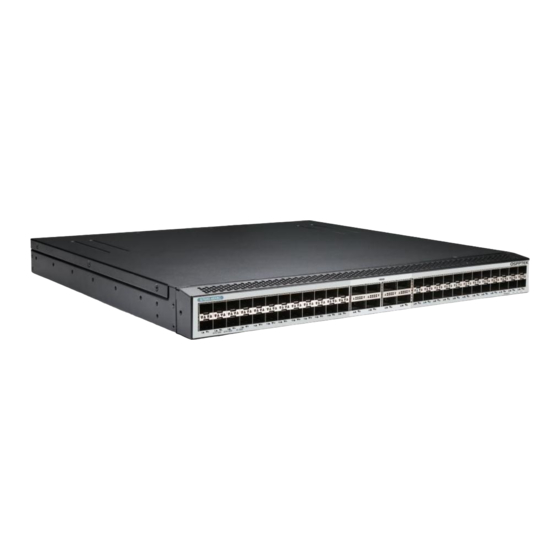
Summary of Contents for QSFPTEK S7600-48X8C
- Page 1 S7600-48X8C Quick Start Guide V2.0 48-Port 10G Ethernet L3+ Switch 48x 10G SFP+ Ports, with 8x 100G QSFP28 Uplinks, Support MLAG, VXLAN www.qsfptek.com V2.0 1 / 12...
- Page 2 Introduction QSFPTEK S7600-48X8C L3+ aggregation switch is designed with 48x 10G SFP+ ports and 8x 100G QSFP28 uplinks. This network switch delivers a 2.56 Tbps switching capacity and 1905 Mpps forwarding rate to meet high-performance aggregation layer requirements. This 10G switch with 2 hot-swap AC power supplies (1+1 redundancy) and 4 hot-swap smart fans, the switch provides hardware redundancy for high reliability.
-
Page 3: Hardware Overview
Port link. Green Port not link. 10G port link. Green Blinking 10G packets receiving or transmitting. SFP+ 1G port link. (Port 1-48) Amber Blinking 1G packets receiving or transmitting. Port not link www.qsfptek.com V2.0 3 / 12... -
Page 4: Back Panel
An RJ45 console port for serial management An RJ-45 Ethernet management port A USB management port for software and configuration backup and offline software upgrade Installation Requirements Tools Preparation Flathead screwdrivers Phillips screwdrivers ESD-preventive wrist strap www.qsfptek.com V2.0 4 / 12... -
Page 5: Mounting The Switch
Mounting the Switch Connecting the Power Plug the AC power cord to the switch power port on the back rear. Connect the other end of the power cord to an AC power source equipment. www.qsfptek.com V2.0 5 / 12... -
Page 6: Connecting The Management Ports
Insert the QSFP28 module into the QSFP28 port. Plug a fiber patch cable to the QSFP28 transceiver. Connect the other end of the fiber to the device that you want to realize data communication. Connecting the Management Ports www.qsfptek.com V2.0 6 / 12... -
Page 7: Connecting The Console Port
Insert one end of the RJ45 Ethernet patch cable into the computer RJ45 port. Connect the RJ45 connector on the other end of the patch cable to the ETH port on the www.qsfptek.com V2.0 7 / 12... -
Page 8: Connecting The Usb Port
Step 1: Connect your computer to the switch using an Ethernet cable and open a web browser. Step 2: Set the IP address of the computer to 192.168.1.x (where "x" is any number from 2 to 254) and the subnet mask to 255.255.255.0. www.qsfptek.com V2.0 8 / 12... - Page 9 Step 2: Launch the terminal simulation software such as Hyper Terminal on the computer. Step 3: Configure the parameters of the terminal emulation software as follows: 115200 bits per second, 8 data bits, no parity, 1 stop bit, and no flow control. www.qsfptek.com V2.0 9 / 12...
-
Page 10: Troubleshooting
2. Input the boot_flash_nopass command to start the system in uBoot mode; Note: After using the boot_flash_nopass command, the system will clear up the startup-config files; before starting this operation, the startup-config files will be stored in flash:/startup- www.qsfptek.com V2.0 10 / 12... -
Page 11: Support And Other Resources
Product Warranty S7600 series switches are backed by a 5-year limited warranty supported by QSFPTEK. You are eligible to apply for a return within 14 days and exchange within 90 days of receiving them. For more details about applying qualifications, please live chat or email sales@qsfptek.com... - Page 12 5 Year Warranty 14-day Return Window www.qsfptek.com V2.0 12 / 12...


Need help?
Do you have a question about the S7600-48X8C and is the answer not in the manual?
Questions and answers