Table of Contents
Advertisement
Advertisement
Table of Contents
Troubleshooting

Related Manuals for Xerox DocuMate 262i


Summary of Contents for Xerox DocuMate 262i
- Page 1 DocuMate 262 scanner user’s guide...
- Page 2 DocuMate 262i scanner user’s guide...
- Page 3 XEROX ® is a trademark of Xerox Corporation in the United States and/or other countries and is used under license. DocuMate ® is a registered trademark of Xerox Corporation used under license. All other Xerox product names and product numbers mentioned in this publication are trademarks of Xerox Corporation.
-
Page 4: Table Of Contents
The Default One Touch Settings on Your Scanner ....... . . - Page 5 Xerox DocuMate 262i Scanner Specifications ........
-
Page 6: Welcome
What’s in the Box DocuMate 262i Scanner User’s Guide Welcome Your new Xerox DocuMate 262i scanner can quickly scan single-sided or double-sided stacks of documents and place their images on your computer. Before proceeding, check the contents of the box. If items are missing or damaged, contact the dealer where you purchased the scanner. -
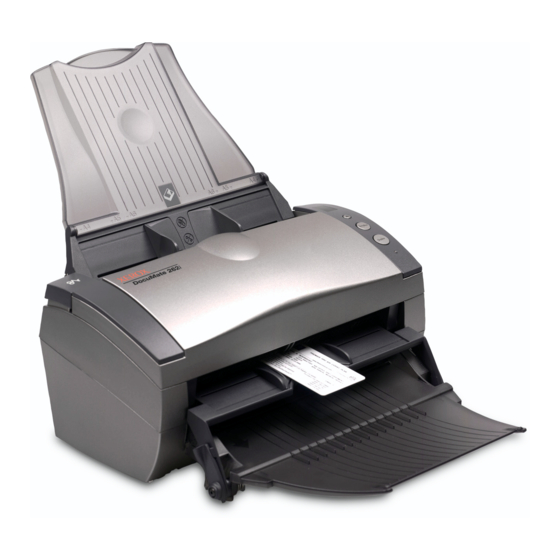
Page 7: The Xerox Documate 262I Scanner
Duplex button—Press to scan a two-sided document. Status light—Shows the scanner’s status. A steady blue light indicates the scanner is available to scan. A rapidly flashing blue light indicates the scanner is preparing to scan. Refer to the Troubleshooting section for additional details. -
Page 8: What You Need
The following documentation is provided with your scanner: • Quick Install Guide—Abbreviated installation instructions. • Xerox DocuMate 262i Scanner User’s Guide—On the Installation DVD; contains detailed installation, scanning, configuration, and maintenance information. • PaperPort User’s Guide—On the Installation DVD; contains detailed feature and configuration information for the PaperPort software. -
Page 9: Installation
Disregard any information about the software not applicable to your chosen product. Please visit our web site at www.xeroxscanners.com for the latest software updates for your Xerox DocuMate 262i scanner. • If your computer has AntiVirus or AntiSpyware software running, you may see messages during installation asking you to allow the installation to proceed. -
Page 10: Step 1: Assemble The Scanner
3. Carefully remove any foam particles that may have gotten inside the document feeder, and close the cover. 4. Align the slots on the paper guide with the ridges on the scanner and slide it down until it snaps into place. -
Page 11: Step 2: Install The Software
Double-click the icon for your DVD-ROM drive. • The Installation menu for the DVD should now open. If the menu does not open: • From the list of files on the DVD, double-click the file named START32.EXE. DocuMate 262i Scanner User’s Guide... - Page 12 DocuMate 262i Scanner User’s Guide 3. On the Installation menu, select Install Products. 4. Make sure the boxes for Nuance PaperPort are checked. The software provided with your scanner may differ slightly NOTE: from the list shown in the window.
- Page 13 7. At the Installshield Wizard Completed window, click Finish. If a message window opens instructing you to restart your computer, click Restart. The Welcome to the One Touch 4.0 Setup Wizard opens. 1. Click Next. DocuMate 262i Scanner User’s Guide...
- Page 14 ISIS driver such as Kofax and QuickScan. The One Touch 4.0 Monitor will not run and you cannot use the One Touch features. You will not be able to use the Xerox DocuMate 262i TWAIN driver. You also will not be able to scan with the buttons on the scanner.
- Page 15 6. Select the option that looks best to you and click Next. 7. STOP when you see the “Complete the installation by connecting your hardware” window. Do NOT click OK yet. Leave the window open and proceed to the next section. DocuMate 262i Scanner User’s Guide...
-
Page 16: Step 3: Connect The Power Supply
Installation Step 3: Connect the Power Supply 1. Plug the power supply into the power port on the scanner. Only use the power supply (HEG42-240200-7L made by NOTE: HiTron) included with your scanner. Connecting any other type of power supply may damage your scanner, and will void its warranty. -
Page 17: Step 4: Connect The Usb Cable And Turn On The Power
Installation Step 4: Connect the USB Cable and Turn on the Power The DocuMate 262i scanner connects to any available USB port. Check your computer’s manual for USB port locations. 1. Remove any protective tape from the USB cable. 2. Plug the USB cable into the USB port on the scanner then into a USB port on the computer. - Page 18 One Touch Button Panel. When you’re finished reading the additional information, click OK. The scanner’s status light is blue when the scanner and computer are communicating properly. 6. Click Close on the Installation Complete window to close and exit the software installer.
-
Page 19: Additional Applications Available With Your Scanner
2. Click Install Products. You will see the screen that shows the applications. Applications already installed have Installed! next to them. 3. See the following table to decide which software you would like to install. DocuMate 262i Scanner User’s Guide... - Page 20 Install Now. Follow the instructions on the screen to install each of the additional products. About the Software ® driver is installed correctly when you install it with your Xerox (LFR) technology. Advanced security features Installation...
-
Page 21: View The User Guides
3. When you’re finished, click Main Menu to return to the Main Menu window and click Exit. 4. Remove the DVD and store it in a safe place. That’s it! Installation is finished and your Xerox DocuMate 262i scanner is ready to scan. DocuMate 262i Scanner User’s Guide... -
Page 22: Register Your Scanner And Check For Updates
After registration is complete you will receive an email message with your RegID. 4. After receiving your RegID, write it down on a piece of paper and keep it with your scanner so you will be able to find it easily. Installation... -
Page 23: Scanning
Scanning If you selected the recommended Full Install option (see page 9), then you have several different options to scan with your Xerox DocuMate 262i scanner. Each method scans equally well, so use the one with appropriate options for the item you are scanning. -
Page 24: Load And Scan Documents From The Input Tray
Load and Scan Documents from the Input Tray DocuMate 262i Scanner User’s Guide When you press either the Simplex or Duplex button, documents are scanned using the scan settings indicated by the LED number. The scanned images are then sent to a software application (known as the Destination Application) on your computer. - Page 25 One Touch utility. In this example the Destination Application is the PaperPort desktop. If you have the front feed tray attached, all pages in the ADF will feed out underneath the front feed tray. DocuMate 262i Scanner User’s Guide...
-
Page 26: Load And Scan Items From The Front Feed Tray
DocuMate 262i Scanner User’s Guide You can scan thick paper, embossed plastic cards, business cards and other items from the scanner’s front feed tray. Please see the “Xerox DocuMate 262i Scanner Specifications” on page 93 for details of the Front Feed scanning specifications. - Page 27 6. To scan a one-sided item, press the Simplex button. To scan a two-sided item, press the Duplex button. 7. The scanner scans the item and ejects it out underneath the front feed tray. A scan progress window opens and the image(s) are sent to the selected application from the One Touch utility.
-
Page 28: Scan With The Front Feed Tray Down
DocuMate 262i Scanner User’s Guide You can lock the front feed tray down so that it is always positioned at the front slot of the scanner. Any items you scan are ejected over the front feed tray when scanning is complete. - Page 29 To Scan with the Front Feed Tray Down: 1. Adjust the paper guides for the width of the item you are scanning. 2. Place a single item face up, with the top pointing into the scanner, between the paper guides on the front feed tray.
- Page 30 5. To scan a one-sided item, press the Simplex button. To scan a two-sided item, press the Duplex button. 6. The scanner scans the item and ejects it out over the front feed tray. A scan progress window opens and the image(s) are sent to the selected application from the One Touch utility.
-
Page 31: Scan From The Input Tray With The Front Feed Tray Down
Scanning Scan from the Input Tray with the Front Feed Tray Down You can scan a maximum of 5 pages in the input tray with the scanner’s front feed tray in the down position. 1. Adjust the paper guide for the paper width, and make sure the input and output trays are fully extended. - Page 32 5. A scan progress window opens and the images are sent to the selected application from the One Touch utility. In this example the Destination Application is the PaperPort desktop. The pages are ejected out of the scanner over the front feed tray. Scanning...
-
Page 33: Auto Scan From The Front Feed Tray
Scanning Auto Scan from the Front Feed Tray You can set the scanner’s One Touch hardware properties to automatically scan an item when it is inserted into the scanner from the front. To Set the Front Feed Scan Event: 1. Right-click on the One Touch icon, located on the Windows task bar, and select “Show Hardware...”... - Page 34 For instance, if the LED on the scanner is set to 6, then the scanner will auto scan from the front feed with the settings of function 6.
- Page 35 2. Place a single item face up, with the top pointing into the scanner, between the paper guides on the front feed tray. 3. The scanner pulls in the item, scans and ejects it out of the front. A scan progress window opens and the image(s) are sent to the selected application from the One Touch utility.
-
Page 36: Using The One Touch Button Panel
The Button View. The Hardware View. • The Button View is your main scanner control panel. Use it to scan or to see all nine buttons. • The Detail View shows the current scan settings for a button. •... -
Page 37: The Default One Touch Settings On Your Scanner
Simplex or Duplex scanner buttons. Based on the recommended install of PaperPort and the scanner driver, your scanner is pre-configured to scan items for various basic tasks, such as email or fax, then send the scanned image to an appropriate, pre- selected Destination Application. -
Page 38: Configuring The One Touch Buttons
This is the application that opens when you are finished scanning. DocuMate 262i Scanner User’s Guide Each One Touch button configuration consists of a Destination Application, a Scan Configuration, and a Document Format. The One Touch Properties window is where you select these three elements for a button. - Page 39 The button names indicate their file types. See “Selecting Page Format Options” on page 50. Options tab—Displays a window for selecting options related to the selected destination application for the scanned image. Grayscale Configure Before Scan DocuMate 262i Scanner User’s Guide...
-
Page 40: Selecting New Settings For A Button
Select a software application as the destination to send scanned documents. DocuMate 262i Scanner User’s Guide For each of the nine One Touch buttons, you can select a new Destination Application, Scan Configuration, and Document Format. To select new settings for a Scanner Button: 1. -
Page 41: Creating A New Scan Configuration
6. When you are finished selecting new settings for a button and you press or click a scanner button, the document is scanned using the newly configured settings for that button. The scan configurations are where you select the scanning resolution, brightness, mode (color, black&white, or grayscale), and a number of... - Page 42 The Scan Settings Tab DocuMate 262i Scanner User’s Guide 1. On the Scan Configuration Properties dialog box, type a name. If you’re going to set up the new configuration to scan duplex TIP: (two-sided), include that in the name, such as “Scan for Dark Print (Duplex),”...
- Page 43 When using the AutoCrop to Original option, always use the paper guides on the scanner so the page is not skewed. Skewed pages may not crop properly. For single-sided scans, the scan area is the size of the image. For double-sided scans, the scan area is the size of the larger of the two areas on the front and back of the page.
- Page 44 The Simplex and Duplex buttons on the scanner take precedence over the One Touch settings. In other words, if the LED number on the scanner is configured to scan as Duplex, but you press the Simplex button, the scanner scans in Simplex, and vice versa.
- Page 45 Gamma—Gamma controls the brightness of the midtones of the color. 2. Click OK to save the new configuration. It will now appear in the list of Scan Configurations on the One Touch Properties window for the appropriate Destination Applications. DocuMate 262i Scanner User’s Guide...
- Page 46 The Device Settings Tab DocuMate 262i Scanner User’s Guide A Device Settings tab appears on the Scan Configurations dialog box when your selected Destination Application sends the scanned image to a printer, fax application, or other device. You use the options on the Device Settings tab to select settings for the device.
-
Page 47: Editing Or Deleting Scan Configurations
Your scanner comes with a number of configurations pre-set at NOTE: the factory. To ensure that your scanner will always have a set of correct scan configurations, do not delete the preset configurations. We also recommend that you keep those configurations locked so they are not inadvertently deleted. - Page 48 DocuMate 262i Scanner User’s Guide 1. Open the One Touch Properties window. 2. Select the scan configuration you want to edit or delete. 3. To delete the configuration, click the Delete button. 4. To edit the configuration, click the Edit button.
-
Page 49: Setting Destination Application Properties
These properties apply to PaperPort, and are for designating the folder to receive your scanned items. 1. Select the PaperPort folder where you want the file of the scanned image to be located. 2. Click OK. DocuMate 262i Scanner User’s Guide... - Page 50 DocuMate 262i Scanner User’s Guide 3. Click OK or Apply on the One Touch Properties window. When PaperPort opens after you finish scanning, the thumbnails of your scanned documents are on the Desktop in that folder. Text Documents Properties These properties apply to Microsoft Word, Microsoft Excel applications indicated by their icons in the list.
- Page 51 6. Click the Add button. 7. Click OK or Apply on the Link Properties window. 8. Click Refresh on the One Touch Properties window. 9. Click OK or Apply on the One Touch Properties window. DocuMate 262i Scanner User’s Guide...
- Page 52 DocuMate 262i Scanner User’s Guide Image Documents Properties These properties apply to OmniPage Pro that you received with your scanner, plus Microsoft Paint and other image processing applications. 1. Click in the Color document handling settings boxes for the options you want.
- Page 53 5" CD (700MB), should also be selected so you will see a message when it’s time to click the Burn to CD button. 4. Click OK on the Link Properties window. DocuMate 262i Scanner User’s Guide...
- Page 54 DocuMate 262i Scanner User’s Guide eMail Properties These properties apply to email applications so you can specify the folder for documents that you will attach to an email message. Microsoft ® Outlook will accept direct attachment of documents to a blank email message as soon as scanning is finished, but other email applications may not.
-
Page 55: Selecting Page Format Options
JPEG files are reduced in size by lowering their image quality, and you can select the degree of quality for your scanned images from the JPEG file format icon. Text Formats; sPDF is only one of several text formats available. DocuMate 262i Scanner User’s Guide... - Page 56 Text Formats DocuMate 262i Scanner User’s Guide The PDF format is often used to create images of text pages. You may want to select PDF as the page format when scanning text pages that do not require OCR processing or other processing. The PDF format is also used to put multi-page documents on web sites as pdf-readable files.
- Page 57 Excel Spreadsheet—The .xls file format used by Microsoft Excel. Example menu for the text format when the Destination Application is a Storage location. DocuMate 262i Scanner User’s Guide...
- Page 58 DocuMate 262i Scanner User’s Guide HTML Document—The .htm file format used to create web pages. Searchable PDF—The .sPDF file format used by Adobe Acrobat and OmniPage Pro. This format converts scanned text into PDF with text search and OCR capabilities. See “Scanning with sPDF or nPDF and Searching for Text”...
-
Page 59: Renaming A One Touch Button
1. Open the One Touch Properties window and click the Options tab. Options tab. 2. Click the Select Button menu arrow and select the button for new options. Type a new name for the button. DocuMate 262i Scanner User’s Guide... - Page 60 DocuMate 262i Scanner User’s Guide 3. Select button options as described below. Show All Destinations—This option selects all the Destination Application categories. Select Destinations—Select this option to individually choose the types of applications to include in the list of Destination Applications.
- Page 61 Printer. Group by type arranges the scanned documents by the type of file, such as .doc or .jpg. If you also want to group them by date you can choose the week and month options. DocuMate 262i Scanner User’s Guide...
-
Page 62: Configure Before Scan
Configure Before Scan DocuMate 262i Scanner User’s Guide Choosing Configure Before Scan simply opens a scanning interface when you press or click a scan button. You can then use the interface to change the Resolution, Scan Mode, and other settings. When you scan, the... - Page 63 Scanning To Scan Using Configure Before Scan 1. Put the documents in the scanner’s ADF tray or on the flatbed glass. 2. Click on the button you set to use the Configure Before Scan option. In the example shown on the previous page, the scanning option 9 has been set to use Configure Before Scan.
- Page 64 Canceling a Configure Before Scan DocuMate 262i Scanner User’s Guide To cancel a scan after scanning has begun: 1. Click on the Cancel button in the scanning progress window. 2. The following window will open asking you if you want to cancel the entire job.
-
Page 65: Scanning With Optical Character Recognition (Ocr)
The One Touch OmniPage Module or the OmniPage Pro software must be installed on your computer in order to use the OCR options with the One Touch 4.0 software and your DocuMate 262i scanner. One Touch 4.0 and OmniPage Pro work together to combine scanning with OCR processing into one integrated step. - Page 66 DocuMate 262i Scanner User’s Guide To scan with OCR: 1. To scan using the buttons on the scanner, press the Destination Selector until the LED is at 6, then press the Simplex or Duplex button. One Touch Button 6 is preset as your OCR button. But you can NOTE: also set up any other button to scan and OCR the text.
-
Page 67: Scanning With Spdf Or Npdf And Searching For Text
3. Select a Destination Application that uses a text format as the page format. 4. Right-click on the text format icon. 5. Choose the Searchable PDF or Normal PDF option for the page format. DocuMate 262i Scanner User’s Guide... - Page 68 DocuMate 262i Scanner User’s Guide Not all Destination Applications have the sPDF and nPDF NOTE: options. The settings for the button (button 8 in this example) now show your page format selection. 6. Choose a Scan Configuration. 7. Click OK. The One Touch Properties window closes.
-
Page 69: Scan And Burn To A Cd
Scan and Burn to a CD If you have a CD burner attached to your computer, you can scan directly from your Xerox DocuMate 262i scanner onto a CD. This feature is available only on computers running Windows XP or Windows Vista. -
Page 70: Scanning With Event Forwarding
If you want to specify an application to use for scanning at the start of the process, you can use event forwarding. The scanner will feed in the first page, but will then stop until you select the application to use. -
Page 71: Creating An Html Web Page From Your Scanned Documents
9. You can now use Microsoft Internet Explorer or other application to post the document to your web page as you would any other HTML page. Choose HTML. DocuMate 262i Scanner User’s Guide... -
Page 72: Transferring Scanned Documents To Storage
OCR process into editable text and numbers before being stored. 1. To scan using the buttons on the scanner, press the Destination Selector until the LED is at 7, then press the Simplex or Duplex button. - Page 73 “Storage for Business Receipts.” 6. Click the Scan Settings, Page Settings, and Advanced Settings tabs, and select the settings you want. Select Transfer to Storage. Click the New button. DocuMate 262i Scanner User’s Guide...
- Page 74 DocuMate 262i Scanner User’s Guide 7. Click the Storage Options tab. 8. Click the Browse button. 9. Select the folder you created for storing the scanned documents. If you haven’t created the folder yet, you can click the Make New Folder button and type the name for the new folder.
- Page 75 Storage destination, and each configuration scans documents to separate folders. 14. Now click the arrow buttons to select a scanner button for each new configuration. Click Apply to set that button for that configuration. The following examples show that buttons 7 and 8 have been set to scan to each of the new configurations.
- Page 76 Scan to multiple storage folders: 1. Insert the documents you want to scan to storage. 2. Press the Destination Selector buttons on the scanner to get to one of the buttons set up for scanning to storage. 3. Press the Simplex or Duplex button to scan the documents.
-
Page 77: Checking The Hardware And Setting The Lamp Power Saving
1. Right-click on the One Touch icon and choose Show Hardware from the pop-up menu. You can also click the scanner icon at the top of the One Touch Button Panel. The Hardware icon. - Page 78 DocuMate 262i Scanner User’s Guide 2. Click the Properties button. Your scanner has a built-in power saving feature that is set to power down after 15 minutes of idle time. You can change the time before the scanner powers down, from 1 minute to a maximum of 4 hours.
-
Page 79: Scanning With The Twain Interface
Because the TWAIN interface is the same regardless of the software you use to open it, you can still use the instructions in this User’s Guide for scanning with your Xerox DocuMate 262i scanner. To access the TWAIN interface from other software, please refer to their user’s guides, then return to this User’s... -
Page 80: Accessing The Twain Interface
3. The TWAIN Interface will open. Please refer to an application’s user guide for the appropriate steps to open the TWAIN Interface for your scanner. The TWAIN interface lists the scanning options available with your Xerox DocuMate 262i scanner. Scanning with the TWAIN Interface... - Page 81 4. Click on the Scan button in the TWAIN interface. 5. When scanning is complete, click Done to close the TWAIN interface. The scanned images appear in the TWAIN software. This example shows a thumbnail image of a scanned page on the PaperPort Desktop. DocuMate 262i Scanner User’s Guide...
- Page 82 AutoCrop to Original—Select this option to let the scanner automatically determine the size of the item being scanned. For example, if you scan a 5" x 7" photo, the scanner will determine the size of the photo, and the scan area is the size of that photo.
- Page 83 The Define page size option cannot be used with AutoCrop to original. • AutoScan on document insertion—Your Xerox DocuMate 262i scanner includes AutoLaunch technology that senses when an item is inserted into the paper feed and starts scanning immediately. Select this option to turn on the AutoLaunch feature.
-
Page 84: Display The Device Configuration
Display the Device Configuration DocuMate 262i Scanner User’s Guide 1. Click the Xerox DocuMate 262i icon in the top right corner of the TWAIN interface. The Device configuration window opens and shows the information about your scanner. 2. Click the arrows for the Lamp timeout setting and choose a time setting. -
Page 85: Scanning With The Wia Interface
To scan using WIA from Microsoft Paint: 1. On the Windows taskbar, click Start, point to Programs, point to Accessories, and then click Paint. The Paint window opens. 2. From the File menu choose From Scanner or Camera. DocuMate 262i Scanner User’s Guide... - Page 86 DocuMate 262i Scanner User’s Guide The Scan using Xerox DocuMate 262i window opens. Use this window to select scanning options and start the scan process. 3. Click the button most appropriate for the item you’re scanning. 4. Select a paper size from the Page Size list.
-
Page 87: Fine Tuning Your Scans
You can select new settings before you scan an item to fine tune exactly how you want to scan it. To select the scanner settings before you scan: 1. On the scan window, click Adjust the quality of the scanned picture. DocuMate 262i Scanner User’s Guide... - Page 88 DocuMate 262i Scanner User’s Guide The Advanced Properties dialog box opens. 2. Select the options for scanning. Brightness and Contrast—Drag the sliders to the right or left to adjust the brightness and contrast of the scanned image. The Contrast setting does not apply to the setting Black and White picture or text.
-
Page 89: Scanning With The Isis Interface
Xerox DocuMate 262i scanner. The Scanner Selection dialog box will then open. 2. Select Xerox DocuMate 262i from the list of scanners and click OK. Your scanner is then ready to work with the QuickScan ISIS driver. -
Page 90: Maintenance
To clean the ADF: 1. Dampen a soft cloth with some Isopropyl rubbing alcohol (95%). 2. Press the ADF cover release on the top left of the scanner body to open the Automatic Document Feeder cover. 3. Wipe the feed roller from side to side. Rotate the roller to clean its entire surface. -
Page 91: Clearing Paper Jams
Document Feeder, a warning dialog box opens after a few moments. To clear a paper jam: 1. Press the ADF cover release on the top-left of the scanner body to open the Automatic Document Feeder cover. 2. Remove the jammed paper and close the cover. -
Page 92: Replacing The Adf Pad Assembly
The ADF pad may wear out and is designed to be a user-replaceable part. Problems with documents feeding into the ADF is an indication that the pad is wearing thin. See the “Xerox DocuMate 262i Scanner Parts List” on page 94 for ordering information. To replace the ADF Pad assembly: 1. -
Page 93: Troubleshooting
Pane? If you use multiple devices with your computer, you may have selected another source for images. Start the PaperPort software and click the Scan icon, then make sure Xerox DocuMate 262i is selected as the scanner. Problem: The installation will not complete successfully. -
Page 94: Status Light Troubleshooting Codes
In all cases you should turn off your scanner and check your scanner setup. Open the scanner and make sure your input tray is fully seated in the scanner casing, make sure your ADF pad is securely snapped in place, verify the connections to the PC and wall. - Page 95 Make sure that the lamp has not been turned off manually. See the steps on page 72 to turn the lamp on and off. Re-boot your computer. If the problem persists, contact Xerox Technical Support. Open the ADF cover and remove the jammed page. See “Clearing Paper Jams”...
-
Page 96: Uninstalling Your Scanner
Uninstalling the Scanner and One Touch Software Uninstalling the PaperPort and OmniPage Software DocuMate 262i Scanner User’s Guide To uninstall the Xerox DocuMate 262i scanner, remove the scanner software, PaperPort, or any other scanning software provided with the scanner. 1. On the Windows taskbar, click Start, point to Settings, then click Control Panel. -
Page 97: To Install Another Driver
User Guide and follow steps for installing one of the other driver options. The One Touch 4.0 driver is required for the scanner’s buttons NOTE: to function. If you select a driver without One Touch 4.0, the scanner buttons will not initiate scanning. DocuMate 262i Scanner User’s Guide... -
Page 98: Xerox Documate 262I Scanner Specifications
Xerox DocuMate 262i Scanner Specifications Optical resolution Bit depth Maximum page size Minimum page size Scan method ADF specifications Scanning Speed Capacity Paper Thickness Front Feed specifications Maximum item size Minimum item size Item thickness Light source Interface Scanner dimensions... -
Page 99: Xerox Documate 262I Scanner Parts List
Maintenance Xerox DocuMate 262i Scanner Parts List Please use the following part names and numbers when ordering replacements for your scanner. Part Name Paper Guide Output Tray Front Feed Tray with Output Tray ADF Pad USB Cable AC Power Cord... -
Page 100: Notices
Your Xerox product and supplies have been designed and tested to meet strict safety requirements. These include safety agency evaluation and certification, and compliance with electromagnetic regulations and established environmental standards. -
Page 101: Section 3: Operational Safety Information
Section 3: Operational Safety Information Your Xerox equipment and supplies have been designed and tested to meet strict safety requirements. These include safety agency examination, approval, and compliance with established environmental standards. To ensure the continued safe operation of your Xerox equipment, follow... -
Page 102: Section 4: Electrical Information
If you are not sure whether or not an outlet is correctly grounded, consult an electrician. 5. Do not use an adapter to connect any Xerox equipment to an electrical outlet that lacks a ground connection terminal. 6. Do not place this equipment where people might step or trip on the power cable. -
Page 103: Section 5: Emergency Power Off
Section 7: Product Safety Certification If any of the following conditions occur, turn off the machine immediately and disconnect the power cable(s) from the electrical outlet(s). Contact an authorized Xerox Service Representative to correct the problem: • The equipment emits unusual odors or makes unusual noises. -
Page 104: Section 8: Regulatory Information
England, Telephone +44 (0) 1707 353434 Xerox operates a worldwide equipment take back and reuse/recycle program. Contact your Xerox sales representative (1-800-ASK-XEROX) to determine whether this Xerox product is part of the program. For more information about Xerox environmental programs, visit: environment.html. - Page 105 Xerox ENERGY STAR equipment is preset at the factory. Your machine will be delivered with the timer for switching to Power Save Mode from the last copy/print out, set at 15 minutes. A more detailed description of this feature can be found in the Machine Setup Section of this guide.
-
Page 106: Section 10: Ilegal Copies
Section 10: Ilegal Copies DocuMate 262i Scanner User’s Guide Congress, by statute, has forbidden the reproduction of the following subjects under certain circumstances. Penalties of fine or imprisonment may be imposed on those guilty of making such reproductions. 1. Obligations or Securities of the United States Government, such as:... - Page 107 9. Copyrighted material or trademarks of any manner or kind without the consent of the copyright or trademark owner. Dependency Status Previous military service DocuMate 262i Scanner User’s Guide...
-
Page 108: Section 11: Eh&S Contact Information
Note: This list is not inclusive and no liability is assumed for either its completeness or accuracy. In case of doubt, contact your legal counsel. Contact Information For more information on Environment, Health, and Safety in relation to this Xerox product and supplies, please contact the following customer help lines: 1-800-828-6571 USA:... - Page 109 DocuMate 262i Scanner User’s Guide...
-
Page 110: Index
DOC 52 Document Format 33, 34 Options 50 Document Management 55 Documentation 3 Double-Feed Detection 39, 78 DocuMate 262i Scanner User’s Guide Index Duplex 39, 71, 77 Duplex button 2, 18, 20, 22, 27 eMail Applications 55 America Online® (AOL) 49... - Page 111 Sti event forwarding 55 Scanning 65 Still Image Client 65 Storage and CD-R/W 55 Scan & Burn to CD 64 Transfer to Storage scanning 67 Storage Options Tab 42 Straighten Image 38 System requirements 3 DocuMate 262i Scanner User’s Guide...
- Page 112 TWAIN 9, 18, 57, 65 Options 77 TWAIN standard 74 TXT 52 Uninstall Software 91 USB port 12 Use enhanced folder browser 56 WIA 80 Windows Image Acquisition (WIA) 9, 18, 57, 80 Word Document 52 XLS 52 DocuMate 262i Scanner User’s Guide Index...
- Page 113 05-0754-000...
Need help?
Do you have a question about the DocuMate 262i and is the answer not in the manual?
Questions and answers