
Related Manuals for Kinderkraft ONETO3 i-Size


Summary of Contents for Kinderkraft ONETO3 i-Size
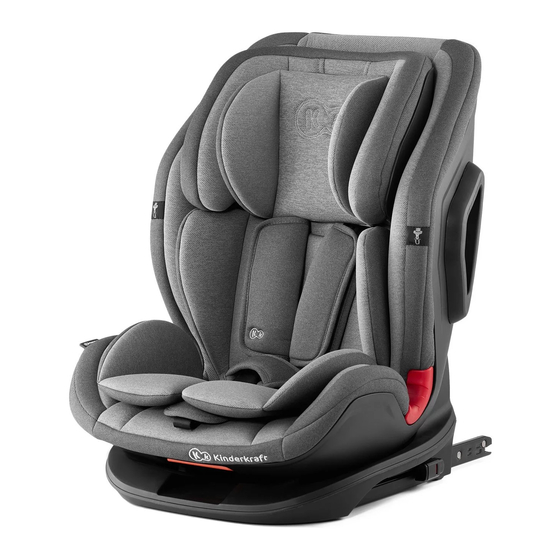
- Page 1 ONETO3 i-Size MODEL: ONETO3 i-Size ECE R129.03 v.1.1 USER GUIDE MODEL: I-GUARD ECE.R129.03 ver. 1.2...
- Page 2 Please read this user manual carefully before using your child’s car seat for the first time. It is your ATTENTION! Product graphics are for reference only responsibility to ensure your child's safety and failure to read this manual may affect it. 1.0 Car seat components (Fig.
- Page 3 2.0 Usage The car seat has been designed, tested and approved for use in accordance with the requirements of UN/ECE Regulation No. 129 concerning the approval of child restraint systems (UN/ECE R129/03). The car seat is designed to be installed forward facing, for children between 76 cm - 150 cm body height (up to approximately 12 years of age).
- Page 4 Hight of the child Car seat setting Car seat mounting ISOFIX + Top-Tether + inner harness straps 76 – 105 cm Forward facing ISOFIX + three-point safety harness 100 – 150 cm Forward facing Three-point safety harness...
-
Page 5: Safety Instructions
3.0 Safety instructions WARNINGS Please take a few minutes to read this instruction manual in order to ensure the adequate safety of your child. Many injuries that are easy to avoid are caused by reckless and improper use of the car seat. - Page 6 • Only an optimally adjusted headrest can provide your child with maximum protection and comfort, while ensuring that the safety harness is properly adjusted. • The Kinderkraft ONETO3 i-Size car seat backrest should be pushed against the backrest of the car seat to provide the best possible protection for your child.
- Page 7 • Do not use replacement covers, other than those recommended by the manufacturer, as they are • The car seat must be secured at all times, even when not in use. The car seat that is not fastened an integral part of the safety system of the car seat. can injure the passengers even during emergency braking.
- Page 8 4.0 Securing the child 4.1 Insert The baby insert (3) is its integral part and plays an important role in the functioning of the cat seat. The insert improves comfort and gives extra support for very young children. The extra insert should be used until the child reaches 87 cm (Fig.
- Page 9 4.3 Height of the headrest A correctly positioned headrest ensures optimal placement of the shoulder part of the vehicle seat belt and provides protection and comfort for your child. The headrest should fit snugly around your child's head, with the lower part of the headrest at the same height as your child's shoulders (Fig.
- Page 10 4.4 Mechanism for adjusting the inclination of the backrest The inclination angle of the car seat can be adjusted with the lever (12). Pull the lever and then adjust the inclination angle of the seat/backrest (Fig. B.6). Release the lever in the required position.
- Page 11 4.5 Securing the child with the inner harness straps • Loosen the harness straps fully by pressing the button (6) and pulling the harness straps (Fig. B.8). • Undo the buckle (4) and place the harness straps on the sides of the car seat (Fig.B.8). Place the child in the seat (Fig.
-
Page 12: Tightening The Harness
B.10 4.6 Tightening the harness • Pull the shoulder straps to eliminate slack in the waist section, so the harness will lie flat. • Tighten the harness with the adjustment strap (7) until the harness lies flat on and close to the child's body (Fig. -
Page 13: Isofix Installation
5.1 Installing a forward-facing car seat for children between 76 and 105 cm tall using the ISOFIX system and the Top-Tether). IMPORTANT The vehicle manual provides the location of the ISOFIX installation points and top fastening strap, as well as other necessary information for installing the car seat in your vehicle. The user MUST read the vehicle operation manual. - Page 14 5.1.2 Mounting the Top-Tether • Pull out the Top-Tether strap (17) and press the buckle release button to loosen it (Fig. C.4). The length of the strap must allow the hook to be hooked to the anchorage point at the rear of the vehicle seat or in the trunk.
- Page 15 5.3 Removing the car seat (ISOFIX installing system) • Press the ISOFIX release buttons (10) on both arms of the ISOFIX latch (19) simultaneously. When the latches are released and the colour of the markers turns red, pull the seat out of the ISOFIX guides.
- Page 16 Fasten the vehicle seat belt, you will then hear a characteristic "click" (Fig. D.3). Tighten the vehicle seat belt by pulling first on the waist belt section, then on the shoulder belt section (Fig. D.4). Make sure that the waist belt is positioned as low as possible over your child's hips, fits into the guides and that it is fastened with a buckle.
- Page 17 6.1 Stowing away the 5-point harness • Unfasten the latches of the shoulder pads (9), remove them from the car seat's harness straps. • Slacken the harness by pressing the adjustment button (6), pull the harness straps forward as much as possible. •...
-
Page 18: Installing The Cover
6.2 Removing the cover • Stow away the harness and remove the insert - if fitted (see section 6.1). Headrest: set the headrest to the highest position, unfasten the latches and, starting from one side, carefully remove the cover (Fig. E.2). Proceed to disassembling the shoulder pads (9) (Fig. E.3). Cover: set the car seat to the most reclined position to make it easier to reach the latches on the back of the car seat. - Page 19 • The harness can be cleaned in lukewarm soapy water. Warning! You must not remove the metal clips from the straps. The full text of the Terms and Conditions of the Warranty is available on the website WWW.KINDERKRAFT.COM...
Need help?
Do you have a question about the ONETO3 i-Size and is the answer not in the manual?
Questions and answers