Advertisement
Before you begin using the device, please check the version you got and ensure that the following
items are included in the shipped box:
Mainframe Accessories :
Step1: Rotary Bracket Installation
Mark the four holes of the rotary bracket on
the wall.
Rotary bracket x 1
Plastic wall anchor x 4
M3x8 Torx screw x 2
Allen wrench x 1
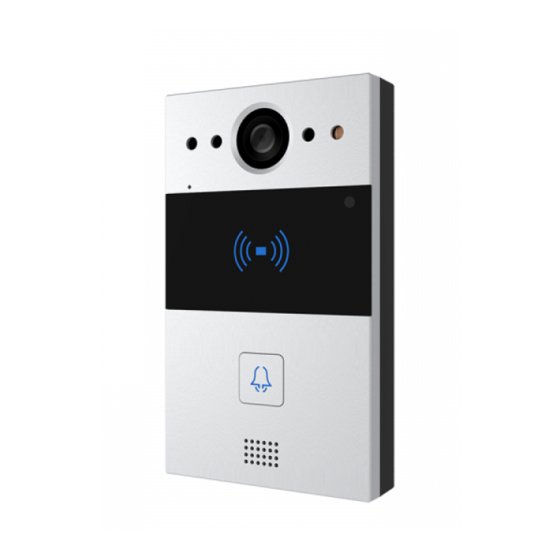
R20A/R20A-2
ST4x20 screw x 4
M4x10 screw x 4
Torx wrench x1
Use a hand drill with 5mm diameter bit
to make the holes (20 mm in depth) in
the marked positions.
Advertisement
Table of Contents

Subscribe to Our Youtube Channel
Related Manuals for Akuvox R20A


Summary of Contents for Akuvox R20A
- Page 1 R20A/R20A-2 Before you begin using the device, please check the version you got and ensure that the following items are included in the shipped box: Mainframe Accessories : Rotary bracket x 1 ST4x20 screw x 4 M4x10 screw x 4...
- Page 2 R20A/R20A-2 Insert the four plastic wall anchors Fix the rotary bracket onto the four plastics into the four drilled holes. wall anchors using four ST4 x20 screws, and make sure the bracket is square to the wall. Step2: Wall-mounting Bracket Installation...
- Page 3 R20A/R20A-2 Step3: Rotary Bracket Adjustment Note: Please refer to R20A or R20A-2 quick guide to install the device back cover and to hang the device on the wall-mounting bracket. Fix the M3x8 Torx screws onto the rotary bracket Installation completed.
Need help?
Do you have a question about the R20A and is the answer not in the manual?
Questions and answers