Akuvox R20K Quick Manual
Adjustable angle wall-mounting installation
Hide thumbs
Also See for R20K:
- Administrator's manual (108 pages) ,
- Admin manual (49 pages) ,
- User manual (12 pages)
Advertisement
Quick Links
Before you begin using the device, please check the version you got and ensure that the following items
are included in the shipped box:
Mainframe Accessories (Please find in device box) :
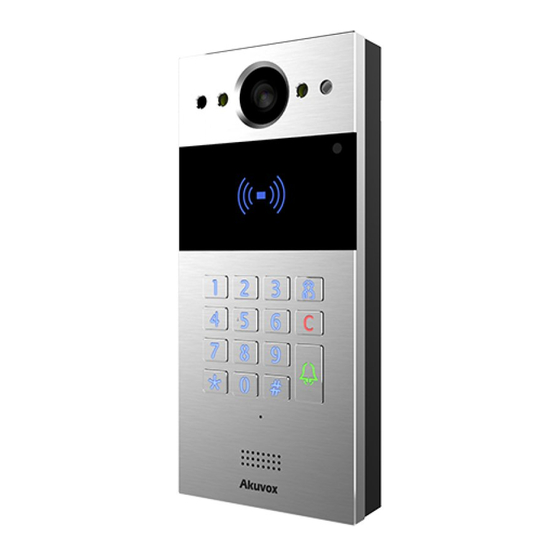
R20K x 1
M2.5x6 screw x 6
Adjustable Angle Wall-mounting Accessories :
Adjustable angle bracket x 1
Torx Wrench x 1
R20K BACK VIEW
R20K BOTTOM VIEW
Back cover x 1
Rubber Plug x 3 (S,M,L)
85.0mm
wall-mounting screws
Adjustable Angle Wall-mounting Installation
Rope x 1
M4x30 screw x 2
Screw fixing seat x 4
M3x6 Torx screw
184.0mm
ADJUSTABLE ANGLE BRACKET LEFT SIDE VIEW
M3x6 Torx screw
ADJUSTABLE ANGLE BRACKET BOTTOM VIEW
R20K
Cable locking plate x 1
Wall-mounting template x 1
ST4x20 screw x 4
M3x6 Torx screw x 2
wall-mounting
screws holes
WALL
Advertisement

Related Manuals for Akuvox R20K


Summary of Contents for Akuvox R20K
- Page 1 Before you begin using the device, please check the version you got and ensure that the following items are included in the shipped box: Mainframe Accessories (Please find in device box) : R20K x 1 Back cover x 1 Cable locking plate x 1...
- Page 2 Step1: Adjustable angle bracket Installation 1. Without embedded junction box in the wall According to the baseline on Insert four screw fixing the mounting template, stick seats into the holes. the mounting template on the 1.45 wall or other surface. Use a drill with 5mm diameter bit to make four holes in the “Hole 3”...
- Page 3 R20K Adjustable Angle Wall-mounting Installation Step2:Back Cover Installation Make cables go through the back cover, connecting to the corresponding interfaces of the main Fasten the back cover board. Select a suitable size rubber with four M2.5x6 screws. plug to push all the cables into the back cover.
- Page 4 Notice Information Akuvox R20K firmware contains third-party open source software under the terms of the GNU General Public License(GPL). Akuvox is committed to meeting the requirements of the GNU General Public License (GPL) and will make all required source code available.
Need help?
Do you have a question about the R20K and is the answer not in the manual?
Questions and answers