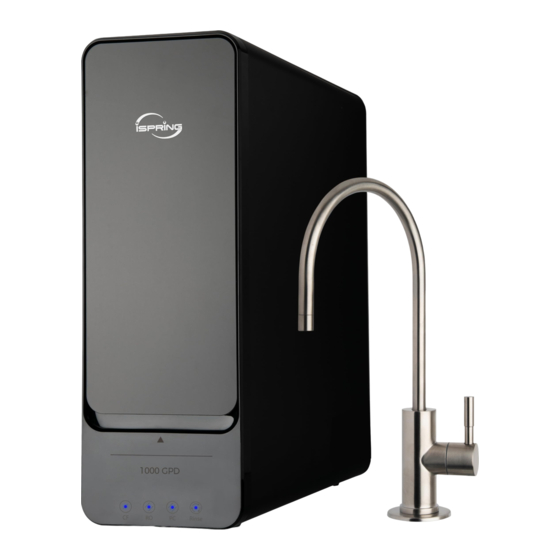
Summary of Contents for Ispring RO1000 Series
- Page 1 Ri ns e Copyright ©2005-2023 ISPRING WATER SYSTEMS, LLC. All rights reserved.
- Page 3 United States. We provide various residential faucets and water filtration systems that deliver pure, healthy, and tasty water to you and your family. At iSpring, we strive to develop products to the highest of standards and aim to make excellent drinking water accessible for all households. With affordable pricing, reliable quality, prompt delivery, and top-notch customer service, we hope to assist in bringing you great water for years to come.
-
Page 4: Table Of Contents
Starting for the First Time .................. 12 Routine Maintenance ..................12 Replacing the Filters ................... 12 Display and Operating Area/Indicators .............. 13 Filter Service Life Reset ..................14 Malfunction Inspection..................14 Warranty iSpring Standard Limited Warranty (End-Users Only) ........... Warranty Registration Form ................... -
Page 5: User Information
User Information Users must adhere to the installation specifications described in this Product Installation and Operation Manual (hereinafter referred to as the "instruction manual"). iSpring is not responsible for any damage, loss, or injury resulting from neglect, improper maintenance, or unauthorized modification of products. -
Page 6: Component Identification
Component Identification Page 4 www.123filter.com | +1 (678) 261-7611 | Support@123Filter.com... -
Page 7: Product Features
Product Features 1) Product Scope • For residential use ONLY. • Applicable water requirement: It is highly recommended to use this system on municipal water supply. Never use a water source that is microbiologically unsafe or of unknown quality without adequate disinfection/pre-filtration. 2) Specifications Specifications Inlet Water Pressure... -
Page 8: Product Structure And Size
Installation 1) Preparation Check the packing list to confirm all accessories are included in the package. Contact iSpring customer service if any components are missing. A. Choose a suitable location for the system. Again, it cannot be mounted and must be placed on a flat surface. -
Page 9: Feed Water Adapter Installation
2) Feed Water Adapter Installation A. Slide the nut onto the 3/8'' PE pipe, then insert the pipe into the male fitting on the feed water adapter and tighten the nut using a spanner wrench. B. Turn off the cold-water supply valve and unscrew the kitchen faucet connector pipe. C. -
Page 10: System Installation And Setup
c. An indent should be made with a punch on the steel before drilling to help guide the bit. d. Use caution when drilling on a Porcelain sink, as it could be easily chipped. Set drill speed to slow. Press the bit downward firmly until breaking through the slippery surface. Some users find it easier to secure the bit by drilling through a piece of wood firmly pressed on the surface. - Page 11 Inlet Water Pipeline Installation: A. Cut the 3/8" PE pipe, which is connected to the feed water adapter, to the appropriate length using a utility knife. B. Insert the other end of the tube into the 3/8" elbow fitting, then plug the stem end into the port marked "Inlet"...
- Page 12 Then install the backplate and tighten the two screws with hex nuts while the tubing remains in the hole. Note: The YouTube video ''iSpring RO System Drain Saddle ADS1K DIY Installation'' is a good reference. D. Insert the other end of the 1/4'' tubing to the ¼'' elbow fitting, then insert the stem to the port marked "Drain"...
-
Page 13: Connecting The Power Supply
5) Connecting the Power Supply Plug the system into the power supply. Do not touch the plug with wet hand. The completed system connection should be as shown below. www.123filter.com | +1 (678) 261-7611 | Support@123Filter.com Page 11... -
Page 14: Using The System
Using the System 1) Starting for the First Time A. To start the system, plug in the power adapter, then turn on the feed water adapter. Turn on the faucet. Vibrations can be expected as the pump starts. Turn on the faucet and let it run for about 15 minutes to flush the system. This should be done each time the filters are changed. -
Page 15: Display And Operating Area/Indicators
E. Turn on the water supply and plug the system back into the power outlet. F. Reset the filter status by pressing and holding the corresponding filter button for 5 seconds. A "beep" will sound as the button is pressed, and the indicator will turn red – hold the button until the indicator light turns solid blue. -
Page 16: Filter Service Life Reset
The system Low incoming water Blink Red Blink Red Beep pressure. will resume functional status when the water pressure returns to normal. In case of issues/questions/concerns, please contact iSpring Support at support@ispringfilter.com Page 14 www.123filter.com | +1 (678) 261-7611 | Support@123Filter.com... - Page 18 __________________ __________________ __________________ __________________ ______________________________________________ ____________ ______________ _________________ ___________________________________________ ______ _________________ ___________________________________...


Need help?
Do you have a question about the RO1000 Series and is the answer not in the manual?
Questions and answers