
Related Manuals for Ispring PH100


Summary of Contents for Ispring PH100
- Page 1 User Manual of Product 1: iSpring PH100 pH+ 6-Stage Under Sink Reverse Osmosis RO Drinking Water Filtration System 100 GPD Fast Flow 1:1 Pure to Waste Ratio with Alkaline Remineralization, US Made Filters...
- Page 2 Reverse Osmosis Water Filtration Systems INSTALLATION INSTRUCTIONS & OWNER’S MANUAL Ver. 04/2020 Copyright ©2005-2020 ISPRING WATER SYSTEMS, LLC. All rights reserved.
-
Page 4: Table Of Contents
Table of Contents Introduction .................. 1 Parts Checklist ................2 Tools List ..................3 Product Overview ................. 3 5-Stage RO System Filtration Process ........4 Tubing Connection Guide ............6 Preparation ..................7 Installation ..................8 RO Faucet Installation .................. 8 Porcelain Sink .................... -
Page 5: Introduction
From various residential water filtration systems that purify your water in everyday life, to drinking water faucets that deliver pure, healthy, and tasty water to you and your family, iSpring strives for high standard products and aims to make excellent drinking water accessible for all households. -
Page 6: Parts Checklist
Parts Checklist Your new iSpring RO system should include the following items. If any item is missing, please contact the online retailer, or iSpring directly. Please take a few moments to check all of the following components. RO Machine Head... -
Page 7: Tools List
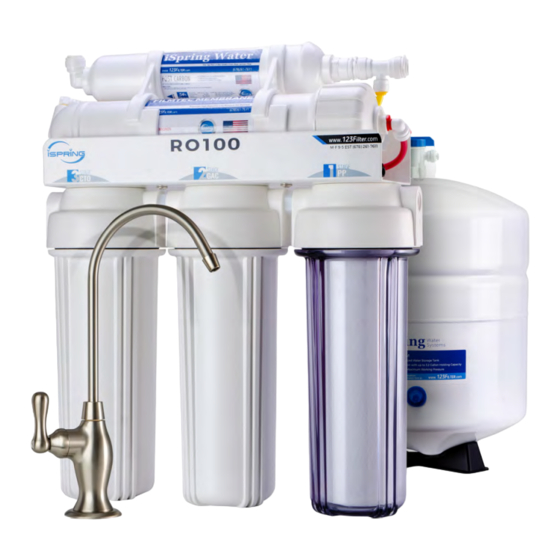
Make sure you have the following tools ready to use. Product Overview Please inspect the entire system before the installation. If any part is missing or damaged, please contact the online retailer or iSpring directly for assistance. Front View Back View... -
Page 8: 5-Stage Ro System Filtration Process
(Tap Water) Pressure Tank Stage Description Service Life stage Sediment Pre-filter 6 months stage GAC Pre-filter 6 months stage Carbon Block Pre-filter 6 months stage RO Membrane 24-36 months stage Polishing Inline Filter 6-12 months iSpring Water Systems Page 4... - Page 9 Tube Color Description RO Faucet White Pure Water to the Faucet Feed Water Valve Feed Water to RO System Tank Ball Valve White Pure Water to Storage Tank Drain Connector Black Discharge Water to Drain iSpring Water Systems Page 5...
-
Page 10: Tubing Connection Guide
Pull on the tubing gently to ensure it is tightly fitted. CAUTION: Before cutting supplied tubings, predetermine the length by measuring the distance between the components to be connected. To Attach Tubing To Release Tubing To Insert Locking Clip iSpring Water Systems Page 6... -
Page 11: Preparation
If no shut-off valve is located under the sink, turn off the main water supply at the entry to the house. CAUTION DO NOT USE WATER THAT IS MICROBIOLOGICALLY UNSAFE OR OF UNKNOWN QUALITY WITHOUT ADEQUATE DISINFECTION BEFORE OR AFTER THE SYSTEM. iSpring Water Systems Page 7... -
Page 12: Installation
8. Slide the push-in fitting up the push-in adapter on the base, then lock it in place by sliding the blue clip under the collet. Insert the White tubing about 1/2 inch into the push fitting, and again, secure it with the blue clip. iSpring Water Systems Page 8... -
Page 13: Porcelain Sink
To drill on a porcelain sink, a spring-loaded Relton-style drill set is strongly recommended in order to prevent chipping. Avoid high speed drilling during the initial cutting of porcelain as this can cause chipping. See the following figures. Recommended drill bit set for a porcelain sink iSpring Water Systems Page 9... -
Page 14: Feed Water Supply Installation
Feed Water Adapter with Bushing to convert 3/8” COMP to 1/2” NPT 5. Connect the feed water tubing to the RO system. Once the feed water adapter has been installed, connect the tubing (RED) to the first stage (clear housing) of the RO system. iSpring Water Systems Page 10... -
Page 15: Mounting The Drain Saddle
(above) the p-trap and on a vertical or horizontal drain. To avoid clogging the drain line with debris, do not install the drain saddle near a garbage disposal. iSpring Water Systems Page 11... -
Page 16: Install The Tank Ball Valve
3. Place the storage tank in the desired location either horizontally or vertically. 4. Connect the WHITE tubing from the post carbon inline filter (5 stage) to the tank ball valve. (See 5-Stage RO system diagram.) 5. Turn the tank ball valve off. Off Position On Position iSpring Water Systems Page 12... -
Page 17: Ro Membrane Cartridge Installation
Also, make sure that the Brine Seal on the membrane seals with no gaps or wrinkles inside the membrane housing. Once the RO membrane cartridge is installed, replace the end cap and reconnect the tubing. iSpring Water Systems Page 13... -
Page 18: System Start-Up
C. ) The storage tank tubing connects to the other end of the post carbon inline filter (5 stage) at the union tee fitting. (3/8” white tubing) D. ) The wastewater tubing from the drain saddle connects to the flow iSpring Water Systems Page 14 restrictor. - Page 19 8. Check for leaks daily during the first week of use and periodically thereafter. 9. You may notice that the water is milky colored during the first week. This is an indication of air bubbles in the water; it is normal and safe to drink. iSpring Water Systems Page 15...
- Page 20 Stage Tubing (water in) Waste water line/RO Water Line (water out) 3/8” White Water Line to Storage Tank/ Yellow Water Line to the RO membrane housing, Water Out port 3/8” Faucet Tubing connected to inline filter iSpring Water Systems Page 16 stage)
-
Page 21: Preventative Maintenance
Lift the filter housing up 1 inch and slide the housing wrench in. Use one hand to hold the system and the other hand to turn the wrench clockwise (viewing from the top) to open the housing. iSpring Water Systems Page 17... - Page 22 • It may take 10–20 minutes for the new membrane to run at a normal flow rate. When the water flow is optimal, turn on the tank ball valve. After one minute, turn off the RO faucet and complete the filter change procedures. iSpring Water Systems Page 18...
-
Page 23: Cleaning Procedures
Pressure gauge and air pump a. The tank should be empty. Check the air’s pre-charge pressure with an accurate gauge (low pressure type 0-12 lbs.) The average tank pressure should be 6–8 psi when the tank is empty. iSpring Water Systems Page 19... - Page 24 Flush the system to remove any remaining disinfectant prior to consuming the water. • Keep a maintenance record for the RO system that includes information about replacement parts, when a service was performed, and names of service providers. iSpring Water Systems Page 20...
-
Page 25: Troubleshooting
No drain water Replace flow restrictor. √ Fittings are not tightened Leaks Tighten fittings as necessary. √ Twisted O-ring Replace the O-ring. √ Misalignment of hole in the Realign the drain saddle drain saddle valve valve. iSpring Water Systems Page 21... -
Page 26: Warranty
In case some states do not allow the exclusion or limitation of incidental or consequential damages, you may choose to return the system. If you choose to keep it, you insist this exclusion STILL apply to iSpring Water Systems Page 22... -
Page 27: Warranty Registration
If you are happy with our products and service, please show your support by writing a product review on Amazon, even just a single line. It takes you just a minute, but means a lot to us. Thank you! iSpring Water Systems Page 23... - Page 28 Water Systems Page 24...
- Page 29 3020 Trotters Parkway Alpharetta, GA 30004, USA 123Filter.com For questions, comments, or technical support, please contact us at: Support@iSpringFilter.com (678) 261-7611 Monday-Friday 8:30 a.m. - 5:30 p.m. EST...
Need help?
Do you have a question about the PH100 and is the answer not in the manual?
Questions and answers
Is there a certification form to tell what percentages of all things taken out by this filter ph100 6 series