Advertisement
Quick Links
Advertisement

Related Manuals for VABCHES J3L215HS02


Summary of Contents for VABCHES J3L215HS02
- Page 1 J3L215HS02 WhatsApp community↑ service@vabchesofficial.com 11/146...
- Page 2 - Open your item in the area you plan to keep it to avoid excessive heavy lifting. - Identify, sort and count the parts before attempting assembly. - Do NOT use harsh chemicals or abrasive cleaners on this item. - Never push, pull, or drag your furniture. 2/14...
-
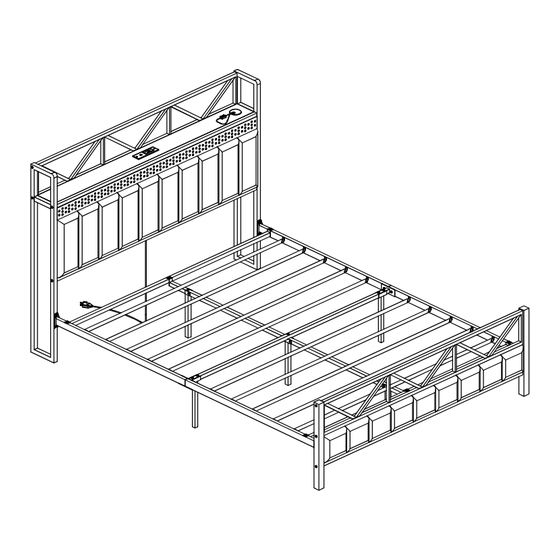
Page 3: Parts Identification
Parts Identification Not actual size HEADBOARD CONNECTER METAL MESH BOARD HEADBOARD FRAME HEADBOARD SIDE FRAME Q'ty: 1 Q'ty:1 Q'ty: 2 Q'ty: 1 METAI TUBE METAI TUBE SIDE RAIL-2 SIDE RAIL-1 Q'ty: 2 Q'ty: 1 Q'ty: 2 Q'ty: 2 METAI TUBE SUPPORT LEGS Q'ty: 1 SLAT... -
Page 4: Hardware List
Hardware List Ø1/4" x 13mm Ø1/4" x 35mm Ø1/4" x 16mm M8 x 13mm x 16 x 22 BOLT BOLT spare: 1 spare: 2 Ø1/4" x 60mm Ø1/4" x 25mm Ø3.5 x 12mm x 15 x 11 ALLEN KEY BOLT BOLT SCREW spare: 1... - Page 5 Parts Identification Not actual size 5/14...
- Page 6 STEP 1 Please tighten the screws to 80% first, and tighten all screws 100% after all Ø1/4" x 60mm parts are assembled. STEP 2 Ø3.5 x 12mm 6/14...
- Page 7 STEP 3 Ø3.5 x 12mm STEP 4 Ø3.5 x 12mm MODE SPEED DEMO SPEED COLOR MODE BRIGHT COLOR BRIGHT The LED switch is RF Wireless free to put onto or hidden underneath the board Connect lamp strip usb, usb adapter and socket .
- Page 8 STEP 5 Ø1/4" x 13mm STEP 6 Please tighten the screws to 80% first, and tighten all screws 100% after all Ø1/4" x 16mm parts are assembled. Before you install this bolt, please make sure the bolt size is Ø1/4"*16mm. Ø1/4"...
- Page 9 Please tighten the screws to 80% first, and tighten all screws 100% after all Ø1/4" x 60mm parts are assembled. 9/14...
- Page 10 STEP 9 Ø1/4" x 16mm STEP 10 Please tighten the screws to 80% first, and tighten all screws 100% after all parts are assembled. 10/14...
- Page 11 STEP 11 STEP 12 Please tighten the screws to 80% first, and tighten all screws 100% after all Ø1/4" x 13mm parts are assembled. 11/14...
- Page 12 STEP 13 STEP 14 12/14...
- Page 13 STEP 15 Please tighten the screws to 80% first, and tighten all screws 100% after all Ø1/4" x 25mm parts are assembled. Ø1/4" x 25mm Before you install this bolt, please make sure the bolt size is Ø1/4"*25mm. STEP 16 Please tighten the screws to 80% first, and tighten all screws 100% after all...
- Page 14 STEP 17 x 24 K x 12 Assemble the slats 4.Press tight the upper part of 3.Put the plastic clamp(10) into the clamp to fix its position. lower part of hole on 45 degree. 14/14...