Table of Contents
Advertisement
Quick Links
Advertisement
Table of Contents
Troubleshooting

Related Manuals for Keysight Technologies InfiniiVision 3000G X Series


Summary of Contents for Keysight Technologies InfiniiVision 3000G X Series
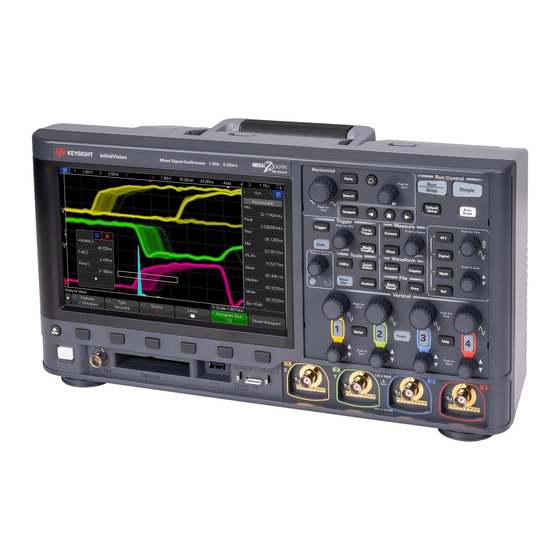
- Page 1 Keysight InfiniiVision 3000G X-Series Oscilloscopes Service Guide...
-
Page 2: Figure 68. Exploded View 2 Of
Notices © Keysight Technologies, Inc. 2008-2022 and may be used or copied only in acquires no greater than Limited Rights as accordance with the terms of such license. defined in FAR 27.401 or DFAR 227.7103-5 No part of this manual may be reproduced in (c), as applicable in any technical data. -
Page 3: In This Service Guide
In This Service Guide This book provides the service information for the Keysight 3000G X-Series oscilloscopes. This manual is divided into these chapters: Characteristics and Specifications This chapter contains a partial list of characteristics and specifications for the Keysight InfiniiVision 3000G X-Series oscilloscopes. Testing Performance This chapter explains how to verify correct oscilloscope operation and perform tests to ensure that the oscilloscope meets the performance specifications. - Page 4 Digital Channels Because all of the oscilloscopes in the Keysight 3000G X-Series have analog channels, the analog channel topics in this book apply to all instruments. Whenever a topic discusses the digital channels, that information applies only to Mixed-Signal Oscilloscope (MSO) models or DSO models that have been upgraded to an MSO.
-
Page 5: Table Of Contents
Contents In This Service Guide / 3 Figures / 9 Tables / 13 Characteristics and Specifications Power Requirements / 15 Measurement Category / 16 Measurement Category / 16 Measurement Category Definitions / 16 Transient Withstand Capability / 17 Environmental Conditions / 18 Specifications / 18 Contact us / 18 Testing Performance... - Page 6 Contents What to Test / 26 Verifying Test Results / 26 To verify DC vertical gain accuracy / 30 To verify dual cursor accuracy / 35 To verify bandwidth (-3 dB) / 39 To verify time base accuracy / 44 To verify trigger sensitivity / 46 Test Internal Trigger Sensitivity (all models) / 46 Test External Trigger Sensitivity / 49...
- Page 7 Contents Troubleshooting Internal Assemblies / 70 Equipment Required for Troubleshooting Internal Assemblies / 70 To prepare for internal assembly troubleshooting / 70 Flowchart for Troubleshooting Internal Assemblies / 73 System Board Drawings / 74 To check the system board power supply test points / 76 To check the interboard supply connector voltages / 77 To check the line filter board AC output / 79 To check the power switch / 80...
- Page 8 Contents Protective Earth Continuity Test / 131 Dielectric Voltage Withstand (Hipot) Test / 131 Replaceable Parts Ordering Replaceable Parts / 134 Listed Parts / 134 Unlisted Parts / 134 Direct Mail Order System / 134 Exchange Assemblies / 135 Exploded Views / 136 Replaceable Parts List / 138 Safety Notices Warnings / 145...
-
Page 9: Figures
Figures Figure 1. Constructing the 8-by-2 Connector / 24 Figure 2. Setting Up Equipment for Digital Channel Threshold Accuracy Test / 28 Figure 3. Setting up Equipment for DC Vertical Gain Accuracy Test / 33 Figure 4. Using a Blocking Capacitor to Reduce Noise / 34 Figure 5. - Page 10 Figures Figure 28. Removing the top rear deck screws / 96 Figure 29. Removing the bottom right rear deck screw / 96 Figure 30. Removing the bottom left rear deck screw / 97 Figure 31. Removing the bottom rear deck screws / 97 Figure 32.
- Page 11 Figures Figure 58. Disconnecting the AC cable / 123 Figure 59. Disconnecting the interboard supply cable from the line filter board / 124 Figure 60. Disconnecting the DC cable from the line filter board / 124 Figure 61. Removing the power supply / 125 Figure 62.
- Page 12 Figures 3000G X-Series Oscilloscopes Service Guide...
-
Page 13: Tables
Tables Table 1. List of test equipment / 21 Table 2. Conventions / 22 Table 3. Materials required to construct the test connectors / 23 Table 4. Equipment Required to Test Digital Channel Threshold Accuracy / 26 Table 5. Threshold Accuracy Voltage Test Settings / 29 Table 6. - Page 14 Tables 3000G X-Series Oscilloscopes Service Guide...
-
Page 15: Characteristics And Specifications
Keysight InfiniiVision 3000G X-Series Oscilloscope Service Guide 1 Characteristics and Specifications Power Requirements / 15 Measurement Category / 16 Environmental Conditions / 18 Specifications / 18 Contact us / 18 This chapter contains a partial list of characteristics and specifications for the Keysight InfiniiVision 3000G X-Series oscilloscopes. -
Page 16: Measurement Category
Characteristics and Specifications Measurement Category Measurement Category The InfiniiVision 3000G X-Series oscilloscopes are not intended to be used for measurements in Measurement Category II, III, or IV.. Use this instrument only for measurements within its specified measurement category WARNING (not rated for CAT II, III, IV). No transient overvol tages allowed. Measurement Category Definitions The "Not rated for CAT II, III, IV"... -
Page 17: Transient Withstand Capability
Characteristics and Specifications Transient Withstand Capability Maximum input voltage for analog inputs CAUTION 135 Vrms 50 Ω input: 5 Vrms Input protection is enabled in 50 Ω mode, and the 50 Ω load will disconnect if greater than 5 Vrms is detected. However, the inputs could still be damaged, depending on the time constant of the signal. -
Page 18: Environmental Conditions
Characteristics and Specifications Environmental Conditions Environment Indoor use only. Ambient 5 to 50 °C temperature Humidity Maximum Relative Humidity (non-condensing): 95%RH up to 40 °C From 40 °C to 50 °C, the maximum % Relative Humidity follows the line of constant dew point Altitude 4,000 m max... -
Page 19: Testing Performance
Keysight InfiniiVision 3000G X-Series Oscilloscope Service Guide 2 Testing Performance Overview / 20 List of Test Equipment / 21 To construct the test connector (for use with MSO models only) / 23 To test digital channels (MSO models only) / 25 To verify digital channel threshold accuracy (MSO models only) / 26 To verify DC vertical gain accuracy / 30 To verify dual cursor accuracy / 35... -
Page 20: Overview
Testing Performance Overview To completely test and troubleshoot MSO models, create and use the test connector accessory as described in this chapter. • The test connector is only required for oscilloscopes that have the MSO option licensed (enabled). • The connector is used in the digital channel threshold accuracy test. •... -
Page 21: List Of Test Equipment
Testing Performance List of Test Equipment Below is a list of test equipment and accessories required to perform the performance test verification procedures. Table 1 List of test equipment Equipment Critical Specifications Recommended Model/ Part Number Test connector, 8-by-2* page 23 for instructions on building test connector. -
Page 22: Conventions
Testing Performance Table 1 List of test equipment (continued) Equipment Critical Specifications Recommended Model/ Part Number Blocking capacitor Note: if a BNC blocking capacitor is not available use Keysight 11742A + an SMA blocking capacitor. Pomona 4289 + Pomona 5088 Adapter (qty 3) N(m) to BNC(f) Keysight 1250-0780... -
Page 23: To Construct The Test Connector (For Use With Mso Models Only)
Testing Performance To construct the test connector (for use with MSO models only) Keysight 3000G X-Series oscilloscopes that have digital channels enabled require the test connector described below. Follow the steps to build the test connector. Table 3 Materials required to construct the test connectors Description Recommended Part BNC (f) Connector... -
Page 24: Figure 1 Constructing The 8-By-2 Connector
Testing Performance Jumper (2) Ground Lead (from scope’s MSO cable) Signal Lead (from scope’s MSO cable) 8 x 2 Berg Strip BNC Panel Mount Connector Figure 1 Constructing the 8-by-2 Connector 3000G X-Series Oscilloscopes Service Guide... -
Page 25: To Test Digital Channels (Mso Models Only)
Testing Performance To test digital channels (MSO models only) The acquisition system testing provides confidence that the acquisition system is functioning correctly. It does not, however, check a particular specification. 1 Disconnect all probes from the circuit under test and from any other input source. -
Page 26: To Verify Digital Channel Threshold Accuracy (Mso Models Only)
Testing Performance To verify digital channel threshold accuracy (MSO models only) This test verifies the digital channel threshold accuracy specification of the Keysight 3000G X-Series oscilloscopes. Threshold accuracy test limits: ±(100 mV + 3% of threshold setting) When to Test You should perform this test every three years or after 6000 hours of operation, whichever comes first. - Page 27 Testing Performance 1 Turn on the test equipment and the oscilloscope. Let them warm up for 30 minutes before starting the test. 2 Set up the precision source. a Set the precision source to provide a DC offset voltage at the Channel 1 output.
-
Page 28: Figure 2 Setting Up Equipment For Digital Channel Threshold Accuracy Test
Testing Performance Precision Source 3000G X-Series Oscilloscope Digital Multimeter Probe BNC Tee Cables Channels BNC-Bananna Test 8 - 15 Channels Cable Connector 0 - 7 Figure 2 Setting Up Equipment for Digital Channel Threshold Accuracy Test 4 Use a BNC-banana cable to connect the multimeter to the other side of the BNC Tee. -
Page 29: Table 5. Threshold Accuracy Voltage Test Settings
Testing Performance 7 Press the User softkey to the right of the D7 - D0 softkey, then turn the Entry knob ( ) on the front panel of the oscilloscope to set the threshold test settings as shown in Table Table 5 Threshold Accuracy Voltage Test Settings Threshold voltage setting (in... -
Page 30: To Verify Dc Vertical Gain Accuracy
Testing Performance 9 When testing 3000G X-Series MSOs, use the 8-by-2 test connector to connect digital channels D15-D8 to the output of the precision source. Then connect the D15-D8 ground lead to the ground side of the 8-by-2 connector. 10 Repeat this procedure (steps 6 through 8) for digital channels D15-D8 to verify threshold accuracy and record the threshold levels in the Performance Test Record (see page... -
Page 31: Table 7. Equipment Required To Verify Dc Vertical Gain Accuracy
Testing Performance Table 7 Equipment Required to Verify DC Vertical Gain Accuracy Equipment Critical Specifications Recommended Model/Part Precision Source DC voltage of 7 mV to 35 V, 0.1 mV resolution Keysight B2912A/B2962A Digital multimeter Better than 0.01% accuracy Keysight 34401A/34461A Ω... - Page 32 Testing Performance Table 8 Settings Used to Verify DC Vertical Gain Accuracy, 3000G X-Series Models Volts/Div Setting Precision Source Setting Test Limits 5 V/Div 35 V 34.2 V 35.8 V 2 V/Div 14 V 13.68 V 14.32 V 1 V/Div 6.84 V 7.16 V 500 mV/Div...
-
Page 33: Figure 3. Setting Up Equipment For Dc Vertical Gain Accuracy Test
Testing Performance 4 Read the “current” average voltage value as V1. 5 Use the BNC tee and cables to connect the precision source /power supply to both the oscilloscope and the multimeter (see Figure Note: Set the Low Force terminal of the Precision Source to its "Floating" state to prevent offset error caused by ground loop current from the Precision Source ground to the DUT ground. -
Page 34: Figure 4 Using A Blocking Capacitor To Reduce Noise
Testing Performance 6 Adjust the output so that the multimeter reading displays the first Volts/div precision source setting value in Table 7 Disconnect the multimeter. 8 Wait until the measurement settles. 9 Read the “current” average voltage value again as V2. 10 Calculate the difference V2 - V1. -
Page 35: To Verify Dual Cursor Accuracy
Testing Performance To verify dual cursor accuracy This test verifies the dual cursor accuracy for each analog channel. This test is similar to the test for verifying the DC vertical gain, except you will measure the dc voltage output of a precision source using dual cursors on the oscilloscope and compare the results with the multimeter reading. - Page 36 Testing Performance Table 10 Settings Used to Verify Dual Cursor Accuracy, 3000G X-Series Models Volts/Div Setting Precision Source Setting Test Limits 5 V/Div 35 V 34.0 V 36.0 V 2 V/Div 14 V 13.6 V 14.4 V 1 V/Div 6.8 V 7.2 V 500 mV/Div 3.5 V...
-
Page 37: Figure 5. Setting Up Equipment For Dual Cursor Accuracy Test
Testing Performance Note: Set the Low Force terminal of the Precision Source to its "Floating" state to prevent offset error caused by ground loop current from the Precision Source ground to the DUT ground. Oscilloscope Precision Source BNC Tee Digital Multimeter BNC (f) to dual bananna adapter... -
Page 38: Figure 6 Using A Blocking Capacitor To Reduce Noise
Testing Performance 8 Press the Y2 softkey, then position the Y2 cursor to the center of the voltage trace using the Entry knob. The ΔY value on the lower line of the display should be within the test limits of Table If a result is not within the test limits, go to the “Troubleshooting”... -
Page 39: To Verify Bandwidth (-3 Db)
Testing Performance To verify bandwidth (-3 dB) This test checks the bandwidth (-3 dB) of the oscilloscope. In this test you will use a signal generator and a power meter. Table 11 Bandwidth (-3 dB) Test Limits Models Test Limits 1 GHz Models All channels (-3 dB), dc to 1 GHz 500 MHz Models... -
Page 40: Figure 7 Setting Up Equipment For Bandwidth (-3 Db) Verification Test
Testing Performance Oscilloscope Signal Generator N to BNC Adapter Power Splitter Power Sensor N Cable Power Meter Figure 7 Setting Up Equipment for Bandwidth (-3 dB) Verification Test 2 Set up the power meter. Set the power meter to display measurements in units of watts. 3000G X-Series Oscilloscopes Service Guide... - Page 41 Testing Performance 3 Set up the oscilloscope. a Press the [Default Setup] key. b Set channel 1 Coupling to DC. c Set channel 1 Imped to 50 Ohm. d Set the time base to 500 ns/div. e Set the Volts/Div for channel 1 to 200 mV/div. f Press the [Acquire] key, then press the Averaging softkey.
- Page 42 Testing Performance 9 Change the signal generator output frequency according to the maximum frequency for the oscilloscope using the following: • 1 GHz Models: 1 GHz • 500 MHz Models: 500 MHz • 350 MHz Models: 350 MHz • 200 MHz Models: 200 MHz •...
- Page 43 Testing Performance 15 The result from step 14 should be between +3.0 dB and -3.0 dB. Record the result in the Performance Test Record (see page 52). 16 Move the power splitter from the channel 1 to the channel 2 input. 17 Turn off the current channel and turn on the next channel using the channel keys.
-
Page 44: To Verify Time Base Accuracy
Testing Performance To verify time base accuracy This test verifies the accuracy of the time base. In this test you will measure the absolute error of the time base oscillator and compare the results to the specification. Table 13 Equipment Required to Verify Time Base Accuracy Equipment Critical Specifications Recommended Model/Part... - Page 45 Testing Performance 4 Make the measurement. a Set oscilloscope horizontal sweep speed control to 1 ms/div. b Set horizontal position control to +1 ms. c Set the oscilloscope horizontal sweep speed control to 5 ns/div. d Measure the number of nanoseconds from where the rising edge crosses the center horizontal grid line to the center vertical grid line.
-
Page 46: To Verify Trigger Sensitivity
Testing Performance To verify trigger sensitivity This test verifies the trigger sensitivity. In this test, you will apply a sine wave to the oscilloscope at the upper bandwidth limit. You will then decrease the amplitude of the signal to the specified levels, and check to see if the oscilloscope is still triggered. -
Page 47: Figure 8 Setting Up Equipment For Internal Trigger Sensitivity Test
Testing Performance 3 Connect the equipment (see Figure a Connect the signal generator output to the oscilloscope channel 1 input. Oscilloscope Signal Generator N to BNC Adapter N Cable Figure 8 Setting Up Equipment for Internal Trigger Sensitivity Test b Set channel 1 Imped to 50 Ohm. 4 To verify the trigger sensitivity at the oscilloscope’s maximum bandwidth, set the output frequency of the signal generator to the maximum bandwidth of the oscilloscope:... - Page 48 Testing Performance 5 Perform these steps to test at the 5 mV/div setting: a Set the signal generator amplitude to about 10 mV b Press the [AutoScale] key. c Set the time base to 10 ns/div. d Set channel 1 to 5 mV/div. e Decrease the amplitude from the signal generator until 1 vertical division of the signal (about 5 mV ) is displayed.
-
Page 49: Test External Trigger Sensitivity
Testing Performance Test External Trigger Sensitivity This test applies to all models. Verify the external trigger sensitivity at these settings: • 100 MHz, 200 mV • 200 MHz, 350 mV 1 Connect the equipment (see Figure a Use the N cable to connect the signal generator to the power splitter input. b Connect one output of the power splitter to the Aux Trig input through a 50Ω... -
Page 50: Figure 9. Setting Up Equipment For 4-Channel External Trigger Sensitivity
Testing Performance Oscilloscope Signal Generator 50 Ohm Feedthrough N to BNC Adapter Power Splitter Power Sensor N Cable Power Meter Figure 9 Setting Up Equipment for 4-Channel External Trigger Sensitivity Test 3000G X-Series Oscilloscopes Service Guide... - Page 51 Testing Performance 2 Set up the oscilloscope. a Press the [Default Setup] key. b Press the [Mode/Coupling] key; then, press the Mode softkey to select Normal. 3 Change the signal generator output frequency to 100 MHz or 200 MHz. 4 Set the power meter Cal Factor % to the appropriate value (100 MHz or 200 MHz) on the calibration chart on the power sensor.
-
Page 52: Keysight 3000G X-Series Oscilloscopes Performance Test Record
Testing Performance Keysight 3000G X-Series Oscilloscopes Performance Test Record Serial No. ______________________________________ Test by _____________________________ Test Interval ____________________________________ Work Order No. ______________________ Recommended Next Testing ________________________ Temperature ____________ Threshold Specification Limits Ch D7-D0 Ch D15-D8 Accuracy Test 5 V - 250 mV 4.750 V ________ ________... - Page 53 Testing Performance Dual Cursor Accuracy Range Power Supply Setting Test Limits Channel 1 Channel 2 Channel 3* Channel 4* 5 V/Div 35 V 34.0 V to 36.0 V ________ ________ ________ ________ 2 V/Div 14 V 13.6 V to 14.4 V ________ ________ ________...
- Page 54 Testing Performance 3000G X-Series Oscilloscopes Service Guide...
-
Page 55: Calibrating And Adjusting
Keysight InfiniiVision 3000G X-Series Oscilloscope Service Guide 3 Calibrating and Adjusting This chapter explains how to adjust the oscilloscope for optimum operating performance. You should perform self-calibration according to the following recommendations: • Every three years or after 6000 hours of operation •... - Page 56 Calibrating and Adjusting Let the Equipment Warm Up Before Adjusting Before you start the adjustments, let the oscilloscope and test equipment warm up for at least 30 minutes. Read All Cautions and Warnings Read the following cautions and warning before making adjustments or performing self-calibration.
-
Page 57: User Calibration
Calibrating and Adjusting User Calibration Perform user-calibration: • Every three years or after 6000 hours of operation. • If the ambient temperature is >10 °C from the calibration temperature. • If you want to maximize the measurement accuracy. The amount of use, environmental conditions, and experience with other instruments help determine if you need shorter User Cal intervals. - Page 58 Calibrating and Adjusting Use 50Ω RG58AU or equivalent BNC cables when performing User Cal. a For a 2-channel oscilloscope, connect a BNC tee to the equal length cables. Then connect a BNC(f)-to-BNC(f) (also called a barrel connector) to the tee as shown below.
-
Page 59: Figure 10 User Calibration Cable For 2-Channel Oscilloscope
Calibrating and Adjusting Figure 10 User Calibration cable for 2-channel oscilloscope b For a 4-channel oscilloscope, connect BNC tees to the equal-length cables as shown below. Then connect a BNC(f)-to-BNC(f) (barrel connector) to the tee as shown below. To Channel 1 To Channel 2 To Channel 3 Longer cable... -
Page 60: User Cal Status
Calibrating and Adjusting User Cal Status Pressing the User Cal Status softkey displays the following summary results of the previous User Cal, and the status of probe calibrations for probes that can be calibrated. Note that AutoProbes do not need to be calibrated, but InfiniiMax probes can be calibrated. -
Page 61: Troubleshooting
Keysight InfiniiVision 3000G X-Series Oscilloscope Service Guide 4 Troubleshooting Solving General Problems with the Oscilloscope / 62 Verifying Basic Operation / 65 Troubleshooting Internal Assemblies / 70 Read All Cautions and Warnings Before you begin any troubleshooting, read all Warning and Cautions in the “Troubleshooting” section. This chapter begins with “Solving General Problems with the Oscilloscope. -
Page 62: Solving General Problems With The Oscilloscope
Troubleshooting Finally, this chapter describes procedures for “Troubleshooting Internal Assemblies when performing assembly-level repair: • To prepare for internal assembly troubleshooting. • To check the system board power supply test points. • To check the interboard supply connector voltages. • To check the line filter board AC output. -
Page 63: If There Is No Trace Display
Check that the circuit under test is powered on. Press the [AutoScale] key. Obtain service from Keysight Technologies, if necessary. If the trace display is unusual or unexpected Check that the Horizontal time/division setting is correct for the expected frequency range of the input signals. -
Page 64: If You Cannot See A Channel
Troubleshooting If you cannot see a channel Recall the default setup by pressing [Default Setup]. This will ensure that the trigger mode is Auto. Check that the oscilloscope probe’s BNC connector is securely attached to the oscilloscope’s input connector. Check that the probe clips are securely connected to points in the circuit under test. -
Page 65: Verifying Basic Operation
Troubleshooting Verifying Basic Operation To power-on the oscilloscope 1 Connect the power cord to the rear of the oscilloscope, then to a suitable ac voltage source. The oscilloscope power supply automatically adjusts for input line voltages in the range of 100 to 240 VAC. Ensure that you have the correct line cord (see page 133). -
Page 66: To Perform Front Panel Self Test
Troubleshooting Successfully passing Hardware Self Test does not guarantee 100% of the oscilloscope's functionality. Hardware Self Test is designed to provide an 80% confidence level that the oscilloscope is operating properly. To perform front panel self test Pressing [Utility] > Service > Front Panel Self Test lets you test the front panel keys and knobs as well as the oscilloscope display. -
Page 67: Figure 12 Default Setup Screen
Troubleshooting • 0 V level. • channel 1 source. • dc coupling. • rising edge slope. • 40 ns holdoff time. • Display: • 20% grid intensity. • persistence off. • Other: • Acquire mode normal. • Run/Stop to Run. •... -
Page 68: To Perform An Auto Scale On The Probe Comp Signal
Troubleshooting To perform an Auto Scale on the Probe Comp signal 1 Press the [Default Setup] key. The oscilloscope is now configured to its default settings. 2 Connect an oscilloscope probe from channel 1 to the Probe Comp signal terminal on the front panel. -
Page 69: To Compensate Passive Probes
Troubleshooting To compensate passive probes You should compensate your passive probes to match their characteristics to the oscilloscope’s channels. A poorly compensated probe can introduce measurement errors. 1 Perform the procedure “To perform an Auto Scale on the Probe Comp signal"... -
Page 70: Troubleshooting Internal Assemblies
If you need parts or assistance from Keysight Technologies to repair your instrument, go to www.keysight.com and locate the service facility for your area. -
Page 71: Figure 14 Setup For Troubleshooting Internal Assemblies
Troubleshooting REMOVE POWER TO AVOID DAMAGE ! CAUTION Do not disconnect any cables or remove any assemblies while power is applied to the oscilloscope, or damage to the oscilloscope can occur. AVOID ESD DAMAGE TO COMPONENTS ! CAUTION ELECTROSTATIC DISCHARGE (ESD) can damage electronic components. Use proper ESD precautions when doing any of the procedures in this chapter. - Page 72 Troubleshooting MAKE SURE EARTH GROUND IS MAINTAINED FOR THE FRONT DECK ! CAUTION For example, connect a cable with alligator clips between the rear deck chassis and the front deck chassis, or connect a BNC cable from one of the BNCs on the system board to a known grounded BNC on your workbench.
-
Page 73: Flowchart For Troubleshooting Internal Assemblies
Troubleshooting Flowchart for Troubleshooting Internal Assemblies The following flowchart is a simplified overview of troubleshooting the oscilloscope’s internal assemblies. Start System Interboard Power Replace Power Board Voltages Supply Voltages Supply Voltages Supply or Line Okay? Okay? Okay? Filter Board Replace Line Filter Board Display/ Replace Keyboard... -
Page 74: System Board Drawings
Troubleshooting System Board Drawings Use these drawings to locate test points on the system board. Figure 15 System Board Test Points/Connectors - Top Side, Left 3000G X-Series Oscilloscopes Service Guide... -
Page 75: Figure 16 System Board Test Points/Connectors - Top Side, Right
Troubleshooting Figure 16 System Board Test Points/Connectors - Top Side, Right 3000G X-Series Oscilloscopes Service Guide... -
Page 76: To Check The System Board Power Supply Test Points
Troubleshooting To check the system board power supply test points This procedure checks the power supply test points on the system board (see See Figure 16 on page 75). Values outside the expected range help identify bad assemblies. 1 Follow the instructions in “To prepare for internal assembly troubleshooting"... -
Page 77: To Check The Interboard Supply Connector Voltages
Troubleshooting 6 Finally, check the supplies coming from the system board: Test Point Expected Value Assemblies If Good If Bad (near J3701) Supplied VM12V -11.5 V to System Board Indicates supply coming from Replace the system board. -12.5 V system board is good. VM8V -7.814 V to System Board... -
Page 78: Figure 17. Line Filter Board Interboard Supply Connector J108
Troubleshooting 5 Check the voltages on the line filter board’s interboard supply connector J108. Cable-Int erboard Header 3 9 -2 9 -9 2 0 2 12 5 2 -8 0 73 VP1V VP1V VP1V4 VP1V2 VP1V8 VP2 V5 VP13 V VP3 V3 VP12 V LINE_TRIG... -
Page 79: To Check The Line Filter Board Ac Output
Troubleshooting Test Point Expected Value Assemblies If Good If Bad (near J3701) Supplied VP5V +5 V ±3% Keyboard, Go to “To check the keyboard Replace the line filter board. System Board supplies" on page 83. VP12V +12 V ±3% System Board If good when the interboard supply Replace the line filter board. -
Page 80: To Check The Power Switch
Troubleshooting Figure 18 Verify line filter board AC output • If you have AC power equal to what is being applied to J100 (power cord socket) on the line filter assembly, the AC mains portion of the line filter assembly is probably okay. •... -
Page 81: Figure 19 Verify Power Switch Operation
Troubleshooting 2 With the power cord disconnected, verify the operation of the power switch (S100) using a DMM in the resistance measurement mode and a set of probes. a Connect the “-” side of the DMM to pin 6 of J107 on the line filter board and the “+”... -
Page 82: To Check The Power Supply Dc Output
Troubleshooting To figure out which of these is causing the problem, see “To check the power supply DC output" on page 82. To check the power supply DC output This procedure checks the power supply DC output after verifying the AC input is good and checking the power switch operation. -
Page 83: To Check The Keyboard Supplies
Troubleshooting If one or both of these voltages are bad when the cables are connected but good when the cables are disconnected, it indicates problems with the display assembly. 1 Follow the instructions in “To prepare for internal assembly troubleshooting" on page 70. -
Page 84: To Check The Fan
Troubleshooting If one or both of these voltages are bad when the keyboard cable is connected but good when the cable is disconnected, it indicates problems with the keyboard assembly. 1 Follow the instructions in “To prepare for internal assembly troubleshooting"... -
Page 85: Figure 20 Location Of The Fan Connector
Troubleshooting 2 Disconnect the fan cable from the line filter board. 3 Connect the power cord, and turn on the oscilloscope. 4 Measure the fan voltage at the connector on the line filter board. See the following figure for the location of the fan connector. 5 If the fan voltage is approximately +6.5 Vdc at room temperature, replace the fan. - Page 86 Troubleshooting 3000G X-Series Oscilloscopes Service Guide...
-
Page 87: Replacing Assemblies
Keysight InfiniiVision 3000G X-Series Oscilloscope Service Guide 5 Replacing Assemblies This chapter describes how to remove assemblies from an oscilloscope. To install a replacement assembly after you have removed an old one, follow the instructions in reverse order. The parts shown in the following figures are representative and may look different from what you have in your oscilloscope. - Page 88 Replacing Assemblies See how the Oscilloscope Parts Fit Together An exploded view of the oscilloscope is included in the “Replaceable Parts” chapter. It shows the individual part numbers used in the assemblies, and shows you how the parts fit together. Read All Warnings and Cautions Read the following warnings and cautions before removing and replacing any assemblies in the oscilloscope.
-
Page 89: To Remove The Front Panel Knobs
Replacing Assemblies To remove the front panel knobs The front panel knobs must be removed prior to localized front panel overlay installation or front panel disassembly. 1 Gently pull on the front panel knobs to remove them. Figure 21 Removing the front panel knobs 3000G X-Series Oscilloscopes Service Guide... -
Page 90: To Remove The Bucket Assembly
Replacing Assemblies To remove the bucket assembly Removing the bucket assembly gives you access to the rear deck, fan assembly, power supply cover, power supply assembly, and power switch assembly. 1 Using T20 TORX driver, remove the four screws securing the bucket assembly to rear deck assembly. -
Page 91: Figure 23 Removing Bucket Assembly
Replacing Assemblies 2 Carefully slide bucket assembly back away from rear deck assembly. Figure 23 Removing bucket assembly 3000G X-Series Oscilloscopes Service Guide... -
Page 92: To Remove The Power Supply Shield
Replacing Assemblies To remove the power supply shield 1 Using a TORX T10 driver, locate and remove the screw securing the power supply shield to the rear deck. Figure 24 Removing the power supply shield screw Sheet metal parts may have sharp edges. Handle with care to avoid injury. WARNING 3000G X-Series Oscilloscopes Service Guide... -
Page 93: Figure 25 Unclipping The Power Supply Shield Right Side
Replacing Assemblies 2 When the screw has been removed, unclip the right side of the shield from the rear deck. Figure 25 Unclipping the power supply shield right side 3000G X-Series Oscilloscopes Service Guide... -
Page 94: Figure 26 Removing The Power Supply Shield - Lift And Pull Out
Replacing Assemblies 3 When the screw has been removed and the shield has been unclipped, carefully remove the shield by lifting the cover upward and then pulling its tabs out of the slots on the rear deck. Figure 26 Removing the power supply shield - lift and pull out 3000G X-Series Oscilloscopes Service Guide... -
Page 95: To Remove The Rear Deck Assembly
Replacing Assemblies To remove the rear deck assembly Removing the rear deck allows access to the front deck and acquisition board. 1 Remove BNC securing nuts and washers. Figure 27 Removing the BNC nuts and washers 2 Using a T10 TORX driver, locate and remove all screws securing rear deck to front deck. -
Page 96: Figure 28 Removing The Top Rear Deck Screws
Replacing Assemblies Figure 28 Removing the top rear deck screws Figure 29 Removing the bottom right rear deck screw 3000G X-Series Oscilloscopes Service Guide... -
Page 97: Figure 30 Removing The Bottom Left Rear Deck Screw
Replacing Assemblies Figure 30 Removing the bottom left rear deck screw Figure 31 Removing the bottom rear deck screws 3000G X-Series Oscilloscopes Service Guide... -
Page 98: Figure 32 Removing The Option Module Guide To Acquisition Board Screw
Replacing Assemblies Figure 32 Removing the option module guide to acquisition board screw 3 If the power supply shield has not already been removed, do that now. See “To remove the power supply shield" on page 92. 3000G X-Series Oscilloscopes Service Guide... -
Page 99: Figure 33. Disconnecting The Interboard Supply Cable From The Acquisition
Replacing Assemblies 4 Disconnect the interboard supply cable from the acquisition board. You may need to use a screwdriver to pry the connector latch. Figure 33 Disconnecting the interboard supply cable from the acquisition board 3000G X-Series Oscilloscopes Service Guide... -
Page 100: Figure 34 Lifting Front Bezel Latch
Replacing Assemblies 5 Carefully separate the rear deck from the front deck. a Lift the front bezel latch that holds the rear deck. Figure 34 Lifting front bezel latch 3000G X-Series Oscilloscopes Service Guide... -
Page 101: Figure 35 Separating The Rear And Front Decks
Replacing Assemblies b Carefully separate the rear deck from the front deck. Take care not to damage the extender switch. Figure 35 Separating the rear and front decks Figure 36 Rear and front decks separated 3000G X-Series Oscilloscopes Service Guide... -
Page 102: To Replace The Battery
Replacing Assemblies To replace the battery If the battery needs to be replaced, use a CR2032/1HG or CR2032/HGN 3V manganese dioxide lithium battery. Figure 37 Battery location 3000G X-Series Oscilloscopes Service Guide... -
Page 103: To Remove The Touch Controller Board
Replacing Assemblies To remove the touch controller board 1 Remove 2 screws. 2 Rotate shield toward bracket wall. 3000G X-Series Oscilloscopes Service Guide... - Page 104 Replacing Assemblies 3 Rotate more than 45° and shield can be released from bracket. 4 Disconnect all cables. 3000G X-Series Oscilloscopes Service Guide...
- Page 105 Replacing Assemblies 5 Remove 2 screws. 6 Slide controller board up to release it from bracket. 3000G X-Series Oscilloscopes Service Guide...
- Page 106 Replacing Assemblies To assemble, reverse steps above. When rotating Shield to assemble to Bracket, push both ground fingers into Bracket. 3000G X-Series Oscilloscopes Service Guide...
-
Page 107: To Remove The Acquisition Board
Replacing Assemblies To remove the acquisition board These steps describes how to remove the acquisition board. 1 Using a TORK T6 driver, locate and remove the 4 screws on the front of the instrument (4 Channel version). Figure 38 Removing the T6 screws (4 channel version) 3000G X-Series Oscilloscopes Service Guide... -
Page 108: Figure 39 Removing The Controller Board Bracket
Replacing Assemblies 2 Using a TORK T10 driver, locate and remove the 2 screws securing the controller board bracket. Figure 39 Removing the controller board bracket 3000G X-Series Oscilloscopes Service Guide... -
Page 109: Figure 40. Disconnecting Keyboard And Display Cables From Acquisition
Replacing Assemblies 3 Disconnect keyboard, display, and display backlight power cables. For the keyboard and display cables, flip up the connector clamp; then, slide the ribbon cables out. Figure 40 Disconnecting keyboard and display cables from acquisition board 3000G X-Series Oscilloscopes Service Guide... -
Page 110: Figure 41. Disconnecting Display Backlight Power Cable From Acquisition
Replacing Assemblies For the display backlight power cable, slide the connector clamp toward the top of the acquisition board; then, slide the ribbon cable out. Figure 41 Disconnecting display backlight power cable from acquisition board 3000G X-Series Oscilloscopes Service Guide... -
Page 111: Figure 42 Acquisition Board Mounting Screw Locations
Replacing Assemblies 4 Using a TORX T10 driver, locate and remove 12 mounting screws. Figure 42 Acquisition board mounting screw locations 5 Carefully lift the acquisition board off the front deck. 3000G X-Series Oscilloscopes Service Guide... -
Page 112: Figure 43 Acquisition Board Removed From Front Deck
Replacing Assemblies Figure 43 Acquisition board removed from front deck 3000G X-Series Oscilloscopes Service Guide... -
Page 113: To Remove The Front Panel Assembly
Replacing Assemblies To remove the front panel assembly WARNING Thin sheet metal parts may have sharp edges. Handle with care to avoid injury. 1 Remove the bezel from the front deck. The bezel is secured to front deck by molded-in retaining clips located around the perimeter of the bezel. -
Page 114: Figure 45 All Bezel Clips Released
Replacing Assemblies Figure 45 All bezel clips released Figure 46 HINT: When reinstalling bezel, align ground terminal first 2 When all the bezel clips are released, gently lift the front deck away from the bezel, and disconnect the keyboard cable. 3000G X-Series Oscilloscopes Service Guide... -
Page 115: Figure 47 Gently Lift Front Deck From Bezel
Replacing Assemblies Figure 47 Gently lift front deck from bezel Flip up the keyboard cable connector clamp; then, slide the ribbon cable out. Figure 48 Disconnect the keyboard cable 3000G X-Series Oscilloscopes Service Guide... -
Page 116: Figure 49 Disconnect The Softkey Board Cable
Replacing Assemblies 3 Remove the softkey board cable from the keyboard board. Slide the connector clamp toward the softkey board; then, slide the ribbon cable out. Figure 49 Disconnect the softkey board cable 3000G X-Series Oscilloscopes Service Guide... -
Page 117: Figure 50 Unclip The Softkey Board From The Bezel
Replacing Assemblies 4 To separate the softkey board from the bezel, carefully pull back locking tabs that secure it. Figure 50 Unclip the softkey board from the bezel Figure 51 Remove the softkey keypad from the bezel 3000G X-Series Oscilloscopes Service Guide... -
Page 118: Figure 52 Unclip The Keyboard Board From The Bezel
Replacing Assemblies 5 To separate the keyboard board from the bezel, carefully pull back locking tabs that secure it. Figure 52 Unclip the keyboard board from the bezel Figure 53 Remove the keyboard keypad from the bezel 3000G X-Series Oscilloscopes Service Guide... -
Page 119: To Remove The Display Assembly
Replacing Assemblies To remove the display assembly The display assembly is part of the front panel assembly. Before you can remove and replace the display assembly, you must remove the front panel assembly. See “To remove the front panel assembly" on page 113. -
Page 120: Figure 55 Display Assembly Removed
Replacing Assemblies Take care while threading display cables thru front deck sheet metal openings. Figure 55 Display assembly removed 3000G X-Series Oscilloscopes Service Guide... -
Page 121: To Remove The Fan Assembly
Replacing Assemblies To remove the fan assembly 1 Ensure that fan power cable has been disconnected from acquisition board. Figure 56 Disconnecting fan power cable 3000G X-Series Oscilloscopes Service Guide... -
Page 122: Figure 57 Removing Fan Assembly
Replacing Assemblies 2 Carefully slide fan assembly (fan and fan mount) to the right, then lift away from rear deck. Note, fan mount is soft and can be damaged by sharp sheet metal edges. Take care that the fan power cable is not damaged when pulling across sheet metal edges. -
Page 123: To Remove The Power Supply
Replacing Assemblies To remove the power supply 1 Disconnect all cables from power supply board. Figure 58 Disconnecting the AC cable 3000G X-Series Oscilloscopes Service Guide... -
Page 124: Figure 59. Disconnecting The Interboard Supply Cable From The Line Filter
Replacing Assemblies Figure 59 Disconnecting the interboard supply cable from the line filter board Figure 60 Disconnecting the DC cable from the line filter board 2 Using a TORX T10 driver, locate and remove the four screws securing the power supply assembly to the rear deck. -
Page 125: Figure 61 Removing The Power Supply
Replacing Assemblies Figure 61 Removing the power supply 3000G X-Series Oscilloscopes Service Guide... -
Page 126: To Remove The Line Filter Board
Replacing Assemblies To remove the line filter board 1 Disconnect all cables on the line filter board. 2 Remove the option module guide. Figure 62 Removing the option module guide 3000G X-Series Oscilloscopes Service Guide... -
Page 127: Figure 63 Disconnecting The Ground Wire
Replacing Assemblies 3 Disconnect the ground wire from its chassis terminal. Figure 63 Disconnecting the ground wire 3000G X-Series Oscilloscopes Service Guide... -
Page 128: Figure 64 Removing The Line Filter Board Screws
Replacing Assemblies 4 Using a TORX T10 driver, locate and remove the three screws screws securing the line filter board to the rear deck. Figure 64 Removing the line filter board screws 3000G X-Series Oscilloscopes Service Guide... -
Page 129: Figure 65 Removing The Line Filter Board
Replacing Assemblies 5 Slide the line filter board out of the slots in the rear deck. Take care that you do not damage the switch extender during removal. Figure 65 Removing the line filter board 3000G X-Series Oscilloscopes Service Guide... -
Page 130: Figure 66 Removing The Power Switch Extender
Replacing Assemblies 6 To remove the switch extender, gently pry open the extender using a flat head screwdriver. Twisting the latch too much could cause it to break! CAUTION Figure 66 Removing the power switch extender 3000G X-Series Oscilloscopes Service Guide... -
Page 131: After Service
Replacing Assemblies After Service After service, a continuity check should be performed between the chassis and the mains inlet ground lug. A dielectric withstand (hipot) test should also be performed at the appropriate voltage per IEC 61010-1 Annex F. Because protective earth continuity is required for hipot testing, many hipot testers also test protective earth continuity. - Page 132 Replacing Assemblies b The test voltage is specified for Installation Category II. The equipment shall withstand, without breakdown, the application of 1400V ac or 2000V dc between mains TERMINALS and ACCESSIBLE conductive parts. “Without breakdown” means the leakage current measured by the hipot tester is between 0 and 1 mA. DUT (oscilloscope) Hipot Tester High-voltage...
-
Page 133: Replaceable Parts
Keysight InfiniiVision 3000G X-Series Oscilloscope Service Guide 6 Replaceable Parts This chapter describes how to order replaceable assemblies and parts for the Keysight 3000G X-Series oscilloscopes. Diagrams and parts lists are included for assemblies and hardware that you can order. Before working on the oscilloscope, read the safety summary at the back of this book. -
Page 134: Ordering Replaceable Parts
Ordering Replaceable Parts Listed Parts To order a part in the parts list, quote the Keysight Technologies part number, indicate the quantity desired, and address the order to the nearest Keysight Technologies Sales Office. To find your nearest sales office go to www.keysight.com. -
Page 135: Exchange Assemblies
The exchange parts have a part number in the form XXXXX-695XX. After receiving the repaired exchange part from Keysight Technologies, a United States customer has 30 days to return the faulty assembly. For orders not originating in the United States, contact the local Keysight Technologies service organization. -
Page 136: Exploded Views
Replaceable Parts Exploded Views The following exploded views provide a graphical representation of the oscilloscope at the time this manual was released. Not all parts are shown. Your parts may be slightly different than those shown. These views provide reference designator numbers that map to those used in the parts list table in this chapter. - Page 137 Replaceable Parts MP12 MP36 MP37 MP34 MP28 MP29 MP27 MP25 MP26 MP30 Figure 68 Exploded View 2 of 2 3000G X-Series Oscilloscopes Service Guide...
-
Page 138: Replaceable Parts List
Replaceable Parts Replaceable Parts List The information given for each part consists of the following: • Reference designation. • Keysight Technologies part number. • Total quantity (Qty) in the instrument or on assembly. • Description of the part. Table 16... - Page 139 Replaceable Parts Table 16 Replaceable Parts (continued) Ref Des Keysight Part Description Number 75037-68703 Display assembly. 75037-66425 Touch Screen Controller Board 54684-42202 Hole plug front panel (2 Channel only, not shown) 2950-0054 Nut, 1/2-28 THD (secures BNCs, not shown) 2190-0068 Washer-LK Intl T 1/2 In.
- Page 140 Replaceable Parts Table 16 Replaceable Parts (continued) Ref Des Keysight Part Description Number 75048-94304 ID Label MSO-X 3052G 75049-94301 ID Label DSO-X 3034G 75049-94302 ID Label MSO-X 3034G 75049-94303 ID Label DSO-X 3054G 75049-94304 ID Label MSO-X 3054G 75050-94301 ID Label DSO-X 3102G 75050-94302 ID Label MSO-X 3102G 75051-94301...
- Page 141 Replaceable Parts Table 16 Replaceable Parts (continued) Ref Des Keysight Part Description Number MP27 75019-00102 Rear Deck MP25 75019-44701 Fan Mount MP26 3160-4343 MP28 75019-43901 Extender, Power Switch MP29 75019-00602 Power Supply Shield MP30 75051-64401 Cabinet (Bucket) Assembly MP33 75051-94309 Overlay - Traditional Chinese, 4 channel MP33 75051-94308...
- Page 142 Replaceable Parts Table 16 Replaceable Parts (continued) Ref Des Keysight Part Description Number MP33 75051-94325 Overlay - French, 4 channel MP33 75051-94324 Overlay - French, 2 channel MP33 75051-94327 Overlay - Japanese, 4 channel MP33 75051-94326 Overlay - Japanese, 2 channel MP33 75051-94329 Overlay - Italian, 4 channel...
- Page 143 Replaceable Parts Table 16 Replaceable Parts (continued) Ref Des Keysight Part Description Number Power cord Part number varies by country. Contact your local Keysight sales office for replacement. 75037-61601 Touch Screen Cable N2843A Passive Probe 10:1, 500 MHz MP10 75019-44108 Protective Cover Assembly Not shown 75019-68705...
- Page 144 Replaceable Parts 3000G X-Series Oscilloscopes Service Guide...
-
Page 145: Safety Notices
Keysight InfiniiVision 3000G X-Series Oscilloscope Service Guide 7 Safety Notices This apparatus has been designed and tested in accordance with IEC Publication 1010, Safety Requirements for Measuring Apparatus, and has been supplied in a safe condition. This is a Safety Class I instrument (provided with terminal for protective earthing). -
Page 146: To Clean The Instrument
Safety Notices Do not install substitute parts or perform any unauthorized modification to the instrument. Capacitors inside the instrument may retain a charge even if the instrument is disconnected from its source of supply. Do not operate the instrument in the presence of flammable gasses or fumes. Operation of any electrical instrument in such an environment constitutes a definite safety hazard. -
Page 147: Index
Index exploded view front panel, accuracy, DC vertical gain, ordering parts, instrument, accuracy, dual cursor, overvoltage category, assemblies exchange, replacing, fan assembly removal, parts front panel list, exploded view, ordering, removal, bandwidth passive probe, front panel self test, verification, perform user cal, performance test record, pollution degree,... - Page 148 Index run self-tests, warnings, warranted specifications, safety notice, 56, self test, front panel, self test, hardware, self-alignment, user cal, self-tests, specifications, startup sequence, status, User Cal, status, user cal, storage lid, removal, test connector, constructing, digital channels, equipment, points, power, 74, record, threshold accuracy, digital channel,...
Need help?
Do you have a question about the InfiniiVision 3000G X Series and is the answer not in the manual?
Questions and answers