Mocka Tahoe Assembly Instructions Manual
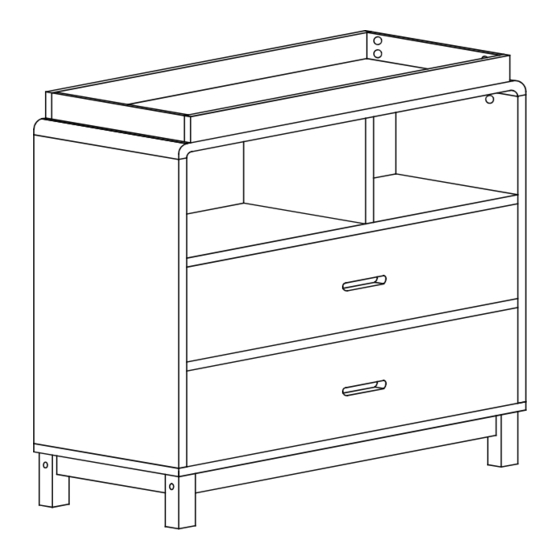
Change table
Hide thumbs
Also See for Tahoe:
- Assembly instructions manual (11 pages) ,
- Assembly instructions manual (10 pages) ,
- Assembly instructions manual (8 pages)
Advertisement
Quick Links
Advertisement

Related Manuals for Mocka Tahoe


Summary of Contents for Mocka Tahoe
- Page 1 Hello, I’ve arrived! Now that I’m here you are only one flat-pack away from transforming your home.
- Page 2 Thank you for supporting us. We believe design belongs to everyone. From materials and processes to safety testing, production and delivery, we are passionate and committed to bringing you the best possible product so you can create beautifully functional spaces to feel comfortably you. Here are a few assembly tips before you get started: Make Time...
- Page 3 WIPE the change table clean using a clean damp cloth and suitable com- mercial cleaner. • ENSURE the changing table is level, stable and structurally sound. manufactured by: mocka products pty ltd. po box 18, pinkenba, qld 4008. mocka limited, po box 29335, riccarton, christchurch 8440, nz mocka.co.nz I mocka.com.au...
- Page 4 For the most up to date versions please refer to the product page on our website. mocka.com.au/mocka.co.nz mocka.co.nz I mocka.com.au...
-
Page 5: Panel Layout
Back Panel-Left Side Panel-Right Back Panel-Right Arc Panel Drawer Front Panel Tray Side Panel-Short Drawer Panel-Left Leg Panel Drawer Panel-Right Connecting Panel Drawer Support Panel Tray Side Panel-Long Drawer Bottom Panel Support Pannel Drawer Back Panel Middle Pannel mocka.co.nz I mocka.com.au... -
Page 6: Hardware Supplied
For quicker assembly, we recommend theuse of a power drill on a low-speed setting. *We recommend using a Flathead screwdriver to tighten all locking nuts 100% before first use. Please clear any loose wood from the locking nut holes before inserting the nut to ensure it locks 100%. mocka.co.nz I mocka.com.au... - Page 7 Tahoe Change Table Hardware Needed Hardware Needed mocka.co.nz I mocka.com.au...
- Page 8 Tahoe Change Table Hardware Needed Hardware Needed mocka.co.nz I mocka.com.au...
- Page 9 Tahoe Change Table Hardware Needed Hardware Needed mocka.co.nz I mocka.com.au...
- Page 10 Tahoe Change Table Hardware Needed Hardware Needed mocka.co.nz I mocka.com.au...
- Page 11 Tahoe Change Table Hardware Needed Hardware Needed mocka.co.nz I mocka.com.au...
- Page 12 Tahoe Change Table Hardware Needed mocka.co.nz I mocka.com.au...
- Page 13 Tahoe Change Table Hardware Needed Hardware Needed Drawer x 2 mocka.co.nz I mocka.com.au...
- Page 14 Use a drill to create a small hole lining up with the top of the 1x safety strap (W). Fasten to the wall using 1x wall anchor (X), 1x washer (Z) and 1x wall screw (J). Ensure the unit is balanced and steady before use. You’re done, enjoy! mocka.co.nz I mocka.com.au...
Need help?
Do you have a question about the Tahoe and is the answer not in the manual?
Questions and answers