Keeler Pulsair Intellipuff Instructions For Use Manual
Non-contact tonometer
Hide thumbs
Also See for Pulsair Intellipuff:
- Instructions for use manual (48 pages) ,
- Instructions for use manual (110 pages) ,
- Instructions for use manual (110 pages)
Table of Contents
Advertisement
Available languages
Available languages
Quick Links
Advertisement
Chapters
Table of Contents

Related Manuals for Keeler Pulsair Intellipuff


Summary of Contents for Keeler Pulsair Intellipuff
- Page 1 Non-Contact Tonometer INSTRUCTIONS FOR USE EN LV SL...
- Page 3 Pulsair Intellipuff Tonometer Instructions For Use ..........1 Pulsair Intellipuff tonometrs Lietošanas instrukcija ..........22 Tonometer Pulsair Intellipuff Navodila za uporabo ..........43...
-
Page 5: Table Of Contents
Pulsair Intellipuff Tonometer by KEELER CONTENTS INDICATIONS FOR USE ..................3 BRIEF DESCRIPTION OF THE INSTRUMENT .....................3 INTENDED USE / PURPOSE OF INSTRUMENT ....................3 SAFETY ........................3 PHOTOTOXICITY ..................................3 WARNINGS AND CAUTIONS ............................4 2.3 CONTRAINDICATION ................................ 5 CLEANING INSTRUCTIONS ................... 5 CLEAN THE PUFF TUBE LENS ON A WEEKLY BASIS: ................ - Page 6 Atmospheric pressure limitation Medical device Humidity limitation Translation The Keeler Pulsair Intellipuff Tonometer is designed and built-in conformity with Directive 93/42/EEC, Regulation (EU) 2017/745 and ISO 13485 Medical Devices Quality Management Systems. Classification: CE / UKCA: Class IIa FDA: Class II The information contained within this manual must not be reproduced in whole or part without the manufacturer’s...
-
Page 7: Indications For Use
24 hours. This applies, in particular, if the retina has been photographed with a flashbulb in advance. Keeler Ltd shall on request, provide the user with a graph showing the relative spectral output of the instrument. -
Page 8: Warnings And Cautions
Please note that the proper and safe functioning of our instruments is only guaranteed if both the instruments and their accessories are exclusively from Keeler Ltd. The use of other accessories may result in increased electromagnetic emissions or reduced electromagnetic immunity of the device and may lead to incorrect operation. -
Page 9: Contraindication
This product should be used in a room with low / dimmed lighting. • Before using the Pulsair IntelliPuff Tonometer, press the Demo button for 1 second to dispel any minute particles of dust or moisture which may have settled whilst the instrument was not in use. -
Page 10: Cleaning Tonometer Body
Replace the blanking plate with the appropriate mains plug adapter if required, or use IEC 60320 TYPE 7 connector (not supplied). 5. WALL MOUNTING Your Pulsair IntelliPuff is supplied with a sturdy wall mounting bracket. 1. The bracket has four holes allowing it to be securely fixed to an appropriate wall or vertical surface. -
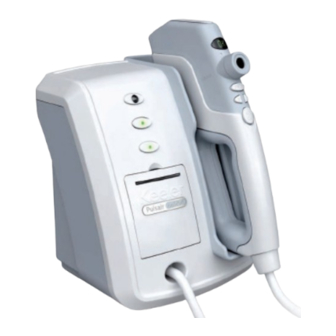
Page 11: Names Of Controls And Components
7. NAMES OF CONTROLS AND COMPONENTS On / Off Push Button To turn the Pulsair IntelliPuff on or off, push the On / Off button – a green LED will indicate the unit is on. Test Eye This is useful for user training;... - Page 12 The Serial Port is used for calibration, systems checking and data output (located on rear of instrument). Power Input Insert the low voltage power lead (located on rear of instrument) using only Keeler power supplies. Forehead Rest Push to release or push to return the Forehead Rest to its discrete position.
- Page 13 To initiate Easy Pulse Mode hold the Review button for greater than one second; the display will show ‘easy’, it will beep once and the Pulsair Intellipuff tonometer will be ready to use on the difficult eye. Pressing any button, returning the Hand Unit to the Cradle, or performing a manual reset by pressing the button in the Cradle Well, will return the Pulsair IntelliPuff to its previous settings.
-
Page 14: Measurement Procedure
The Eyepiece allows the user to view the patient’s eye and align the targeting system. Puff Tube and Lens The Puff Tube and Puff Lens are the parts of the Pulsair IntelliPuff through which the Pulsair IntelliPuff is aligned and a gentle puff of air is emitted. Alignment LEDs The two green LEDs located on the front of the Hand Unit act as a guide when you are lining up the patient’s eye to take... -
Page 15: Preparing The Patient
Once the Pulsair IntelliPuff and the patient are prepared, you are ready to take a reading. 1. The Pulsair IntelliPuff is set to automatically select the right eye as the first eye to be measured. If you wish to select the left eye, press the OD / OS button on the hand unit. - Page 16 8. Once you have taken a reading, remain in the operating position; wait a few seconds for the air chamber to refill. When the ‘bow tie’ image appears the Pulsair IntelliPuff takes a subsequent reading. When two successive readings within 1mmHg of each other are recorded, a sound may be emitted (if sounds are enabled in the User Menu Options).
-
Page 17: Display Examples
Pulsair Intellipuff Tonometer by KEELER 9. DISPLAY EXAMPLES Standby The tonometer will display STBY when power is on. System Initialisation The unit will display WAIT for one second while the system initialises. When no fault is found, OK is displayed and the tonometer defaults to measure the right eye OD. -
Page 18: Printing
Pulsair Intellipuff Tonometer by KEELER 10. PRINTING The results can be printed by pressing the Print button on the Hand Unit, or if the user menu is set to automatically print by replacing the Hand Unit in the cradle. 10.1 SAMPLE PRINT The reading in brackets (20) indicates a discarded value (not taken into account in the average calculations). -
Page 19: Calibration, Maintenance And Inspection
In the event of the device being outside of the calibration tolerances, it is important to send the device back to Keeler Ltd. or your local dealer for repair and re-calibration. 13.1 REGULAR INSPECTION Inspect your power supply unit and cable for damage regularly. -
Page 20: General
Keep the tonometer free from dust. If the Pulsair IntelliPuff Tonometer is to remain unused for any length of time, press the On / Off Push button switch to ‘Off’ and remove the power supply. Use the dust cover to protect the tonometer. -
Page 21: Electromagnetic Emissions
16.1 ELECTROMAGNETIC EMISSIONS Guidance and manufacturer’s declaration – electromagnetic emissions The Keeler Pulsair IntelliPuff Tonometer is intended for use in the electromagnetic environment specified below. The customer or user should assure that it is used in such an environment. Emissions test Compliance Electromagnetic environment –... - Page 22 – guidance Test level Portable and mobile RF communications equipment should be used no closer to any part of the Keeler Pulsair IntelliPuff Tonometer, including cables, than the recommended separation distances calculated from the equation applicable to the frequency of the transmitter.
-
Page 23: Recommended Safe Distances
To assess the electromagnetic environment due to fixed RF transmitters, an electromagnetic site survey should be considered. If the measured field strength in the location in which the Keeler Pulsair IntelliPuff Tonometer is used exceeds the applicable RF compliance level above, the Keeler Pulsair IntelliPuff Tonometer should be observed to verify normal operation. -
Page 24: Technical Specifications
30 VA (12V DC 2.5A) Frequency 50/60 Hz *In a clinical study, the Pulsair IntelliPuff Tonometer appeared to slightly underestimate IOP relative to the Goldmann Tonometer at pressures above 30mmHg but these differences were not clinically significant. Environmental Conditions: 1060 hPa °C... -
Page 25: Accessories And Spares
Pulsair Intellipuff Tonometer by KEELER STORAGE CONDITIONS 1060 hPa °C -10°C 700 hPa TRANSPORT CONDITIONS 1060 hPa °C °C 500 hPa Vibration, sinusoidal 10 Hz to 500 Hz: 0.5g Shock 30 g, duration 6 ms Bump 10 g, duration 6 ms 18. - Page 26 Pulsair Intellipuff tonometrs no KEELER SATURS LIETOŠANAS INDIKĀCIJAS ................24 1.1 INSTRUMENTA ĪSS APRAKSTS ..........................24 1.2 INSTRUMENTA PAREDZĒTAIS PIELIETOJUMS/MĒRĶIS..............24 DROŠĪBA ........................24 2.1 FOTOTOKSICITĀTE ................................24 2.2 BRĪDINĀJUMI UN PIESARDZĪBAS PASĀKUMI ....................24 2.3 KONTRINDIKĀCIJA................................26 TĪRĪŠANAS INSTRUKCIJAS .................26 3.1 TĪRIET PŪŠANAS CAURULES LĒCU IK NEDĒĻU: ..................26 3.2 TONOMETRA KORPUSA TĪRĪŠANA ........................27 BAROŠANAS BLOKA MONTĀŽA ............... 27 KOMPLEKTA SPRAUDNIS..............................27...
- Page 27 Sērijas numurs robežvērtība Medicīniskā ierīce Mitruma robežvērtība Tulkojums Keeler Pulsair Intellipuff tonometrs ir paredzēts un konstruēts atbilstoši Direktīvai 93/42/EEK, Regulai (ES) 2017/745 un ISO 13485 Medicīnisko ierīču kvalitātes vadības sistēmām. Klasifikācija: CE / UKCA: IIa klase FDA: II klase Šajā rokasgrāmatā sniegto informāciju nedrīkst pavairot nedz pilnībā, nedz daļēji bez ražotāja iepriekšējas rakstiskas piekrišanas.
-
Page 28: Lietošanas Indikācijas
Keeler Ltd pēc pieprasījuma sniegs lietotājam diagrammu, kurā attēlota instrumenta relatīvā spektrālā jauda. 2.2 BRĪDINĀJUMI UN PIESARDZĪBAS PASĀKUMI Lūdzu, ņemiet vērā, mūsu instrumentu pareiza un droša darbība tiek garantēta tikai tad, ja gan instrumenti, gan to piederumu ražotājs ir tikai uzņēmums Keeler Ltd. Izmantojot citus piederumus,... - Page 29 Izmantojiet tikai apstiprinātu Keeler barošanas avotu EP29-32777, vai arī instrumentam var rasties darbības traucējumi. • Nenoņemiet uzlīmes, kas nosedz galvenos caurumus, ja vien Pulsair IntelliPuff netiek montēts pie sienas. • Instrumenta īpašnieks ir atbildīgs par personāla apmācīšanu instrumenta pareizā lietošanā.
-
Page 30: Kontrindikācija
Uzstādiet pie sienas tikai saskaņā ar Keeler instrukcijām. • Šis izstrādājums ir jāizmanto telpā ar vāju/ blāvu apgaismojumu. • Pirms Pulsair IntelliPuff lietošanas nospiediet demonstrācijas pogu 1 sekundi, lai izkliedētu visas sīkās putekļu daļiņas vai mitrumu, kas, iespējams, ir sakrājies uz instrumenta, kamēr tas netika lietots. •... -
Page 31: Tonometra Korpusa Tīrīšana
7. Uzmanīgi ievietojiet plāksnes montāžas tapas Pulsair IntelliPuff aizmugurē esošajos galvenajos caurumos un nolaidiet to galīgajā un drošā pozīcijā. 6. TONOMETRIJA, SPIEDIENA IZMAIŅAS CILVĒKA ACĪ Keeler Pulsair IntelliPuff tonometrs mēra acs intraokulāro spiedienu, automātiski uzpūšot nelielu gaisa plūsmu uz radzenes. To sauc par notikumu. -
Page 32: Vadības Elementu Un Komponentu Nosaukumi
+/-1 mmHg robežās viens no otra, norādot, ka turpmāki mērījumi var nebūt nepieciešami. 7. VADĪBAS ELEMENTU UN KOMPONENTU NOSAUKUMI Ieslēgšanas/ izslēgšanas poga Lai ieslēgtu vai izslēgtu Pulsair IntelliPuff, nospiediet ieslēgšanas/ izslēgšanas pogu – zaļa gaismas diode norādīs, ka iekārta ir ieslēgta. Testa acs Tā ir noderīga lietotāja apmācībai, tā nesniegs IOS mērījumu. - Page 33 Seriālā pieslēgvieta tiek izmantota kalibrēšanai, sistēmu pārbaudei un datu izvadei (atrodas instrumenta aizmugurē). Barošanas ievade Ievietojiet zemsprieguma strāvas vadu (atrodas instrumenta aizmugurē), izmantojot tikai Keeler barošanas avotus. Pieres atbalsts Nospiediet, lai atbrīvotu, vai nospiediet, lai atgrieztu pieres balstu sākotnējā stāvoklī.
- Page 34 Lai aktivizētu vienkāršā impulsa režīmu, turiet nospiestu pārskatīšanas pogu ilgāk par vienu sekundi; displejā būs redzams “easy” (viegli), atskanēs viens skaņas signāls, un Pulsair Intellipuff tonometrs būs gatavs lietošanai acij, kurai bija grūtības veikt mērījumu. Nospiežot jebkuru pogu, atgriežot rokas ierīci sēdnē...
-
Page 35: Mērīšanas Procedūra
Okulārs Okulārs ļauj lietotājam skatīt pacienta aci un veikt salāgošanu ar mērķēšanas sistēmu. Pūšanas caurule un lēca Pūšanas caurule un pūšanas lēca ir Pulsair IntelliPuff tonometra daļas, caur kurām tiek salāgots Pulsair IntelliPuff un tiek izdalīts viegls gaisa pūtiens. Salāgošanas LED Divas zaļas LED, kas atrodas rokas ierīces priekšpusē,... -
Page 36: Pacienta Sagatavošana
8.3 LASĪJUMU VEIKŠANA Kad Pulsair IntelliPuff un pacients ir sagatavoti, jūs esat gatavs nolasīt rādījumus. 1. Pulsair IntelliPuff ir iestatīts, lai automātiski izvēlētos labo aci kā pirmo aci, kam veikt mērīšanu. Ja vēlaties atlasīt kreiso aci, nospiediet OD/OS pogu uz rokas ierīces. - Page 37 8. Kad nolasījums veikts, palieciet darbības režīmā; uzgaidiet dažas sekundes, lai piepildītos gaisa nodalījums. Kad parādās “tauriņa” attēls, Pulsair IntelliPuff uzņem nākamo nolasījumu. Kad divi secīgi rādījumi būs 1 mmHg robežās, atskanēs skaņas signāls, kas norāda, ka, iespējams, ir veikts pietiekami daudz nolasījumu. Ja netiek iegūti secīgi rādījumi 1 mmHg robežās vienam no otra, Keeler iesaka veikt līdz četriem nolasījumiem.
-
Page 38: Displeja Piemēri
Pulsair Intellipuff tonometrs no KEELER 9. DISPLEJA PIEMĒRI Gaidstāve Kad barošana būs ieslēgta, tonometrs parādīs STBY. Sistēmas inicializācija Iekārtā būs redzams WAIT (uzgaidiet) vienu sekundi, kamēr sistēmas veiks inicializāciju. Labi Ja kļūda netiks konstatēta, tonometrā parādīsies OK (Labi) un pēc noklusējuma iekārta būs gatava labās acs OD mērīšanai. -
Page 39: Drukāšana
Pulsair Intellipuff tonometrs no KEELER 10. DRUKĀŠANA Rezultātus var izdrukāt, nospiežot drukāšanas pogu uz rokas ierīces vai, ja lietotāja izvēlne ir iestatīta automātiskai drukāšanai, atkārtoti ievietojot rokas ierīci sēdnē. 10.1 IZDRUKAS PARAUGS Nolasījums iekavās (20) norāda uz izmestu vērtību (nav ņemta vērā... -
Page 40: Kalibrēšana, Apkope Un Pābaude
Ja ierīce ir ārpus kalibrēšanas pielaidēm, ir svarīgi to nosūtīt atpakaļ Keeler Ltd. vai vietējam izplatītājam remontam un atkārtotai kalibrēšanai. 13.1 REGULĀRA PĀRBAUDE Regulāri pārbaudiet, vai barošanas bloks un kabelis nav bojāti. Pirms pārbaudes atvienojiet barošanas padevi no Pulsair IntelliPuff tonometra un elektrotīkla. -
Page 41: Vispārīgi
Instrumentā nav daļu, kuru apkopi varētu veikt lietotājs. Apkopes rokasgrāmatas būs pieejamas pilnvarotiem Keeler apkopes centriem un Keeler apmācītam apkopes personālam. 15. GARANTIJA Jūsu Keeler produktam tiek sniegta 2 gadu garantija, un tas tiks nomainīts vai remontēts bez maksas, ievērojot šādus nosacījumus: •... -
Page 42: Elektromagnētiskās Emisijas
Pulsair Intellipuff tonometrs no KEELER 16.1 ELEKTROMAGNĒTISKĀS EMISIJAS Vadlīnijas un ražotāja deklarācija – elektromagnētiskās emisijas Keeler Pulsair IntelliPuff tonometrs ir paredzēts lietošanai tālāk norādītajā elektromagnētiskajā vidē. Klientam vai lietotājam ir jānodrošina, lai šī ierīce tiktu lietota šādā vidē. Emisiju tests Atbilstība Elektromagnētiskā vide – vadlīnijas RF emisijas CISPR 11... - Page 43 Elektromagnētiskā vide – vadlīnijas tests Testa līmenis līmenis Portatīvo un mobilo RF sakaru aprīkojums jāizmanto ne tuvāk no Keeler Pulsair IntelliPuff tonometra daļām, ieskaitot kabeļus, kā ieteicamie attālumi, kas tiek aprēķināti saskaņā ar raidītāja frekvencei piemērojamo formulu. Ieteicamais attālums Vadītās RF IEC 6 Vrms...
-
Page 44: Ieteicamie Drošie Attālumi
Keeler Pulsair IntelliPuff tonometrs tiek izmantots, pārsniedz augstāk norādīto piemērojamo RF atbilstības līmeni, jāvēro, vai Keeler Pulsair IntelliPuff tonometrs darbojas normāli. Ja tiek novērota anormāla darbība, var būt nepieciešami papildu pasākumi, piemēram, Keeler Pulsair IntelliPuff tonometra pārorientācija vai pārvietošana. -
Page 45: Tehniskās Specifikācijas
EN 60601-1, EN 61000-6-2, EN 61000-6-3 Barošanas jauda 30 V A (12 V līdzstrāva 2,5 A) Frekvence 50/60 Hz *Klīniskā pētījumā Pulsair IntelliPuff tonometra IOS novērtēšanas veiktspēja bija nedaudz zemāka salīdzinājumā ar Goldmann tonometru pie spiediena virs 30 mmHg, taču šīs atšķirības nebija klīniski nozīmīgas. Vides nosacījumi: LIETOŠANA 1060 hPa °C... -
Page 46: Piederumi Un Rezerves Daļas
Pulsair Intellipuff tonometrs no KEELER GLABĀŠANAS APSTĀKĻI 1060 hPa °C 55 -10 °C 700 hPa TRANSPORTĒŠANAS APSTĀKĻI 1060 hPa °C 70 °C -40 500 hPa Vibrācija, sinusoidāla 10 Hz līdz 500 Hz: 0,5 g Triecieni 30 g, ilgums 6 ms Kratīšana 10 g, ilgums 6 ms 18. PIEDERUMI UN REZERVES DAĻAS Elements Daļas numurs... - Page 47 Tonometer Pulsair Intellipuff družbe KEELER VSEBINA INDIKACIJE ZA UPORABO ................45 KRATEK OPIS INSTRUMENTA ...........................45 NAMEN UPORABE/NAMEN INSTRUMENTA ....................45 VARNOST ........................ 45 2.1 FOTOTOKSIČNOST ................................45 OPOZORILA IN SVARILA ...............................45 2.3 KONTRADIKACIJA ................................47 NAVODILA ZA ČIŠČENJE ..................47 3.1 LEČO CEVKE ZA VPIHOVANJE ČISTITE VSAK TEDEN. ..............47 3.2 ČIŠČENJE OHIŠJA TONOMETRA........................48 SKLOP ELEKTRIČNEGA NAPAJALNIKA ............
- Page 48 Kot del naše politike stalnega razvijanja izdelkov, si kot proizvajalec pridržujemo pravico do sprememb tehničnih podatkov in drugih informacij v tem dokumentu brez predhodnega obvestila. Ta navodila za uporabo so na voljo tudi na spletnih straneh družbe Keeler UK in Keeler ZDA. Avtorske pravice © Keeler Limited 2023. Izdano v Združenem kraljestvu 2023.
-
Page 49: Indikacije Za Uporabo
NAMEN UPORABE/NAMEN INSTRUMENTA Brezstični tonometer Pulsair IntelliPuff je indiciran za merjenje intraokularnega tlaka brez stika z očesom za pomoč pri presejanju in diagnostiki glavkoma. 2. VARNOST FOTOTOKSIČNOST... - Page 50 Instrumenta nikoli ne uporabljajte, če je vidno poškodovan, in redno pregledujte, ali so na njem vidni znaki poškodb ali nepravilne uporabe. • Pred uporabo preverite, ali so na izdelku Keeler vidni znaki poškodb, ki so nastale pri transportu/shranjevanju. • Zvezni zakon ZDA omejuje prodajo tega pripomočka na zdravnike ali medicinske delavce oziroma njihovo naročilo.
-
Page 51: Kontradikacija
Ta izdelek je treba uporabljati v prostoru z malo svetlobe/zatemnjeno svetlobo. • Pred uporabo tonometra Pulsair IntelliPuff za 1 sekundo pritisnite gumb za demonstracijo, da razpršite vse majhne delce prahu ali vlage, ki so se morda nabrali, medtem ko instrument ni bil v uporabi. -
Page 52: Čiščenje Ohišja Tonometra
IEC 60320 TIP 7 (ni dobavljen). 5. MONTAŽA NA STENO Vaš tonometer Pulsair IntelliPuff se dostavi s čvrstim nosilcem za montažo na steno. 1. Nosilec ima štiri luknje, s katerimi se lahko dobro pritrdi na ustrezno steno ali navpično površino. -
Page 53: Imena Krmilnih Elementov In Komponent
7. IMENA KRMILNIH ELEMENTOV IN KOMPONENT Gumb za vklop/izklop Če želite tonometer Pulsair IntelliPuff vklopiti ali izklopiti, pritisnite gumb za vklop/izklop – zelena svetleča dioda kaže, da je enota vklopljena. Testno oko Uporablja se pri usposabljanju uporabnika in ne izvaja meritev intraokularnega tlaka. - Page 54 (nahajajo se na zadnji strani instrumenta). Napajalni vhod Nizkonapetostni električni kabel (na zadnji strani instrumenta) priključite samo z elementi, ki jih dobavlja družba Keeler. Naslon za čelo Pritisnite za sprostitev ali za vračilo naslona za čelo v skrit položaj. Indikatorja za desno (OD) / levo (OS) Indikatorja kažeta oko, ki se bo merilo, z gumbom OD/OS pa preklapljate med obema...
- Page 55 »easy« (enostaven) in enkrat zaslišite pisk, kar pomeni, da je tonometer Pulsair Intellipuff pripravljen za uporabo na težavnem očesu. Če pritisnete kateri koli gumb, odložite ročnik nazaj na stojalo ali izvedete ročno ponastavitev s pritiskom gumba v...
-
Page 56: Postopek Merjenja
Okular omogoča uporabniku pregled očesa bolnika in poravnano sistema za ciljanje. Cevka in leča za vpihovanje Cevka in leča za vpihavanje sta dela tonometra Pulsair IntelliPuff, s katerima se poravna tonometer Pulsair IntelliPuff in se izvede nežen vpih zraka. Svetleče diode za poravnavanje Dve zeleni svetleči diodi, ki sta na sprednji strani ročnika,... -
Page 57: Priprava Bolnika
IntelliPuff ni bil v uporabi. 8.2 PRIPRAVA BOLNIKA Pred uporabo tonometra Pulsair IntelliPuff morate pomiriti svoje bolnike in jim zagotoviti, da so v najboljšem položaju za merjenje, pri čemer je najbolje, če imajo glavo podprto. To je zato, ker lahko imata zaskrbljenost in živčnost neželen učinek na merjene vrednosti. Za ta namen upoštevajte spodaj naštete točke:... - Page 58 Ko se prikaže slika metuljčka, tonometer Pulsair IntelliPuff izvede naslednjo meritev. Če se posnameta dve zaporedni meritvi, ki se razlikujeta za manj kot 1 mmHg, se lahko sproži zvok (če je zvok omogočen v možnostih uporabniškega menija).
-
Page 59: Primeri Zaslonov
Tonometer Pulsair Intellipuff družbe KEELER 9. PRIMERI ZASLONOV Standby (način pripravljenosti) Ob vklopu napajanja se na zaslonu prikaže STBY. Inicializacija sistema Na enoti se med inicializacijo sistema za eno sekundo prikaže napis WAIT. Če se ne odkrije nobene okvare, se prikaže napis OK (V redu), tonometer pa se privzeto nastavi za merjenje desnega očesa... -
Page 60: Tiskanje
Tonometer Pulsair Intellipuff družbe KEELER 10. TISKANJE Rezultate lahko natisnete s pritiskom gumba za tiskanje na ročniku, če pa je v uporabniškem meniju nastavljeno samodejno tiskanje, pa pri namestitvi ročnika nazaj v stojalo. 10.1 TISKANJE VZORCA Izmerjena vrednost v oklepaju (20) kaže zavrženo vrednost (ne upošteva se pri izračunu povprečnih vrednosti). -
Page 61: Umerjanje, Vzdrževanje In Pregledovanje
Keeler Ltd. ali lokalnemu trgovcu za popravilo in ponovno umerjanje. 13.1 REDNO PREGLEDOVANJE Redno preverjajte, ali sta napajalna enota in kabel poškodovana. Pred pregledom odklopite električni napajalnik s tonometra Pulsair IntelliPuff in električnega omrežja. -
Page 62: Splošno
V tem instrumentu ni delov, ki jih lahko popravi uporabnik. Pooblaščeni servisni centri in servisno osebje, ki ga usposablja družba Keeler, ima na voljo servisne priročnike. 15. GARANCIJA Vaš izdelek Keeler ima garancijo za 2 leti in se ga bo zamenjalo ali popravilo brezplačno v naslednjih primerih: •... -
Page 63: Elektromagnetne Emisije
Tonometer Pulsair Intellipuff družbe KEELER 16.1 ELEKTROMAGNETNE EMISIJE Smernice in izjava izdelovalca – elektromagnetne emisije Tonometer Keeler Pulsair IntelliPuff je namenjen za uporabo v elektromagnetnem okolju, ki je določeno spodaj. Stranka ali uporabnik mora zagotoviti, da se ga uporablja v takem okolju. Test emisij Združljivost Elektromagnetno okolje –... - Page 64 IEC 60601 Prenosne in mobilne RF komunikacijske opreme se ne sme uporabljati bližje kateremu koli delu tonometra Keeler Pulsair IntelliPuff, vključno s kabli, kot je priporočena ločilna razdalja, izračunana iz enačbe, primerne za frekvenco oddajnika. Priporočena ločilna razdalja Prevajana RF 6 Vrms d = 1,2 √...
-
Page 65: Priporočene Varnostne Razdalje
RF oddajnikov je treba razmisliti o elektromagnetnem pregledu lokacije. Če izmerjena jakost polja na lokaciji, kjer se uporablja tonometer Keeler Pulsair IntelliPuff, presega ustrezno raven RF združljivosti, ki je navedena zgoraj, je treba tonometer Keeler Pulsair IntelliPuff opazovati, da se ugotovi, ali deluje pravilno. -
Page 66: Tehnični Podatki
Izhod električnega napajalnika 30 VA (12-V DC 2,5 A) Frekvenca 50/60 Hz *V klinični študiji je tonometer Pulsair IntelliPuff ocenil intraokularni tlak kot malce nižjega v primerjavi s tonometrom Goldmann pri tlakih nad 30 mmHg, vendar te razlike niso bile klinično pomembne. Okoljski pogoji: UPORABA 90 %... -
Page 67: Dodatki In Rezervni Deli
Artikel Številka dela Zvitek papirja za tiskanje 2208-L-7008 Komplet za namestitev na steno Intellipuff 2414-P-7011 Protiprašna prevleka Pulsair IntelliPuff EP39-70304 Obrazni ščit za tonometer 2415-P-7038 19. INFORMACIJE O OVOJNINI IN ODSTRANITVI Odstranjevanje električne in elektronske opreme Ta simbol na izdelku ali njegovi ovojnini ter v navodilih pomeni, da se tega izdelka ne sme obravnavati kot gospodinjskih odpadkov. - Page 68 电话:021‐61519088 Tel +91 22 4124 8001 Representatives Notified Body 0120 SGS United Kingdom Ltd Keeler Europe Distribution, S.L. Inward Way, Rossmore Business Park Colom, 453, Nau D50 Ellesmere Port, Cheshire, CH65 3EN 08223 Terrassa, Spain United Kingdom Tel +44 (0) 151 350 6666...
Need help?
Do you have a question about the Pulsair Intellipuff and is the answer not in the manual?
Questions and answers