Table of Contents
Advertisement
Quick Links
Advertisement
Table of Contents

Related Manuals for Kobold TIN-SH


Summary of Contents for Kobold TIN-SH
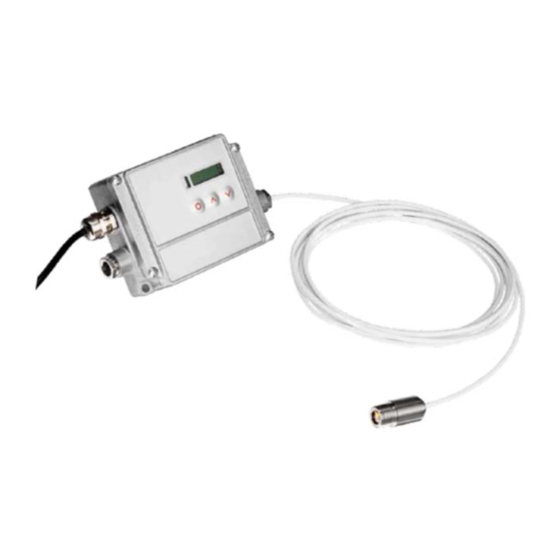
- Page 1 Operating Instructions Infrared Pyrometer Model: TIN-SH...
-
Page 2: Table Of Contents
Factory Default Settings ............... 6 General Specifications ................. 6 Electrical Specifications ............... 7 Measurement Specifications [TIN-SH] ..........7 Optical Charts ..................8 CF Lens and Protective Window ............9 ... - Page 3 Appendix B – Table of Emissivity for non-metals ........36 Appendix C – Smart Averaging ..............37 Manufactured and sold by: Kobold Messring GmbH Nordring 22-24 D-65719 Hofheim Tel.: +49(0)6192-2990 Fax: +49(0)6192-23398 E-Mail: info.de@kobold.com Internet: www.kobold.com...
-
Page 4: Note
Please read these operating instructions before unpacking and putting the unit into operation. Follow the instructions precisely as described herein. The instruction manuals on our website www.kobold.com are always for currently manufactured version of our products. Due to technical changes, the instruction manuals available online may not always correspond to the product version you have purchased. -
Page 5: Regulation Use
They calculate the surface temperature based on the emitted infrared energy of objects [see chapter 11 Basics of Infrared Thermometry]. The sensor housing of the TIN-SH head is made of stainless steel (IP65/ NEMA-4 rating) – the sensor electronics is placed in a separate box made of die casting zinc. -
Page 6: Factory Default Settings
TIN-SH 5.2 Factory Default Settings The unit has the following presetting at time of delivery: Signal output object temperature 0-5 V Signal output channel 2 (only with TIN-SH Internal head temperature: 0-5 V = 0-70 °C Emissivity 0.970 Transmissivity 1.000 Averaging (AVG) 0.2 s... -
Page 7: Electrical Specifications
TIN-SH 5.4 Electrical Specifications 5.5 Measurement Specifications [TIN-SH] TIN-SH K01/1023 page 7... -
Page 8: Optical Charts
Consequently, the spot should at all times have at least the same size like the object or should be smaller than that. D = Distance from front of the sensing head to the object S = Spot size The D:S ratio is valid for the focus point. page 8 TIN-SH K01/1023... -
Page 9: Cf Lens And Protective Window
The optional CF lens allows the measurement of very small objects and can be used in combination with all TIN-SH models. The minimum spot size depends on the used sensing head. The distance is always measured from the front edge of the CF lens holder or laminar air purge collar. -
Page 10: Mechanical Installation
TIN-SH 6. Mechanical Installation The TIN-SH sensing heads are equipped with a metrical M12x1-thread and can be installed either directly via the sensor thread or with help of the hex nut (included in scope of supply) to the mounting bracket available. Various mounting brackets, which make the adjustment of the sensing head easier, can be additionally ordered as accessories. -
Page 11: Mounting Accessories
TIN-SH 6.1 Mounting Accessories Mounting bracket, adjustable in one axis [TIN-ZTFB] Mounting bolt with M12x1 thread, adjustable in axis [TIN-ZTAB] TIN-SH K01/1023 page 11... -
Page 12: Air Purge Collars
The needed amount of air (approx. 2...10 l/ min.) depends on the application and the installation conditions on-site. Laminar air purge collar [TIN-ZTAP] The sideward air outlet prevents a cooling down of the object in short distances. Hose connection: 3x5 mm Thread (fitting): M5 page 12 TIN-SH K01/1023... -
Page 13: Further Accessories
6.3 Further Accessories Laser-Sighting tool [TIN-ZTLS] battery powered (2x Alcaline AA), for alignment of TIN-SH sensing heads. The laser head has the same mechanical dimensions as the TIN-SH sensing head. WARNING: Do not point the laser directly at the eyes of persons or animals! Do not stare into the laser beam. - Page 14 The OEM-Laser-Sighting tool is available with 3.5 m [TIN-ZMLS] connection cable. The laser can be connected to the pins 3 V SW or PINK (only for TIN-SH 4M) and GND [see chapter 7 Electrical Installation] and switched on and off via the programming keys or via the software.
- Page 15 TIN-SH USB programming adaptor The connector cable can be used for the connection to your PC in combination with the software which can be downloaded for free on the Kobold website. www.kobold.com/qr/TIN USB programming adaptor [TIN-ZHIA] TIN-SH K01/1023 page 15...
-
Page 16: Electrical Installation
TIN-SH 7. Electrical Installation 7.1 Cable Connections For the electrical installation of the TIN-SH please open at first the cover of the electronic box (4 screws). Below the display are the screw terminals for the cable connection. 7.1.1 Designation +8…36 VDC Power supply... - Page 17 8–36 VDC which can supply 100 mA. The ripple should be max. 200 mV. Please do never connect a supply voltage to the analog outputs as this will destroy the output! The TIN-SH is not a 2-wire sensor! 7.1.3 Cable Assembling The cable gland M12x1,5 allows the use of cables with a diameter of 3 to 5 mm.
-
Page 18: Exchange Of The Sensing Head
Please do not remove this label or make sure the code is noted anywhere. The code is needed if the electronics has to be exchanged or in case of a necessary recalibration of the sensor. page 18 TIN-SH K01/1023... -
Page 19: Outputs And Inputs
After you have modified the head code a reset is necessary to activate the change. [see chapter 9 Operating] 7.2.1 Sensing Head Cable On all TIN-SH models the sensing head cable can be shortened if necessary. 8. Outputs and Inputs 8.1 Analog Outputs The TIN-SH has two analog output channels. -
Page 20: Digital Interfaces
TIN-SH 8.2 Digital Interfaces The TIN-SH sensors can be optionally equipped with an USB-interface. If you want to install an interface, plug the interface board into the place provided, which is located beside the display. In the correct position the holes of the interface match with the thread holes of the electronic box. -
Page 21: Alarms
To activate the according output channel has to be switched into digital mode. For this purpose, the software is required. On the TIN-SH model 4M both outputs are freely selectable. Analog mA/mV, Alarm mA/mV and TCK are available. Visual Alarms These alarms will cause a change of the colour of the LCD display and will also change the status of the optional relays interface. -
Page 22: Operating
– a change of parameters will have immediate effect. If no key is pressed for more than 10 seconds the display automatically shows the calculated object temperature (according to the signal processing). page 22 TIN-SH K01/1023... - Page 23 Setup of Valley hold. In this mode the sensor waits for ascending signals. The definition of the algorithm is according to the peak hold algorithm (inverted). If the value is set to 0.0 the display will show --- (function deactivated). TIN-SH K01/1023 page 23...
- Page 24 To compensate this impact, this function allows the setup of a fixed value which represents the ambient radiation. page 24 TIN-SH K01/1023...
-
Page 25: Error Messages
6.3 Further Accessories]. By pressing Up or Down a voltage of 3 VDC will be switched to the PINK connection pin on the mainboard. 9.2 Error messages The display of the sensor can show the following error messages: Modell TIN-SH OVER Object temperature too high UNDER... -
Page 26: Software For Parameterization
Graphic display for temperature trends and automatic data logging for analysis and documentation Complete sensor setup and remote controlling Adjustment of signal processing functions Programming of outputs and functional inputs Software for Windows page 26 TIN-SH K01/1023... -
Page 27: Communication Settings
10.2.2 Protocol All sensors of the TIN-SH series are using a binary protocol. Alternatively, they can be switched to an ASCII protocol (only LT versions). To get a fast communication the protocol has no additional overhead with CR, LR or ACK bytes. - Page 28 10.2.4 Saving of parameter settings After power on of the TIN-SH sensor the flash mode is active. It means, changed parameter settings will be saved in the TIN-SH-internal Flash-EEPROM and will be kept also after the sensor is switched off.
-
Page 29: Basics Of Infrared Thermometry
Distance to Spot size. The spectral filter selects the wavelength range, which is relevant for the temperature measurement. The detector in cooperation with the processing electronics transforms the emitted infrared radiation into electrical signals. TIN-SH K01/1023 page 29... -
Page 30: Emissivity
CAUTION: On all three methods the object temperature must be different from ambient temperature. page 30 TIN-SH K01/1023... -
Page 31: Characteristic Emissivity
Blow off loose particles using clean compressed air. The lens surface can be cleaned with a soft, humid tissue (moistened with water) or a lens cleaner (e.g. Purosol or B+W Lens Cleaner). Never use cleaning compounds which contain solvents (neither for the lens nor for the housing). TIN-SH K01/1023 page 31... -
Page 32: Technical Information
TIN-SH 14. Technical Information Operating instructions, data sheet, approvals and further information via the QR code on the device or via www.kobold.com 15. Order Codes Operating instructions, data sheet, approvals and further information via the QR code on the device or via www.kobold.com 16. -
Page 33: Disposal
(Cd, Hg, Li or Pb) of the heavy metal that is decisive for the classification as containing pollutants: 1. „Cd" stands for cadmium 2. „Hg" stands for mercury 3. „Pb" stands for lead 4. „Li" stands for lithium Electrical and electronic equipment TIN-SH K01/1023 page 33... -
Page 34: Eu Declaration Of Conformance
TIN-SH 18. EU Declaration of Conformance We, KOBOLD Messring GmbH, Nordring 22-24, 65719 Hofheim, Germany, declare under our sole responsibility that the product: Infrared Pyrometer Model: TIN-SH to which this declaration relates is in conformity with the following EU directives... -
Page 35: Appendix A - Table Of Emissivity For Metals
TIN-SH 19. Appendix A – Table of Emissivity for metals TIN-SH K01/1023 page 35... -
Page 36: Appendix B - Table Of Emissivity For Non-Metals
TIN-SH 20. Appendix B – Table of Emissivity for non-metals page 36 TIN-SH K01/1023... -
Page 37: Appendix C - Smart Averaging
Therefore those peaks can only be seen with a delay on the signal output. The function Smart Averaging eliminates this disadvantage by passing those fast events without averaging directly through to the signal output. TIN-SH K01/1023 page 37...
Need help?
Do you have a question about the TIN-SH and is the answer not in the manual?
Questions and answers