Table of Contents
Advertisement
Quick Links
Wireless HD Side
Marker Light Cameras
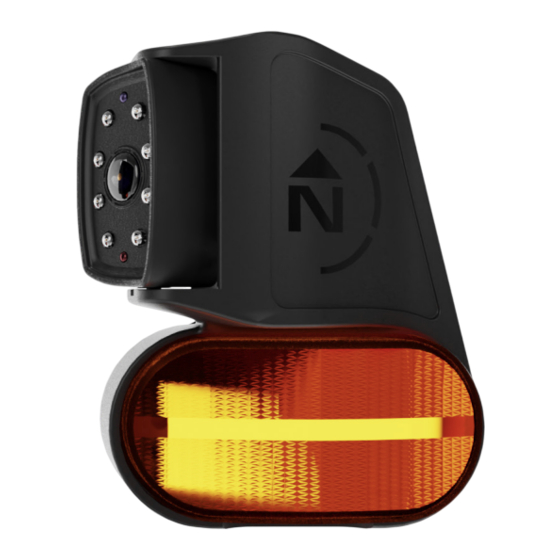
AHDS-7812
Recommended Tools
Difficulty Level
Wire Strippers
Wire Cutters
Electrical Tape
Install Time
45m - 1hr
Screw Driver
Zip Ties
Questions? Call the Brandmotion technical support line at (734) 619-1250 or
CLICK HERE
Side Marker Light Cameras: AHDS-7812
AR_10_03_23
Page 1/6
Advertisement
Table of Contents

Related Manuals for BrandMotion AHDS-7812


Summary of Contents for BrandMotion AHDS-7812
- Page 1 Recommended Tools Difficulty Level Wire Strippers Wire Cutters Electrical Tape Install Time 45m - 1hr Screw Driver Zip Ties Questions? Call the Brandmotion technical support line at (734) 619-1250 or CLICK HERE Side Marker Light Cameras: AHDS-7812 AR_10_03_23 Page 1/6...
- Page 2 Vehicle Application: Universal Part Number: AHDS-7812 Kit Contents Components for installing the AHDS-7812 Kit Contents: (1) Left side camera W/ marker light (1) Right side camera W/ market light (2) Thin gaskets for a smooth surface such as fiberglass (2) Thicker gaskets for a corrugated surface such as aluminum (4) #10 x 1-1/2”...
- Page 3 4. Carefully remove the orange marker light cover from the marker light housing. Place aside. 5/8” width for smooth 1” width for corrugated surface surface installation installation Remove lens of marker light for installation Side Marker Light Cameras: AHDS-7812 AR_10_03_23 Page 3/6...
- Page 4 AHDS-7812 and connect them to the ground wire from your vehicle (typically a WHITE wire). Locate the RED wires from the camera and light on your AHDS-7812 and connect them to the power wire that is connected to the trailer factory lights. Please ensure all connections are either soldered or properly crimped.
- Page 5 CAM button until you reach the appropriate input. b. Locate the manual pairing button on the driver’s side AHDS-7812 side marker light camera, as shown in the image below. Press and release the button. You now have 30 seconds to pair your camera to the monitor.
- Page 6 The Split Screen option you select is what will be displayed as the 5th camera view when you cycle the camera input with the CAM button • Select OFF to disable the mode input manual pairing button Side Marker Light Cameras: AHDS-7812 AR_10_03_23 Page 6/6...
Need help?
Do you have a question about the AHDS-7812 and is the answer not in the manual?
Questions and answers