
Related Manuals for Johnson Controls YORK YVAM


Summary of Contents for Johnson Controls YORK YVAM
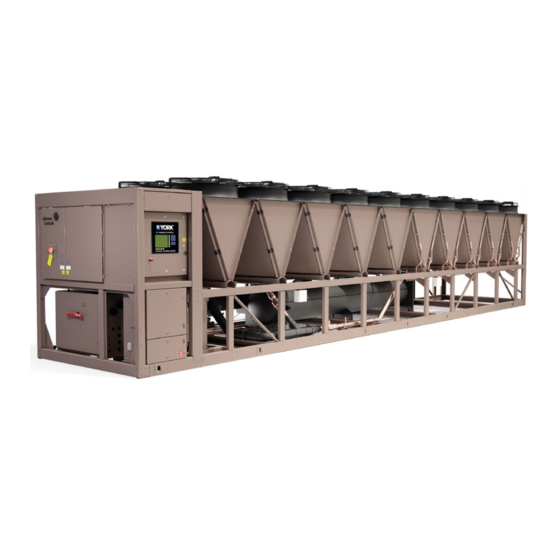
- Page 1 YVAM with OptiView Control Center Centrifugal Liquid Chiller with R-134a and R-1234ze Refrigerant Operation and Maintenance Form Number: 160.88-OM1 (823) Issue Date: 2023-08-24 Supersedes: 160.88-OM1 (922)
- Page 2 YVAM with OptiView Control Center...
-
Page 3: Table Of Contents
Contents General safety guidelines..........................5 C o n t e n t s Safety symbols............................5 Wiring warning............................6 Refrigerant warning..........................6 Changeability of this document......................6 Associated literature..........................7 Conditioned based maintenance......................8 Nomenclature............................8 General chiller information and safety......................10 Warranty............................... 10 Certifications and labels........................10 Quality assurance and safety...................... - Page 4 HYP compressor drive operation....................... 126 HYP compressor drive features....................... 126 Smart sensor system.........................128 Low ambient operation........................129 YVAM HYP compressor drive details for the 0490B amp drive............ 129 YVAM HYP0730C compressor drive added features..............134 Low ambient operation........................134 Electronic signature board....................... 134 HYP compressor drive and chiller operation.................
-
Page 5: General Safety Guidelines
General safety guidelines Important: Read before proceeding. This equipment is a relatively complicated apparatus. During rigging, installation, operation, maintenance, or service, individuals may be exposed to certain components or conditions including, but not limited to: heavy objects, refrigerants, materials under pressure, rotating components, and both high and low voltage. -
Page 6: Wiring Warning
All wiring must be in accordance with Johnson Controls’ published specifications and must be performed only by a qualified electrician. Johnson Controls will not be responsible for damage or problems resulting from incorrect connections to the controls or application of incorrect control signals. -
Page 7: Associated Literature
Table 1: Revision notes Affected pages Description Updated document title to include R-1234ze refrigerant. Added new safety note. 8 and 9 Updated nomenclature figures. 10 to 16 Added new General chiller information and safety section. Added Figure 12 Table 38 and 39 Added new physical data tables Table Table... -
Page 8: Conditioned Based Maintenance
Conditioned based maintenance Traditional chiller maintenance is based upon assumed and generalized conditions. Instead of the traditional maintenance program, a Johnson Controls YORK Conditioned Based Maintenance (CBM) program can be substituted. This CBM service plan is built around the specific needs for the chiller, operating conditions, and annualized impact realized by the chiller. - Page 9 Figure 3: Evaporator vessel nomenclature Figure 4: Variable speed compressor drive nomenclature YVAM with OptiView Control Center...
-
Page 10: General Chiller Information And Safety
Warranty Johnson Controls warrants YVAM chillers in accordance with the Limited Warranty Engineered Systems Equipment (Form 50.05-NM2). Johnson Controls warrants all equipment and materials against defects in workmanship and materials for a period of eighteen months from date of shipment or 12 months from date of start-up, whichever comes first, unless labor or extended warranty has been purchased as part of the contract. -
Page 11: Quality Assurance And Safety
This manual and any other document supplied with the unit are the property of Johnson Controls which reserves all rights. They may not be reproduced, in whole or in part, without previous written authorization from an authorized Johnson Controls representative. - Page 12 CAUTION This chiller is not intended for use by persons, including children, with reduced physical, sensory, or mental capabilities. The chiller must also not be used by persons with a lack of adequate experience and knowledge, unless they have supervision or instruction on the use of the unit by a person responsible for their safety.
- Page 13 Rotating parts Fan guards must be fitted at all times. Do not remove fan guards unless the power supply has been isolated. If ductwork is to be fitted, requiring the wire fan guards to be removed, take alternative safety measures to protect against the risk of injury from rotating fans. Sharp edges The fins on the air-cooled condenser coils have sharp metal edges.
- Page 14 CAUTION To prevent undetected dilution or loss of glycol, do not use an automatic makeup water system. Note: Glycol concentration impacts the heat transfer. Chiller performance can be negatively affected by a higher concentration of glycol. Table 3: Ethylene glycol concentration corresponding freeze point * ) at 20ºC Concentration (%) by Concentration (%) by Freeze point ºF (ºC)
- Page 15 Table 4: Propylene glycol concentration corresponding freeze point * ) at 20ºC Concentration (%) by Concentration (%) by Freeze point ºF (ºC) Density (G/M weight volume 32 (0) 1.003 30.2 (-1) 1.006 28.4 (-2) 1.009 11.6 24.8 (-4) 1.012 15.5 23 (-5) 1.016 19.4...
- Page 16 Safety labels Table 5: Safety labels Label Description White symbol on a blue background. For safe operation, read the instructions first. Black symbol on a yellow background WARNING: This machine may start auto- matically without prior warning. Black symbol on a yellow background CAUTION: Hot surface.
-
Page 17: System Fundamentals
System fundamentals The following section contains information about the system components and the operation of the YORK Model YVAM Centrifugal Liquid Chiller. System components The YORK Model YVAM Centrifugal Liquid Chiller is completely factory-packaged and includes the following components: • Evaporator •... - Page 18 Figure 6: YVAM0350 (mod level A) compressor side view Callout Description Callout Description Evaporator Eaton surge suppressor ® Motor cooling filter drier Direct drive motor and MBC Expansion valve Compressor Cooling piping for compressor drive Figure 7: YVAM0350 (mod level A) VSD end view Callout Description Callout...
- Page 19 Figure 8: YVAM1150, YVAM1500, and YVAM1650 (mod level B) control panel side view Callout Description Callout Description HYP model compressor drive Evaporator water nozzles, inlet at the bottom and outlet at the top Signal box for the condenser fan VSD Waterbox heaters on both sides Condenser sections, there is usually...
- Page 20 Figure 10: YVAM1150, YVAM1500, and YVAM1650 (mod level B) VSD end view Callout Description Callout Description HYP model compressor drive Single point combined power panel with UPS OptiView panel Compressor The compressor is a single-stage centrifugal type powered by a hermetic electric motor, on a common shaft with a cast aluminum, fully shrouded impeller.
- Page 21 Heat exchangers The evaporator shell is fabricated from rolled carbon steel plates with fusion welded seams. The heat exchanger tubes are internally enhanced type. Evaporator The evaporator is a shell and tube, hybrid falling film, and flooded type heat exchanger. A distributor trough provides uniform distribution of refrigerant over the tubes in the falling film section.
- Page 22 UPS power panel The power panel includes the uninterrupted power supply and power storage battery. These work together to feed essential electrical loads if the chiller shuts down due to the loss of main chiller power. WARNING Removing high voltage power to the chiller removes the 115 VAC supply voltage to the control panel circuitry and the evaporator heaters.
- Page 23 System piping wiring diagrams Figure 11: System piping and instrumentation diagram (P&ID) for YVAM Mod A design Table 6: Legend for system piping and instrumentation diagram for YVAM Mod A design Device Description ABV-1 Actuated butterfly valve, VSD cooling valve EEV-1 Condenser liquid line drain valve, motorized butterfly valve EEV-2...
- Page 24 Table 6: Legend for system piping and instrumentation diagram for YVAM Mod A design Device Description PUMP-1 Coolant pump, VSD PUMP-2 Coolant pump, power panel QDDB-1 Quick disconnect dry break, power panel on coolant QDDB-2 Quick disconnect dry break, power panel off coolant SG-1 Evaporator sight glass SST-1...
- Page 25 Figure 12: System piping and instrumentation diagram (P&ID) for YVAM Mod B design Table 7: Legend for system piping and instrumentation diagram for YVAM Mod B design Device Description EEV-1 Motor cooling valve EEV-2 VSD cooling BPHE feed valve FLTR-1 Filter dryer FS-1 Customer fluid flow switch...
- Page 26 Table 7: Legend for system piping and instrumentation diagram for YVAM Mod B design Device Description Pump-1 Coolant pump, VSD SST-1 Motor cooling eductor motive strainer SST-2 Motor cooling eductor suction strainer SV-1 Discharge service valve SV-2 Discharge service valve SV-3 Discharge service valve, low point TE-1...
- Page 27 Building Automation System (BAS) provides increased remote control of the chiller, including 24-hour performance monitoring by a remote site. An optional circuit board called the SC-EQUIP provides Johnson Controls and YORK mechanical equipment such as the YVAM chiller with BAS networking connectivity.
-
Page 28: System Operation Description
They are only displayed when logged in at the service access level or higher. The setpoints and parameters displayed on these screens are explained in detail in YORK YVAM Service Manual (Form 160.88-M2). These parameters affect chiller operation and must never be modified by anyone other than a qualified service technician. - Page 29 absorbs heat from the refrigerant vapor and causes it to condense. The cooling air is always at ambient conditions and requires correct installation for reliable operation. The condensed refrigerant drains from the condenser into the evaporator liquid line and is controlled by the condenser drain valve.
- Page 30 VSD speed. This limit is the Active Anti-Surge Minimum Frequency. It is calculated and applied to the speed each cycle of the capacity control routine. Smart Freeze The Smart Freeze feature prevents nuisance chiller shutdowns due to brief periods of chilled liquid flow fluctuations or other brief operating conditions that would normally cause low evaporator pressure safety shutdowns.
-
Page 31: System Operating Procedures
System operating procedures The following section provides information on pre-starting, start-up, and operation of the chiller. Pre-starting Before starting the chiller, make sure that the display shows the message SYSTEM READY TO START. The panel can only start when line power is available to the VSD transformers and the UPS battery in the power panel is present and connected with the battery disconnect switch closed. -
Page 32: Chiller Operation
When the control is changed to local from any other source, it remains in run mode if already running or it remains in stop mode if already stopped. A hardware safety stop button is also located on the side of the panel. The chiller starts if the following conditions are met: •... - Page 33 Table 10: Temperature setpoint Control source LCHLT setpoint Local cooling setpoint is entered from the panel. It is programmable over the range of 50°F to 80°F (10°C to 26.7°C) for water or brine Local applications. The default is 70°F (21.1°C). Remote cooling setpoint value sent over communications.
-
Page 34: Operator Setpoints Quick Reference
Automatic data logging is also possible by connecting the optional printer and programming the data logging function. An optional status printer is available for this purpose. Figure 14 shows an example log sheet used by Johnson Controls Personnel for recording test data on chiller systems. YVAM with OptiView Control Center... -
Page 35: Fault Shutdowns
Controls office. Figure 14: Chiller log sheets Note: A pad of 50 log sheets can be ordered from your local Johnson Controls branch by requesting Form 160.88-MR1. An accurate record of readings serves as a valuable reference for operating the system. Readings taken when a system is newly installed establish the normal conditions with which to compare later readings. -
Page 36: Restart After Prolonged Shutdown
Restart after prolonged shutdown The chiller has a start inhibit limit for storage battery minimum voltage below 12.8 VDC when charging. Ensure that the chiller has line power and battery disconnect restored at least eight hours before the first planned startup to charge the battery. Freeze damage protection WARNING Failure to follow required freeze protection protocols can void the warranty. - Page 37 of subfreezing ambient temperatures, then one of the freeze damage protection protocols in the following table must be followed. Table 12: YVAM freeze damage protection requirements Condition Chiller control of chilled fluid circuit pumps Waterbox immersion heaters Ambient air temperatures from 32°F Required Not required (0°C) down to 0°F (-17.8°C)
-
Page 38: Physical Data
Physical data Table 13: Physical data for YVAM model 0350 YVAM model 0350 Evaporator Passes Inlet/outlet diameter 8 in. Compressor Type Semi-hermetic centrifugal Number of circuits Number of compressors Refrigerant type R-134a Refrigerant charge, lb Condenser fans Number of fans Fan power, 60 Hz, kW 2.04 Variable speed drive... - Page 39 Operating weight, lb 27,550 Note: • Refer to the chiller performance data provided by the Johnson Controls Sales team for the minimum and maximum flow rates based on the specific evaporator configuration and chiller application. YVAM with OptiView Control Center...
- Page 40 Johnson Controls sales office for ratings and further information. • Shipping and operating weights are shown for the base unit. Selected options can add weight. Contact your nearest Johnson Controls sales office for weight data. YVAM with OptiView Control Center...
-
Page 41: Optiview Control Center Functions And Navigation
OptiView Control Center functions and navigation Each screen description in this section begins with an overview that describes the graphical elements on the screen and gives a short summary of the functions available. Each element on the screen is then categorized into three distinct groups: display only, programmable, and navigation. The following section provides a short description on the types of information included in these groups. -
Page 42: Navigation
prompt described previously. From this prompt, the user can log on at a higher access level without returning to the home screen. After logging on, the user can then modify setpoints on that screen. Programming setpoints The OptiView Control Center uses the setpoint values to control the chiller and other devices that are connected to the chiller system. -
Page 43: Languages
display with the graphics for that screen. The following figure is a layout of all the screens and how they are connected. Figure 15: Screen layout and navigation Languages The screens can be displayed in various languages. Language selection is performed on the User screen. -
Page 44: Analog Input Ranges
English is the default language. If a language other than English is displayed, an English-speaking person must navigate to the User screen using the preceding Navigation chart and select English. Analog input ranges The following table indicates the valid display range for each of the analog input values. In the event that the input sensor is reading a value outside of these ranges, the <... -
Page 45: Optiview Screens
OptiView screens Home screen Figure 16: Home screen The home screen display depicts a visual representation of the chiller itself. The animation indicates the chilled liquid flow when the flow switch input is satisfied. When the chiller system is powered on, the default display in Figure 16 appears. - Page 46 Table 20: Programmable fields Button Access Description View Use this button to change the access level when the correct password is Login entered at the prompt. Operator This button appears when a user is logged on at any level other than the Logout view level.
- Page 47 System screen Figure 17: System screen The system screen gives a general overview of common chiller parameters for both shells. Table 22: Display only fields Field name Description Discharge Temperature The temperature of the refrigerant in its gaseous state at discharge of the compressor as it travels to the condenser Input % Full Load Amps The percentage of FLA used by the system...
- Page 48 Table 22: Display only fields Field name Description Suction Saturation The saturation temperature of the compressor suction gas calculated from the compressor suction pressure Evaporator Pressure The refrigerant pressure in the evaporator Evaporator Saturation The saturation temperature in the evaporator calculated from the evaporator pressure Temperature Table 23: Navigation buttons Button...
- Page 49 Evaporator screen Figure 18: Evaporator screen The evaporator screen displays a cutaway view of the chiller evaporator. All setpoints relating to the evaporator side of the chiller are maintained on this screen. Animation of the evaporation process indicates whether the chiller is presently in a run condition. Animation of the liquid flow indicates chilled liquid flow.
- Page 50 Table 24: Display only fields Field name Description The Leaving Chilled Liquid Temperature at which the chiller restarts after it shuts down on Leaving Chilled Liquid LEAVING CHILLED LIQUID – LOW TEMPERATURE cycling shutdown. This temperature Temperature Setpoints - is set as an offset using the Leaving Chilled Liquid Temperature Cycling Offset - Restart Restart setpoint.
- Page 51 Condenser screen Figure 19: Condenser screen The condenser screen displays the air-cooled condenser with an animation of heat ejection out of the fan deck. Table 28: Display only fields Field name Description Condenser saturation The saturation temperature in the condenser, determined from the condenser pressure temperature Condenser small temperature The difference between the discharge saturation temperature and the outside ambient air...
- Page 52 Table 28: Display only fields Field name Description Condenser fan speed Command signal to condenser fan speed for group 1B* command 2 Condenser fan speed Command signal to condenser fan speed for group 2B* command 3 Condenser fan speed Command signal to condenser fan speed for group 2A* command 4 Table 29: Navigation buttons Button...
- Page 53 Compressor screen Figure 20: Compressor screen The compressor screen displays a cutaway view of the chiller compressor, revealing the impeller, and shows all conditions associated with the compressor. Animation of the compressor impeller indicates whether the chiller is presently in a Run condition. This screen also serves as a gateway to subscreens for navigating to capacity control and displaying MBC, surge, and VGD and power panel detail.
- Page 54 Table 32: Navigation buttons Button Description Home Navigates to the home screen Capacity Control Navigates to the capacity control screen Navigates to the MBC subscreen Surge Navigates to the Surge subscreen Navigates to the VGD subscreen. Service access level is required to program setpoints on this screen.
- Page 55 Magnetic bearing controller screen Figure 21: Magnetic bearing controller screen The MBC screen displays the orientation of the magnetic bearing axes relative to the compressor driveline. Pertinent parameters transmitted to the control panel from the magnetic bearing controller (MBC) are displayed on this screen. Many parameters are shown in the diagram in the locations they represent.
- Page 56 Table 33: Display only fields Field/LED name Description V24 Position The shaft position in micrometers from center along the radial axis designated V for the opposite impeller end bearing W24 Position The shaft position in micrometers from center along the radial axis designated W for the opposite impeller end bearing W2 (Current) The magnetizing current to the upper bearing on the radial axis designated W for the...
- Page 57 Magnetic bearing controller details screen Figure 22: Magnetic bearing controller details screen The MBC details screen displays the orientation of the magnetic bearing axes relative to the compressor driveline similar to the MBC screen. Additional pertinent parameters transmitted to the control panel from the MBC are displayed on this screen. Many parameters are shown in the diagram in the locations they represent.
- Page 58 Table 36: Display only fields Field name Description W1 (Current) V1 (Current) Z1 (Current) V3 (Current) W3 (Current) Magnetic bearing currents as described for the MBC screen W2 (Current) V2 (Current) Z2 (Current) V4 (Current) W4 (Current) Motor Speed The compressor motor rotational speed MBC Input Voltage The voltage being supplied to the MBC power panel.
- Page 59 Surge protection screen Figure 23: Surge protection screen The surge protection screen displays the chiller compressor and all parameters relating to the surge protection feature. All setpoints relating to this screen are maintained on this screen. Table 38: Display only fields Field/LED name Description When the chiller enters run mode, this value counts up to the time programmed as the...
- Page 60 Use the surge protection feature to define how many surges are excessive and how the control reacts to an excess surge condition. When excess surging is detected, you can configure the chiller to shut down. The sensitivity of this surge detection is set by the Sensitivity setpoint on this screen. Table 40: Programmable fields Button Access...
- Page 61 Variable geometry diffuser screen Figure 24: Variable geometry diffuser screen The VGD screen displays information pertinent to the VGD operation. Table 42: Display only fields Field/LED name Description Active Stall Voltage The stall detector output voltage (x.xx VDC), as received by the microboard, from the stall board Active Stall Voltage Type Standard or Enhanced to indicate whether the active stall voltage has enhanced filtering...
- Page 62 Table 44: Navigation buttons Button Description Home Navigates to the Home screen Compressor Navigates to the Compressor screen YVAM with OptiView Control Center...
- Page 63 Power panel screen Figure 25: Power panel screen The power panel screen displays information pertaining to the power panel, which includes the uninterruptable power supply (UPS) and storage battery for essential loads necessary for shutdown during a line power loss. Table 45: Display only fields Field name Description...
- Page 64 Table 46: Display only fields: LED LED name Description Control Voltage The OptiView control voltage digital input voltage is present, indicating line power is available UPS Line / Charging The UPS is in charging mode, using line power to supply loads and any necessary current to the power storage battery UPS Inverter The UPS is providing power from the storage battery...
- Page 65 Capacity control screen Figure 26: Capacity control screen The capacity control screen displays the pertinent parameters associated with capacity control in relation to Leaving Chilled Liquid temperature, current and pressure overrides, and anti-surge control. This screen also provides a means for a service technician to control VGD, speed, and optional hot gas bypass valve manually for maintenance or service.
- Page 66 Table 48: Display only fields Field name Description The active temperature setpoint to which the chiller is set to control liquid leaving the evaporator. The active setpoint is a target to the local, remote or BAS (ISN) cooling programmed setpoint, depending on the control source selected. When the chiller is not running, the active setpoint is set to entering chilled liquid temperature - cooling setpoint start offset.
- Page 67 VSD screen Figure 27: VSD screen The VSD screen displays information related to the HYP compressor drive. Table 50: Display only fields Field name Description Input % Full Load Amps The input current as a percentage of the job FLA value, based on the highest phase Active Input Current Limit The actual setpoint being used for input current limit control Table 52...
- Page 68 Table 50: Display only fields Field name Description Voltage Total Harmonic The total harmonic distortion (THD) for each of the voltage lines as calculated by the VSD Distortion L1, L2, L3 Input Current Total Demand The total dynamic distortion (TDD) for each of the supply current lines as calculated by the Distortion L1, L2, L3 VSD.
- Page 69 Table 54: Navigation buttons Button Description Home Navigates to the Home screen VSD Details Navigates to the VSD details screen Motor Details Navigates to the Motor Details Screen Capacity Control Navigates to the Capacity Control screen Power Panel Navigates to the Power Panel screen YVAM with OptiView Control Center...
- Page 70 VSD details screen Figure 28: VSD details screen The VSD details screen displays more detailed parameters associated with the VSD. From this screen, a service technician can access setpoints or control the DC Bus manually for maintenance or service. Table 55: Display only fields Field name Description Output Current Rating...
- Page 71 Table 55: Display only fields Field name Description The control state of the VSD. States are as follows: • 0 = Idle • 1 = Precharge • 2 = Pre-Regulate • 3 = Waiting for Run • 4 = Run •...
- Page 72 VSD cooling screen Figure 29: VSD cooling screen Table 58: Display only fields Field name Description Auxiliary VSD Cooling Offset The auxiliary drive cooling offset setpoint Auxiliary VSD Cooling Kp The auxiliary drive cooling Kp Auxiliary VSD Cooling Ti The auxiliary drive cooling Ti Auxiliary VSD Cooling Td The auxiliary drive cooling Td Auxiliary VSD Cooling...
- Page 73 Table 59: Navigation Button Description Home Navigates to the Home screen Navigates to the VSD screen VSD Details Navigates to the VSD details screen YVAM with OptiView Control Center...
- Page 74 Motor details screen Figure 30: Motor details screen The motor details screen displays information related to the motor temperature monitoring feature. The feature measures the motor winding temperature and the motor housing temperature. The individual winding temperature sensors can be disabled on this screen. Table 60: Display only fields Field/LED name Description...
- Page 75 Table 60: Display only fields Field/LED name Description Ambient dew point The optional ambient dew point temperature sensor temperature Motor cooling valve command Output to the motor cooling valve in percent from 0%, closed, to 100% opened The present motor cooling state from the following: •...
- Page 76 Setpoints screen Figure 31: Setpoints screen The setpoints screen provides a convenient location for programming the most common setpoints involved in the chiller control. This screen also serves as a gateway to the Setup screen for defining the setup of general system parameters. Table 63: Display only fields Section Field name...
- Page 77 Table 64: Programmable fields Button Access Description Range Default Local cooling setpoint Operator Define the leaving chilled liquid temperature that is to be 50° F to 70°F maintained by the chiller 80°F The leaving chilled liquid temperature at which the chiller 1°F to 70°F 4°F Leaving chilled liquid shuts down on a Leaving chilled liquid –...
- Page 78 Remote control screen Figure 32: Remote control screen The remote control screen enables the user to independently select the method of control for run/ stop, cooling setpoint and current limit setpoint. For more information on BAS interface specifics, refer to YVAM Field Control Modification (Form 160.88-PW2). In local mode, you can use the local setpoint to set the chiller controls.
- Page 79 Table 66: Display only fields Control Field and LED name Description Displays the present active current limit setpoints used for input Active current limit current limit control Local current limit Displays the present local current limit setpoint Pulldown demand limit Indicates the pulldown demand limit is active active (LED) Input current limit...
- Page 80 Table 67: Programmable fields Button Access Description [Cooling setpoint The maximum remote cooling setpoint. control] Remote Operator Range: 0°F (-17.8°C) to 200°F (93.3°C) setpoint maximum Default: 100°F (37.7°C) The current limit control source from: • Local • Select current limit Operator •...
- Page 81 12 h or the 24 h format. The chiller configuration, as determined by the state of the microboard program jumpers and program switches, is displayed. A qualified service technician, following instructions in YORK YVAM Service Manual (Form 160.88-M2), establishes this configuration for the required operation. This screen also serves as a gateway to more subscreens for defining general system parameters.
- Page 82 Table 69: Display only fields Field name Description VSD Cooling Protection VSD Cooling Protection must be disabled on YVAM VSD Cooling Source The cooling for drive cooling (LCHT or ECHLT) Auxiliary VSD Cooling Control The auxiliary drive cooling enabled or disabled setting Table 70: Programmable fields Button Access...
- Page 83 Schedule screen Figure 34: Schedule screen The schedule screen displays the chiller schedule. There are no other display options. The schedule screen contains more programmable values than the normal display screen. Programmable values are not linked to a specific button. Use Select to enable the cursor arrows to highlight the day and the start or stop time you want to modify.
- Page 84 Table 72: Programmable fields Button Access Description Repeat Sunday Schedule Operator Duplicates the schedule defined for Sunday for the remainder of the standard weekdays. Reset All Exception Days Operator Deletes all programming for exception days within the next six weeks. Select Operator Select a start time for a given day.
- Page 85 User screen Figure 35: User screen The user screen displays attributes assigned to user IDs. There are no other display options. On this screen you can define custom user IDs and passwords. The building administrator can assign custom passwords to users who are authorized to maintain the chiller. Table 74: Programmable fields Button Access...
- Page 86 Table 75: Navigation buttons Button Description Home Navigates to the home screen Setup Navigates to the setup screen YVAM with OptiView Control Center...
- Page 87 Comms screen Figure 36: Comms screen The comms screen displays attributes assigned to comms IDs. There are no other display options. This screen shows the system communications parameters. See Acceptable printers for details on the printer connections and setup. There are no COM 2 communications features available. Table 76: Programmable fields Button Description...
- Page 88 Printer screen Figure 37: Printer screen Use the printer screen to define communications parameters for the printer. See Acceptable printers for details on printer connections and setup. Table 78: Display only fields Field name Description Time Remaining Until Next The time until the next print log is scheduled to occur, if the function is enabled Print Table 79: Programmable fields Button...
- Page 89 Table 79: Programmable fields Button Access Description Printer Type Operator Define the printer type connected to the chiller system. Select the report type to print. Available reports: • Status report: present system parameters • Setpoints report: present value of the system setpoints •...
- Page 90 Entry instructions are included in the YORK YVAM Service Manual (Form 160.88-M2). The remainder of the values are entered at the YORK factory during the manufacturing of the chiller.
- Page 91 Table 82: Programmable fields Button Access Description Print Operator Generate a listing of the sales order data. Table 83: Navigation buttons Button Description Home Navigates to the Home screen Setup Navigates to the Setup screen YVAM with OptiView Control Center...
- Page 92 Operations screen Figure 39: Operations screen On the operations screen you can define the general parameters that affect the operation of the chiller. Table 84: Display only fields Field name Description The amount of time the chiller has been running since the last start signal was received. The Run Time value is reset to 0 when the chiller enters coastdown.
- Page 93 History screen Figure 40: History screen On the history screen you can browse through the faults. For a more thorough reporting of the system conditions at the time of the recorded shutdown, use the History details screen. Table 86: Display only fields Field name Description The date and time and the description of the last normal shutdown, normal shutdowns...
- Page 94 Table 88: Navigation buttons Button Description Home Navigates to the Home screen View Details Navigates to a subscreen containing the value of select chiller parameters at the time of the associated shutdown. Trending Navigates to the Trending screen Custom View Navigates to the Custom Setup screen Page Up Scrolls up to the next page of ten faults.
- Page 95 History details screen Figure 41: History details screen Use the history details screen to view an on-screen printout of all the system parameters at the time of the selected shutdown. The number of screens required to display all of the data varies according to type of motor starter and options applied.
- Page 96 Custom screen Figure 42: Custom screen The custom screen displays up to 10 parameters that are selected by the service technician, for example, related parameters while troubleshooting an issue. These parameters are selected from a list on the Custom setup screen.
- Page 97 Custom setup screen Figure 43: Custom setup screen The service technician can use the custom setup screen to select up to 10 parameters for display on Custom screen. Table 94: Display only fields Field name Description Slot Numbers Available parameters that can be displayed, required parameters for display are selected from this list Table 95: Programmable fields Button...
- Page 98 Trend screen Figure 44: Trend screen The trend screen displays the graphical trending of the selected parameters and is also a gateway to the graph setup screens. You can plot up to six operator selected parameters, or data points, in an X/Y graph format. The X-axis scales to the selected data collection interval and displays in a time of day or elapsed time format, as selected with the X-axis toggle button.
- Page 99 If a power failure occurs while the trending is running, the trending stops. When power is restored, the last screen of data that was collected is displayed on the trending screen. To begin a new trend screen, press Start. Note: A red screen with the words TREND MAX MUST BE > TREND MIN appears if the Y-axis minimum has been programmed to a value that is greater than the Y-axis maximum for any parameter.
- Page 100 Trend setup screen Figure 45: Trend setup screen The trend setup screen displays chiller trend setup fields. There are no display only fields. This screen is used to configure the trending screen. Select trending parameters from the Common slots screen Master slot numbers list and entered as Slot Numbers for Data Points 1 to 6.
- Page 101 Table 99: Programmable fields Button Access Description The minimum value displayed for the Y-axis. If you select a parameter for a data point, this value sets to the default value, which is the lowest value allowed for that parameter. You can change it to a value that provides a more appropriate resolution for the parameter being monitored.
- Page 102 Common slots screen Figure 46: Common slots screen The common slots screen displays the slot numbers of the commonly monitored parameters. The slot numbers for the remainder of the available parameters are listed in Master slot numbers list From these lists, you can select up to six parameters to trend. Return to the Trend setup screen and enter the parameters Slot Numbers into Data Points 1 to 6.
-
Page 103: Master Slot Numbers List
Master slot numbers list The following table is the master slot number list for use with the Trend feature. Slot number Description System Chiller operating state Coastdown time remaining Safety relay Cycling relay Warning relay Operating hours Runtime in seconds Number of starts Run permissive Remote ready to start... - Page 104 Slot number Description Subcooling 2059 Sub cooling temperature Drop leg refrigerant 2061 Drop leg refrigerant temperature Compressor 1296 Discharge temperature 1299 Discharge superheat Surge 1813 Delta P / P 8236 Surge detected 8238 Surge count Refrigerant level control 8205 Refrigerant level position 8206 Refrigerant level setpoint 8207...
- Page 105 Slot number Description 2822 VSD output frequency 20788 Max chiller frequency 2818 Input power 2819 Input kW hours 2878 L1 voltage total harmonic distortion 2879 L2 voltage total harmonic distortion 2880 L3 voltage total harmonic distortion 3014 L1 input current total demand distortion 3015 L2 input current total demand distortion 3016...
- Page 106 Slot number Description 18371 Motor winding temperature setpoint 18362 Motor cooling valve command 18396 Motor cooling control state 18397 Estimated rotor temperature 18398 Ambient dew point temperature Capacity control 2822 VSD output frequency 18023 HGBP command 18041 Condenser pressure override threshold 18042 Evaporator pressure override threshold 18058...
- Page 107 Slot number Description 21022 MBC amplifier temperature 21024 Rotor elongation 21025 Motor speed 21041 MBC fault 21042 First alarm code 21043 Rotation allowed 21045 Control mode 21072 VW13 soft landing counter 21073 VW24 soft landing counter 21074 Z12 soft landing counter 21075 VW13 hard landing counter 21076...
-
Page 108: Display Messages
Display messages The status bar of the display contains a status line and a details line beneath it. The status line contains a message that describes the operating state of the chiller, for example whether it is stopped, running, starting, or shutting down. The details line displays warning, cycling, safety, start inhibit, and other messages that provide further details of the status bar messages. - Page 109 Table 104: Status messages Message Description The chiller is shut down but initiates start after receiving a local or remote start signal. The MBC does not have the driveline System ready to start rotor levitated. The level control valve position is set to the programmed condenser level control valve startup position. The VGD is driven to the programmed VGD startup position.
- Page 110 Warning messages Table 108: Warning messages Message Description The evaporator pressure transducer is indicating a higher pressure than the condenser pressure transducer after the chiller has been running for 10 min. This is indicative of a condenser or evaporator transducer failure. Condenser or evaporator XDCR error This warning is displayed until the condition clears and the warning reset keypad key is pressed in operator or higher access mode.
- Page 111 Table 108: Warning messages Message Description The chiller motor current is greater than or equal to the motor overload current limit. The motor overload current limit is predetermined from the motor model and maximum VSD output current. While this condition is in effect, chiller capacity control is in override to reduce current.
- Page 112 Routine shutdown messages Table 109: Routine shutdown messages Message Description Local stop A local shutdown command has been received by pressing the keypad stop key. A soft shutdown is initiated A shutdown command has been received from a remote device. Remote stop commands can be received by I/O Board TB4-7 Remote stop in hardwire run/stop control or through the SC-Equip Gateway serial communications in BAS run/stop control.
- Page 113 Table 114: Cycling shutdown messages, evaporator Message Description The evaporator pressure monitoring begins after 30 s of runtime. The fault is set when evaporator pressure < evaporator pressure override threshold for more than continuous 120 s. Low pressure - Smart freeze The fault is released when the chiller is not running.
- Page 114 Table 118: Cycling shutdown messages, MBC Message Description This cycling shutdown is set when the MBC looses the speed signal that is expected from the VSD or the speed signal is less than 10 Hz while the MBC is commanded in rotation mode. The MBC fault contacts open.
- Page 115 Table 118: Cycling shutdown messages, MBC Message Description The measured synchronous speed, first harmonic, shaft vibration at the opposite-impeller end radial magnetic bearing is greater than 45 µm peak amplitude in rotation mode. This condition is monitored only when the AVR and ABS filter is on, which occurs for speed above 70 Hz. The MBC fault VW24 vibration contacts open.
- Page 116 Table 123: Cycling shutdown messages, UPS Message Description This cycling fault initiates a soft shutdown if it is set while the chiller state is running. It is set during chiller state running or soft shutdown when all of the following are true: •...
- Page 117 Table 125: Cycling shutdown messages, VSD Message Description Upon application of power, all boards go through the initialization process. At this time, memory locations are cleared, program jumper positions are checked and serial communications links are established. There are several causes for an unsuccessful initialization as follows: •...
- Page 118 The chiller can be started after the reason for the shutdown is determined and repaired. Manual resets are performed as detailed in the following table. Service and troubleshooting information is contained in the YORK YVAM Service Manual (Form 160.88-M2), Chiller Service (Form 160.88-M1), and Drive Service (Form 160.88-M3).
- Page 119 Table 128: Safety shutdown messages, condenser Message Description This fault is set when the digital inputs to I/O board for Condenser Fan VSD Fault 1 and Condenser Fan VSD fault 2 both go to low values three times in 15 min. This indicates that at least one fan in each group has opened the fault contacts. Fan VSD fault 1 and 2 You can start the chiller after both inputs go high and you press Clear Faults.
- Page 120 Table 133: Safety shutdown messages, MBC Message Description This safety shutdown is set when the MBC control board detects a communication error between the control and amplifier boards of the MBC. The MBC fault contacts open. The MBC remains in levitation mode with the motor shaft levitated until commanded to de-levitate over serial communications.
- Page 121 Table 133: Safety shutdown messages, MBC Message Description This is set when OptiView software is commanding MBC levitation mode ON but the MBC is not reporting levitated within 15 s. This fault is prohibited when the MBC alive input is not high, indicating the MBC is unavailable. No levitation This fault is released when the chiller is stopped.
- Page 122 Table 136: Safety shutdown messages, sales order Message Description This safety shutdown is set when the compressor model field entered on the Setpoints > Setup > Sales Order screen does not conform to the format expected. The format data can be found on the compressor nameplate if it needs to be re-entered in the control. The format is as follows: •...
- Page 123 The messages in the following table are VSD generated. Table 141: Safety shutdown messages, VSD Message Description The 105% motor current overload value is based on the highest output current compared to the programmed motor current value displayed on the control panel. •...
- Page 124 Table 141: Safety shutdown messages, VSD Message Description The drive software contains a verification process to ensure that the correct set of software is installed in the drive logic board for the application. Inverter program fault You can restart the chiller when the reason for the shutdown is resolved and you press Clear Faults. The input current overload value is variable based on the input job FLA value programmed at the control panel.
- Page 125 Table 143: Impeller/motor combination Compressor Motor 197FA 205FA 218FA 233FA 246FA 275FA 295FA 331FA Note: This table relates to Invalid compressor model Table 136. YVAM with OptiView Control Center...
-
Page 126: Hyp Compressor Drive Operation
HYP compressor drive operation The new YVAM HYP Compressor Drive is specifically designed for the application of driving a permanent magnet high-speed motor with magnetic bearings used on the YORK Model YVAM Centrifugal Air-Cooled Chiller. This type of design allows the chiller to be designed as a complete system, and take full advantage of the strengths of each major component within the system. - Page 127 The drive components on YVAM1150, YVAM1500, and YVAM1650 (Mod B) are cooled by an ethylene glycol solution. The ethylene glycol solution in turn rejects heat through a brazed plate heat exchanger to liquid refrigerant from the condenser. The drive can now be configured for many different input voltage levels. Lower input voltages may de-rate the input current rating of the drive, but the drive produces the same output voltage and uses the same motor.
-
Page 128: Smart Sensor System
As with drive systems used on the YCIV and YVAA chillers, this drive has a NEMA 4 outdoor enclosure rating. The drive also contains an internal heater to ensure components are not damaged due to sub-freezing conditions. A panel heater is installed inside the drive, and it is manually adjusted to 32˚F (0˚C). -
Page 129: Low Ambient Operation
Figure 48: Red flip dot WARNING A tripped circuit breaker is an indication of a serious fault condition. Do not reset a tripped circuit breaker without an inspection of the drive by a certified technician. Low ambient operation When power is removed, the ambient temperature in the drive may become very low. This low temperature may inhibit the chiller from starting. - Page 130 frequency switching of the rectifier. The load inductor provides the inductance for boosting the bus voltage above the peak of the line voltage. The higher bus voltage is required for harmonic current correction at the input of the drive, and to provide the correct output voltage for high speed operation of the compressor motor.
- Page 131 Harmonic filter general information The harmonic filter is no longer an option with the HYP model drive. The function of the harmonic filter is now integrated into the input of the drive. The input rectifier has fast switching transistors instead of SCRs and diodes. The drive can now control the input current waveform to a near sine wave shape by controlling how the rectifiers are turned on and off.
- Page 132 Figure 50: Right side of the HYP0490B drive cabinet Callout Component Callout Component Power unit. Includes three phases for the Output capacitor assembly rectifier and inverter. Smart sensors Service hole Drive logic board Line inductor Output inductor YVAM with OptiView Control Center...
- Page 133 Figure 51: Drive logic board for model HYP0490B Callout Component Callout Component YVAM with OptiView Control Center...
-
Page 134: Yvam Hyp0730C Compressor Drive Added Features
Figure 52: Rectifier side of the HYP0490B power unit Callout Component Callout Component Smart sensor power supply Phase B Smart sensor board Phase C Phase A YVAM HYP0730C compressor drive added features The HYP0730C drive is used on the YVAM mod B chiller has some new features: •... - Page 135 flip dot that functions the same as on the smart sensor system. The flip dot in this design requires a reset at the electronic signature board. Service power is required to reset the flip dot. Figure 53: Left side of the HYP0730C drive Callout Description Callout...
- Page 136 Figure 54: Right side of the HYP0730C drive Callout Description Callout Description Power unit, including three Output inductor phases for the rectifier and inverter Output capacitor assembly Drive logic board Panel heater Electronic signature board YVAM with OptiView Control Center...
-
Page 137: Hyp Compressor Drive And Chiller Operation
Figure 55: Electronic signature board for the HYP0730C HYP compressor drive and chiller operation When the chiller enters a start command, the drive is commanded to pre-charge. The pre-charge contactor closes and slowly charges the DC Bus capacitors through the pre-charge resistors. This is called the pre-charge period, which lasts for 12 seconds. -
Page 138: Maintenance
When necessary, perform the following maintenance. Important: If a unit failure occurs due to incorrect maintenance during the warranty period, Johnson Controls will not be liable for costs incurred to return the system to satisfactory operation. Table 144: Maintenance requirements... -
Page 139: Renewal Parts
Electrical isolation Isolate electrical power supply to the chiller from the facility. Isolate the power panel battery from the uninterrupted power supply (UPS) by opening the power panel disconnect switch. Isolate plant fluid flow to the chiller at appropriate valves or have refrigerant isolated to prevent free-wheeling the driveline and generating electrical energy from the permanent magnet rotor. -
Page 140: Checking The System For Leaks
3. Compressor drive motor: Measure the motor winding insulation resistance. 4. Check all enclosure door gaskets for any signs of leakage or damage that might cause a leak. This includes the VGD actuator shaft bellows. 5. Replace all vapor emitters in the VSD and any other locations where they are present. 6. - Page 141 Figure 56: Service connections for YVAM0350, view from the control panel side Callout Description Callout Description Condenser vapor service valves Condenser drain isolation valve Evaporator vapor service valve Evaporator liquid service valve Liquid drain service valve Compressor discharge isolation valves. Both must be open.
-
Page 142: System Pressure Test
Callout Description Callout Description Evaporator vapor service valve Compressor discharge isolation valves (2) * Condenser drain isolation valve Condenser vapor service valve (2) Liquid drain service valve (2) Evaporator liquid service valve Note: * Ensure that both compressor discharge isolation valves are open. System pressure test With the refrigerant charge removed and all known leaks repaired, charge the system with a small amount of refrigerant mixed with dry nitrogen. - Page 143 Figure 58: Leak test hold times What to do next: • For a unit with no loss of pressure, proceed to unit evacuation. • For units where a leak is suspected and there is any amount of drop in recorded pressure, proceed to either of the following leak detection methods: Conducting the soap visual gas leak test...
- Page 144 Important: To prevent freezing of any moisture that might be in the system, do not go below 5 mmHg. See System evacuation for more details. With the system evacuated, charge the system with dry nitrogen to 100 psig (690 kPa). Mix together soap and water.
-
Page 145: System Evacuation
If a tube leak is suspected, complete the following steps: a. Remove the waterboxes to facilitate application of the soap solution to the tubesheets. b. To test for tube wall leaks, insert a rubber cork in both ends of each tube, and leave pressurized for at least 8 hours. - Page 146 Figure 59: Evacuation of chiller operation Table 145: System pressures Gauge Absolute Boiling temperatures of In. of mercury (Hg) below one Millimeters of mercury water, °F psia Microns standard atmosphere (Hg) 0 in. 14.6960 760.00 760,000 10.240 in. 9.6290 500.00 500,000 22.050 in.
- Page 147 Dehydration To make sure that there is confidence in the vacuum decay related to moisture boiling off, only perform the dehydration process after the system has been thoroughly leak checked. The dehydration process is only needed if the following situations occur: •...
- Page 148 When the vacuum indicator registers this temperature or pressure, it is a positive sign that the system is dehydrated to the recommended limit. If this level cannot be reached, it indicates that there is a leak somewhere in the system. Any leaks must be corrected before you can evacuate the system to 35°F (1.6°C) or 5,000 μm (5,000 micron).
-
Page 149: Refrigerant Charging
Operate the vacuum pump to evacuate the system to the best attainable vacuum. The vacuum must be less than 500 μm (500 micron), but if that cannot be attained, a vacuum at 1,000 μm (1,000 micron) or lower is acceptable. To start the 8 h vacuum hold test, close the system charging valve connection to the vacuum pump. - Page 150 Table 146: R-134a pressure to saturated temperature conversion Pressure Dew point Pressure Dew point Pressure Dew point psig (bar) temperature ºF psig (bar) temperature ºF psig (bar) temperature ºF (ºC) (ºC) (ºC) 0.0 (0.0) -14.9 (-26.1) 135.0 (9.31) 105.0 (40.6) 270.0 (18.62) 152.0 (66.7) 5.0 (0.34)
- Page 151 Table 147: R-1234ze pressure to saturated temperature conversion Pressure psia (bar) Temperature ºF Pressure psia (bar) Temperature ºF Pressure psia (bar) Temperature ºF (ºC) (ºC) (ºC) 44.72 (3.08) 50.0 (10.0) 90.90 (6.27) 91.0 (32.8) 166.25 (11.46) 132.0 (55.6) 45.57 (3.14) 51.0 (10.6) 92.36 (6.37) 92.0 (33.3)
- Page 152 WARNING To avoid liquid freezing in the chiller tubes when removing refrigerant from a charged system, run the chilled water pumps. Maintain chilled liquid flow for the entire refrigerant recovery process. If water flow cannot be maintained, completely drain the chilled liquid from the chiller and the waterbox vents. Open all drains before beginning this process.
-
Page 153: Compressor And Motor Maintenance
When all liquid refrigerant has been recovered, begin the vapor recovery process by connecting to any of the chiller vapor service connections so that the refrigerant vapor can be recovered and condensed into the refrigerant container. The chilled liquid pumps must remain operational for this process because the vapor pressures can drop significantly below the values that would cause water or brine to freeze. -
Page 154: Evaporator Maintenance
Table 148: Approximate refrigerant and water weight Evaporator Pass Number of Condenser Refrigerant Water weight, tubes weight, lb lb (kg) (kg) EB2914 25 mm 4G 750 (340) 820 (370) microchannel EB2914 25 mm 4G 750 (340) 700 (320) microchannel EB2914 25 mm 4G 750 (340) 500 (225) - Page 155 CAUTION Ensure that the piping is clean before connecting it to the evaporator. Any debris left in the water piping between the strainer and evaporator could cause serious damage to the tubes in the evaporator and must be avoided. Keep evaporator nozzles and chilled liquid piping capped before installation to ensure construction debris is not allowed to enter.
- Page 156 Always clean the tubes with a brush before using acid cleaning. Acid cleaning of tubes If the tubes are fouled with a hard scale deposit, they might require acid cleaning. Before acid cleaning, it is important to clean the tubes using the brushing process described previously. If the relatively loose foreign material is removed before the acid cleaning, the acid solution has less material to dissolve and flush from the tubes.
-
Page 157: Condenser Maintenance
Do not use caustic or acidic cleaning solutions on coils. Only use cleaning solutions approved by • Johnson Controls. The required cleaning procedure is different depending on the type of coil and protective coating supplied with the coil. To maintain the integrity of each type of coil, see the following procedures: •... - Page 158 Do not contact the coil with the hose nozzle. Rinse the coil by running water through every passage in the heat exchanger surface until it is clean. Apply a coil cleaning solution approved by Johnson Controls, such as RectorSeal brand GulfClean™ coil cleaner, or equivalent, on the microchannel coils. Coil cleaning solution is available from Johnson Controls Aftermarket Parts Centers in all global regions.
- Page 159 Apply a coil cleaning solution approved by Johnson Controls, such as RectorSeal brand GulfClean™ coil cleaner or equivalent, on Environment Guard Premium microchannel coils only. Coil cleaning solution is available from Johnson Controls Aftermarket Parts Centers in all global regions.
- Page 160 b. To remove any excess water, blow air through the coils with a hand-held blower or vacuum. Visually inspect the Environment Guard Premium e-coating on the microchannel coils for any damage, degradation, or bare spots. What to do next: If the e-coating requires further touch-ups after cleaning, complete the following procedures: •...
-
Page 161: Electrical Controls
Important: Do not change the factory settings of operation and safety controls. If the settings are changed without Johnson Controls approval, the warranty will be jeopardized. Unit heater operation verification The YVAM chiller uses various heaters to protect all of the devices that are susceptible to low ambient temperature limits. - Page 162 At the auxiliary power panel, use wires 325 and 325 A to measure the current to the heaters. The nominal current for each one is 3.75 A. However, it may read lower values based on the load at the time of testing. Return the J9 connector immediately after recording the current value.
- Page 163 Figure 62: Drive internal heater Record the value in 160.88-CL2. Return the temperature setting to 32°F (0°C) when testing is complete. Testing the OptiView Control Panel heater Measure the current to the heater using wire 31A at 5BR on TB6 in the OptiView Panel. The nominal current is 1.5 A.
-
Page 164: Automatic Battery Health Test During Shutdown
Figure 64: Control panel heater thermostat options Testing the OptiView Control Panel cooler The OptiView panel has a cooler in it that removes heat from the panel to prevent overheating. When the chiller power is energized, the control panel cooler operates the onboard cooling fans regardless of the operating status of the cooler. - Page 165 2. Navigate to Compressor > Power Panel screen. 3. On the Power Panel screen, make sure that the Start Battery Test button is shown. The function is available when all of the following are true: Access level is Operator or higher Chiller state is Stopped Safety stop push-button is depressed The Local Run/Stop is set to Stop...
-
Page 166: Optiview Data Collection
OptiView data collection A laptop computer can be connected to the OptiView microboard to capture reports. The microboard SD card is used for datalogging, backup/restore, and a single Export Report. OptiView is only able to perform one print function at a time. When the print button is missing from a screen this means OptiView is currently printing something. -
Page 167: Acceptable Printers
Table 150: OptiView reports Report Description Screen Access *Waveform Captures the raw data for the • Printer Service or operator VSD waveform live and faults. • VSD Waveform (Live) [Service access] • History Details Datalogging Continuous capture of the Serial/SD Service chiller parameters. - Page 168 Figure 65: OKIPOS printer Printer connections Connect the printer to the Control Center Microboard as follows. Only one printer can be connected at a time. Table 151: Okidata OkiPos 441 Microboard Printer Function J2-4 pin 3 Tx (data to printer) J2-2 pin 20 DSR (busy signal from printer)
-
Page 169: Control Center Setup
Brecknell Models: Brecknell CP130 • Dimensions: 2.50 in x 3.75 in. x 5.25 in. (H x W x D) • Paper: Thermal 57 mm (2.25 in.) • Type: Dot Matrix • Purchase: 800-637-0529 (North America), +44 (0) 845-246-6717 (Europe and ME) •... -
Page 170: Automatic Status Reporting
• Stop Bits: 1 Printer type Access level required: Operator Using the Printer screen, set the printer type to Weigh-Tronix. Automatic data logging Access level required: Operator If automatic data logging is required, a status report can be automatically printed at a specified interval beginning at a specified time, using the Printer screen. - Page 171 Navigate to the Setpoints > Setup > Comms screen and check that the printer settings match the following: Table 154: OptiView printer port setup Field Value Bits per second 57,600 Data bits Parity None Stop bits Locate the laptop's com port. a.
- Page 172 On the screen that you need to capture, press the Print button. The HyperTerminal software displays the printed information, and the information is recorded as a .txt file. When you have recorded the required reports, click Transfer from the toolbar. From the transfer list, click Capture Text and then click Stop.
- Page 173 Table 156: Standard RS-232 DB9 pin assignments Male signal Description Description Female signal direction direction → Carrier Detector Pin 1 Carrier Detector ← (CD) (CD) ← Received Data Pin 2 Transmit Data → (RXD) (TXD) → Transmit Data Pin 3 Received Data ←...
-
Page 174: Example Optiview Reports
Example OptiView reports The following are examples of the different print reports. Figure 70: Status sample printout YVAM with OptiView Control Center... - Page 175 Figure 71: Status sample printout, continued YVAM with OptiView Control Center...
- Page 176 Figure 72: Setpoints sample printout YVAM with OptiView Control Center...
- Page 177 Figure 73: Setpoints sample printout, continued YVAM with OptiView Control Center...
- Page 178 Figure 74: Schedule sample printout YVAM with OptiView Control Center...
- Page 179 Figure 75: Sales Order sample printout YVAM with OptiView Control Center...
- Page 180 Figure 76: Security Log sample printout YVAM with OptiView Control Center...
- Page 181 Figure 77: Security Log sample printout, continued YVAM with OptiView Control Center...
- Page 182 Figure 78: Security Log sample printout, continued YVAM with OptiView Control Center...
- Page 183 Figure 79: Trend sample printout YVAM with OptiView Control Center...
- Page 184 Figure 80: Custom screen sample printout YVAM with OptiView Control Center...
- Page 185 Figure 81: Slots Numbers Log sample printout YVAM with OptiView Control Center...
- Page 186 Figure 82: Slots Numbers Log sample printout, continued YVAM with OptiView Control Center...
- Page 187 Figure 83: Slots Numbers Log sample printout, continued Figure 84: MBC Event Log YVAM with OptiView Control Center...
- Page 188 Figure 85: History Log sample printout YVAM with OptiView Control Center...
- Page 189 Figure 86: History Log sample printout, continued YVAM with OptiView Control Center...
- Page 190 Figure 87: VSD Waveform sample printout YVAM with OptiView Control Center...
- Page 191 Figure 88: Serial Data Logging sample printout YVAM with OptiView Control Center...
-
Page 192: Unit Conversion
To convert a temperature range (that is, a range of 10°F) from Fahrenheit to Celsius, multiply by 5/9 or 0.5556. Example: 10.0°F range x 0.5556 = 5.6 °C range © 2023 Johnson Controls. 5000 Renaissance Drive, New Freedom, York, PA 17349, USA. Subject to change without notice. All rights reserved.
Need help?
Do you have a question about the YORK YVAM and is the answer not in the manual?
Questions and answers