Table of Contents
Advertisement
Quick Links
Advertisement
Table of Contents

Related Manuals for Amcrest IP8M-TD2685EW-AI


Summary of Contents for Amcrest IP8M-TD2685EW-AI
- Page 1 4K UltraHD Deterrent Turret Camera User Manual Version 1.0.0 October 8 , 2021...
-
Page 2: Table Of Contents
Contents Overview ......................................4 Connection & Installation ................................. 5 Performing a Factory Reset ................................6 Installation Guide ....................................6 Camera Access ....................................7 App Setup ......................................8 Desktop Access Setup ..................................12 Live ........................................13 Playback ......................................14 Cloud Storage....................................14 Setup ....................................... - Page 3 USA: +1-713-893-8956 Canada: 437-888-0177 UK: 203-769-2757 Important Security Warning To keep your Amcrest camera secure and prevent unauthorized access, please make sure to follow the steps below: • Always make sure that your camera has the latest firmware as listed on www.amcrest.com/firmware...
-
Page 4: Overview
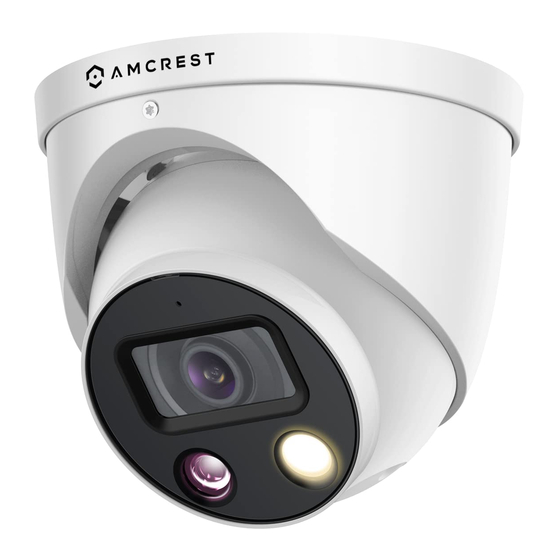
Be sure to use only the accessories recommended by manufacturer. Before installation, please open the package and check to ensure that all the components are present. Contact the retailer that you purchased from, or Amcrest directly if anything is broken or missing in the package. Overview This 4K active UltraHD deterrent turret camera features the latest JS technology which allows the camera to operate in any web browser without the use of a plugin. -
Page 5: Connection & Installation
The images below show the dimensions for the camera. The measurements are in millimeters (mm): Connection & Installation This section provides information about the connection and installation of your camera. MicroSD Card Installation Guide If using a microSD card, please make sure the microSD card is installed before physical installation of your camera. To Install a microSD card into your camera, please refer to the step-by-step guide below: Note: A microSD card with a max of 256GB can be used. -
Page 6: Performing A Factory Reset
Performing a Factory Reset Performing a factory reset on your camera will revert the camera back to its original factory default settings. perform a physical factory reset, make sure the device is powered on and follow the instructions provided below. Please note, you will need a Phillips head screwdriver to complete the reset. -
Page 7: Camera Access
Camera Access This section will provide information on how to setup and access your camera through the following methods: • Local PC (Web User Interface (Web UI), Amcrest Surveillance Pro, etc.) • Amcrest View Pro app •... -
Page 8: App Setup
Amcrest Cloud app, follow these steps: 1. Download and open the Amcrest Cloud app from the App Store or Play Store. 2. Register for an Amcrest Cloud account. To register click on Sign Up and fill out the form to complete registration. - Page 9 3. Tap on Add Camera 4. Give your camera a name (Ex. Garage, Living Room, Kitchen, etc.) and tap Next to continue. 6. If you are adding a new camera that does not have a 5. Scan the QR code on the back/side/bottom of the set password the app will automatically detect that a camera or manually enter the camera’s serial number...
- Page 10 Download and install the Amcrest View Pro app for the App Store or Google Play Store. Open the app on your mobile device and allow the app to load.
- Page 11 6. Scan the QR code. The QR code can be found on the serial tag along with a scannable barcode. Note: IP/Domain/DDNS can be used to establish a DDNS connection. For more information on how to setup a DDNS connection, visit amcrest.com/support...
-
Page 12: Desktop Access Setup
To access your camera from your computer you will need to first locate the camera’s IP address. To locate the camera’s IP address is it highly recommended to download our free Amcrest IP Config Tool software. The Amcrest IP Config Tool can be downloaded at the following web page: amcrest.com/downloads... -
Page 13: Live
By default, the interface opens on the Live tab. The live view tab allows the user to see a live video feed from the camera. The live view tab has five main sections: Section 1: These options allow the user quick access to the live view screen, playback, as well as to the Amcrest Cloud. -
Page 14: Playback
Playback Bar: These options allow the user to play, stop, and adjust the audio levels of a recording. Record Type: Filter and view different record types such as continuous recordings (General), motion detection recordings (Event), alarm events (Alarm), manual recordings (Manual). Cloud Storage The Cloud Storage tab allows the user quick access to the Amcrest Cloud website. -
Page 15: Setup
At this website (amcrestcloud.com) users can register for new accounts as well as view or modify existing accounts. For more information on Amcrest Cloud visit: amcrest.com/cloud Setup The Setup tab allows the user to change different camera settings. Below is a screenshot of the setup tab:... - Page 16 whole video is too dark or too bright. Please note the video may become hazy if the value is too high. The recommended value ranges from 40 to 60. • Contrast: This slider is used to adjust playback and recorded video window contrast. The value ranges from 0 to 100. The default value is 50.
- Page 17 BLC Mode This menu allows the user to select Back Light Compensation. The values are Off, BLC (Auto), WDR, and HLC. This feature should only be used in black lit environments. • Profile: This dropdown box allows the user to select which profile to modify. The 3 options are Day, Night, and General (automatically adjust between day and night profiles).
- Page 18 • Mode: This dropdown box allows the user to select different Day & Night balance modes. The 3 options are Auto, Color, and B&W. Auto - Uses D&N Sensitivity setting to change between color mode and infrared and black and white mode. Color - Preset which allows the camera to compensate color in day or night profiles.
-
Page 19: Video
Profile Management: This set of radio buttons allow the user to set what basis the profile management settings run on. There are 4 options: General, Full Time, Schedule, and Day/Night. General means that the system can automatically alternate between night and day based on the profiles for each. Full Time means that the system sticks to one profile the entire time it is running. - Page 20 • Reference Bit Rate: This is the recommended bit rate value according to the resolution and frame rate selected. • Bit Rate: This dropdown box allows the user to select a bit rate. • Frame Interval: This field allows the user to set the P frame amount between two I frames. The value ranges from 1 to 150 seconds.
- Page 21 • Time: Clicking the Display Weekdays checkbox will show the weekday at the end of the timestamp. • Logo Overlay: This radio button is used to enable or disable the Amcrest logo on the live view screen. • Face Statistics: This option is used to provide a face detection overlay which counts the number of faces detected by the camera.
-
Page 22: Audio
Audio This menu allows the user to modify audio settings for the camera. Below is an explanation for each of the fields on the Audio menu: Enable: This checkbox allows the user to enable audio recording. Encode Mode: This dropdown box allows the user to select what audio format the audio should be recorded in. Sampling Frequency: This dropdown box allows the user to select a sampling frequency for the audio. -
Page 23: Network
The P2P settings screen is where users can use a QR code to connect their smartphone or tablet to the camera. This feature needs to be enabled for use with the Amcrest View app, Amcrest Cloud, or AmcrestView.com. Below is a... -
Page 24: Connection
QR code scanning feature cannot be used. • QR Code: This image is a Quick Response (QR) code. By scanning this image using the Amcrest View app, this camera can establish a connection with the app. -
Page 25: Ddns
For purposes of this guide, AmcrestDDNS will be used. AmcrestDDNS is a free DDNS service provided by Amcrest, and it must be renewed every year. A renewal reminder email will be sent to the email entered in the username field below. -
Page 26: Upnp
• Authentication: This dropdown box allows the user to select an encryption type. There are two types of email encryption protocols that are available. • SSL: Secure Socket Layer • TLS: Transport Layer Security • Subject: This field allows the user to define the subject line of the email that is sent to the receivers. •... -
Page 27: Https
HTTPS. For more information on how to setup HTTPS in the web user interface visit amcrest.com/support Event This menu section allows the user to change different settings for triggering events. The options available in this menu are video detection, audio detection, face detection, IVS (tripwire and Intrusion), and Smart Motion Detection. - Page 28 activated again. After 10 seconds, if system detects another alarm signal, it can generate a new alarm since the anti- dither time has expired. • Detection Area: Clicking this button opens a pop-up screen that can be used to set detection areas. When the setup button is clicked, a live stream of the video is shown.
-
Page 29: Audio Detection
Click and drag to set video tampering for certain days of the week. Also, periods of video tampering can be set for each day and enabled using the period settings on the bottom half of the screen. There are a total of 6 periods that can be set. -
Page 30: Smart Plan
To reset to default settings, click the Reset Defaults button. To refresh the page, click the Refresh button. To save the settings, click the Save button. Smart Plan A smart plan acts as the “master switch” for the AI features associated with your camera. The smart plan options include face detection and IVS. - Page 31 7. Click on Send Email and Snapshot checkboxes to have a snapshot of the face event emailed. A valid email address must be established prior to enabling this feature. For more information on setting up email alerts, please visit amcrest.com/support...
-
Page 32: Ivs
Setting an IVS Rule All IVS rules can only be set and/or modified using the web user interface. They cannot be set using the Amcrest View Pro app or any other platforms associated with your device. For more information on setting IVS rule, refer to the information below. - Page 33 For more information on how to setup a tripwire rule, please visit amcrest.com/support To reset to default settings, click the Reset Defaults button. To refresh the page, click the Refresh button. To save...
- Page 34 Intrusion Intrusion allows the camera to trigger an event if an object, such as a human or vehicle, appears or crosses a set intrusion area set by the user. Below is a description of the features in this menu: No.: Provides the order in which the IVS rules will be displayed in the menu. Name: Allows the user to customize a name for their rule.
-
Page 35: Smart Motion Detection
Email address must be established in the camera prior to enabling this setting. For more information on how to setup email alerts, please visit amcrest.com/support. 6. To have a siren activated when the rule is triggered click on the Siren option. -
Page 36: Alarm
Snapshot: This checkbox allows a snapshot of the IVS event to be sent via email when triggered. To reset to default settings, click the Reset Defaults button. To refresh the page, click the Refresh button. To save the settings, click the Save button. Alarm This menu allows the user to set and schedule relay activated external alarms. -
Page 37: Abnormality
Sensor Type: There are two types of sensors, normally open (NO) and normally closed (NC). Switch from normally open to normally closed, open the alarm. Switch from normally closed to normally open, shut the alarm. Record: This checkbox allows the user to enable the camera to record video when an audio detection alarm is triggered. -
Page 38: Storage
• Record Delay: This field specifies in seconds how long the delay between alarm activation and recording should be. To reset to default settings, click the Reset Defaults button. To refresh the page, click the Refresh button. To save the settings, click the Save button. Illegal Access This tab allows the user to set the camera’s response to an Illegal Access related abnormality. - Page 39 Below is an explanation of the fields on the Record schedule settings tab: Record Type: These checkboxes allow the user to select which recording type they want to configure on the schedule. There are 3 types of recordings: General: General recording means that the camera captures all footage for the specified time period. General recording is represented by the color green.
- Page 40 Below is an explanation of the fields on the Snapshot Schedule settings tab: Record Type: These checkboxes allow the user to select which snapshot type they want to configure on the schedule. There are 3 types of snapshots: General: General means that the camera will take snapshots during the specified time period. General recording is represented by the color green.
-
Page 41: Destination
To set a holiday schedule, select with record type you would like the holiday schedule to apply and select a date from the calendar then click Save. Return to the record or snapshot menu and click the Setup option next to the Holiday field. -
Page 42: Record Control
Save button. Cloud Storage This menu redirects the user to the Amcrest Cloud web site. At this website (amcrestcloud.com) users can register for new accounts as well as view or modify existing accounts.For more information on Amcrest Cloud visit:... -
Page 43: System
System This menu section allows the user to change general settings for the camera. General This tab is where the user can configure some basic camera settings. Below is an explanation of the fields on the General settings tab: • Device Name: This field allows the user to change the device’s name. -
Page 44: Default Settings
• Group: This tab shows the user groups available on the camera. • No.: This column shows the user’s number on the user list. • User Name: This column shows the usernames of the different accounts on the camera. • Group Name: This column shows the group of the different accounts on the camera. -
Page 45: Upgrade
This menu allows the user to upgrade the camera’s firmware. To upgrade the firmware for your camera, follow the steps provided below: • Go to amcrest.com/firmware-subscribe • Search for the model number of your camera and download the latest firmware file. •... -
Page 46: Logout
Clicking the logout button will log out the user. Remote Web Access Setup Port Forwarding is an alternative method to setting up remote access for Amcrest cameras. Below is a step-by-step walkthrough that details how to setup the camera for Remote Web Access using Port Forwarding: Login to your camera, open the main menu then go to Setup ->... - Page 47 View your camera live or watch recorded clips using the menu button on the top of the page. You can also use the Amcrest Cloud app on iOS and Android to add more cameras, play recordings, and view your camera live, from anywhere.
- Page 48 UID to open the live viewing and playback interface. The device is now successfully setup for live viewing and playback! For additional assistance, please contact us at www.amcrest.com or give us a call at 1-888-212-7538. Step by step video tutorials available at www.amcrest.com/videos FAQs/Troubleshooting 1.
- Page 49 • Windows version is pre -Windows 2000 service pack 4. Use a more recent version of Windows. • ActiveX controls have been disabled. • The PC is not using DirectX 8.1 or higher. Upgrade to a more recent version of DirectX. •...
- Page 50 FCC Statement This device complies with Part 15 of the FCC Rules. Operation is subject to the following two conditions: (1) this device may not cause harmful interference, and (2) this device must accept any interference received, including interference that may cause undesired operation. The user’s manual or instruction manual for an intentional or unintentional radiator shall caution the user that changes, or modifications not expressly approved by the party responsible for compliance could void the user's authority to operate the equipment.
- Page 51 Note: • To view setup videos for many of the steps outlined in this guide, go to http://amcrest.com/videos • This user manual is for reference only. Slight differences may be found in the user interface. •...
Need help?
Do you have a question about the IP8M-TD2685EW-AI and is the answer not in the manual?
Questions and answers