Table of Contents
Advertisement
Quick Links
0. Content
1. Synology DS220+ NAS Server
1. Synology DS220+ Nas Server
The NAS server DS220+ is a desktop unit and requires the following assembly. Insert the hard drives numbered 1 - 2 into the slots numbered 1 - 2 of the
NAS server. The numbers must match and be sure to push in the hard drives firmly to snap close the lock handles.
Next connect an Ethernet port on the back of the NAS server to the local network (VLAN) using the enclosed LAN cable. You can use any one of the two
Ethernet ports to connect. Note that the MAC addresses corresponding to the Ethernet ports are written on the bottom of the NAS server and will be
needed to enable the NAS server in the VLAN. Connect the enclosed power cable to a power source. Power on by pressing the Start button which is at
the lower righht side of the front panel.
When connecting the NAS server to the VLAN for the first time, it is required to set the IP address of the NAS server within the range of the IP address
allowed in the VLAN. Connect directly an Ethernet port of the NAS server to an Ethernet port of a laptop installed with Synology Assistant program. Run
the Synology Assistant program in the laptop and follow the program instruction to set the IP address for the NAS server. The Synology Assistant program
can be downloaded from Synology.com website.
CAVS Network Karaoke System
Version 4.0
Advertisement
Table of Contents

Subscribe to Our Youtube Channel
Related Manuals for CAVS JB-199 IV Online


Summary of Contents for CAVS JB-199 IV Online
- Page 1 CAVS Network Karaoke System Version 4.0 0. Content 1. Synology DS220+ NAS Server 2. CAVS JB-199 IV Online 3. E-Songbook 4. Appendix 1. URL Whitelist for VLAN323 5. Appendix 2. Data Sync and Map Drive . Appendix 3. Advertisement and Background video 1.
- Page 2 Setting IP address When connecting the JB-199 IV Online to the VLAN for the first time, it is required to set the IP address of the JB-199 IV Online within the range of the IP address allowed in the VLAN. In the JB-199 IV Online, go to Open Networks & Internet setting > Ethernet > Change adopter options. Right click on the Ethernet port which is connected to the VLAN and select Properties.
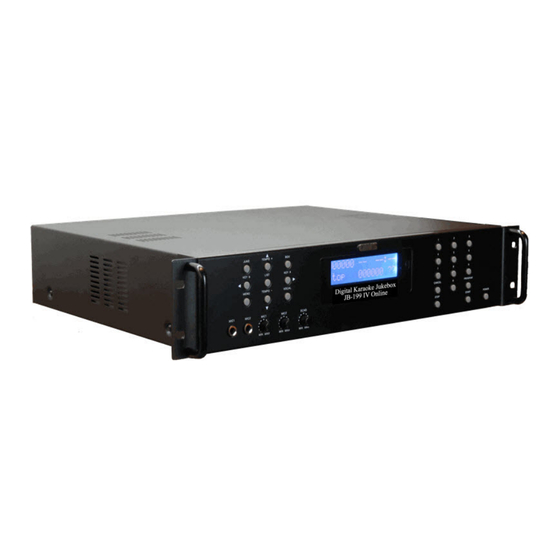
- Page 3 JB-199 IV Online Back Panel Use the enclosed USB cable to connect the DK3 mixer to the JB-199 IV Online. The USB-B end of the cable goes to the front of the DK3 mixer. The USB-A end of the cable goes to a USB port on the back panel of the JB-199 IV Online.
- Page 4 IP address, Subnet mask, and Default gateway. Also selet Use the following DNS server address, and fill in the Prefered DNS server and Alternate DNS server. Click OK and exit. Reboot the tablet. Appendix 1. URL Whitelist for VLAN The VLAN requires the following whitelist of URLs. CAVS USA Inc Port cavskaraoke000.synology.me 1194 cavskaraoke003.synology.me...
- Page 5 checkipv6.synology.com checkport.synology.comÿ codecstatistic.synology.com/codec_feedback.php collectorautoupdate7.synology.com collectorupdate7.synology.com czr1.re.cs.quickconnect.to czr2.re.cs.quickconnect.to dataautoupdate7.synology.com database.clamav.net dataupdate.synology.com dataupdate7.synology.com ddns.synology.com dec.quickconnect.to der3.re.cs.quickconnect.to der4.re.cs.quickconnect.to der7.re.cs.quickconnect.to der8.re.cs.quickconnect.to desktop.docker.com docker.io docker-pinata-support.s3.amazonaws.com download.synology.com download.synology.com/routerdb dseasb33srnrn.cloudfront.net elb-io.us-east-1.aws.dckr.io elb-registry.us-east-1.aws.dckr.io frlp.lp.cs.quickconnect.to frp1.punch.cs.quickconnect.to frp2.punch.cs.quickconnect.to frp3.punch.cs.quickconnect.to frp4.punch.cs.quickconnect.to frr2.re.cs.quickconnect.to frr3.re.cs.quickconnect.to frr4.re.cs.quickconnect.to global.download.synology.com global.geo.synology.com/multilingual_reverse.php global.quickconnect.to global.synologydownload.com gofile.me help.synology.com help.synology.com/spreadsheet/ hub.docker.com...
- Page 6 hub.docker.com/_/node identity.us.c2.synology.com index.docker.io jpr4.re.cs.quickconnect.to jpr5.re.cs.quickconnect.to kb.synology.com ldap.identity.us.c2.synology.com license.synology.com login.docker.com myds.synology.com notification.synology.com notify.bugsnag.com orlp.lp.cs.quickconnect.to orp1.punch.cs.quickconnect.to orp2.punch.cs.quickconnect.to payment.synology.com pkgautoupdate7.synology.com pkgupdate7.synology.com production.cloudflare.docker.com registry.hub.docker.com registry.npmjs.org registry-1.docker.io registry-origin.docker.io report.synology.com/upload.php sessions.bugsnag.com sgr3.re.cs.quickconnect.to sgr4.re.cs.quickconnect.to signal1.fr.webrtc.quickconnect.to signal1.or.webrtc.quickconnect.to signal1.ty.webrtc.quickconnect.to signal2.fr.webrtc.quickconnect.to signal2.or.webrtc.quickconnect.to signal2.ty.webrtc.quickconnect.to signal3.fr.webrtc.quickconnect.to signal4.fr.webrtc.quickconnect.to sns.synology.com subscribe.insight.synology.com supapi.synology.com synocloudsync.synology.com synoconf.synology.com synoconfkms.synology.com...
- Page 7 NAS server can next be connected to CAVS HQ NAS server using VPN for data synchonization. In a JB-199 IV Online karaoke player, open the Google Chrome browser and naviagate to "NAS server IP address:5000". You will see the signin page of the NAS server.
- Page 8 Sign out of the NAS server by selecting the User Account at the top right corner of the screen. Sign in again and confirm that the "Synology Drive ShareSync" icon appears at the top right corner of the screen. Sign out of the NAS server and close the Google Chrome browser in the JB-199 IV Online player.
Need help?
Do you have a question about the JB-199 IV Online and is the answer not in the manual?
Questions and answers