
Related Manuals for CAVS JB-99RT


Summary of Contents for CAVS JB-99RT
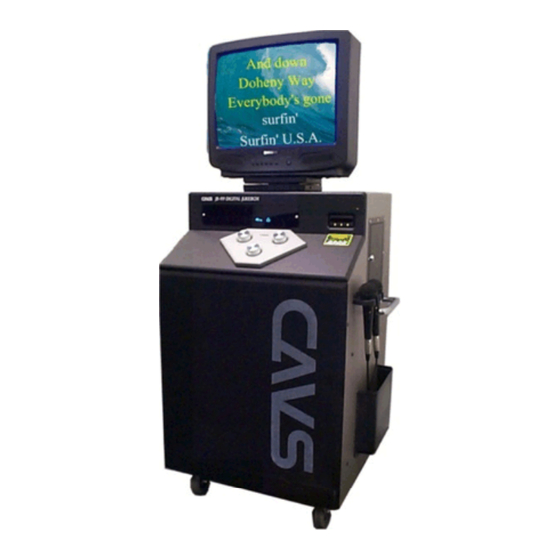
- Page 1 CAVS USA INC Quickstart Manual Karaoke Jukebox CAVS JB-99RT Version 00.73RT and above...
-
Page 2: Table Of Contents
2.1 TV monitor 2.2 Mixer-Amplifier 2.3 Microphone 2.4 Remote control 2.5 Instruction sticker 3. Booting up 4. Operating JB-99RT 4.1 Quickstart operation 4.2 Basic functions 4.3 Password 5. Setting the button controls 6. Programming bill acceptor 6.1 Setting the bill acceptor on or off 6.2 Setting prices... -
Page 3: Unpacking
Then using a crowbar, gently pry open the top cover followed by four sidewalls. Next using the steel handles located on three sides of JB-99RT, lift the unit out of the bottom holder and gently... -
Page 4: Installation
2.1 TV monitor o Attach the swivel joint found in the back bottom compartment of JB-99RT onto the steel plate on the top of JB-99RT. Use the four bolts that came with the swivel joint for the attachment. o Place the TV monitor on top of the swivel joint and attach it with the four bolts that came in the side pocket of JB-99RT. -
Page 5: Mixer-Amplifier
Connect the RS232 connector from the TV monitor to the RS232 connector from the JB-99RT case. o Connect the DC power plug from the JB-99RT case to the back of the RS232 connector from the TV monitor. 2.2 Mixer-Amplifier o Set all round knobs of the mixer-amplifier at the 12 o’clock (center) position... -
Page 6: Remote Control
2.5 Instruction Sticker Locate the Instruction sticker from the bottom compartment of JB-99RT. Peel off the back cover off the sticker and place it on the front panel of the JB-99RT. An exact location of the sticker can vary with personal preference. -
Page 7: Operating Jb-99Rt
Press the Power button on the TV monitor to turn it on. Change the channel to 1 for Video. Press the Power button on the Remote Control of JB-99RT to begin the boot up process. Boot up will take approximately 30 to 60 seconds. -
Page 8: Basic Functions
CAVS USA INC o Turn on the microphones and adjust the volume and echo levels by turning Mic1, Mic2, and Echo control knobs on the front panel. o To stop the song in play, press the Stop button on the remote control. -
Page 9: Password
Section 7. How To Operate in the User’s Manual for JB- 4.3 Password o To set or change many features available in JB-99RT, you first need to enter and register your own password. The factory default password is Pause - Pause - 7. -
Page 10: Setting The Button Controls
99RT unit. 5. Setting Button Controls Button on the remote control of JB-99RT can access many features and settings of the jukebox. This however may not be desirable at all times especially when the unit is out operating in actual locations. To limit such access, you can impose a variety of restrictions on the buttons as shown below. -
Page 11: Programming Bill Acceptor
Using the remote control, enter the <<SYSTEM CONTROL>> screen with your password: o Press 1 to choose “Select Acceptor”. Then use the LineDn and LineUp buttons to choose Bill. Only Bill / Off options are viable in JB-99RT model. o Press the Stop button to return to the Welcome screen. -
Page 12: Setting Prices
CAVS USA INC WARNING: To operate the JB-99RT with bill acceptor, you must check the button control settings to be as instructed in the Step 5. Setting Button Controls: Button Controls Remote Control Selection 1 Disable Selection 2 (Button set#01) -
Page 13: Setting Karaoke Play / Jukebox Play
CAVS USA INC o Select a song using the touch screen TV. o Press the Play button to begin playing the song or the Program button to program the song into the reservation queue. You can program as many songs as your credit allows and press Play to begin playing. -
Page 14: Setting Score Function
Off / On High / On Med / On Low. When set as On High / On Med / On Low, the JB-99RT will give numeric scores to users for their singing after each song. The scores will average at 90, 80 or 70 points out of perfect 100 points depending on High, Med, or Low setting. -
Page 15: Setting Song Count
10.4 Press the Stop button twice to return to the welcome screen. 11. Collecting bills 11.1 Open the steel case door on the right side of the JB-99RT using a key provided with JB-99RT. Inside, there is a gray plastic box held attached to the bill acceptor. -
Page 16: Loading Song Updates
CAVS USA INC 12. Loading Song Updates Monthly song updates will arrive in a Data CD (of CD-ROM format) from CAVS. To download the songs into JB-99RT: 12.1 Enter the password to open <<SYSTEM CONTROL>> screen using the remote control. -
Page 17: Upgrading Operating System
12.7 Refer to the instruction note that comes with the song update Data CD and follow the instruction for changing the setting. WARNING: Each JB-99RT unit has customized set of songs. Loading the song updates must follow the instruction given with the song update Data CD to avoid any unwanted overwriting of songs. - Page 18 JB-99RT and close the tray. 13.6 Press the Play button and the new operating system will begin loading into the JB-99RT system. When the loading is completed, the following message will appear at the bottom of the screen: System program update...
-
Page 19: Internal Background Video
‘NO DISC’ on the top right corner of the TV monitor. Press the Play button once more to proceed. 13.7 Turn off the JB-99RT by pressing the Power button on the Remote Control. After waiting for a few seconds, restart the JB-99RT by pressing the Power button. - Page 20 14.9 Select 4.Disc 1 Type to display “VCD”. Press Stop button twice to return to the welcome screen. 14.10 Attach the front panel back to the case of JB-99RT and screw the two white bolts at each end. 14.11 Enter the password to return to <<SYSTEM CONTROL>> screen using the remote control.
-
Page 21: External Background Video
15.1 Remove the top back panel on the back of the JB-99RT by unscrewing 6 bolts. 15.2 Insert a video RC cable through the circular hole on the top of the JB-99RT and connect the end below the hole to the Video In of the JB-99. Connect the other end outside the hole to the Video Out of an external video source. -
Page 22: Mixer-Amplifier
“Disable”. 15.10 Press the Stop button until the welcome screen is displayed. NOTE: Having connected an external video source to JB-99RT and set the Video Source as External as above, you may turn on or off the background picture simply by pressing the BGV button for BGV ON / BGV OFF. -
Page 23: Vocal Volume Control
Using the Volume button on the remote control of JB-99RT, increase the volume level by pressing the up ( ) button and decrease by pressing the down ( ) button. You may also go directly to the back of the JB-99RT and turn the master volume control knob of the mixer-amplifier. -
Page 24: Frequently Asked Questions (Faq)
18. Frequently Asked Questions 18.1 Can the JB-99RT unit be connected to more than one TV monitor? Answer: Yes, using a video distributor, the video cable coming out from the top of the JB-99RT can be connected to 2 or more TV monitors simultaneously. -
Page 25: Technical Support
JB-99RT unit. 18.4 How can the previous credits in the bill acceptor be erased? Answer: To erase the credit remaining in the JB-99RT, turn off and on the bill acceptor from the <<SYSTEM CONTROL>> window. Please note that turning off and on the JB-99RT unit will not erase the credit remaining.
Need help?
Do you have a question about the JB-99RT and is the answer not in the manual?
Questions and answers