CAVS JB-199 Premier User Manual
Cavs jukebox player cavs jb-199 user's manual
Hide thumbs
Also See for JB-199 Premier:
- User manual (91 pages) ,
- Supplementary manual (1 page) ,
- User manual (14 pages)
Table of Contents
Advertisement
Quick Links
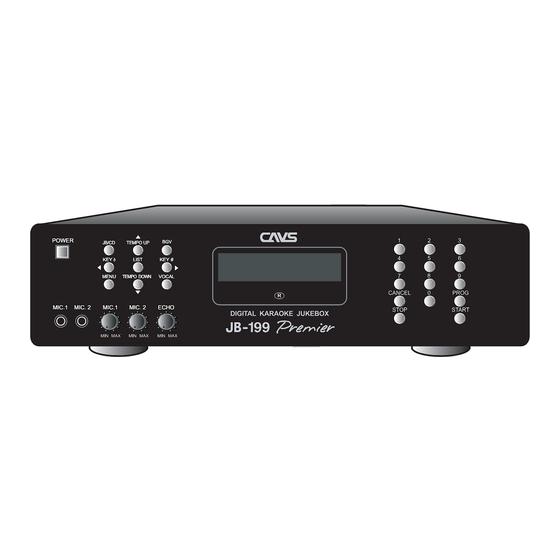
CAVS JB-199
Digital Karaoke Jukebox Player
USER'S MANUAL
POWER
BGV
JB/CD
TEMPO UP
KEY b
LIST
KEY #
MENU
TEMPO DOWN
VOCAL
MIC.1
MIC. 2
MIC.1
MIC. 2
ECHO
R
WELCOME
TO
CAVS SING ALONG
Select Song Number
00000
POWER
MUTE
Open/Close
UP
VOL
SET UP
MENU
JB/CD
LEFT
SELECT
RIGHT
TIME
LIST
VOL
DOWN
1
2
3
4
5
6
7
8
9
BGV
ENTER
PPgm
RANDOM
0
CANCEL
PROG
REPEAT
VOCAL
INFO
TITLE
PLAY
STOP
PAUSE
Advertisement
Table of Contents

Related Manuals for CAVS JB-199 Premier


Summary of Contents for CAVS JB-199 Premier
- Page 1 CAVS JB-199 Digital Karaoke Jukebox Player USER’S MANUAL POWER JB/CD TEMPO UP KEY b LIST KEY # MENU TEMPO DOWN VOCAL MIC.1 MIC. 2 MIC.1 MIC. 2 ECHO WELCOME CAVS SING ALONG Select Song Number 00000 POWER MUTE Open/Close SET UP...
-
Page 2: Important Safety Instructions
IMPORTANT SAFETY INSTRUCTIONS All the safety and operating instructions should be read before the product is operated. The safety and operating instructions should be retained for future reference. All warnings on the product and in the operating instructions should be adhered to. All operating and using instructions should be followed. - Page 3 A product and cart combination should be moved with care. Quick stops, excessive force, and uneven surface may cause the product and cart combination to overturn. Slots and openings in the cabinet are provided for ventilation and to ensure reliable operation of the product and to protect it from overheating, and these openings must not be blocked or covered.
-
Page 4: Federal Communications Commission Requirements
Federal Communications Commission Requirements WARNING CHANGES OR MODIFICATIONS NOT EXPRESSLY APPROVED BY THE PARTY RESPONSIBLE FOR COMPLIANCE WITH THE FCC'S RULES(THE FCC 'GRANTEE') COULD VOID THE USER’S AUTHORITY TO OPERATE THE EQUIPMENT. Note This equipment consists of parts that has been tested and found to comply with the limits for a Class B digital devices, pursuant to part 15 of the FCC Rules. -
Page 5: Table Of Contents
& video outputs, PC monitor, mouse and keyboard attachable, LAN 100 mbps, S-Video output, Bill & credit acceptors, etc. With CAVS JB-199 Premier, you can control and monitor your show in a separate screen, instantly record and make custom CDs, connect by Internet for remote song updates, and many many more. - Page 6 Contents (continued) DataCD & DataStick Optional Devices 1. External disc drive 2. Optional hard drive 3. VGA monitor 4. Keyboard and mouse 5. USB Camera 6. HUB or Router Windows Platform 1. USB Camera 2. NTSC / PAL 3. Play DVD and Video CD 4.
-
Page 7: Product Features
MIC.1 MIC. 2 MIC.1 MIC. 2 ECHO JB-199 Premier WELCOME CAVS SING ALONG Select Song Number 00000 KJ Control Panel Play DVD, VCD, CD+G, MIDI and CD songs from the internal memory. Play Super CD+G, CD+G, MIDI and CD discs.* Store up to 100,000 songs.*... -
Page 8: Safety/Precautions
SAFETY / PRECAUTIONS WHEN INSTALLING UNIT Place the unit on even-level. Tilted position may cause damage to the unit and the disc. Moving the unit between extreme temperatures may cause water dew on the laser pickup of the unit and result in malfunctioning. - Page 9 SAFETY / PRECAUTIONS SAFETY Be sure to read the user manual before operating the unit Place the unit in an area well ventilated an with no heat. Never open the top cover. It is very dangerous to touch the inside of the unit due to possible electric shock.
- Page 10 WHEN HANDLING DISCS Do not use damaged discs. Damaged disc will not play its audio/video content as specified and can cause damage to the unit due to high speed rotation when inserted. How to keep. To prevent discs from bending, be sure to pull discs out of the unit after using and keep them in the disc case.
-
Page 11: Check Points Before Use
CHECK POINTS BEFORE USE ACCESSORIES Accessories of the unit are as follows. User manual : 1 Remote controller : 1 POWER MUTE SET UP JB/CD TIME CANCEL INFO TITLE PLAY STOP Program CDs Video and audio cable : 1 Open/Close MENU LEFT SELECT... -
Page 12: Controls And Functions
CONTROLS AND FUNCTIONS FRONT PANEL POWER JB/CD TEMPO UP KEY b LIST MENU TEMPO DOWN MIC.1 MIC. 2 MIC.1 MIC. 2 POWER Button Power On / Off. MIC 1 and MIC 2 Inputs Plug-in jacks for MIC 1 and MIC 2 microphones. -
Page 13: Remote Sensor
CONTROLS AND FUNCTIONS BGV (Background video) Select between Off / Internal video / Still images / External USB camera for background video. Left & Right, Key Up & Down Move Left / Right, Key (pitch) Down / Up. LIST Open / close the song list on TV screen. MENU Open / Close the MENU screen. -
Page 14: Audio Input
REAR PANEL CAUTION RISK OF ELECTRIC SHOCK DO NOT OPEN WARNING: CAUTION: TO REDUCE TO REDUCE THE RISK OF ELECTRIC THE RISK OF FIRE OR SHOCK, DO NOT REMOVE COVER, NO VIDEO OUT VIDEO IN ELECTRIC SHOCK, DO NOT USER-SERVICEABLE PARTS INSIDE. REFER EXPOSE THIS APPLIANCE TO SERVICING TO QUALIFIED SERVICE PERSONNEL. -
Page 15: Lcd Display Panel
CONTROLS AND FUNCTIONS LCD DISPLAY PANEL >03456 Stop SONG IN PLAY Display song number in play. AVAILABLE CREDIT Credit remaining from bill, coin, or card acceptor. TIME Display elapsed or remaining time. 00 00 00000 ?? STATUS Display Stop, Play or Pause. SONG IN SELECTION Display song number being selected. - Page 16 KJ CONTROL PANEL All operations on the KJ Control Panel are performed with a PC mouse and a keyboard (See Section: How to connect). WELCOME CAVS SING ALONG Select Song Number 00000 TV OUTPUT PANEL STATUS PANEL OPERATION PANEL SONG SEARCH PANEL...
- Page 17 This display shows what is being played on the TV screen. STATUS PANEL Elapsed Time Display elapsed time. Total Time Display total duration time. Play Status Display operation mode. (Play, Stop, Pause) WELCOME CAVS SING ALONG Select Song Number 00000 Song Number Display song number. Title Display Display song title.
-
Page 18: Fast Backward
OPERATION PANEL Slider Drag the slider to any time position in a song in play (for Juke play mode). Loop A, B Right click on A and B for two time positions in a a song in play. Then left click on between A and B (for Juke play mode). - Page 19 CONTROLS AND FUNCTIONS SONG SEARCH PANEL 1. Search Songs Click on + or - signs in the display to expand or minimize the available selection. At any time, double click on a title or an artist of a song to play. Or click on a song number to program. Search Categories Double click to expand or minimize the search categories.
- Page 20 2. Total Songs Click on + or - signs in the display to expand or minimize the available selection. At any time, double click on a title or an artist of a song to play. Or click on a song number to program. Total Songs Double click to expand or minimize the total songs menu.
- Page 21 CONTROLS AND FUNCTIONS 3. Karaoke Songs Click on + or - signs in the display to expand or minimize the available selection. At any time, double click on a title or an artist of a song to play. Or click on a song number to program. Karaoke Songs Double click to expand or minimize the karaoke song menu.
- Page 22 4. Music Songs Click on + or - signs in the display to expand or minimize the available selection. At any time, double click on a title or an artist of a song to play. Or click on a song number to program. Music Songs Double click to expand or minimize the music song menu.
-
Page 23: Key Control
CONTROLS AND FUNCTIONS PROGRAM PANEL This section displays the Program queue of the programmed songs. To program a new song, click on the song number of a song in Panel D. Queue Number Indicates the queue order of the programmed songs. Tempo Control Click on UP / DOWN arrows to preset the tempo of the programmed song. - Page 24 EQUALIZER PANEL This section displays the 8-band Equalizer with Auto Amp, 6 Pre-settings, and Reset. Place the cursor on any slider to display the current value. Drag the slider to increase or decrease each band output. You can also click on a slider and use the Up and Down keys on the keyboard to increase or decrease.
- Page 25 CONTROLS AND FUNCTIONS SETUP PANEL Place the cursor on any slider to display the current value. Drag the slider to increase or decrease the control. You can also click on a slider and use the Up and Down keys on the keyboard to increase or decrease.
- Page 26 Record Click on REC to turn on the Recording mode. Clear Click on CLEAR to delete the last recorded file. The REC button must first be turned off. Select between MV (moving picture) / ST (slide show) / EX (external camera) / OFF for background video. Fanfare Select between Off / 75 / 85 / 95.
-
Page 27: Remote Controller
CONTROLS AND FUNCTIONS REMOTE CONTROLLER INFO TITLE MUTE Mute on / off master music volume. POWER Power off the player. To power on, press the POWER button on the front panel. OPEN/CLOSE Open / close disc drive (in Disc mode only). KEY Control Raise / lower key (pitch) level. -
Page 28: Numeric Buttons
JB/CD Select between JB (Jukebox) / CD (disc) for song selection. FANFARE Select between Off / 75 / 85 / 95. Press PLAY. MENU Display MENU screen with available functions. LIST Display the song list on TV screen. UP / DOWN Move cursor up / down. -
Page 29: Using Remote Controller
USING REMOTE CONTROLLER BATTERY How to load the batteries Open the bottom cover of the remote controller. Load two batteries (1.5V) of "AA" size with +/- polarities as specified. Close the bottom cover. Precautions in using batteries When changing batteries 1. -
Page 30: How To Use
HOW TO USE Operating range The effective angle of remote controller is 30 degrees up/down and right/left from the front remote sensor in main body of the unit. Use the remote controller within this range. The effective distance of remote controller is 7 meters or 23 feet from the remote sensor in the main body of the unit. -
Page 31: How To Connect
HOW TO CONNECT When connecting PC Monitor, Mouse and Keyboard to JB-199 Premier The connection from JB-199 Premier to PC Monitor, Mouse, and Keyboard is illustrated below. Note : Connect the VGA output of JB-199 Premier into video input of the PC Monitor. CAUTION RISK OF ELECTRIC SHOCK DO NOT OPEN... - Page 32 When connecting video/audio output to TV The connection for JB-199 Premier unit with a TV is illustrated below. For a TV with S-Video connection, use the S-Video output of JB-199 Premier for improved video quality. CAUTION RISK OF ELECTRIC SHOCK DO NOT OPEN WARNING: CAUTION:...
- Page 33 HOW TO CONNECT When connecting video output to TV and audio output to amplifier The connection for JB-199 Premier with a TV and an amplifier is illustrated below. For a TV with S-Video connection, use the S-Video output of JB-199 Premier for improved video quality.
- Page 34 When connecting external disc drives and external hard drive to JB-199 Premier unit The connection for an external disc drives and external hard drive to JB-199 Premier unit is illustrated below. Note : Two external disc drives or one external disc drive with one external hard drive can be connected to JB-199 Premier.
- Page 35 HOW TO CONNECT When connecting a remote PC to JB-199 Premier unit The connection from a remote PC to JB-199 Premier unit is illustrated below. Note : Use the LAN 100Mbps cable included in JB-199 Premier unit. CAUTION RISK OF ELECTRIC SHOCK DO NOT OPEN WARNING: CAUTION:...
- Page 36 When connecting external USB camera to JB-199 Premier unit The connection for an external video source such as a USB camera to JB-199 Premier unit is illustrated below. Note : To install the USB camera to JB-199 Premier, see Chapter: Windows Platform CAUTION RISK OF ELECTRIC SHOCK DO NOT OPEN...
- Page 37 HOW TO CONNECT When connecting an audio source for recording The connection for JB-199 Premier with an external audio source for recording is illustrated below. Note : JB-199 Premier can record its own audio output or audio ouput of any audio source through an external amplifier.
-
Page 38: How To Operate
HOW TO OPERATE BASIC FUNCTIONS Power on Be sure to set the power input of JB-199 Premier in the back panel according to your wall outlet. Incorrect setting will cause serious and un-repairable damage to JB-199 Premier. As shown in Section: HOW TO CONNECT, connect the JB-199 Premier with PC (VGA) monitor, a mouse, and a keyboard. - Page 39 HOW TO OPERATE Total Songs Double click on Total Songs or click on the + (or -) sign in front of the Total Songs to expand (or minimize) available selection. It will show Song by number and Disc drive. Click on Song by number to display the songs inside JB-199 Premier on the right side window.
- Page 40 Play, Pause, Stop To play a song, click on the title or artist of the song from the song list in Panel D. To play from the Program queue, click on Play button in Panel C. To pause a song, click on Pause in Panel C. To stop, click on Stop in Panel C.
- Page 41 HOW TO OPERATE Deleting Silence Gap To skip the silence gap when starting a song, click on SILENCE button. Continuous Play / Single Play To play songs continuously from the Program queue or a disc, click to release the SINGLE button. To play the songs one at a time, click on the SINGLE button. Lyric, Standby, Logo To turn off the lyric display, click on LYRIC button.
- Page 42 Program To program a song, click on the song number of the song from the song list in Panel D. The song will appear on Panel E indicating that it is in queue. To delete a song from the Program queue, click on its song number in the song list of Panel E. To preset the Tempo / Key controls of a programmed song, click on Up / Down arrows of Tempo and Key columns in Panel E.
-
Page 43: Balance Control
HOW TO OPERATE Repeat Click on button in Panel G to play a song repeatedly. Click on songs sequentially. When there are songs in the Program queue, click on all songs in the Program queue sequentially. To play songs continuously (in repeat or in sequence), release the SINGLE button in Panel C for the Continuous play mode. - Page 44 Fanfare Click on any of Off / 75 / 85 / 95 buttons under FANFARE in Panel G, and click on PLAY to send out a fanfare music and score display. This is different from Score Control function, which turns on / off the automatic score display after each song.
-
Page 45: Record And Play
HOW TO OPERATE Record and Play Any audio source can be connected to the AUDIO IN terminals of JB-199 Premier for recording. To record a song from JB-199 Premier, connect the AUDIO OUT of JB-199 Premier to the audio input terminals of an external amplifier. Then connect the audio output (line output) of the amplifier to the AUDIO IN terminals of JB-199 Premier. -
Page 46: Disc Play
Disc Play To connect the disc drives to JB-199 Premier unit, see Section: How To Connect. Up to two disc drives can be connected using USB 2.0 connectors. JB-199 Premier with a CD+G compatible drive can play Audio CD, CD+G, and Super CD+G discs. -
Page 47: Hot Keys
HOW TO OPERATE Hot Keys Following Hot Keys are available to operate JB-199 Premier unit from a key board: COMMAND Numbers 0-9 0 - 9 Play Stop Pause Space bar Key Up Key Down Tempo Up Tempo Down JB/CD Open/Close Program Cancel Priority Program ! -
Page 48: Configuration
HOW TO OPERATE CONFIGURATION Click on CONFIG button in Panel G. The following window will appear. Do not change any settings without a specific instruction to do so, or without reading the manual. When a change is made, click on Apply button at the bottom followed by click on OK button. For the change to take effect, reboot the JB-199 Premier unit. - Page 49 HOW TO OPERATE General Display Display mode (Full / Windows): - Select Windows for the Dual Screen mode of JB-199 Premier. - Select Full for the single screen model of JB-199. The PC monitor will show the same video ouput as the TV screen. Once changed to Full, the Display mode can only be changed back to Windows manually.
- Page 50 This page controls the contents of the initial Welcome message: Select Song Number - Select Disc Number - WELCOME - TO - CAVS KARAOKE - list0 list1 - list2 - Click on any line and the content will appear below in the input field. Click on the input field and make changes using the keyboard.
- Page 51 HOW TO OPERATE This page controls the size of display area for lyrics in CD+G songs: Width Height Top margin Make the changes using the Up and Down arrows. Click on Use Mid Screen Position if you wish to center the display area in the TV screen. Click on Apply and click on OK button. To see the changes on screen, reboot the JB-199 Premier unit.
-
Page 52: Color Table
Font This page controls the choice of fonts used on the TV screen: English - Font for the initial Welcome screen English - Disabled Japan - Disabled China-GBK - Disabled China-Big5 - Disabled None - Disabled None - Disabled None - Disabled None - Disabled... -
Page 53: Advance Functions
HOW TO OPERATE ADVANCE FUNCTIONS Jukebox Press MENU button on the remote control or on the front panel to show the FUNCTIONS window in the TV screen. Use the to 1. Jukebox and press * System ID (xxxxxxxxxxxx) This is a unique machine ID for JB-199 Premier unit. All songs registered within the unit will be tagged with this system ID. -
Page 54: Disc Capture
Disc Capture From the initial Welcome screen, press JB/CD button to switch from JUKE to DISC (DISC1/DISC2) mode. Press OPEN/CLOSE button on the remote control to open the disc drive and insert a CD+G or Audio CD disc into the disc drive (DISC1 or DISC2). Press the OPEN/CLOSE button again to close the disc drive. -
Page 55: Disc Recording
HOW TO OPERATE 9. Edit, Save, and Print Song list To edit, save and print the song list of JB-199 Premier, see Chapter: JB-199 Manager Program. All songs newly captured in JB-199 Premier must be registered in order to play properly. See 1. -
Page 56: Download (Datecd, Datastick)
Download (DataCD, DataStick) This part describes how to transfer files (songs or program upgrades) from DataCD or DataStick to JB-199 Premier. (DataCD) From the initial Welcome screen, press JB/CD button to switch from JUKE to DISC (DISC1/DISC2) mode. Press OPEN/CLOSE button on the remote control to open the disc drive and insert the DataCD. -
Page 57: System Control
HOW TO OPERATE System Control This part describes how to change the system settings in JB-199 Premier. Press MENU button to show the FUNCTIONS window. Use the System Control and press 1. Play mode (Continuous / Single) Select Continuous to play songs in Program queue or Repeat mode continuously. Select Single to play the songs and stop after each one for a press of PLAY button. -
Page 58: Video Control
Video Control This part describes how to change the video settings in JB-199 Press MENU button to show the FUNCTIONS window. Use the Video Control and press 1. Video source (Blue Screen / Internal Video / Internal Still / External Video) Select a source for background video (BGV). -
Page 59: Audio Control
HOW TO OPERATE 8. Edit standby Press to enter. The Standby message will appear in Edit box. Use UP / DOWN / LEFT / RIGHT buttons to move the cursor into a position. Press PLAY or SELECT button to edit. The cursor will change from blue to red in color, indicating the edit mode. -
Page 60: Download Songs From
DOWNLOAD SONGS FROM JB-99 The instruction below may damage the JB-99 hard drive for use in JB-99 unit. Make a backup copy of the JB-99 hard drive before proceeding. To transfer song files of JB-99 to JB-199 Premier, 1. Insert the hard drive of JB-99 into an external drive case with USB 2.0 connection. -
Page 61: Front Panel & Remote Control
HOW TO OPERATE FRONT PANEL & REMOTE CONTROL This chapter describes how to operate JB-199 Premier unit using the buttons on the front panel and the remote controller. Many functions are same as those of the KJ Control Panel. Select a song Press LIST button to display the song list in TV screen. -
Page 62: Fast Forward And Fast Backward
Set TEMPO and KEY controls Use TEMPO UP / DOWN buttons and KEY UP ( the tempo and key of a song in play. Presetting TEMPO and KEY controls before play or program With no song selected, press PROG button. Enter a song number followed by TEMPO and KEY control settings. -
Page 63: Repeat Play
HOW TO OPERATE Master Volume Control Raise / lower the master volume of JB-199 Premier by pressing VOLUME UP / DOWN button on the remote control. TIME Press TIME button on the remote control to select between Elapsed / Remaining time shown on the front LCD display. -
Page 64: Random Play
Random play Press RANDOM button on the remote control for the Random play mode. Next press PLAY to play a song in random. To continuously play in random, set the Play mode to Continuous and the Repeat mode to Repeat All in 5. System Setup under MENU. When there are songs in the Program queue, only the songs in the queue will be chosen in random. - Page 65 HOW TO OPERATE Disc Play From the initial Welcome screen, press JB/CD button to switch from JUKE to DISC (DISC1/DISC2) mode. Note: JB/CD button will not function if no disc drive has been connected to JB-199 Premier. To install a disc drive, see Section: How To Connect. Press OPEN/CLOSE button on the remote control to open the disc drive and insert an audio CD, CD+G, or Super CD+G disc.
-
Page 66: Picture Files
- Double click on CAVS JB-199 Manager icon to start the JB-199 Manager program. - To return to KJ Control Panel, exit the JB-199 Manager program and double click on JB-199 Startup.exe icon on the desktop. -
Page 67: Preparing Song Files
HOW TO OPERATE Preparing Song Files A. Encoding Audio CD or CD+G discs Encoding of song files from audio CD or CD+G discs can be done in two ways: * directly in JB-199 Premier * using JB-199 Manager program (in Windows platform or in a remote PC) Note: Encoding a CD+G disc requires a CD+G compatible disc drive connected to JB-199 Premier or a remote PC. -
Page 68: Transfering Song Files
B. Encoding MIDI (MID and KAR) files Encoding of MIDI files is done using JB-199 Manager program. - Start JB-199 Manager program and click on MDK ENCODER. - Click on Folder and select the directory in which the MID or KAR files are stored. - Select Code for the text language. - Page 69 HOW TO OPERATE A. Sending song files to JB-199 Premier - Click on FOLDER button on the left side panel. Select a directory in which the new song files are stored. The new song files will appear on the left side window. - The left side window will show five columns: File Name, Title, Singer, Number, Country.
- Page 70 B. Backing up song files from JB-199 Premier It is important to regularly backup the hard drive of JB-199 Premier as a part of good maintenance. From the JB-199 Manager program, - Click on FOLDER to select a directory into which the song files of JB-199 Premier will be copied. When in Windows platform of JB-199 Premier: - A directory in an external hard drive, connected to JB-199 Premier by USB connector, is recommmended.
-
Page 71: Program Upgrades
HOW TO OPERATE Program Upgrades A. Upgrading JB-199 Premier program - Download the latest JB-199 Premier program from www.cavsusa.com/jb-199premier.htm. - Save the downloaded file in a directory of your PC and double click on the file to unzip. You will see a new program, JB99NEW.exe. - Copy the program JB99NEW.exe to wherever you run the JB-199 Manager program (Windows platform in JB-199 Premier or a remote PC). -
Page 72: Picture Files
C. Upgrading JB-199 Manager program - Download the latest JB-199 Manager program from www.cavsusa.com/jb-199premier.htm. - Save the downloaded file in a directory of your PC and double click on the file to unzip. You will see a new program CAVSJB-199Manager(xxxx).exe. - Copy the folder to wherever you run the JB-199 Manager program (Windows platform in JB-199 Premier or a remote PC). -
Page 73: Edit, Save, And Print Song List
HOW TO OPERATE - Go to MENU and 6. Video Control. - If a new AVI file is added, Go to 2. Video file and select. - If a new still image is added, Go to 3. Still image and first select All to load the new file. - Page 74 - The song list of JB-199 Premier will appear in the right side window. - Use the mouse to click on a song number, title or singer of a song to edit. Input the changes using the keyboard and press ENTER. Note: You must press ENTER after typing to make the changes remain.
-
Page 75: Datacd & Datastick
CAVS. This is different from cdg (rw) files produced by other internet programs without compression. The file size of CDG of CAVS is usually around 100K bytes whereas cdg(rw) is of 1M bytes. The cdg(rw) can be converted to CDG of CAVS using the Encoder MCG program, available at www.cavsusa.com/playcdg_home/. - Page 76 1. Rename the song files numerically, assigning a number for each song. For example, 00001.MP3 00011.MP3 00011.CDG 00021.MP3 00021.MCG 00031.MP3 00031-.MP3 00031.AVI 00041.MP3 00041.AVI 00051.MDK 2. Using a Notepad or Wordpad editor, make a text file named Juke.txt of the song list in the following format: 00001 | Unbreak My Heart | Braxton, Tony 00002 | After The Loving | Humperdink,Englebe The file name, title, and singer are separated by “|”...
- Page 77 HOW TO OPERATE D. Writing to DataCD or DataStick Having prepared the files you wish to download into JB-199 Premier, write the files and the directories onto a DataCD (CD-ROM or DVD-ROM) or a Datastick (USB memory stick). The contents of DataCD or DataStick, after having been written, should look as follows: 00001.MP3 00011.MP3 00011.CDG...
-
Page 78: Optional Devices
Optional Devices External disc drive Two external disc drives can be connected to JB-199 Premier unit using USB 2.0 connectors. See Section: How To Connect. Turn on the disc drives and restart the JB-199 Premier unit. A list of recommended disc drives, compatible to JB-199 Premier and CD+G discs, is given at www.cavsusa.com/jb-199premier.htm. -
Page 79: Optional Hard Drive
HOW TO OPERATE Optional hard drive Connect an external hard drive to JB-199 Premier using USB 2.0 connector. See Section: How To Connect for the instruction. Turn on the hard drive and start the JB-199 Premier player. The song data inside the external hard drive must be of same directory structure as those inside the internal hard drive of JB-199 Premier. -
Page 80: Vga Monitor
VGA Monitor A VGA monitor can be connected to JB-199 Premier using 15 pin D-sub connector. See Section: How to connect. Keyboard and Mouse A keyboard and a mouse can be connected to JB-199 Premier using mini-din connectors. See Section: How to connect. Instruction for mouse operation: ACTION Click... -
Page 81: Windows Platform
HOW TO OPERATE Windows Platform JB-199 Premier runs on Windows XP platform. At the KJ Control Panel, press Alt-F4 in the keyboard. The KJ Control Panel will close to show Windows XP desktop. To return to JB-199 Premier, double click on JB-199 Startup.exe icon at the desktop. To power off JB-199 Premier from Windows platform, click on Start and click on Turn off Computer button. -
Page 82: Play Dvd And Video Cd
Play DVD and Video CD To play a DVD or Video CD disc, press Alt-F4 from the KJ Control Panel to exit to Windows desktop. Click on AVON.exe at the desktop. This enables sharing of audio and video signals with the audio / video output devices of JB-199 Premier, such as the TV and an amplifier. To disable the sharing, click on AVOFF.exe. -
Page 83: Backup Hard Drive
HOW TO OPERATE BACKUP HARD DRIVE It is vital to make a backup copy of the JB-199 Premier hard drive. As more and more songs are added, even an unlikely failure of the hard drive becomes too risky to be left to chances when measured against the damages that would be disasterous and costly. - Page 84 Making backup copy: - Turn on any external hard drive connected to JB-199 Premier. - Connect the power cord of JB-199 Premier and power on the unit. - At the KJ Control Panel , press Alt-F4 on the keyboard to exit to Windows desktop. - Using the mouse, double click to open My Computer - Local Disc C: - NJB99 - util.
- Page 85 HOW TO OPERATE Replacing a failed JB-199 Premier hard drive - When the JB-199 Premier hard drive fails, disconnect the power cord from JB-199 Premier and open the top cover. - Disconnect the IDE and power supply cables from the failed JB-199 Premier hard drive. - Unfasten the failed JB-199 Premier hard drive from its holder and remove.
-
Page 86: Trouble Shooting
There may be various reasons for abnormal operation of the JB-199 Premier unit. Please refer to the trouble shooting guide below. For continuing problems, contract your local dealer or CAVS Tech Support. Also visit www.cavsusa.com for the latest update of the User’s Manual and the Trouble Shooting guide. -
Page 87: Specification
SPECIFICATION System Disc playable Hard drive Disc drive Input terminals Output terminals Power Dimension Weight Note : Technical specifications are subject to change without notice. Digital Jukebox player Super CD+G, CD+G, Audio CD EIDE/IDE 7200 RPM (Internal) External USB 2.0 (External) Plextor CDR (52/32/52, 48/24/48, etc.) Plextor DVDR (PX-504, 708, 712, 712UF, 716UF) Microphone input... -
Page 88: Limited Warranty
If service is not available locally, box the product carefully, preferably in the original carton, and ship, insured, with a copy of your bill of sale plus a letter of explanation of the problem to the nearest CAVS Factory Service Center, the name and location of which will be given to you by the phone. - Page 89 CAVS USA INC.
Need help?
Do you have a question about the JB-199 Premier and is the answer not in the manual?
Questions and answers