Advertisement
Quick Links
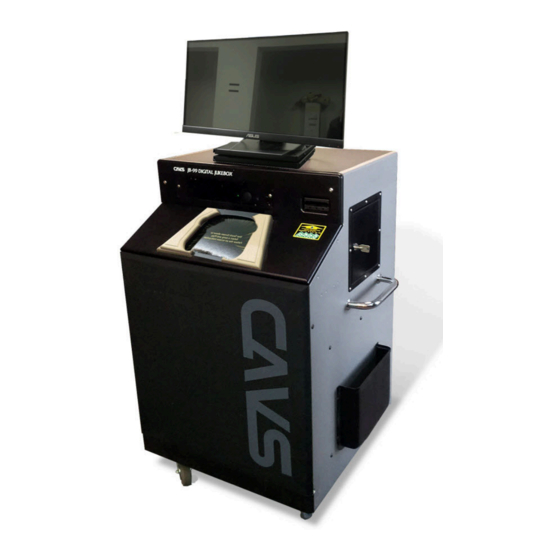
0. Unpacking
CAVS JB-99 RS II karaoke system will arrive in two pieces, a box and a crate.
1. In the box, you will find
Touch Screen monitor
Monitor Stand
Swivel plate
JB-199 mini II karaoke player
2. For the crate,
Remove the straps.
Open the wooden boards by removing the screws holding the crate.
CAVS JB-99 RS II Karaoke Jukebox
Version 1.0
Advertisement

Related Manuals for CAVS JB-99 RS II


Summary of Contents for CAVS JB-99 RS II
- Page 1 CAVS JB-99 RS II Karaoke Jukebox Version 1.0 0. Unpacking CAVS JB-99 RS II karaoke system will arrive in two pieces, a box and a crate. 1. In the box, you will find Touch Screen monitor Monitor Stand Swivel plate JB-199 mini II karaoke player 2.
- Page 2 With the top and sides removed, two adults can lift the kiosk using the two side bars to take the kiosk out of the base block. Set the kiok down on its wheels and be sure to unlock the wheels before rolling. In the crate, you will find JB-99 RS II kiosk Wireless microphone x 4 1. How to assemble the touch screen monitor...
- Page 3 Touch screen monitor Swivel plate Monitor Stand JB-199 mini II back plate 4 x silver screws and 8 x black screws Assembly 1. Set the Monitor Stand on top of the Swivel plate. User 4 x black screws as shown in the picture (and in the opposite side) to connect. Be sure to attach the two parts in the correct orientation.
- Page 4 The arm is generally stiff to hold the touch screen monitor in any position. It requires gentle but firm extending. 3. Connect the touch screen monitor and the back plate of the JB-199 mini II to the monitor stand using the 4 x silver screws. Be sure the monitor stand is in-between the touch screen monitor and the back plate of the JB-199 mini II.
- Page 5 Use the remaining 4 x black screws to connect the assembled monitor to the kiosk. 2. How to connect the karaoke player From the box, find the JB-199 mini II karaoke player. Depending on the shipment, the JB-199 mini II karaoke player may already have USB dongles connected. Remove the dongles and set them aside for now as they will be reconnected later.
- Page 6 Connect the AC power plug to the touch screen monitor and 3.5mm jack to the karaoke player as shonw in the picture. Connect the USB-A and DC power plug to the karaoke player as shonw in the picture. 3. Next using an enclosed short HDMI cable, connect the touch screen monitor to the karaoke player as shown.
- Page 7 Using an enclosed short USB cable, connect the USB-B end of the cable to the touch screen monitor and USB-A end of the cable to the karaoke player. 4. Two more cables that you may consider connecting are a LAN cable for a network router and a HDMI cable for an external TV. Connect as shown the LAN cable for a network router.
- Page 8 Although both Wi-Fi and LAN connections are available in the JB-199 mini II karaoke player, the LAN connection is recommended for a faster and more reliable connection. Connect as shown the HDMI cable for an external TV. 5. Lastly the USB dongles must be connected to the JB-199 mini II karaoke player as shown. The Red dongle must be connected at all times.
- Page 9 Since there is no more USB port on the JB-199 mini II, a USB hub or a USB-C adapter is needed to connect it. It can also be connected instead of the black dongle of the remote controller if you prefer to use the wireless mouse & keyboard. 3. How to connect the karaoke kiosk From the work above, the JB-99 RS II karaoke player will appear as shown.
- Page 10 There are now a few things left to tidy up around the kiosk. Standing in front of the kiosk, search the right side pouch. You will find Microphone holder x 2 AC power cable Key x 2 1. Attach the microphone holder x 2 with enclosed screws on the side of the kiosk as shown.
- Page 11 2. Connect the AC power cable to the power plug at the back side bottom of the kiosk. 3. Use the key to open the bill acceptor compartment on the right side and the speaker compartment on the back side of the kiosk.
- Page 12 4. How to operate the karaoke kiosk 1. Power on Connect the AC power cable of the kiosk to a wall outlet. The LED lights for the amplifier, the bill acceptor, and the microphone receivers will turn on. Next turn on the touch screen monitor and the external TV, if connected. Lastly turn on the JB-199 mini II player by pressing the power button as shown.
- Page 13 Test the music playing and adjust the sound using the amplifier located on the back of the kios. 5. Audio Ouput An award winning CA-242RA amplifier provides professional karaoke sound in JB-99 RS II system. The controls are located at the back of the kiosk as shown above, away from the customer's reach.
- Page 14 Be sure not to overload the sound system by going higher than 3 o'clock with the master volume knob. It would likely result in blowing out of the amplifer or the speakers. To connect to an external audio system, find an output RCA (red and white) cable at the back of the kiosk. Connecting additional speakers directly onto the CA-242RA amplifier is not recommended as it will more likely cause blow-out of amplifier or the speakers when playing aloud.
Need help?
Do you have a question about the JB-99 RS II and is the answer not in the manual?
Questions and answers