Table of Contents
Advertisement
Quick Links
Lite Series
Network PTZ Camera
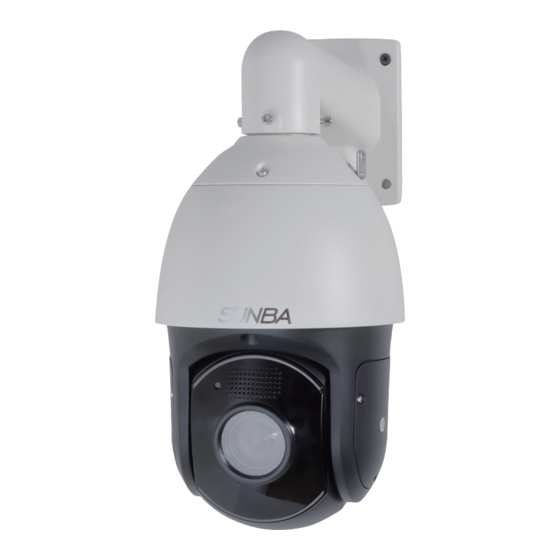
Premium Engineering. Durable Outdoor Surveillance
Ideal for House or Project Site
User Guide V12.0
For 405-ECO V2, 405-D20X 4K V2, 405-D25X 4K
2024/01
Version 12.0
Visit http://lite.sunbatech.com to access the step by step YouTube video
tutorials for setting up Sunba IP PTZ camera.
Advertisement
Table of Contents

Subscribe to Our Youtube Channel
Related Manuals for SUNBA 405-ECO V2


Summary of Contents for SUNBA 405-ECO V2
- Page 1 Network PTZ Camera Premium Engineering. Durable Outdoor Surveillance Ideal for House or Project Site User Guide V12.0 For 405-ECO V2, 405-D20X 4K V2, 405-D25X 4K 2024/01 Version 12.0 Visit http://lite.sunbatech.com to access the step by step YouTube video tutorials for setting up Sunba IP PTZ camera.
-
Page 2: Table Of Contents
MENU 1. Camera Bench Test 2. Camera Setup by Smartphone 3. Camera Setup by VMS Client 4. WiFi Application 5. Mounting Outdoor 6. Web Access 7. Assign a Static IP 8. Access by 3rd Party Software 9. Remote Access 10. Presets,Patrol and Pattern 11. -
Page 3: Camera Bench Test
1. Camera Bench Test When you take the camera out of the box, please test the camera indoor first before mounting outside. Type A: With DC12V Aadapter (non-PoE) IP Camera Computer Router Do NOT extend the power cable during the bench test because DC power drops quickly along the transmission. - Page 4 PoE Standard It is important to note that all Sunba pan tilt zoom cameras require to be powered by PoE+/++ adapters (injector/switch) with 802.3at/bt standard. Conventional PoE standard 802.3af delivers only 15.4W per port and using those adapters would cause underpower.
-
Page 5: Camera Setup By Smartphone
Download Android Click the "+" icon to add device. ****** NOTE: iSunba/iSunba Pro/XMEye These APPs are suitable for Sunba Lite Series cameras. Register to select "Cloud Login" (push notification requires a cloud account to store picture alert). - 03 -... - Page 6 SUNBA TECH. P2P: 5935d7d9 00XXXXXX The app automatically shows all Sunba devices in LAN. Use “Search” if your camera and smartphone are connected to the same WiFi. Modify other settings such as Press the camera to password for the camera.
-
Page 7: Camera Setup By Vms Client
Click “IPV4 Search” and select the camera, then click “add” to connect the device. Try the following if no device shows up: Temporarily disable the firewall; Connect the camera directly to your parental router; Connect the camera directly to your PC/Mac for testing; Contact support@sunba.net - 05 -... - Page 8 If you checked this function, VMS will automatically modify the IP address of your camera to adapt to the same gateway as your PC. If you do not need VMS to automatically modify the camera IP, please uncheck this function. Now the camera status should show “Connected”.
-
Page 9: Wifi Application
Step 3: Live View Please go to the “Live View” page. click to open PTZ panel Right click and select "Main Stream" to start live view 4. WiFi Application This chapter only applies to WiFi Version (405-ECO WiFi/ 405-D25X WiFi etc ) This section will provide the user with information on how to setup the WiFi connection. - Page 10 Method A: Search and add the camera by smartphone. After the camera is powered on and completes the self-test, you can directly search and add the camera via XMEye APP on smartphone. Attention: Make sure the distance among the camera, phone and the router within 2meter.
- Page 11 Tips: If the search fails, please refer to the following two ways to default the camera, and then refer to the above steps to search again. 1. Please manually press the button to default the camera as shown below Remove the 2 screws to take Press and hold the black button off the camera TF slot cover.
- Page 12 Method B: Enable WiFi function via VMS/IE browser. Please refer to Chapter 3 and Chapter 6 for the steps to access the camera through the VMS/IE browser. After adding the camera, please go to Device Config > Network > WiFi (In Internet Explorer, please go to Device Config >...
-
Page 13: Mounting Outdoor
5. Mounting Outdoor Please complete bench test (see Chapter 1) before mounting the camera outdoor. Wiring Type A: Power of Ethernet Solution POE+out Injector/Swith 100~250ft 100V~250V Data out Data in POE+ 802.3at Wiring method: Router ELV (Extra-Low Voltage System) Wiring Type B: Non-PoE (DC12V) Solution 100V~250V DC 12V Power Adapter... -
Page 14: Web Access
For Non-PoE Application (if you extend the power): The camera may not work properly if the power reaches the camera is below 12V due to resistance along the extended DC line (distance dependent). If that happens, please make your AC power source near the camera, and connect it with our default adapter you received from the package. - Page 15 Step 2: Start a web browser Enter the IP address of your camera in the browser’s URL bar. If you have changed the default http port (80) of the camera, you need to enter IP: http port. e.g:192.168.1.211:8787 Note: After 2024, the lite series already support Chrome browser live view and camera configuration (Windows Systems Only), but the prerequisite is to install web plugins.
- Page 16 Step 4: Select Language You can change the language from the upper right corner. Changes only take effect after you successfully install the plugin. Select the language before login. Step 5. Enter Username and Password Enter username and password. The username is admin with no password by default.
-
Page 17: Assign A Static Ip
7. Assign a static IP Step 1: Enter Device Config Page of Internet Explorer or VMS, and select the Network tab. Step 2: Unselect the DHCP option. Step 3: Change the camera IP and click “Apply” to save the changes. Power cycle the unit to activate the new setting. -
Page 18: Remote Access
ONVIF version. If you have particular 3rd party software that you would want to use with Sunba PTZ cameras, we are happy to supply resources and assistance we can offer to integrate our protocol. - Page 19 2) Enter the Cloud ID in Sunba Cloud Platform for remote access: Internet Explorer: Please go to xmeye.net and use “Device Login”. Enter the cloud ID of the camera and associated username and password. xmeye.net (Internet Explorer) 987dc021338***** admin 987dc021338***** Type 2: Port Forwarding Please refer to portforward.sunba.net for more instructions.
-
Page 20: Presets,Patrol And Pattern
Enter the number and hit “ ” to call a preset. PTZ Preset Position Sunba dome cameras can set preset PTZ positions for which cameras can memorize and travel directly by calling the preset. Preset positions are repre- sented by numbers. You need to “add” a preset and then “call” it. -
Page 21: The Full Preset List
11. The Full Preset List - 19 -... - Page 22 12. Camera Configuration HDD Info: The information of the storage device (TF card). LOG: Access the events, alarm and activity record of camera. Version: Check the serial number of the camera, and the build date of the firmware. Reboot: Restart the camera. Upgrade: Upgrade the firmware of the camera.
- Page 23 Set an alarm for special events such as storage device access failure or IP conflict with other devices. How to Access the Device Config: For IE: Click “DeviceCfg” For VMS: Choose Device Config (PS: You must add the camera via Sunba protocol, not ONVIF) - 21 -...
-
Page 24: Camera Configuration
General: Change system language and date. Encode: Change resolution, bit rate and other factors that affect video quality and connectivity. Enable/Disable audio. Network: Configure the camera's IP address, gateway, DNS etc. NetService: Configure NTP, email alert, WiFi and other services. GUI Display: Customize camera name, time title and other display setting. -
Page 25: Motion Detection
Camera accounts can only be managed by its native clients. Third party software will not be able to modify any accounts information as it doesn’t have access to the camera’s private protocol. Modify your password here! Default Camera Account Information: User name: admin Password: Modify your password here! -
Page 26: Face Capture
15. Face Capture The face capture feature is only supported by specific models (For details, you can contact us via support@sunba.net), and needs to be coupled with the Sunba NVR model F8009SE/F8010SE to be able to capture, store and browse snapshots of human faces. Firmware upgrade might be required to realize this feature. -
Page 27: Cable Waterproof Measures
Step 3: Enable the motion detection (in Video Detect or Video Motion). See Chapter 15. Then enable the FTP option. Snapshots: You must also enable snapshot in Video Detect. Videos: You must also enable record in Video Detect and have a storage media in order to upload the videos to FTP. -
Page 28: Audio Setting
18. Audio Setting Note: The camera has built-in microphone with sound pick-up capacity. There is no need to install additional microphone on this model. Setup: how to enable the audio at camera after installation? Please remember to check the audio option in "Device Config->Encode-> video/audio->Enable it "... -
Page 29: Auto Tracking Setup
19. Auto Tracking Setup Only applies to 405-ECO V2, 405-D20X 4K V2 and 405-D25X 4K (Almost all Lite series in 2024 support automatic tracking) 1.Intrusion Tracking ① Go to Device Config > Intelligent Alert, enable Human Detect (Disabled by default). - Page 30 2. Line Cross Tracking ① Go to Device Config > Intelligent Alert, enable Human Detect (Disabled by default). ② Set up line cross rules. ③ Add preset 51 and then call preset 51. 3. Patrol Tracking ① Go to Device Config > Intelligent Alert, enable Human Detect (Disabled by default).
- Page 31 In this case, please kindly provide us with your tracking number so that we can match the return package and the refund will be manually pro- cessed within 24 hours. Please watch your email notifications. For any questions, don't hesitate to reach support@sunba.net SUNBA Technology ®...
Need help?
Do you have a question about the 405-ECO V2 and is the answer not in the manual?
Questions and answers
Wil this camera work on an h.264 only NVR ?